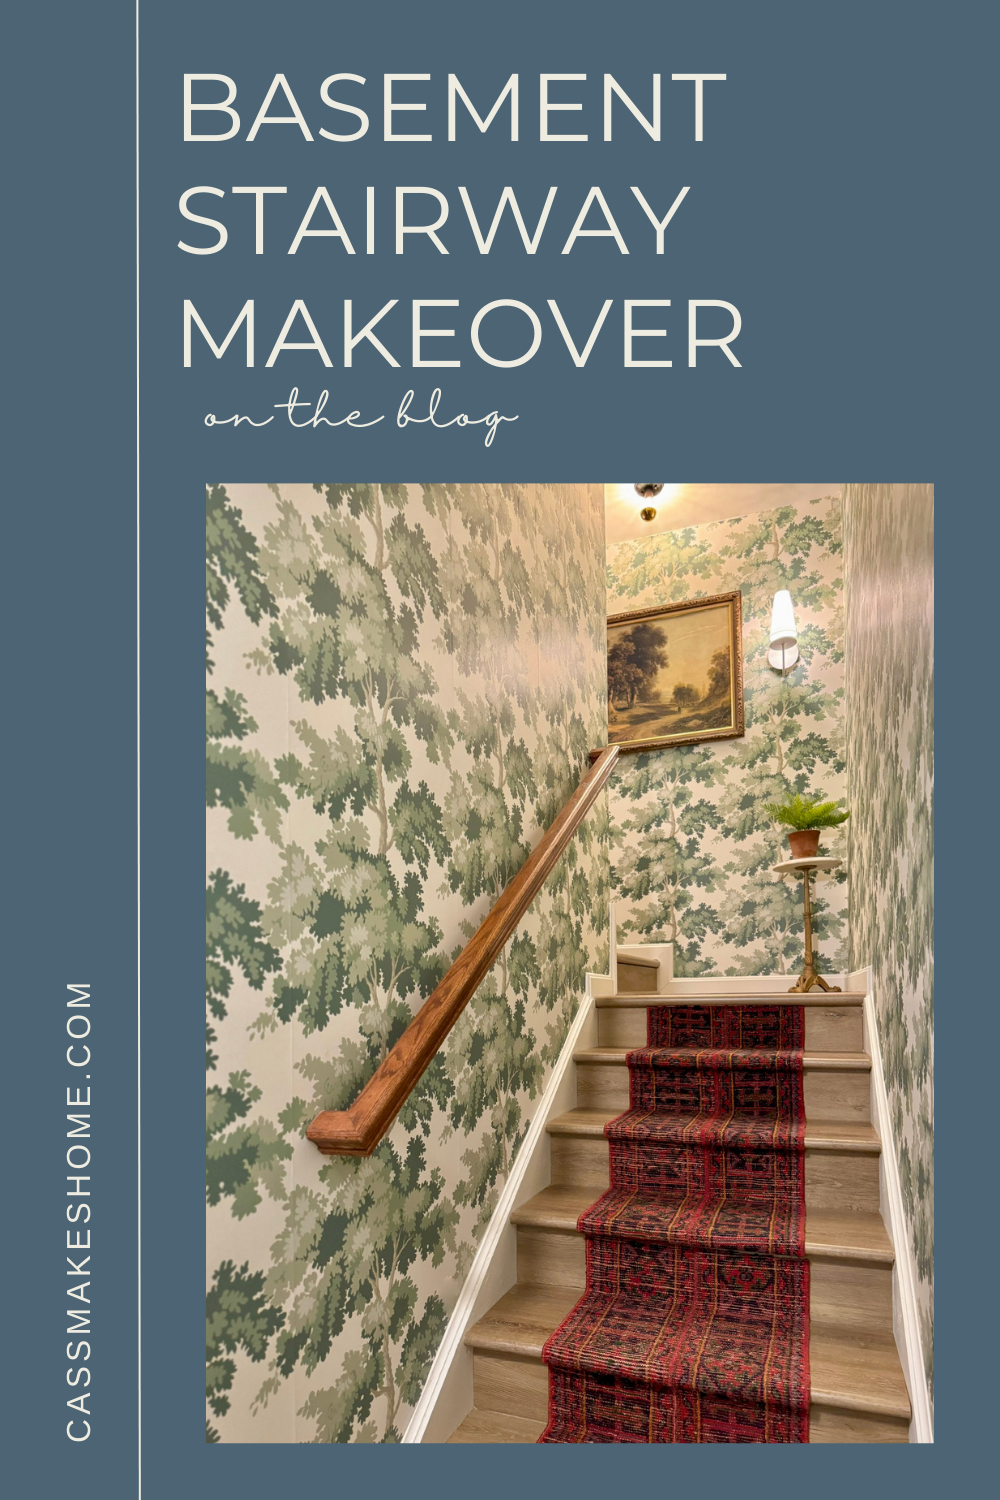
Basement Stairway Makeover Reveal!

I can’t believe how far this little stairway has come! Honestly, I wasn’t even planning on doing this renovation and I’m so glad I did. I love it and I think you will too! Here’s the final Basement Stairway Makeover Reveal.
*This post may contain affiliate links, which means I may earn a small commission if you purchase through my links, at no extra cost to you. I only share products I genuinely love.
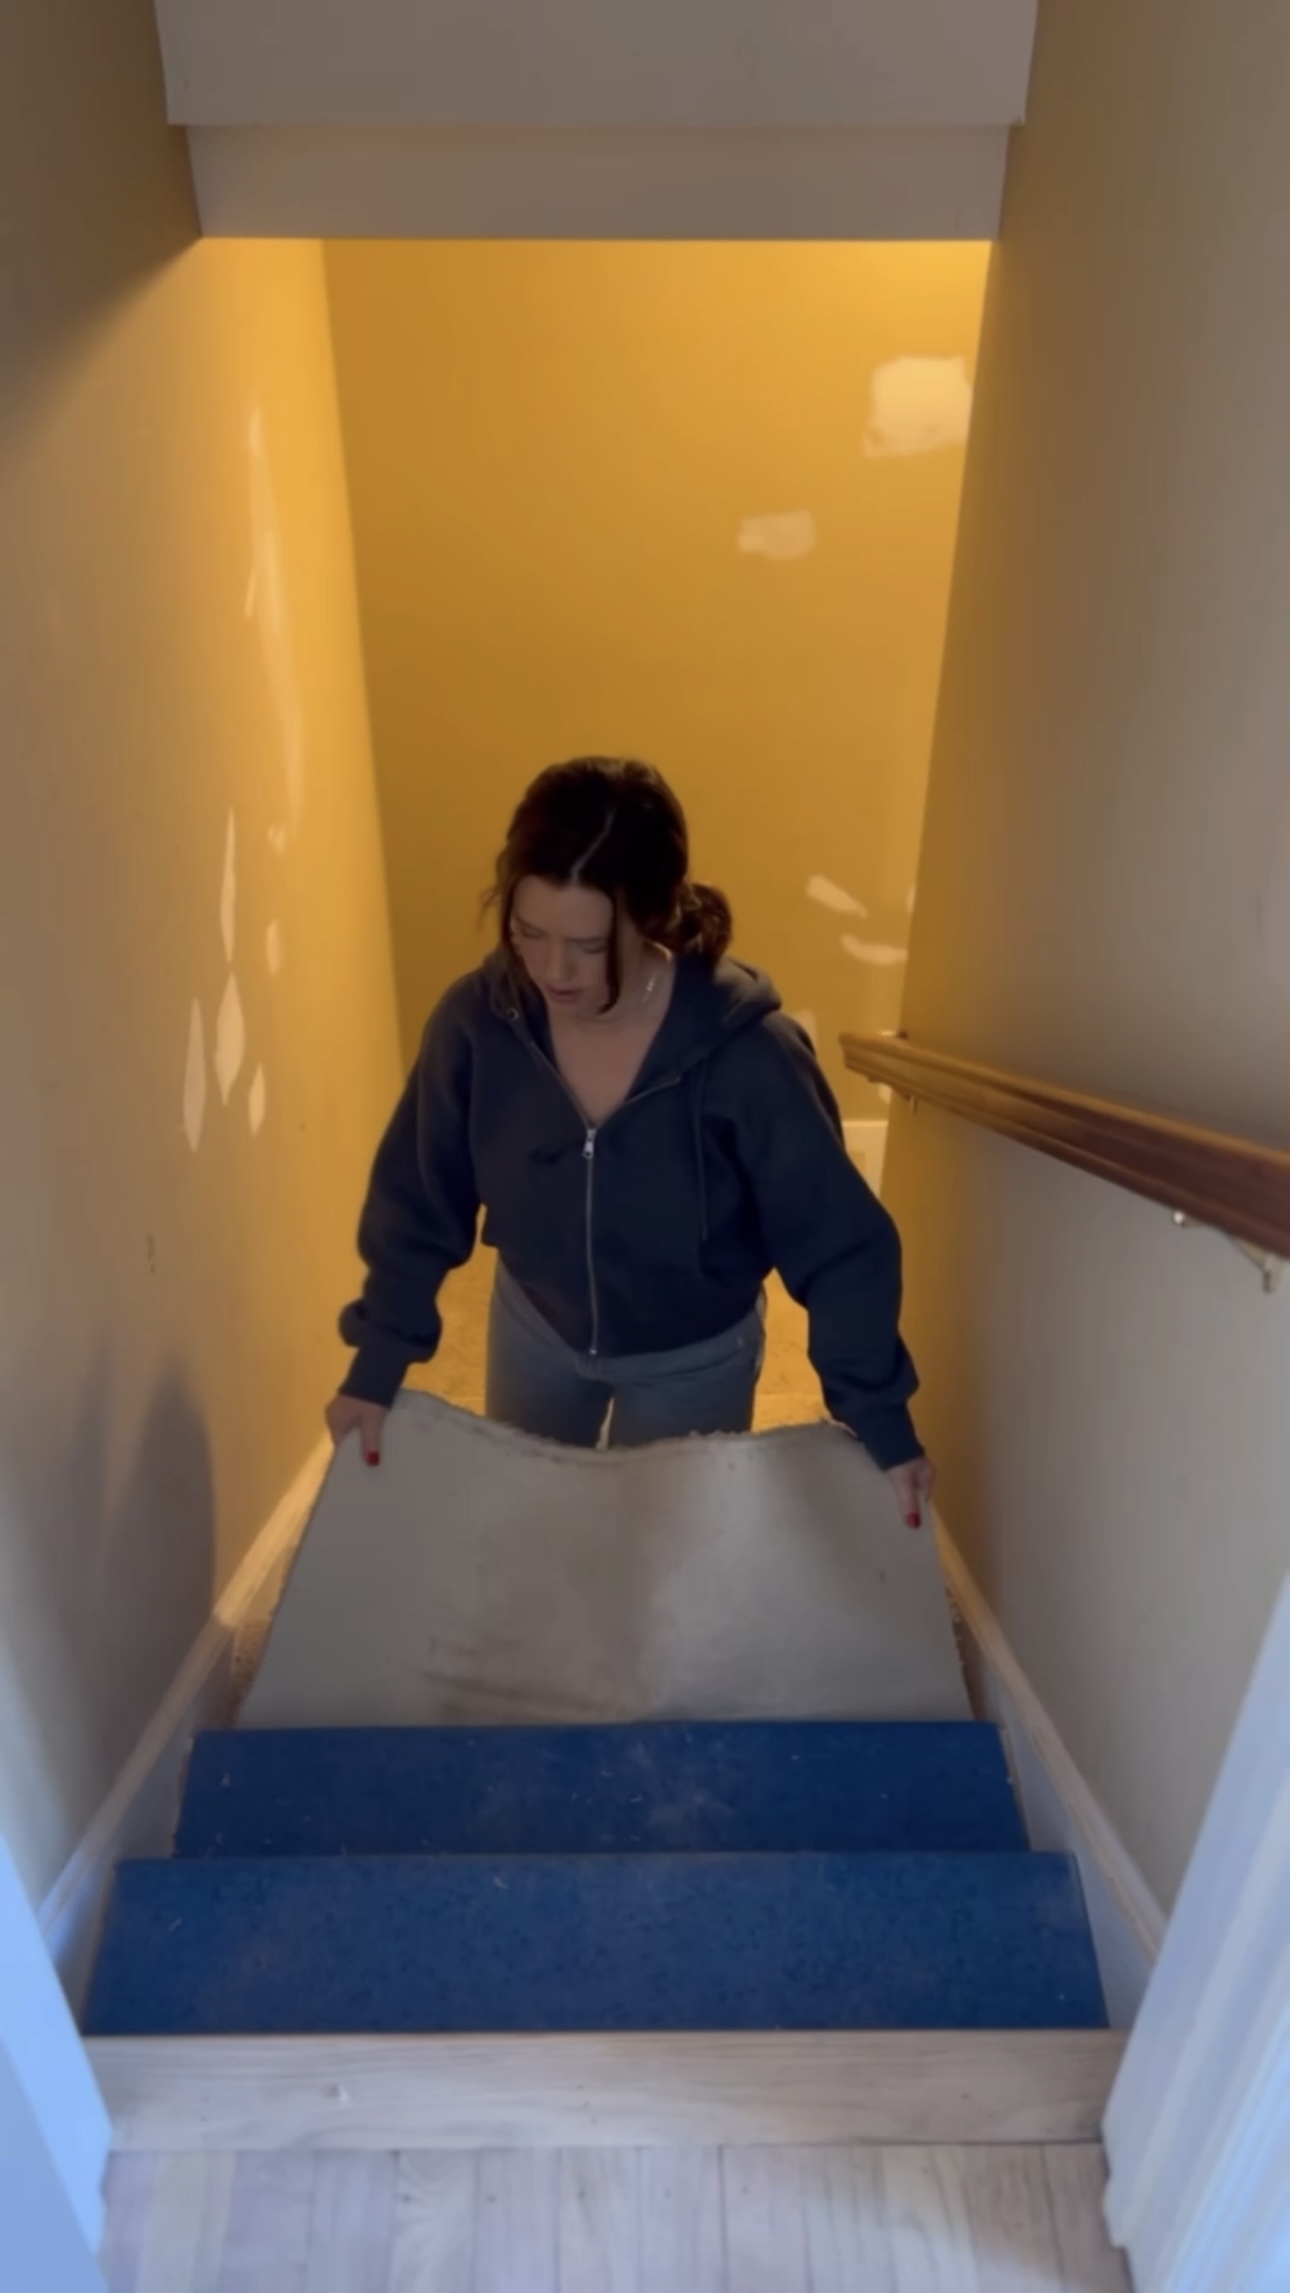
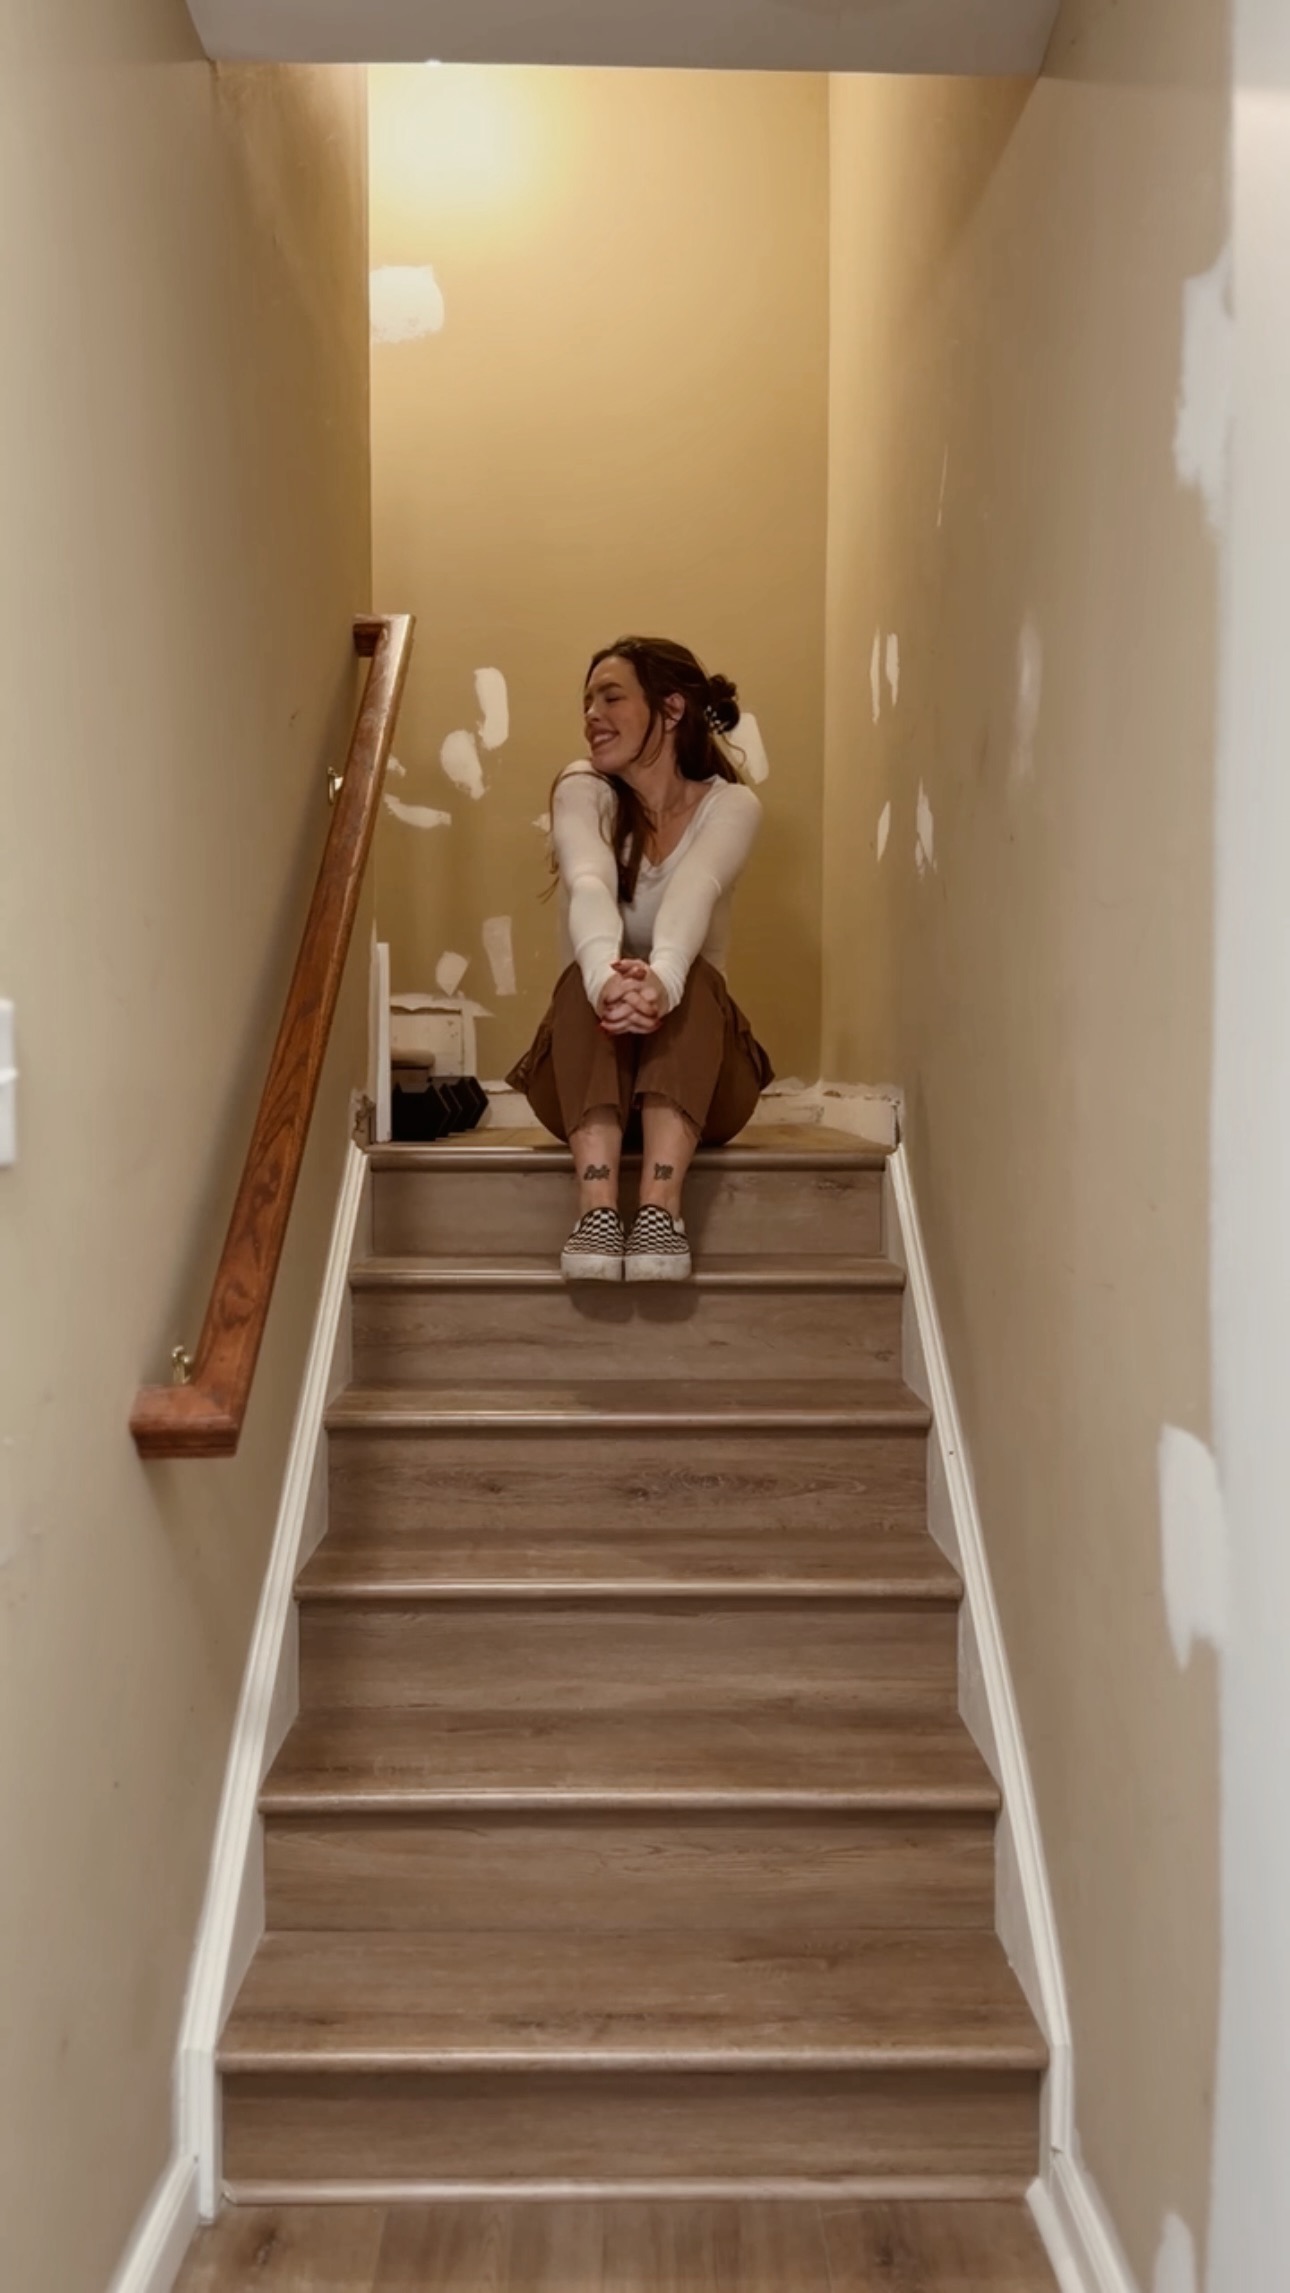
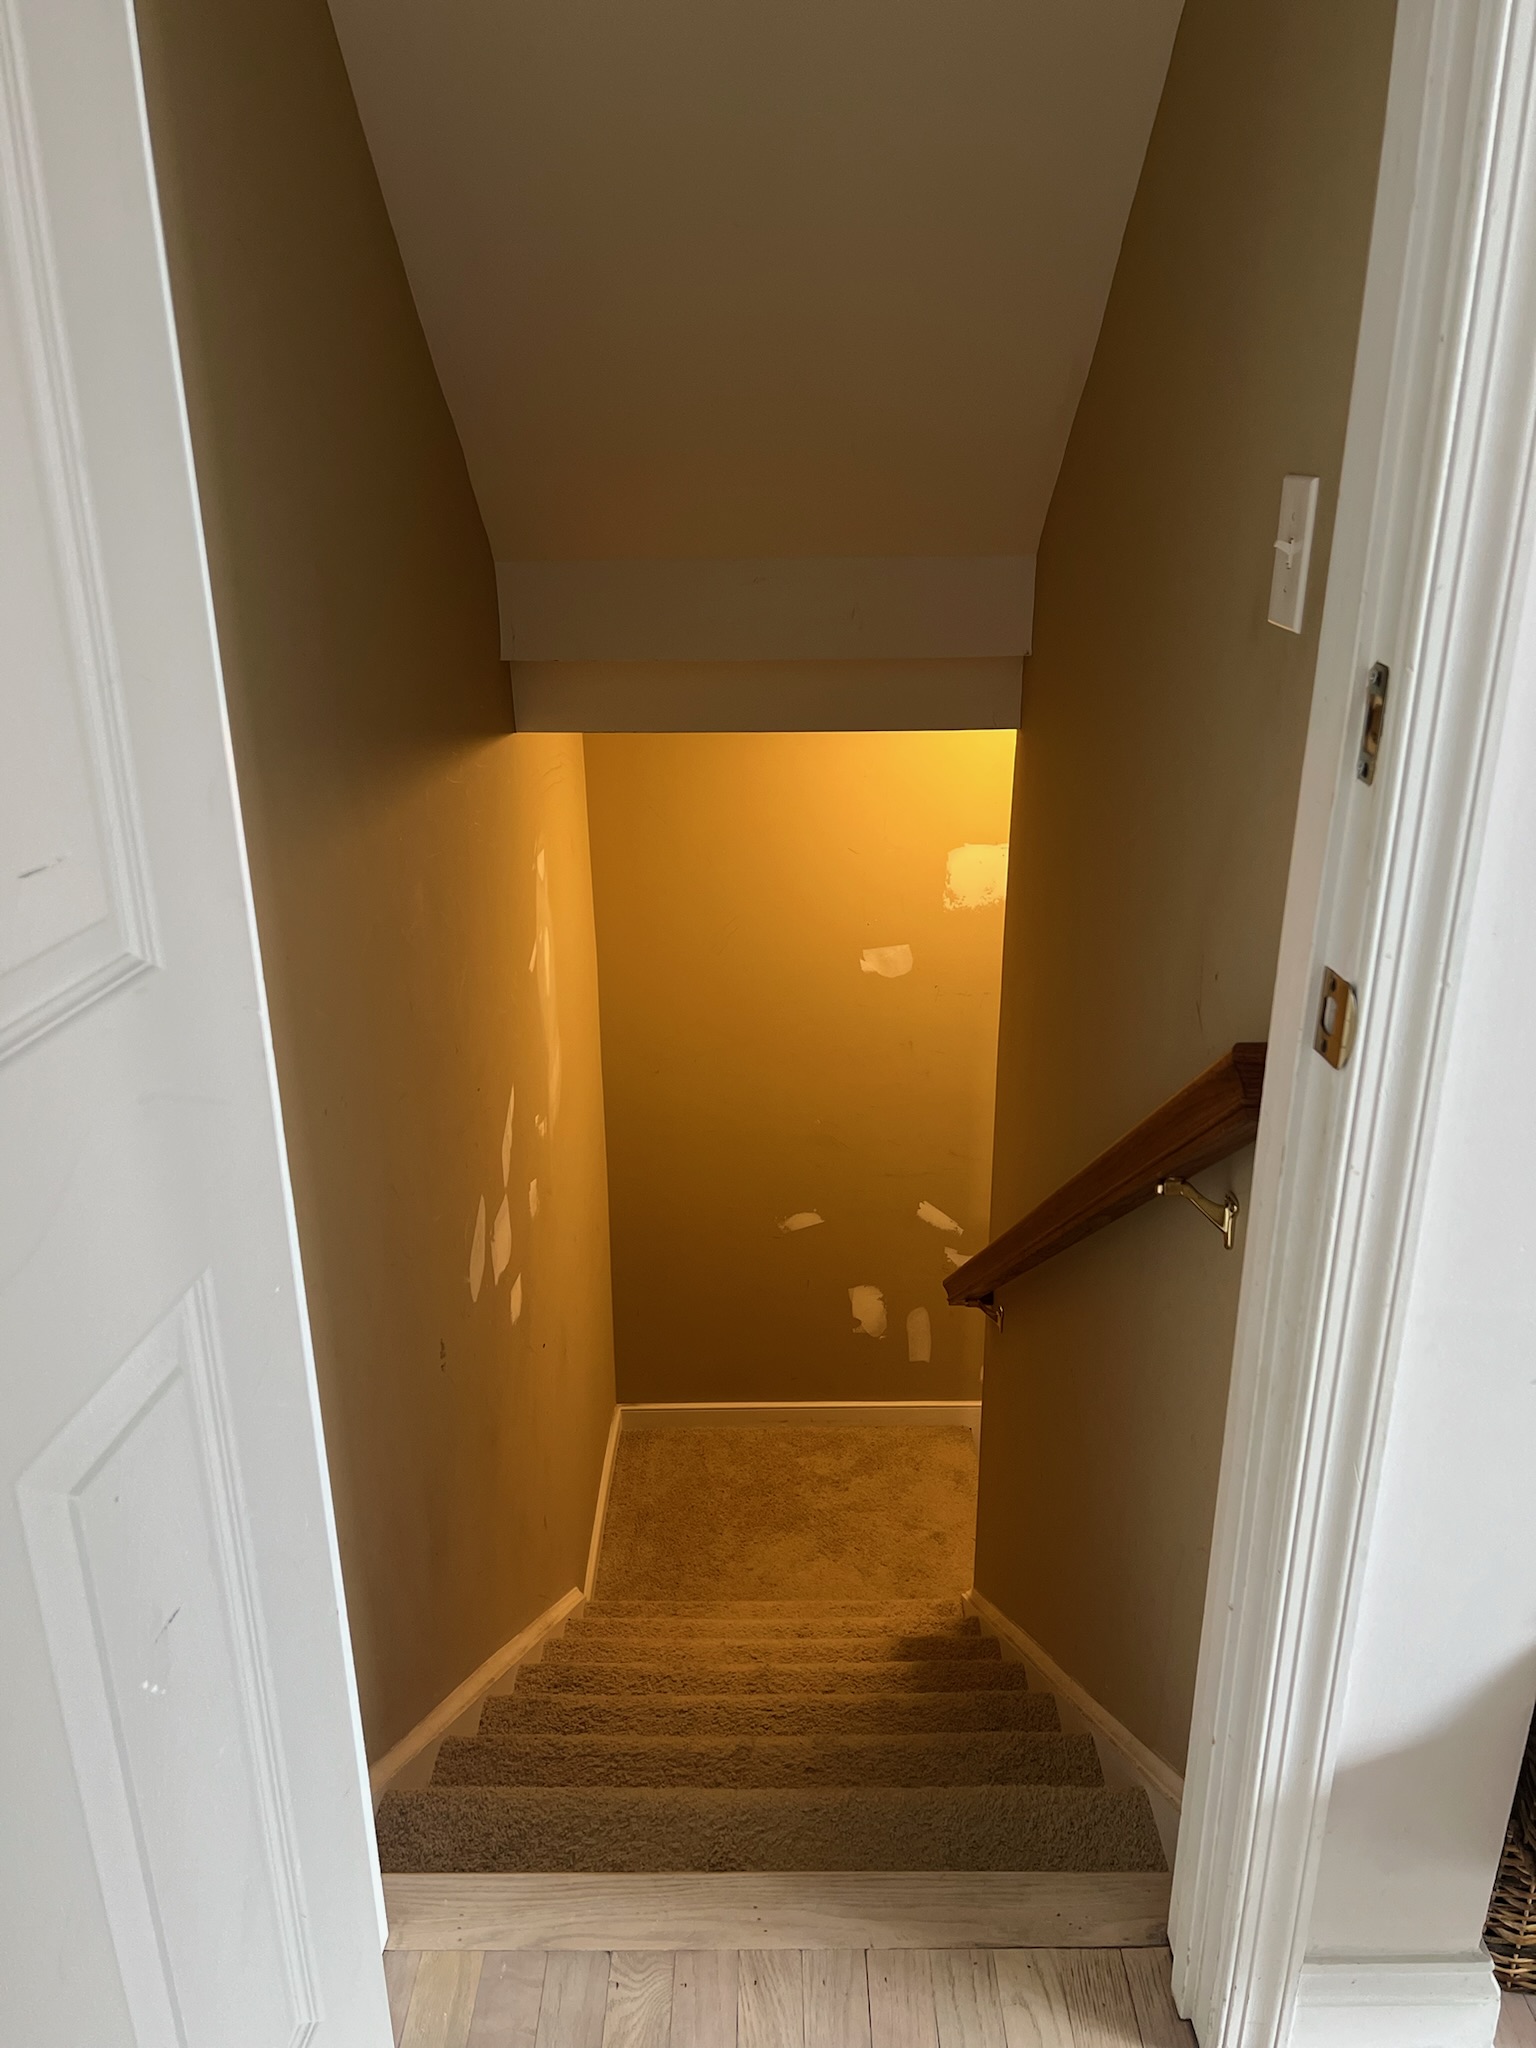
Demo
First and foremost, I ripped out the old carpet! This carpet had been here for forever and it needed to go. Read more about the entire demo process here.
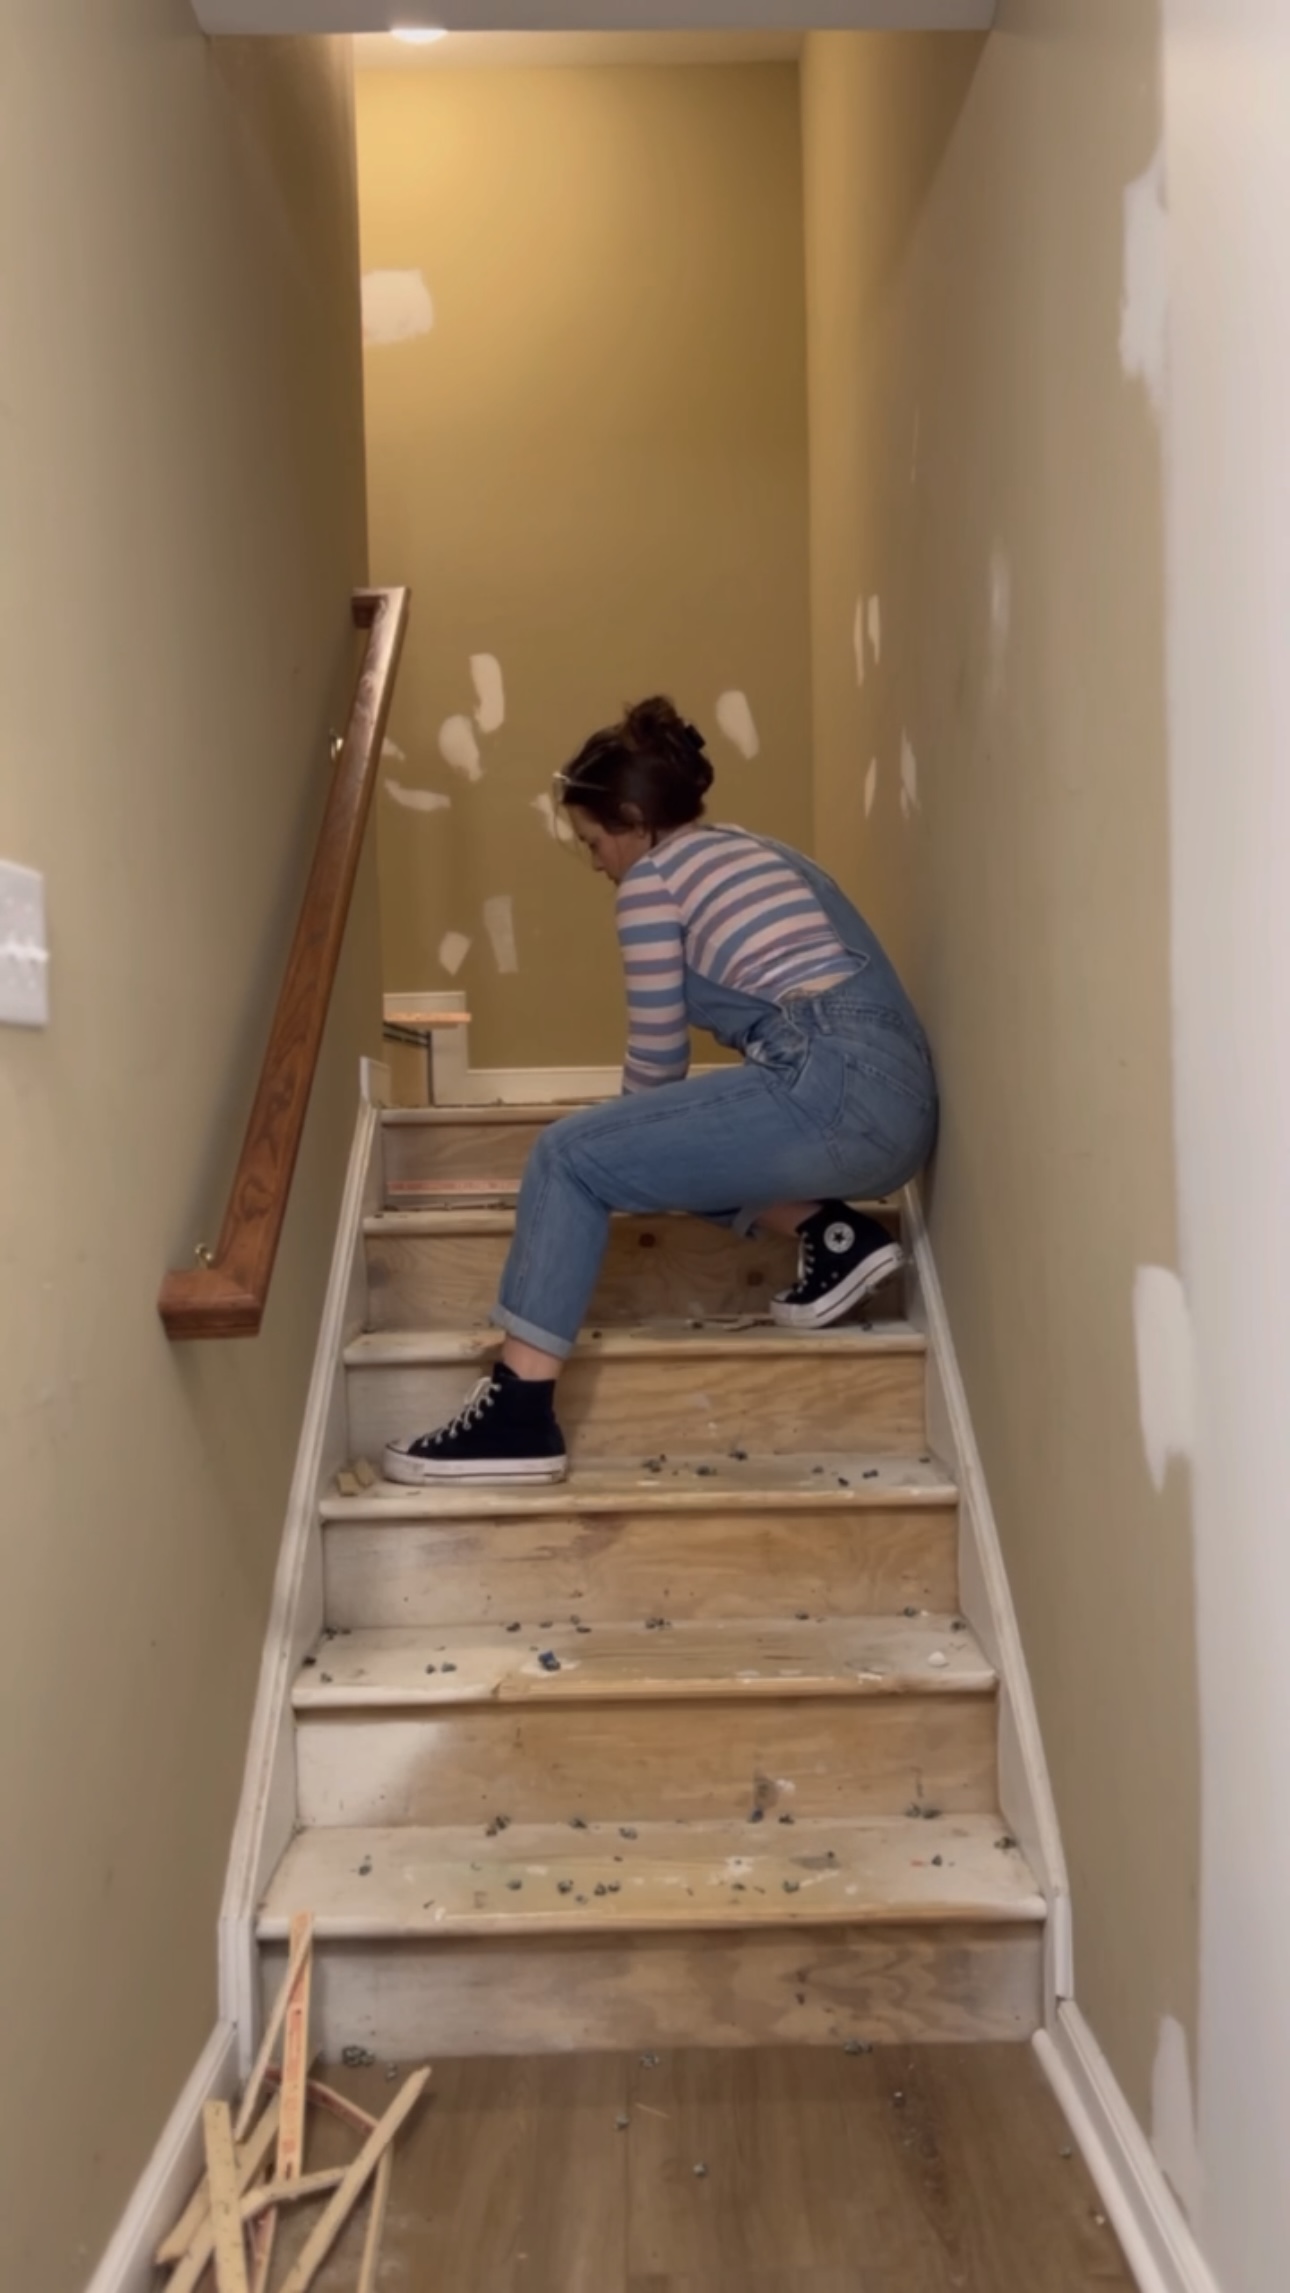
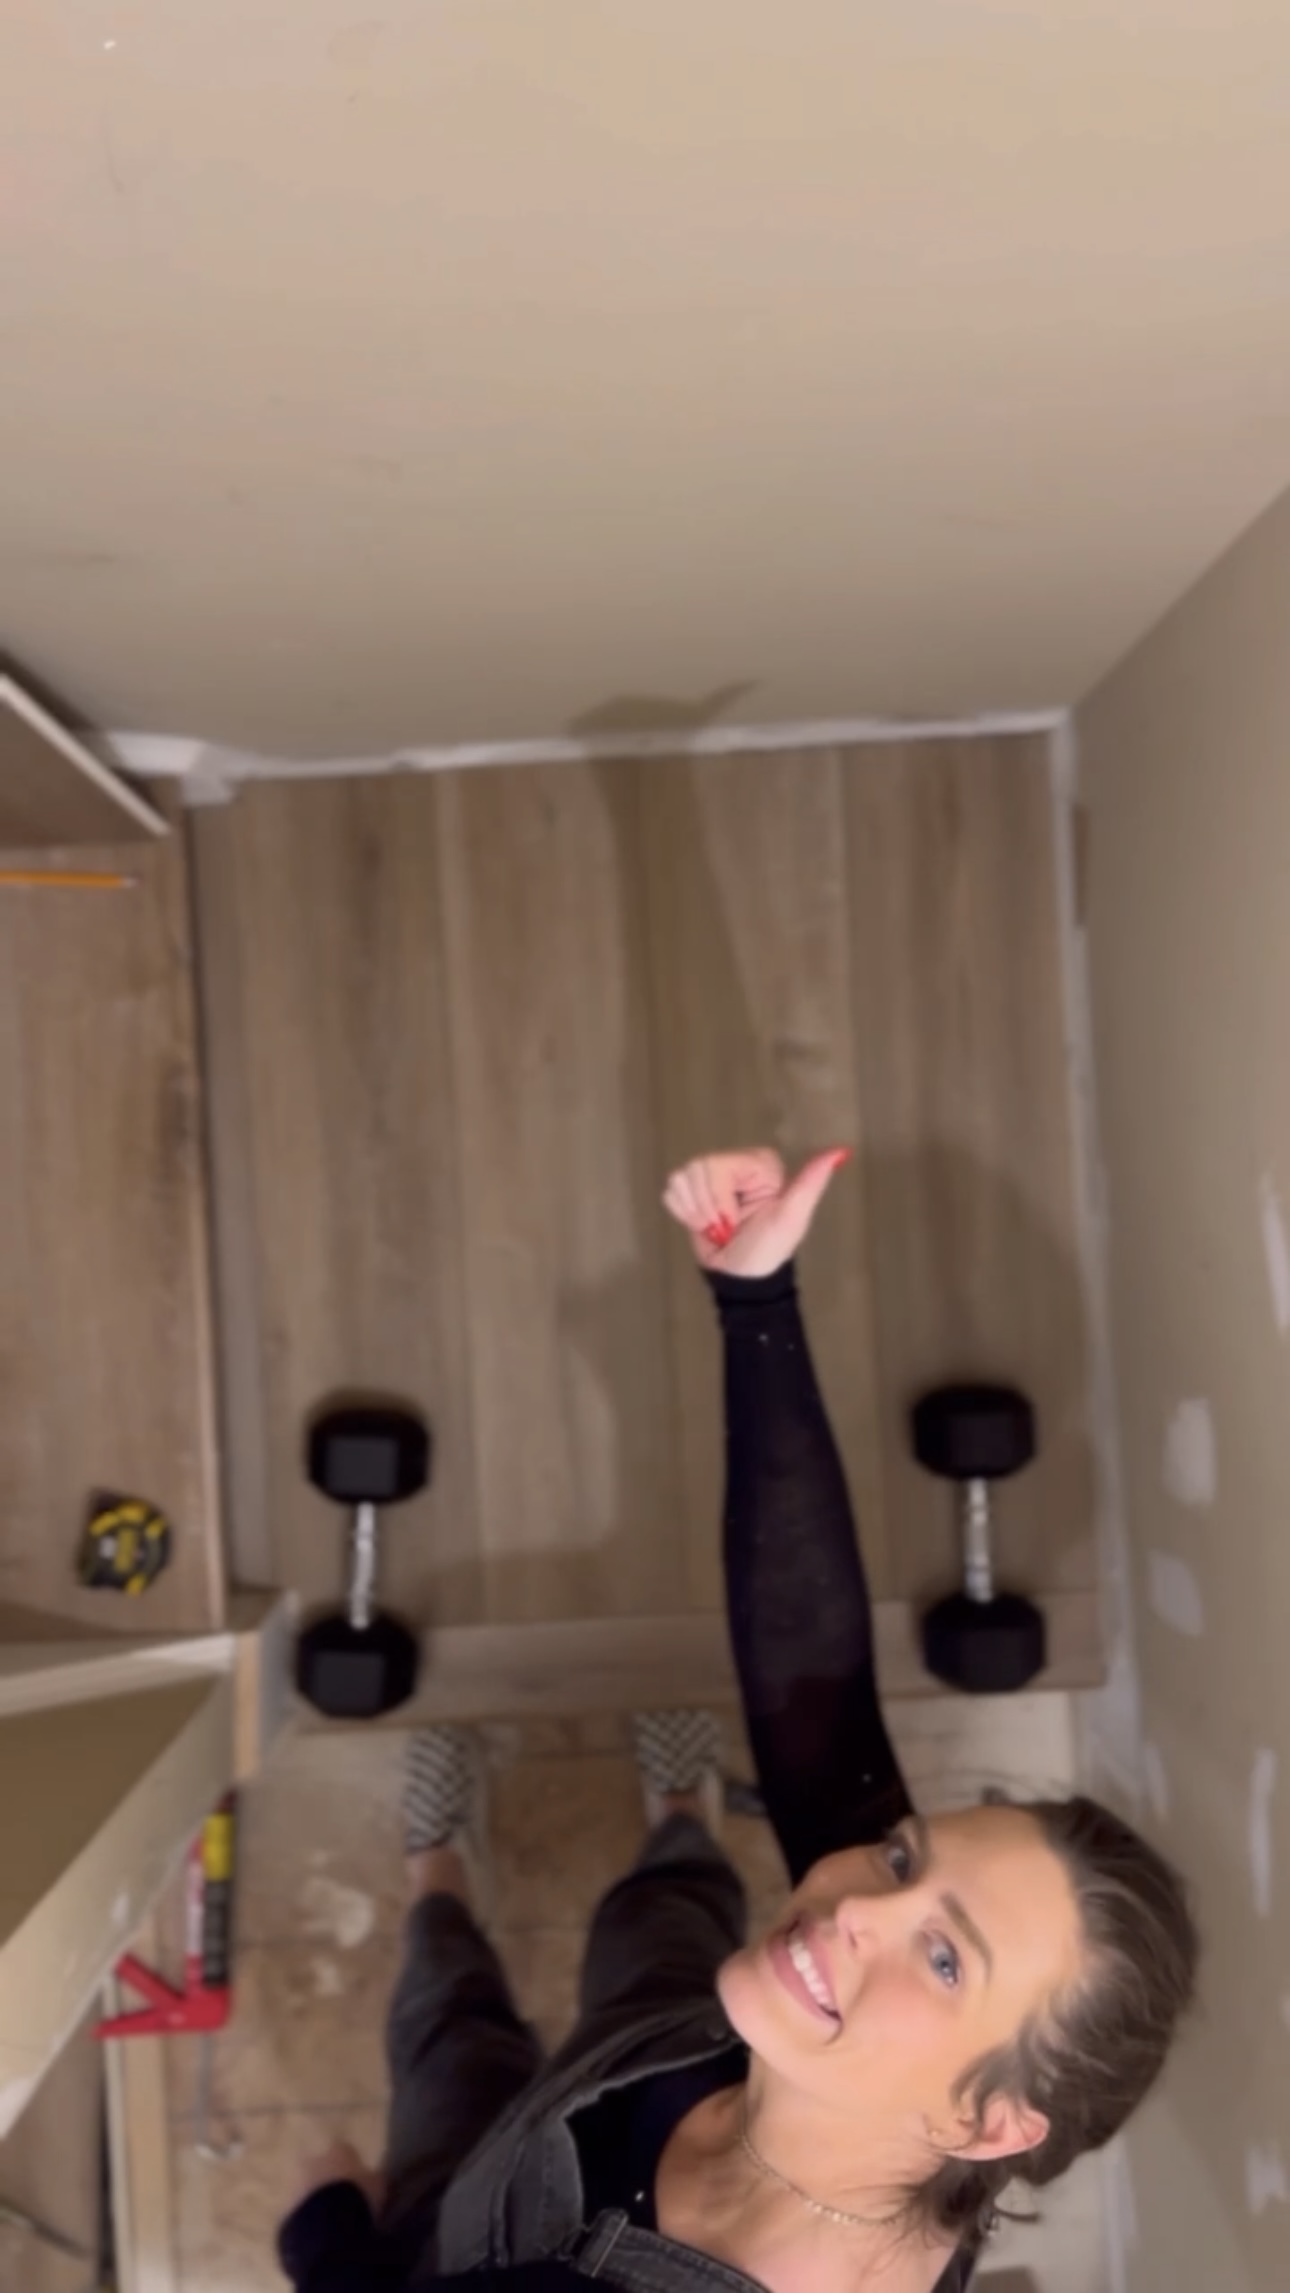
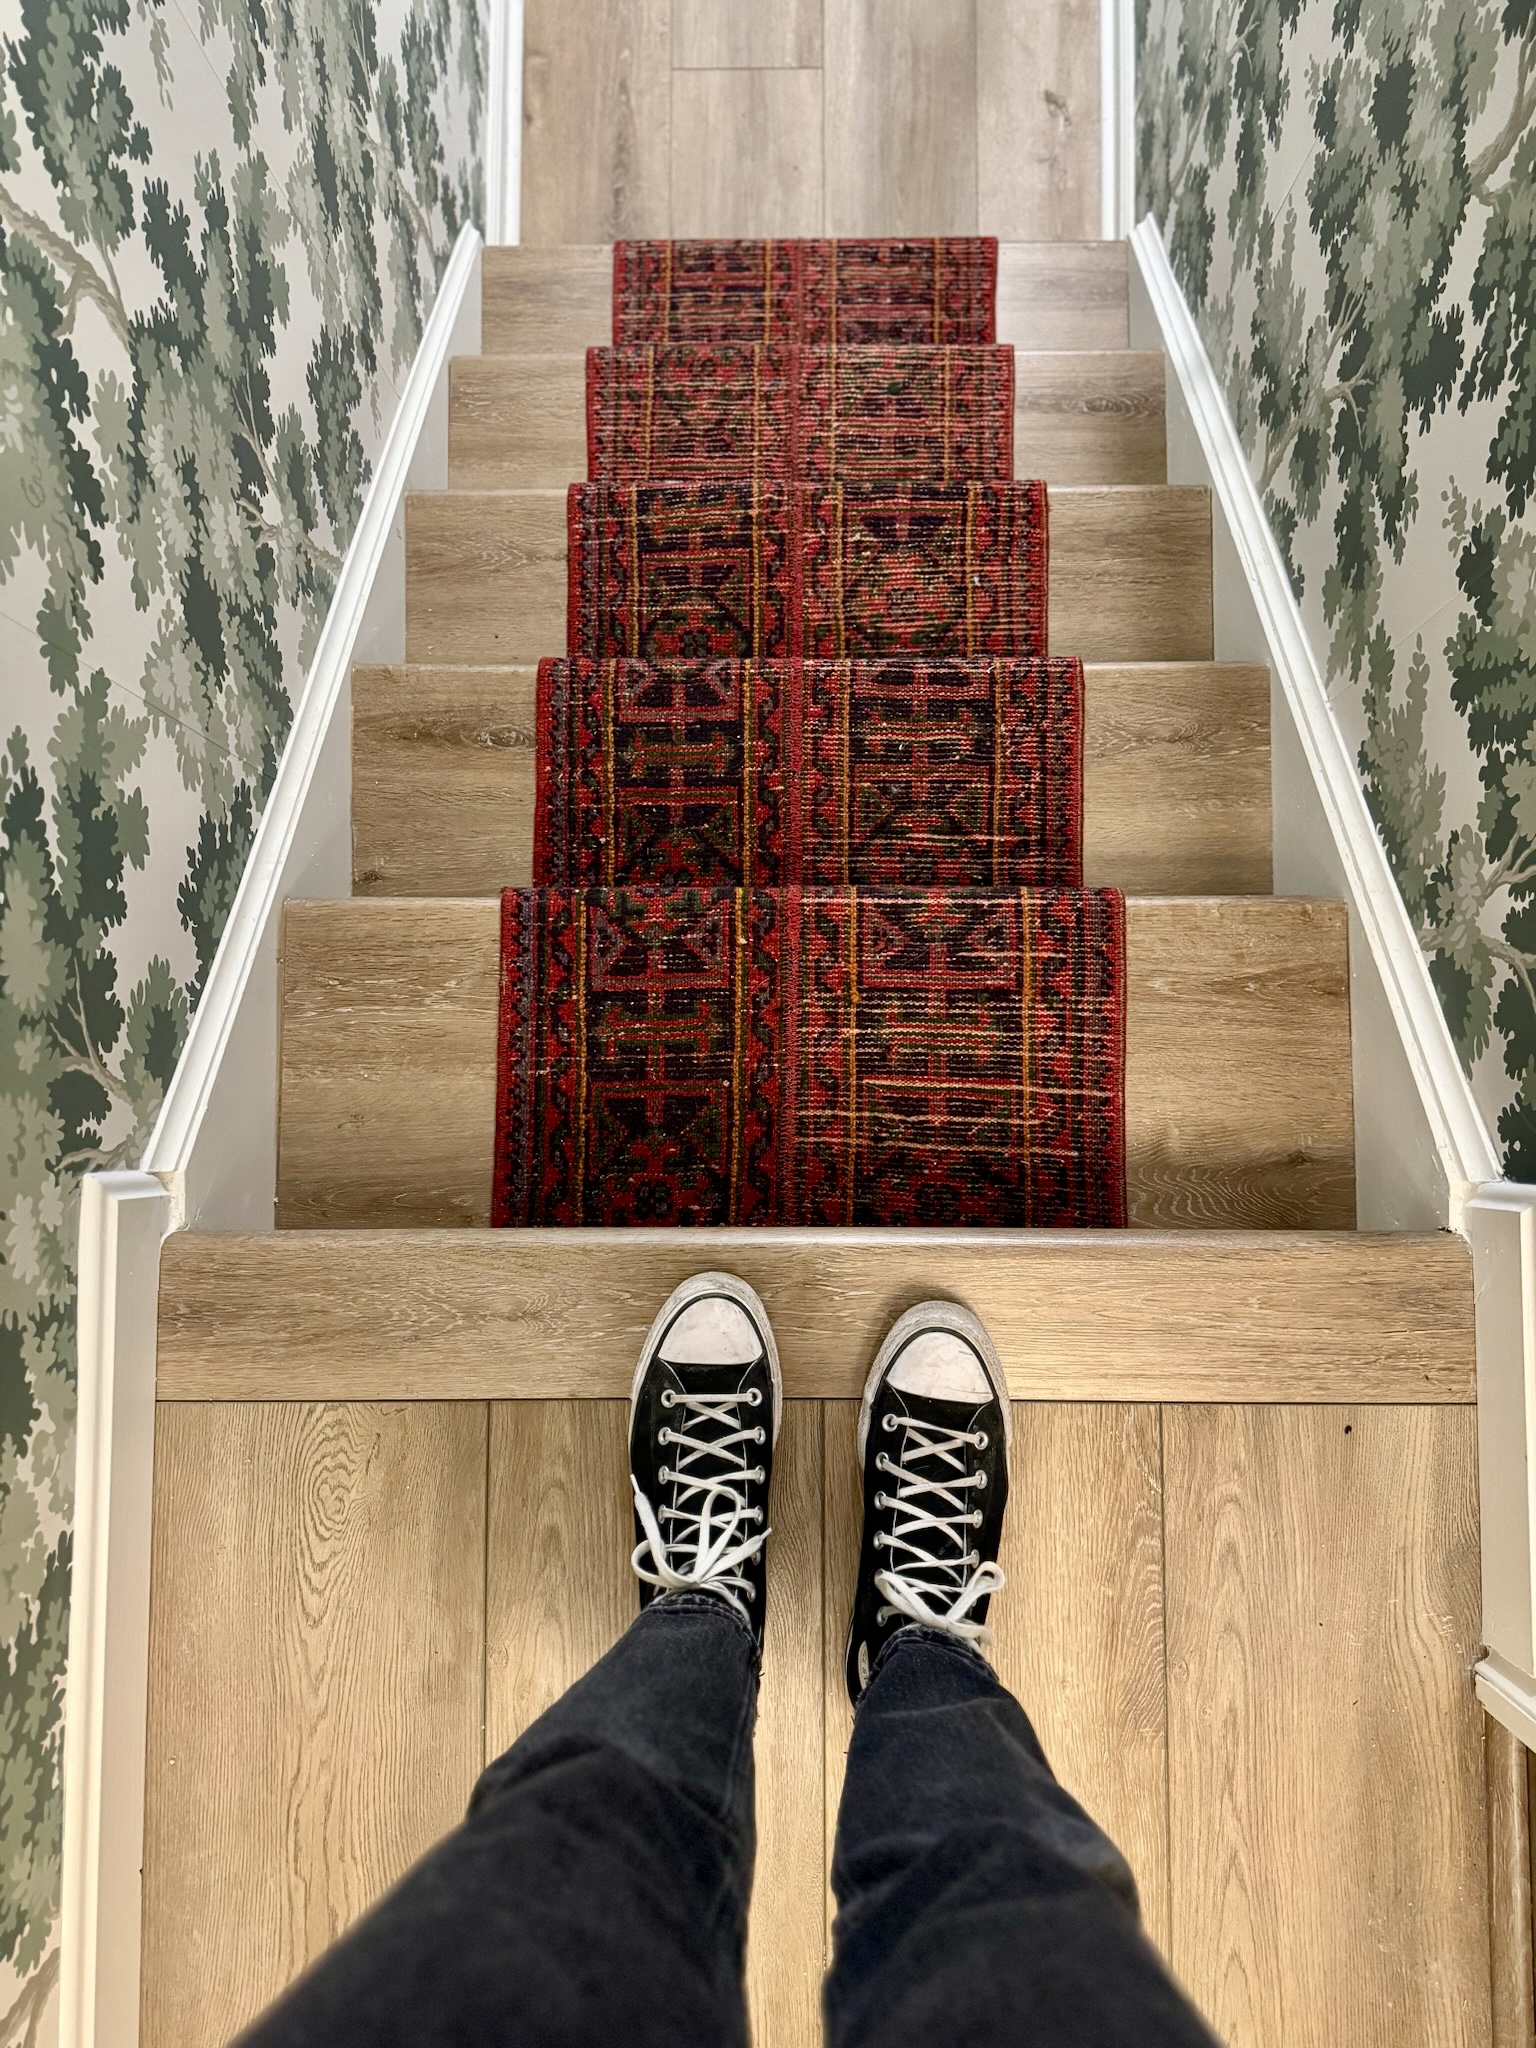
Stair Installation
Then, I installed completely new steps. I went with the exact same flooring that I installed in the rest of my basement last year. You can see the entire step-by-step process in this post.
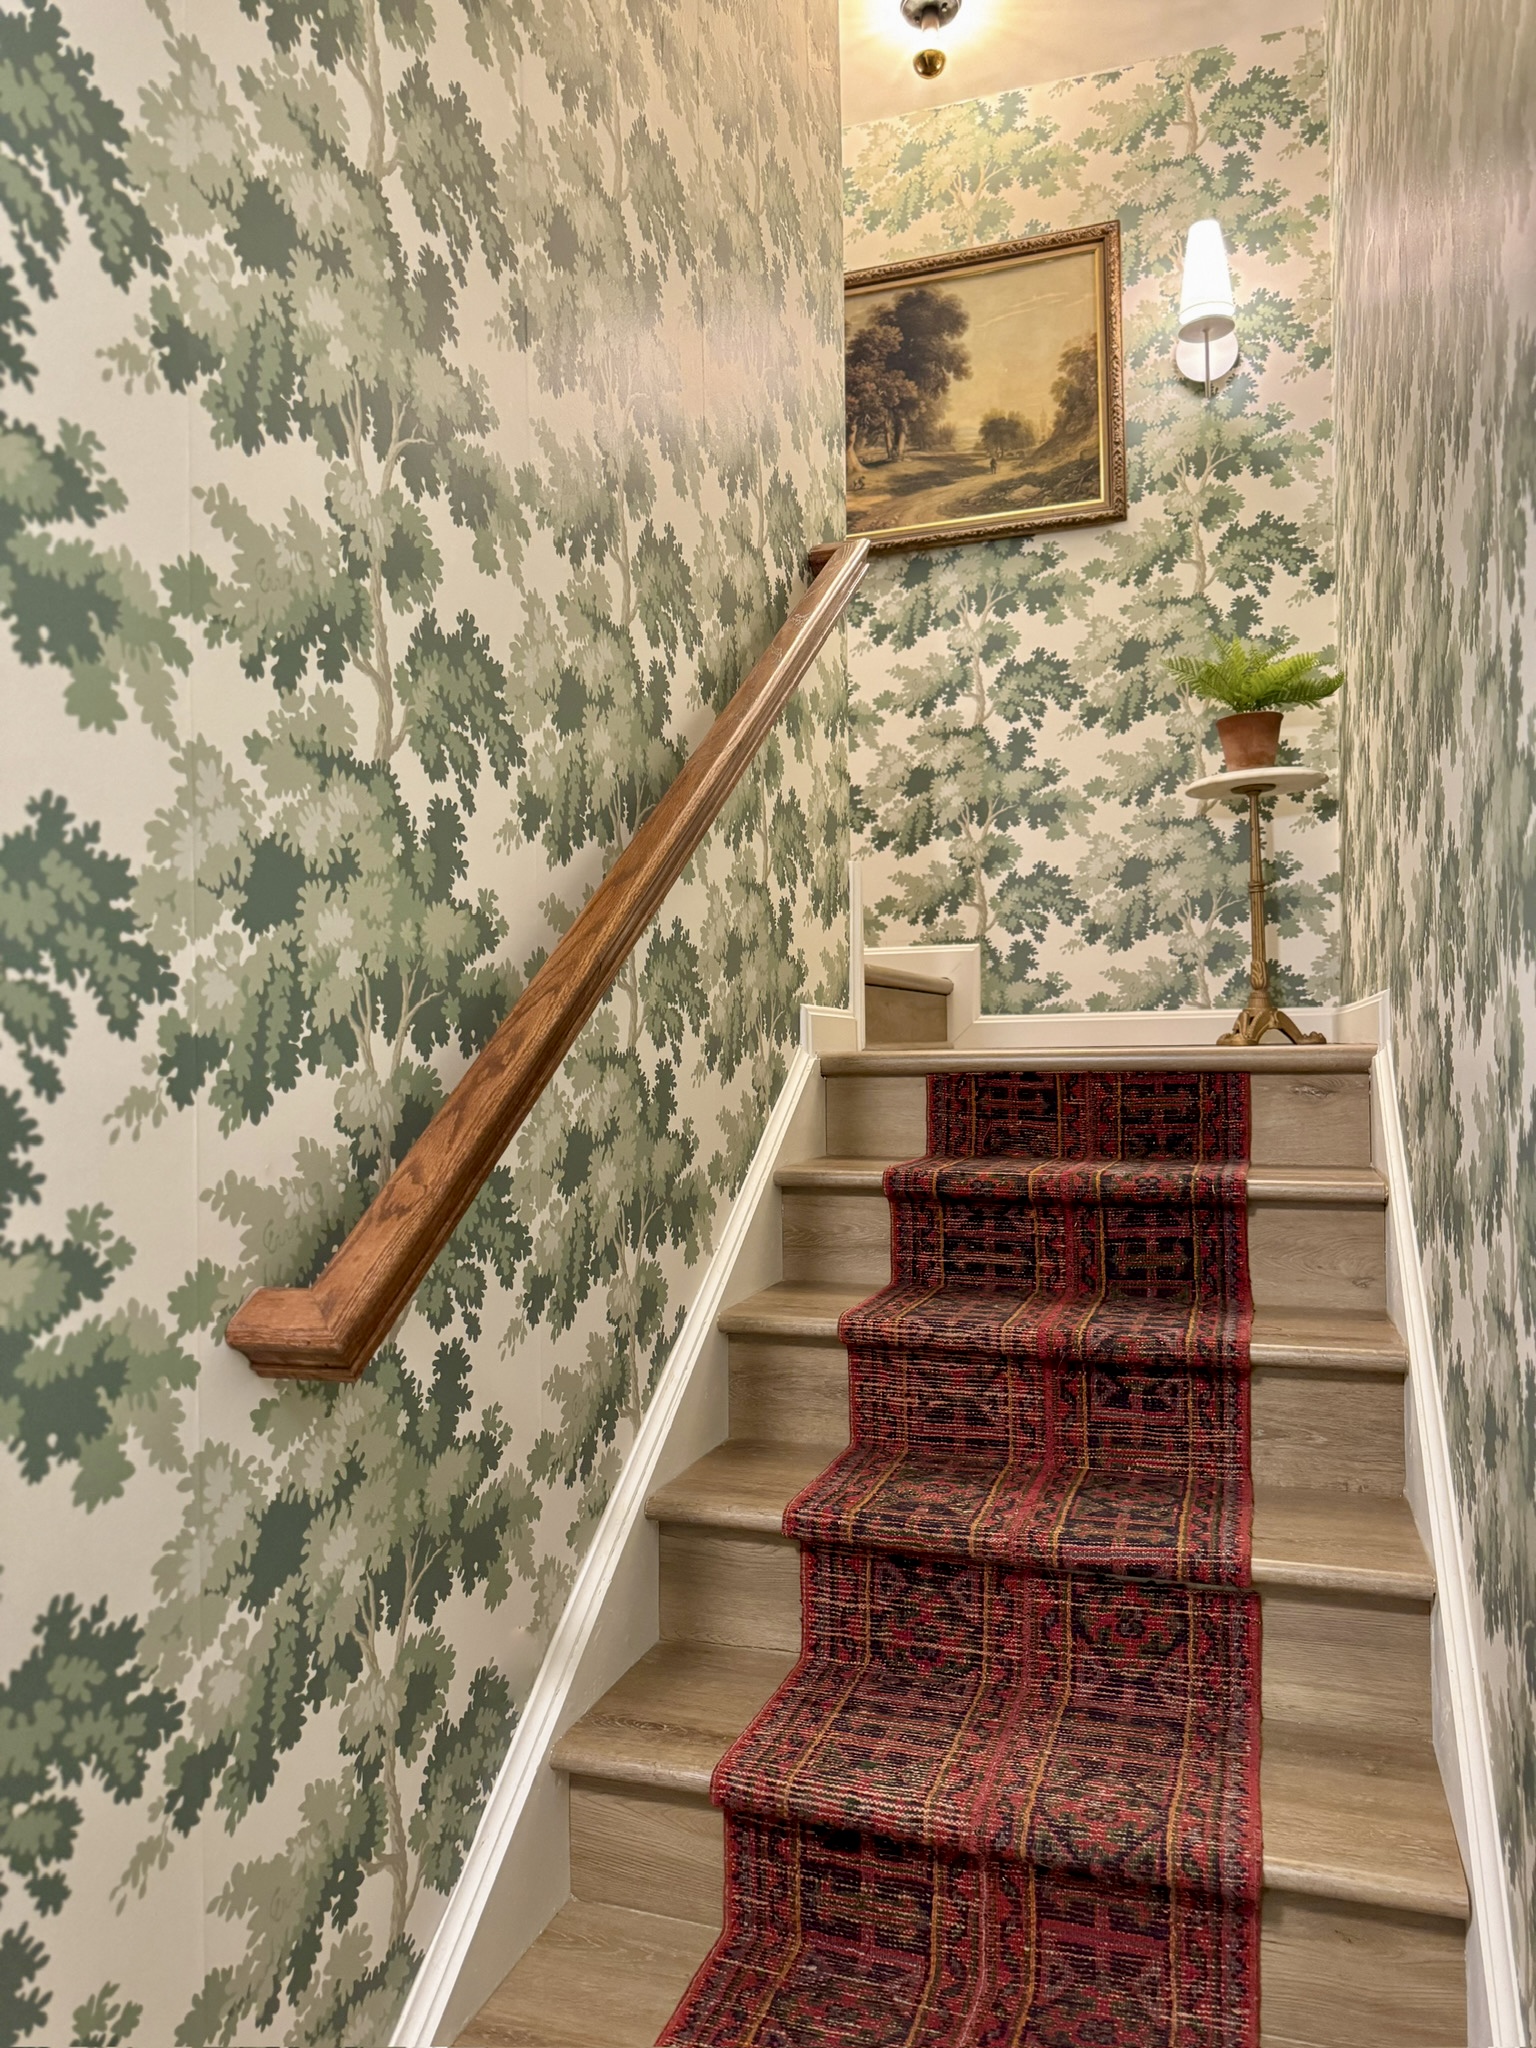
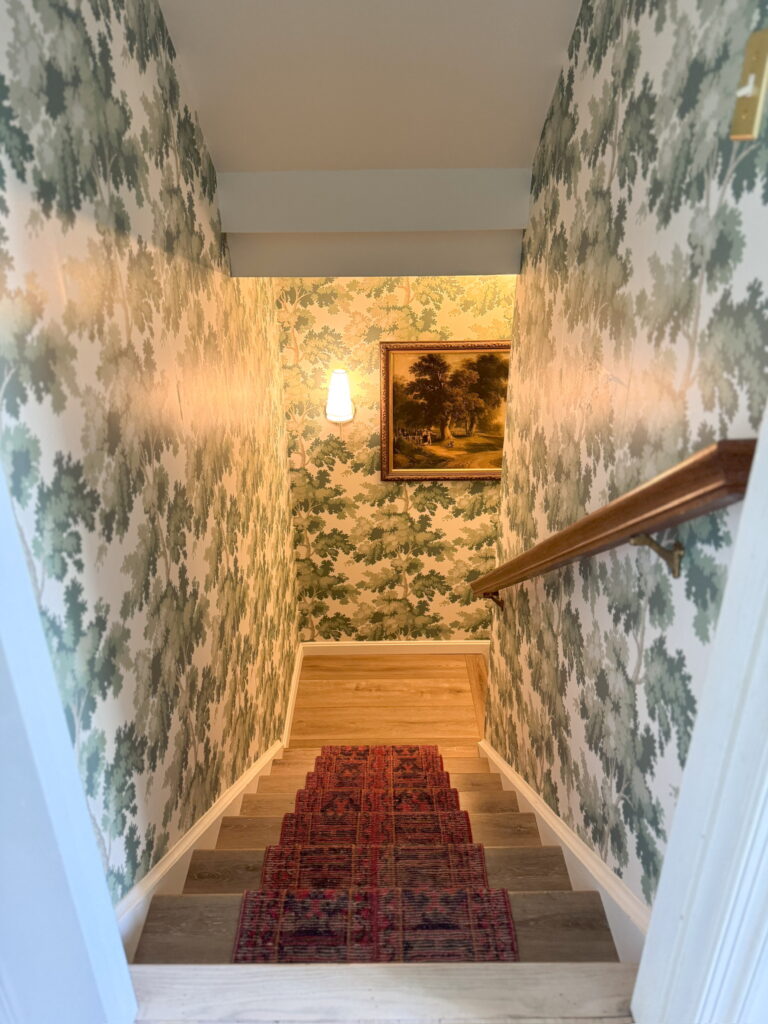
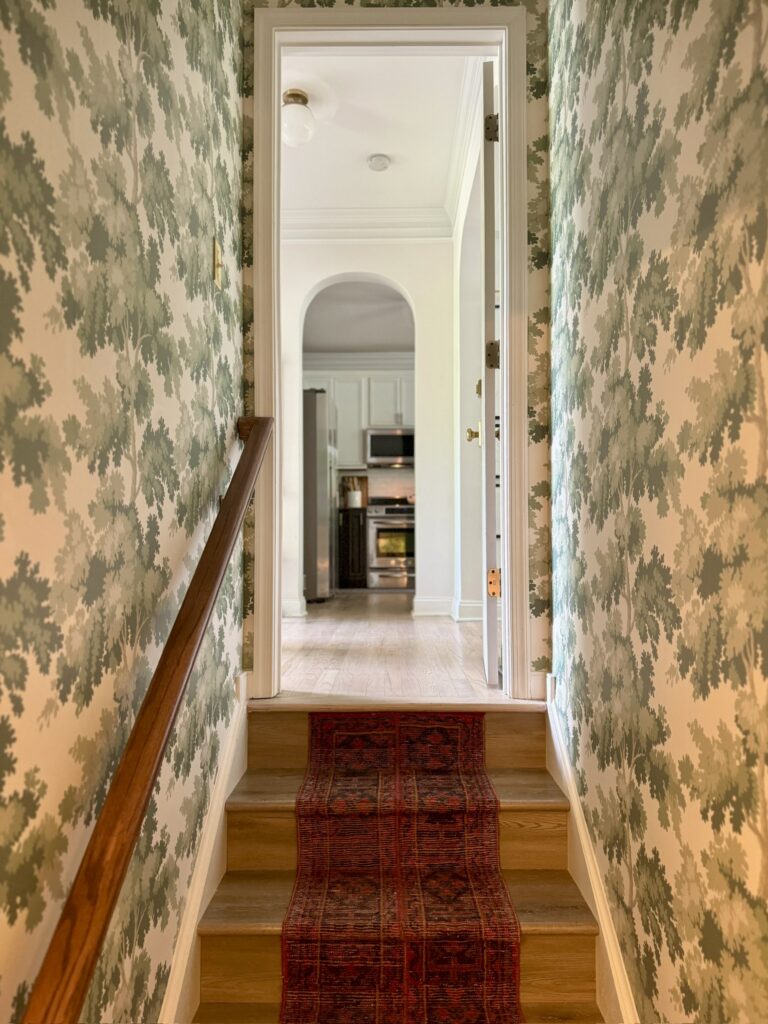
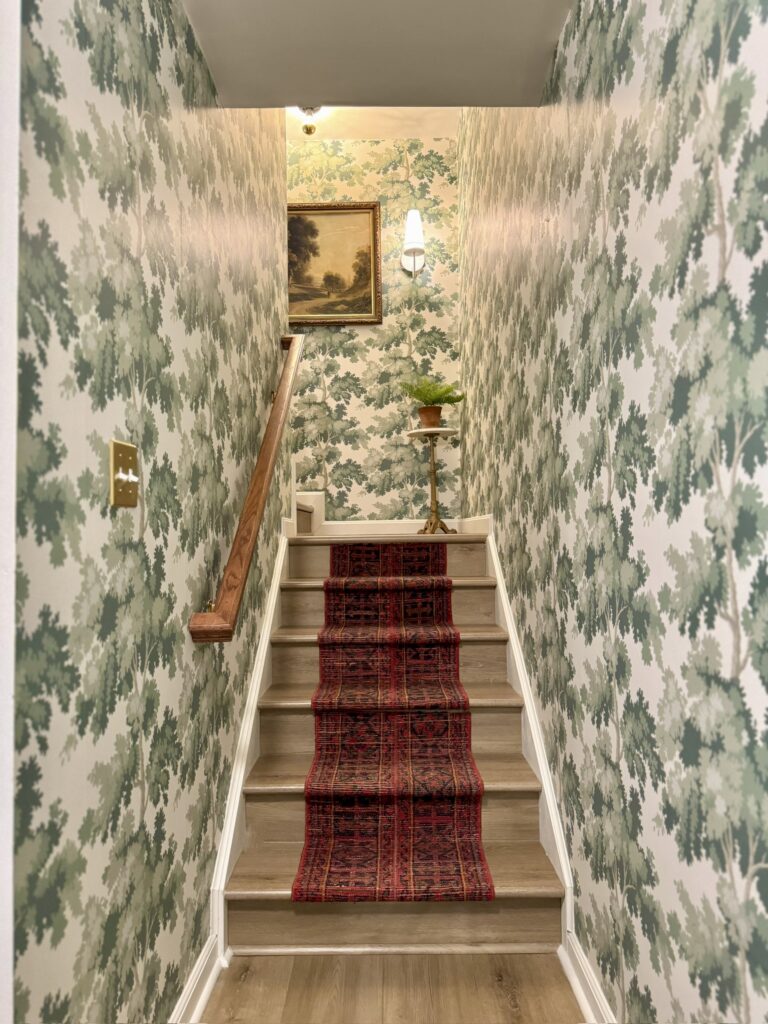
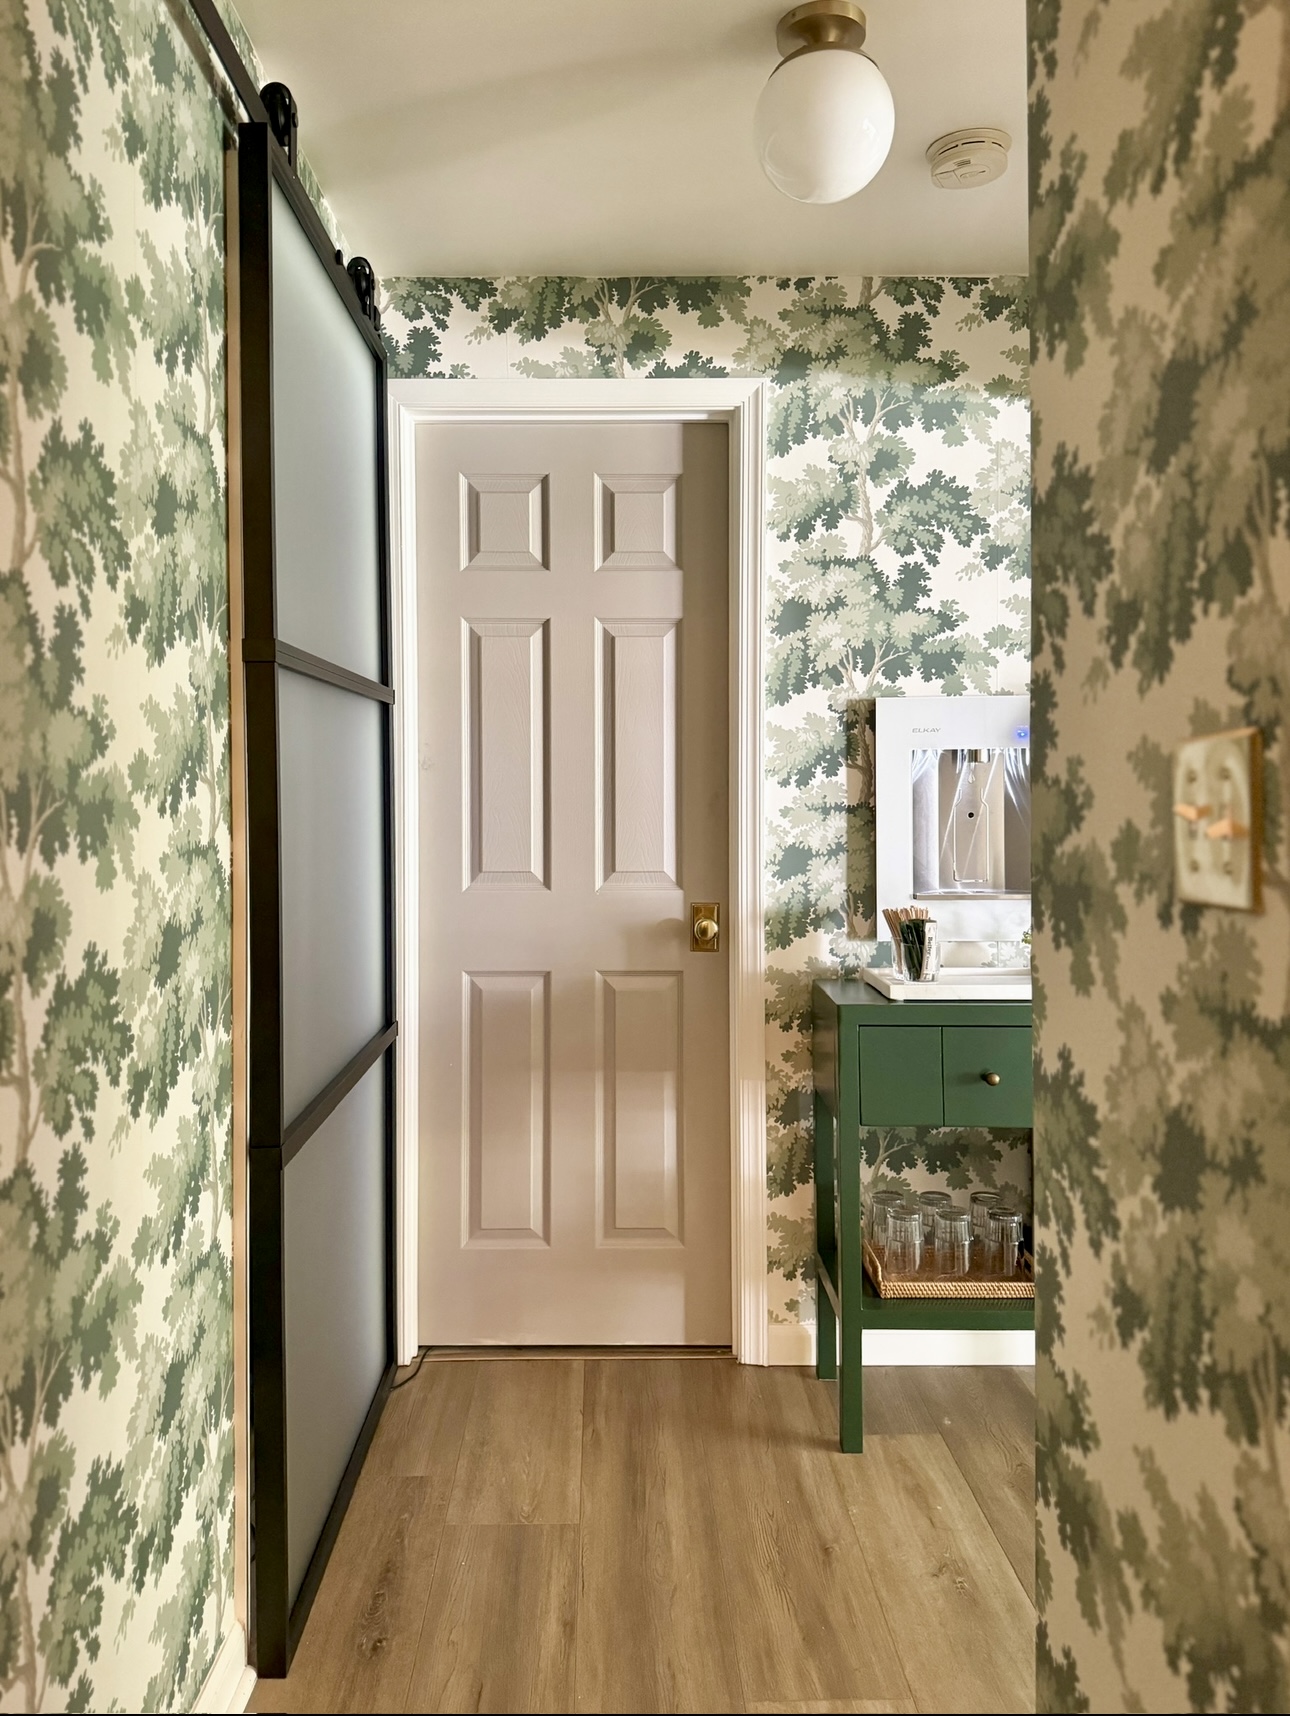
Wallpaper
This is maybe my favorite part! I’d been crushing on this wallpaper for a couple years now. I was so excited to finally use it somewhere!
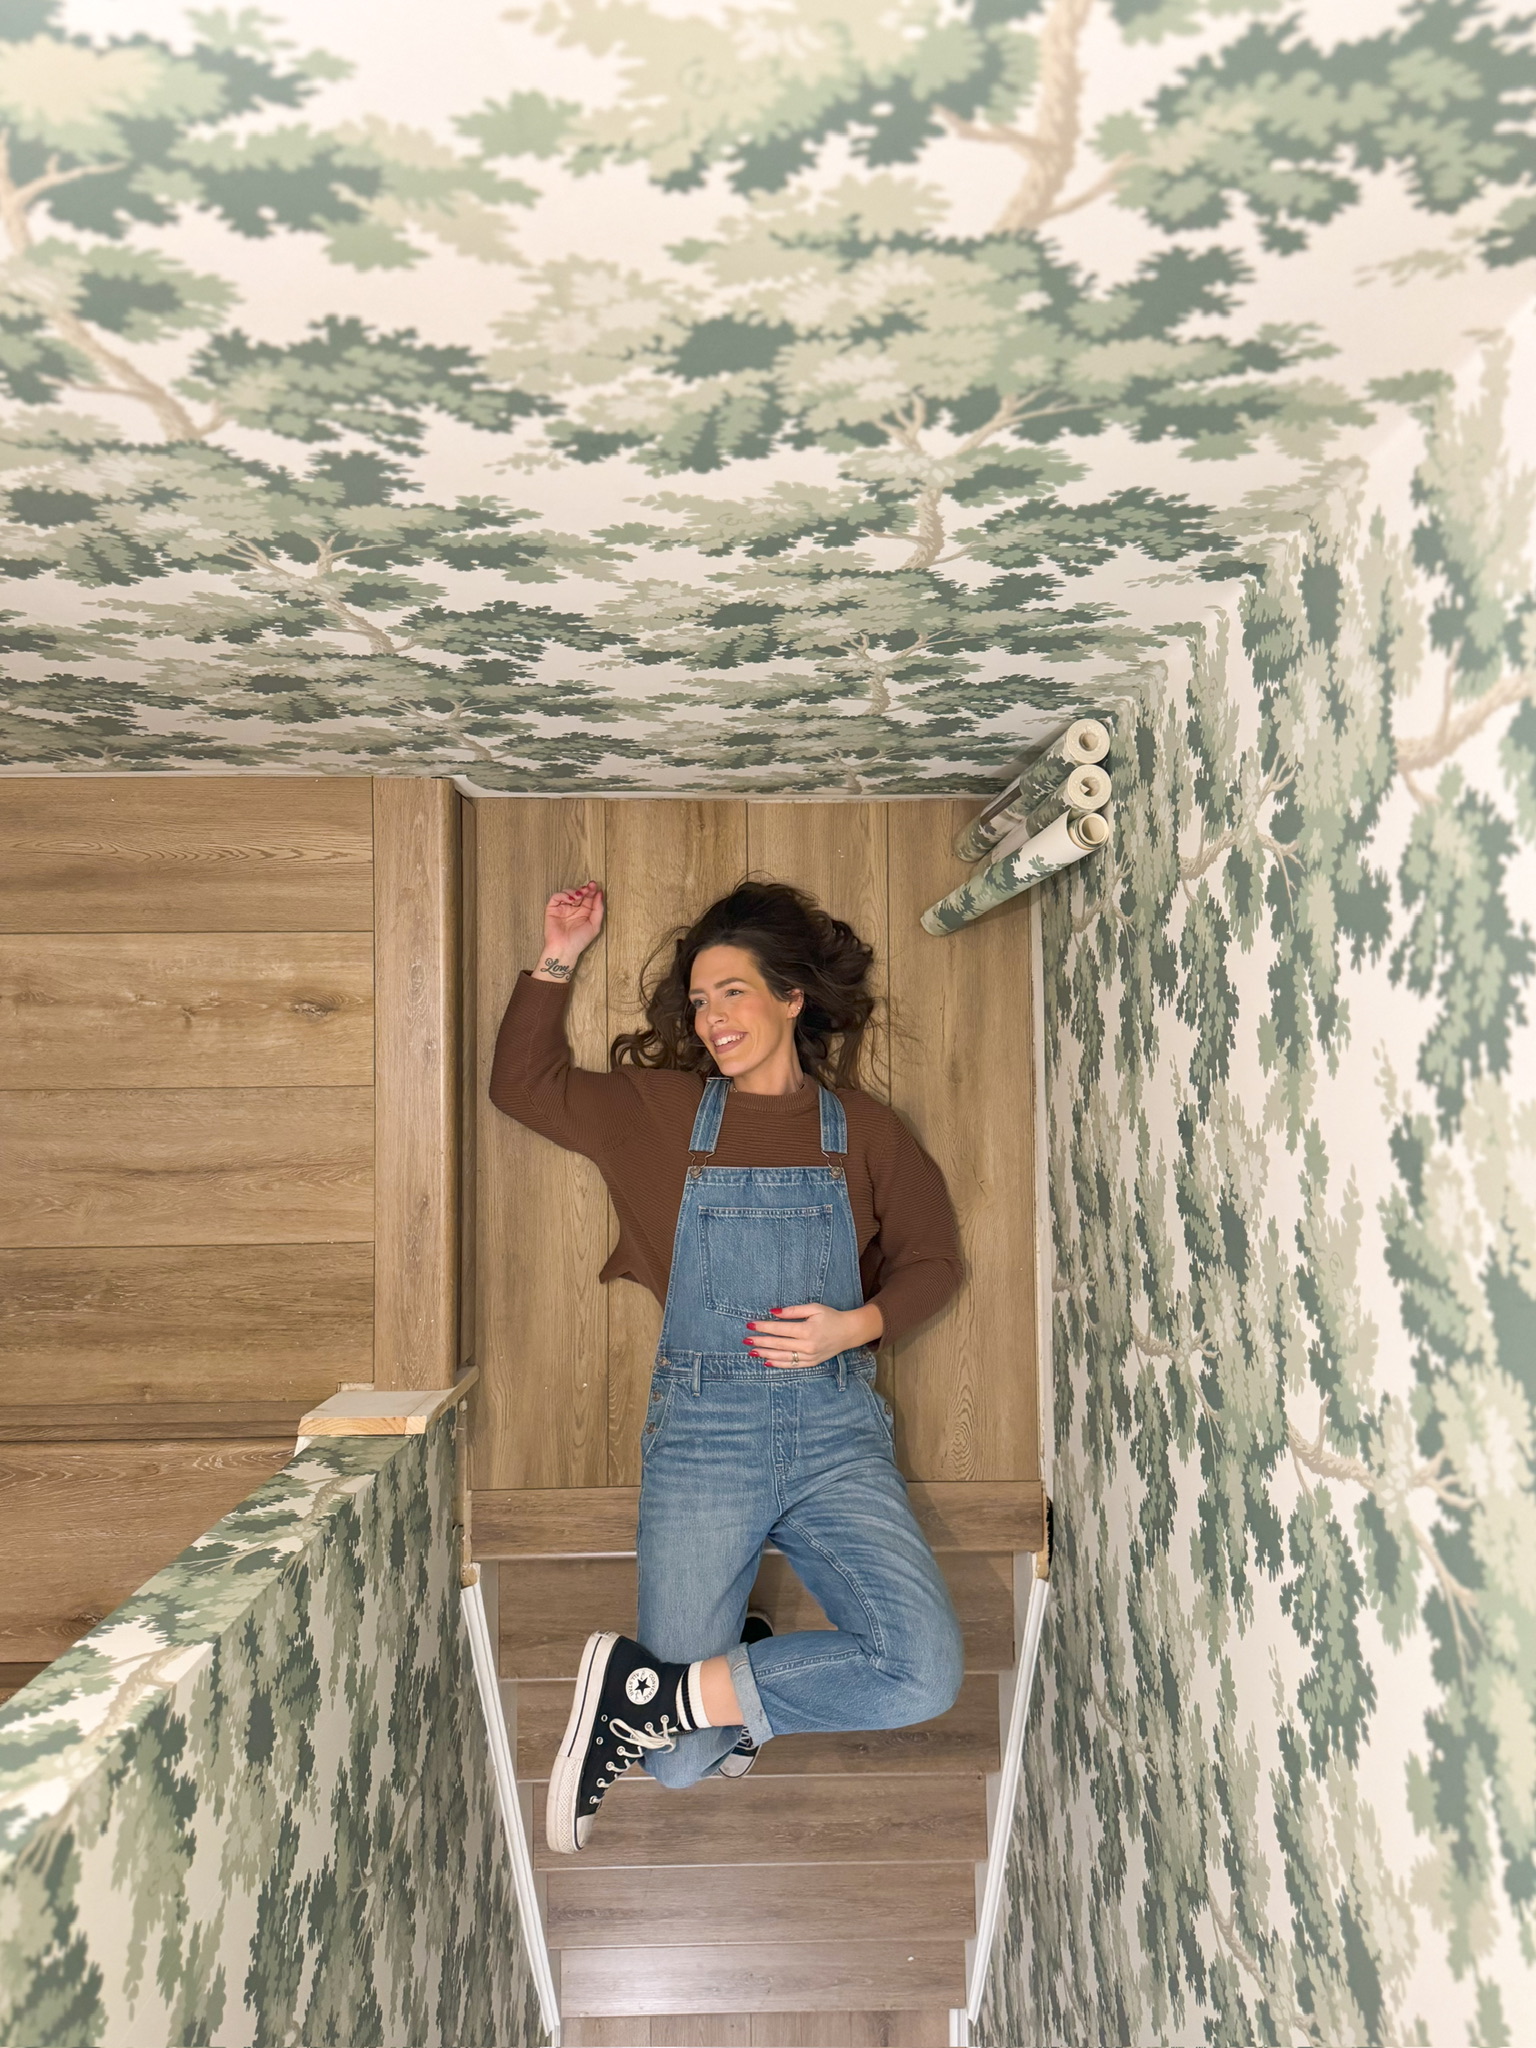
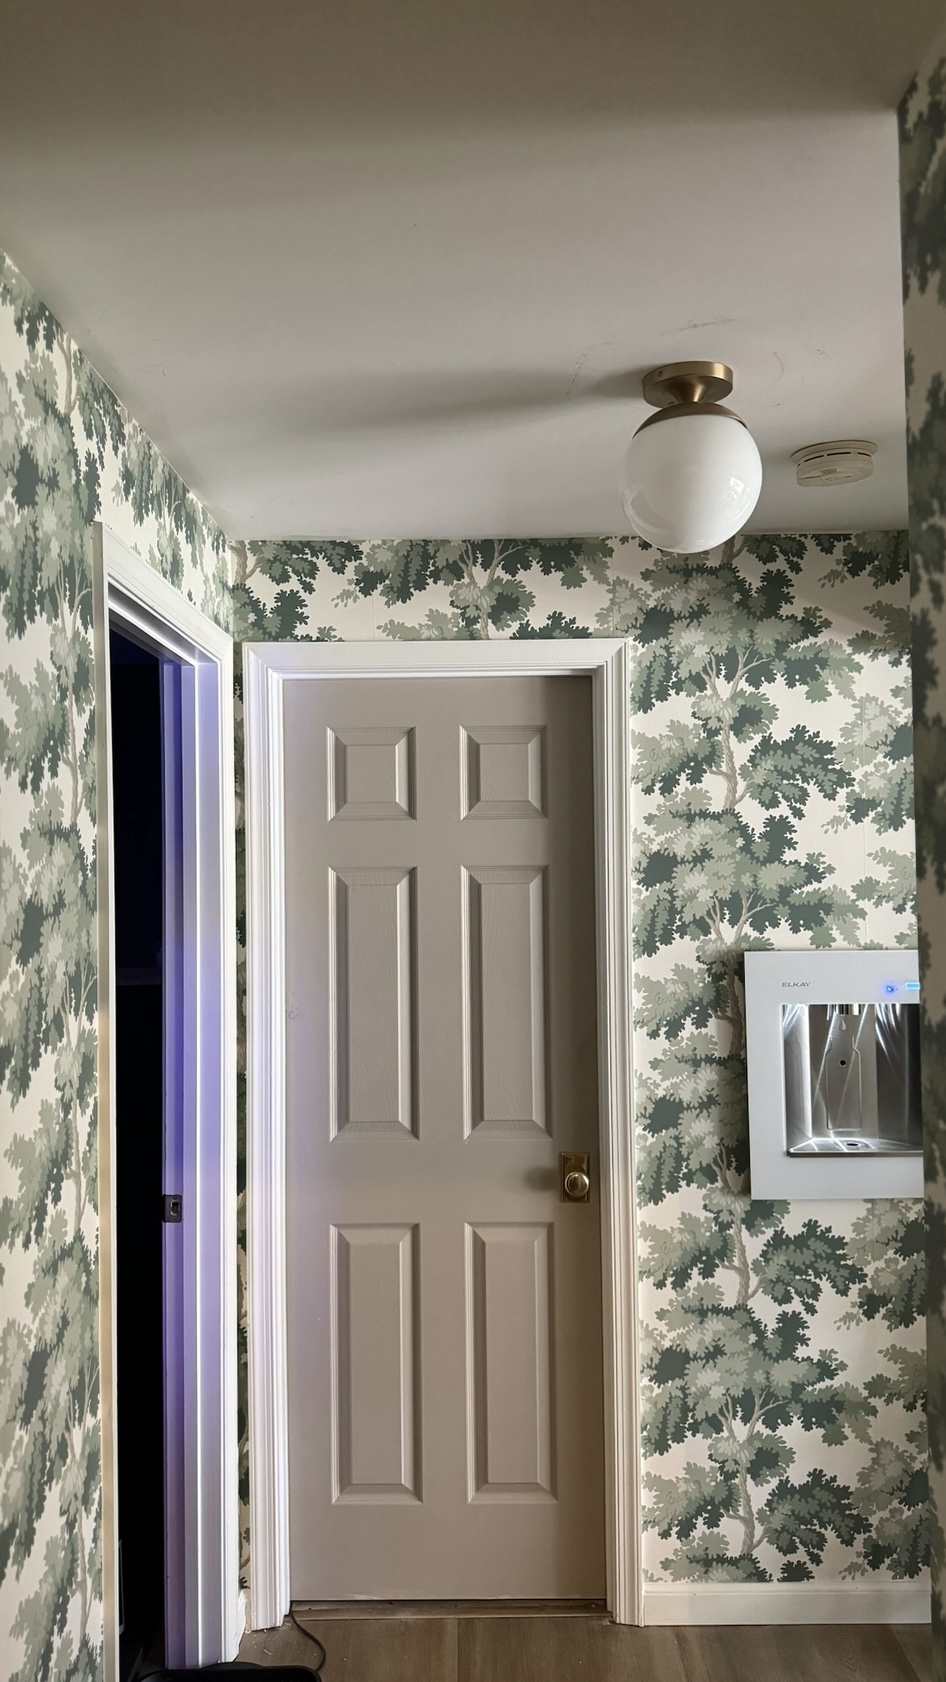
I love how when you open up the door to the basement, the wallpaper is a fun little surprise! The entire wallpaper process took me about three days to finish up, doing a little bit each day. You can read about the entire process here.
Lighting & Artwork
Next, I got to work on the lighting and the artwork on the landing. I had this piece of art in Emery’s room for a while until it made its way to the storage closet. I was so excited to finally get it back up in the house!
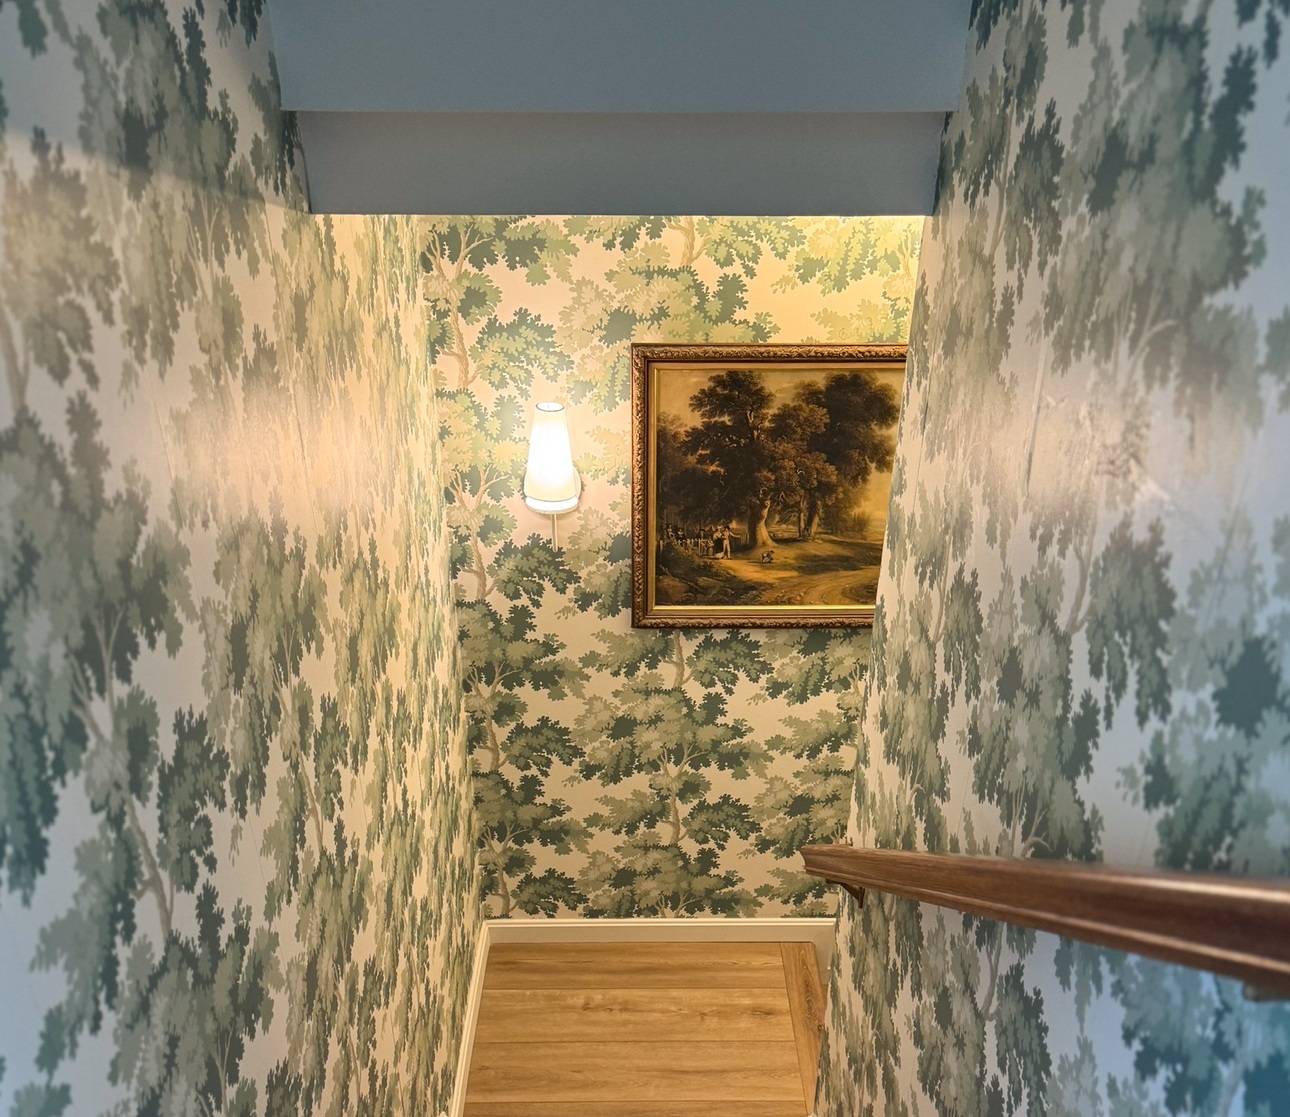
You can read more about the wiring and installation process here!
DIY Stair Runner
I’m in love with this stair runner! I didn’t want to put holes in my new flooring, so installed this vintage stair runner using just carpet tape. I absolutely love the contrasting pop of color against the wallpaper.
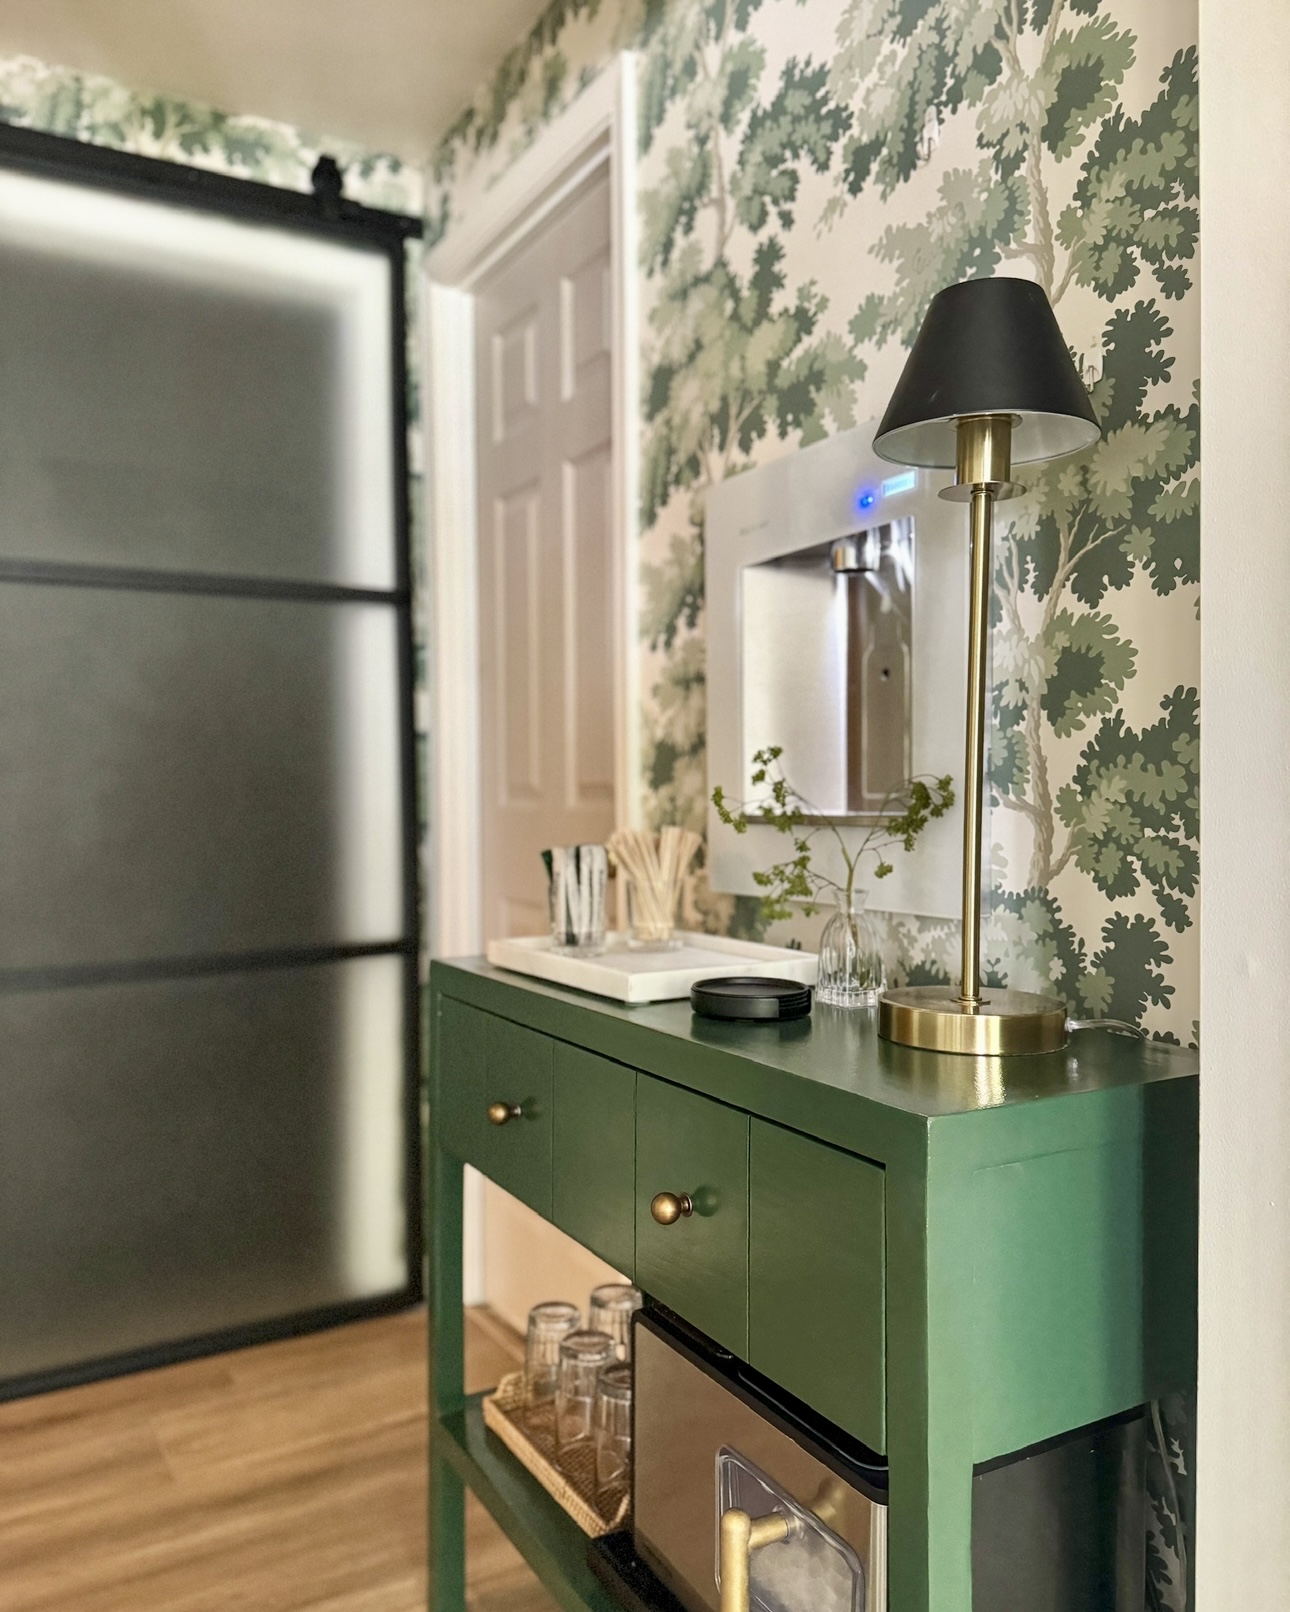
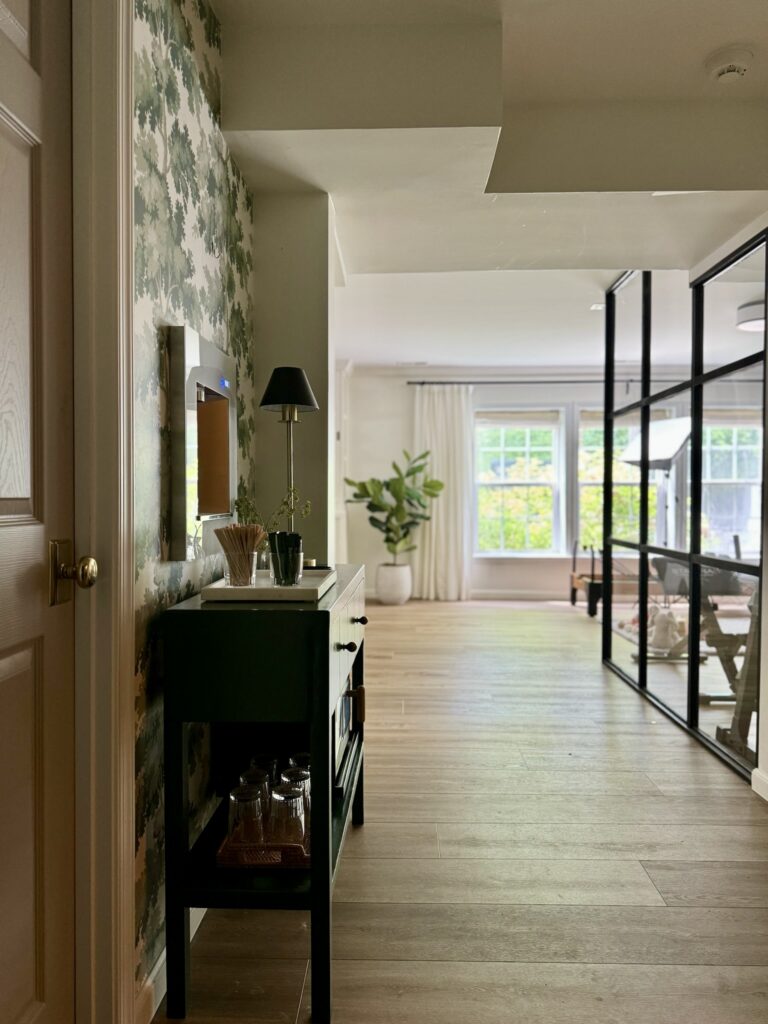
DIY Console Table and Drink Station
I had an idea to build a drink station below the Elkay Water Dispenser we installed in our basement last year. For that, I decided to build a DIY console table. I had such a clear vision of the the table I wanted. It went terribly wrong and it earned the name, the Cursed Console Table. After lots of detours, I ended up with a table I truly love. You can see the entire process here!
I’m such a drink girl. I love to have little drinks throughout the day. I work in the basement a ton, so turning this into a drink station would be a game changer! Here’s everything I used to stock my drink station.

It’s crazy to see where we started…

…& where we ended up. I’m so proud of this basement stairway makeover. Thanks for following along!
— Cass