Plans – Main Bathroom One Room Challenge – Week 2


If you’re new here…Hi! I’m Cass! Welcome to my One Room Challenge.
I’m a mom, wife, and fearless DIY’er. I live in Eastern Virginia with my little family. I’ve been passionate about the idea of homemaking since I was a young girl. I started trying to make our house a home when my husband, David, and I bought our first house. This started with painting and small home decor crafts. My visions started becoming bigger but our budget was still small. Once my husband began leaving home on long deployments, I realized that if I wanted to make those bigger projects happen, I would have to just do it myself. I then began, little by little, trying out new things and teaching myself to use new tools. Now, in our third home together, I have learned how to tackle MUCH larger projects. Making my home with my own two hands has become my PASSION! I love taking my big ideas and making them come to life and I hope to inspire others to do the same!
*This post may contain affiliate links, which means I may earn a small commission if you purchase through my links, at no extra cost to you. I only share products I genuinely love.
It’s week 2 of the One Room Challenge….Let’s talk PLANS!
STRUCTURAL
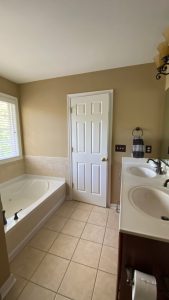
The layout of this bathroom will not be changed much during this One Room Challenge, but I do have big plans to accentuate it’s existing layout. I don’t like that there is not much natural light in the shower enclosure, which makes it feel a little tight. Before coming up with my current plans, I considered removing the wall separating the shower and tub. This would give me the option to make the shower all glass, or even remove the tub completely and convert that entire wall into one large shower.

BUT… both ideas were leaving me feeling uninspired. So, I went digging through my Bathroom Pinterest Board to find inspiration for the One Room Challenge and struck out completely. I was struggling with what to do with this shower/tub layout. Then, I came across this image that I had saved years ago. THIS is my solution. Instead of knocking out walls (the most obvious idea)…why don’t I find a way to make the existing walls BETTER!
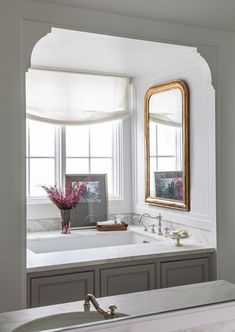
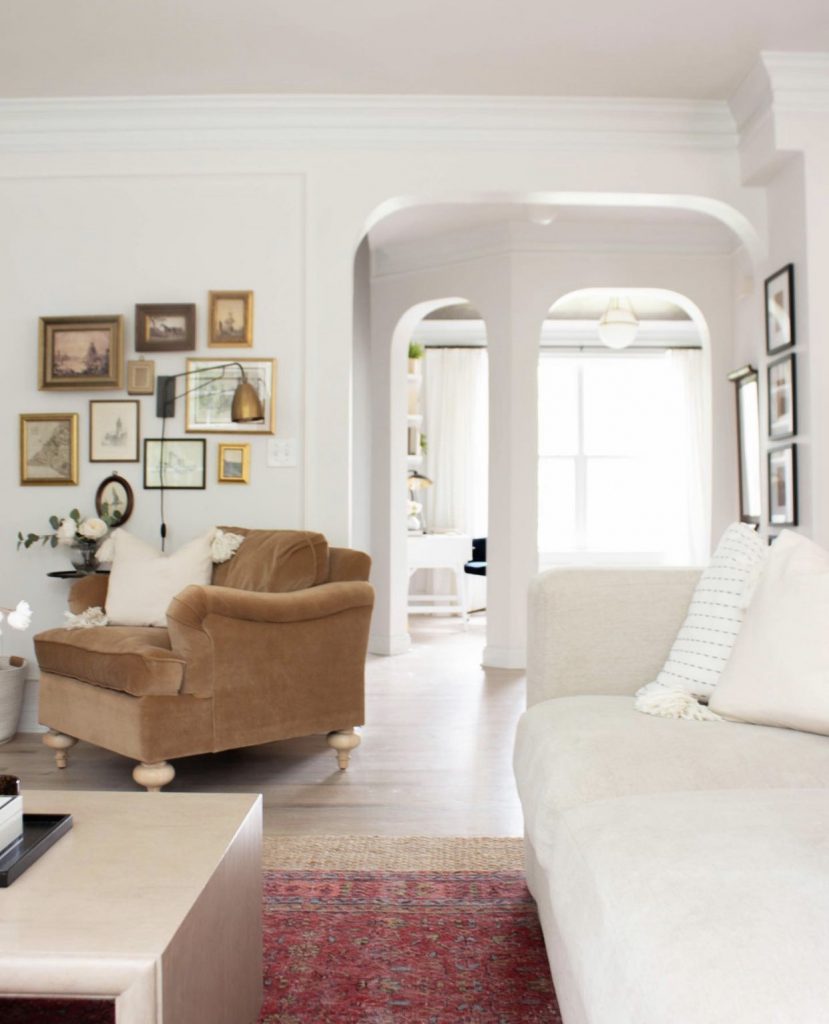
This bathroom also reminded me that I already have a similar existing design in my home downstairs that I could carry through in my bathroom…

*I felt like this announcement was too special for just all caps* 😆
Are you as excited as I am about that?!?! BECAUSE WOW. My sister @copelandstudio drew up a rough sketch of my vision.
![]()
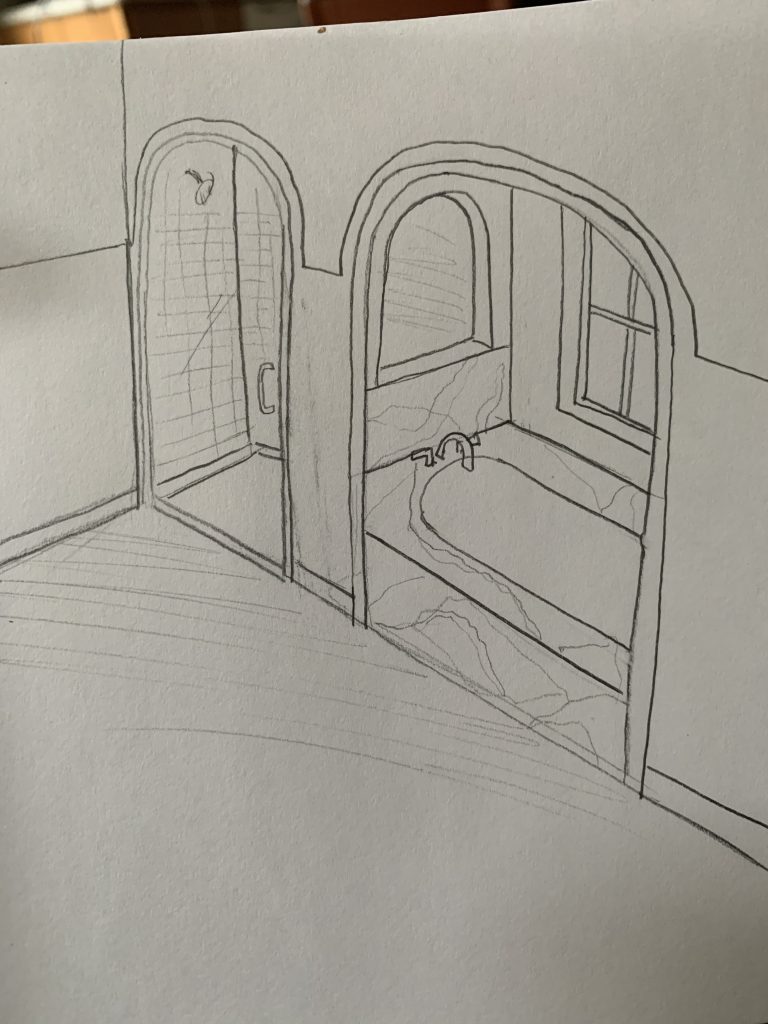
RIGHT?!? Creating an alcove tub space with an arch entry, and mimicking that with the shower entry as well! It is just TOO GOOD!
I also had an idea to add a little arched shower window so that the shower can get more light! VOILA! This takes care of that major pain point (no natural light in the shower) while also giving me an opportunity to do something unique, which I LOOOVE! It may be hard to tell from the sketch, but the shower will also be extended by about 6 inches (depth wise) to allow for the arches to connect. It’s a win-win all around!
Structurally, this is all that will change. But it is going to make such an impact in the space!
DESIGN
For the bathroom design, I plan to keep it pretty neutral. You guys know that I love color, but my soul has been craving fresh and light spaces. A master bathroom retreat is the perfect opportunity for that! Here is my mood board for the space:
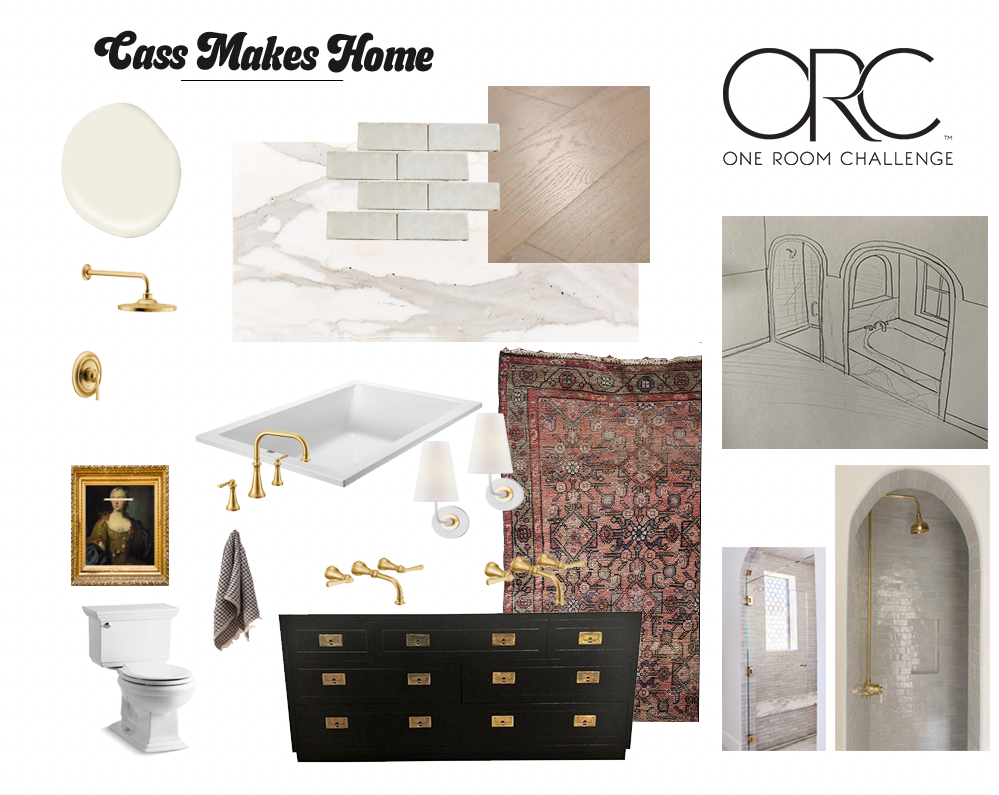
Arched shower inspo : @amberinteriors / @enchantedberkeley
I plan to paint the bathroom a creamy white and also use a light and distressed tile in the shower enclosure (this Zellige tile from Riad Tile). I will also be using Pacific Oak engineered hardwood flooring by Cali Bamboo on the floors! Remember when I chose this for my closet and I mentioned that it was important for me to find a durable and waterproof option? This is why! This flooring will continue in our bedroom and hallway as well.
I will be using Moen brass fixtures (from the Colinet Collection) throughout. The plan is to convert a vintage dresser for the double sink vanity (with lots of drawers for optimal storage, of course!). I love to incorporate antique/vintage items in each room and I think that this will add so much character! Also, I’ll be using a natural stone for the vanity top and for the tub surround. It is gonna be SO GOOD!!
PROGRESS
Last week I showed you the current bathroom situation and quickly got to work on some demo. I removed some drywall, disconnected some plumbing, and started installing the pocket door.
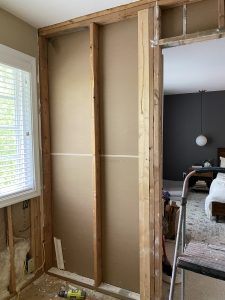
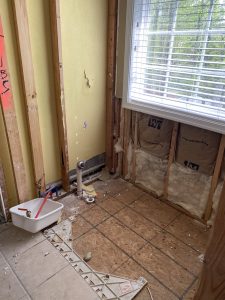
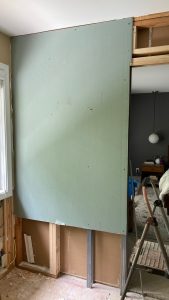
This week, I plan to start prepping some of the framework for the tub/shower wall and hopefully install the tub!
Don’t forget to check out what the other One Room Challenge Featured Designers are up to this week!
Ariene C. Bethea | At Home With Ashley | Banyan Bridges | Bari J. Ackerman | Brit Arnesen
Brownstone Boys| Dominique Gebru | Gray Space Interiors| Haneen’s Haven
Home Ec. | Nile Johnson Design | Pennies for a fortune | Prepford Wife | Rachel Moriarty Interiors
Sachi Lord | Susan Hill Interior Design | This Is Simplicite | Tiffany DeLangie | Victoria Lee Jones
This is going to be so good! I’m excited for your arch and the announcement was epic!!!
Thank you SO much!!!
Looks awesome! Love the plan you came up with and can’t wait to hear how your finding the vanity!
Yay! I can’t wait for that part!!
This is going to be awesome. I can’t wait to watch the process.
Yay! I am so excited!
Wow, love the design!! It’s going to be gorgeous. Can’t wait to see the whole transformation!
Yay, thank you so much!
I’ve just found you and feel so inspired!! I love your style and everything you do! Thank you! 😊
I’m so happy you’re here!!
This is all so exciting!!! I’m so happy for you and the design is gorge!! My eyes are glued to your timeline!
Yay! Thank you so much!!
This is going to be amazing. Loved all the design ideas. Great Job.
Thank you! I can’t wait!
You’re a rockstar!
Thank youuuu!