My Backyard Tuff Shed

It wasn’t long after jumping into my DIY journey that I realized…”I need a designated space for all of these tools”. And for quite some time, I made it work in random areas of my house. Collecting my tools either in a small corner of the garage or our carpeted basement. And even cutting/drilling/building outside on my patio to make my visions come to life. I knew that I couldn’t keep this up for long. I needed a Tuff Shed space to work on my projects and store all of my tools.
*This post may contain affiliate links, which means I may earn a small commission if you purchase through my links, at no extra cost to you. I only share products I genuinely love.
Customizing my Tuff Shed
Thankfully, Tuff Shed agreed that I needed a sweet set up for my DIY projects and tools. They decided to sponsor me and I can’t even express how cool that made me feel. After working through the details for several months…I customized my dream shed online and we scheduled a date for install.
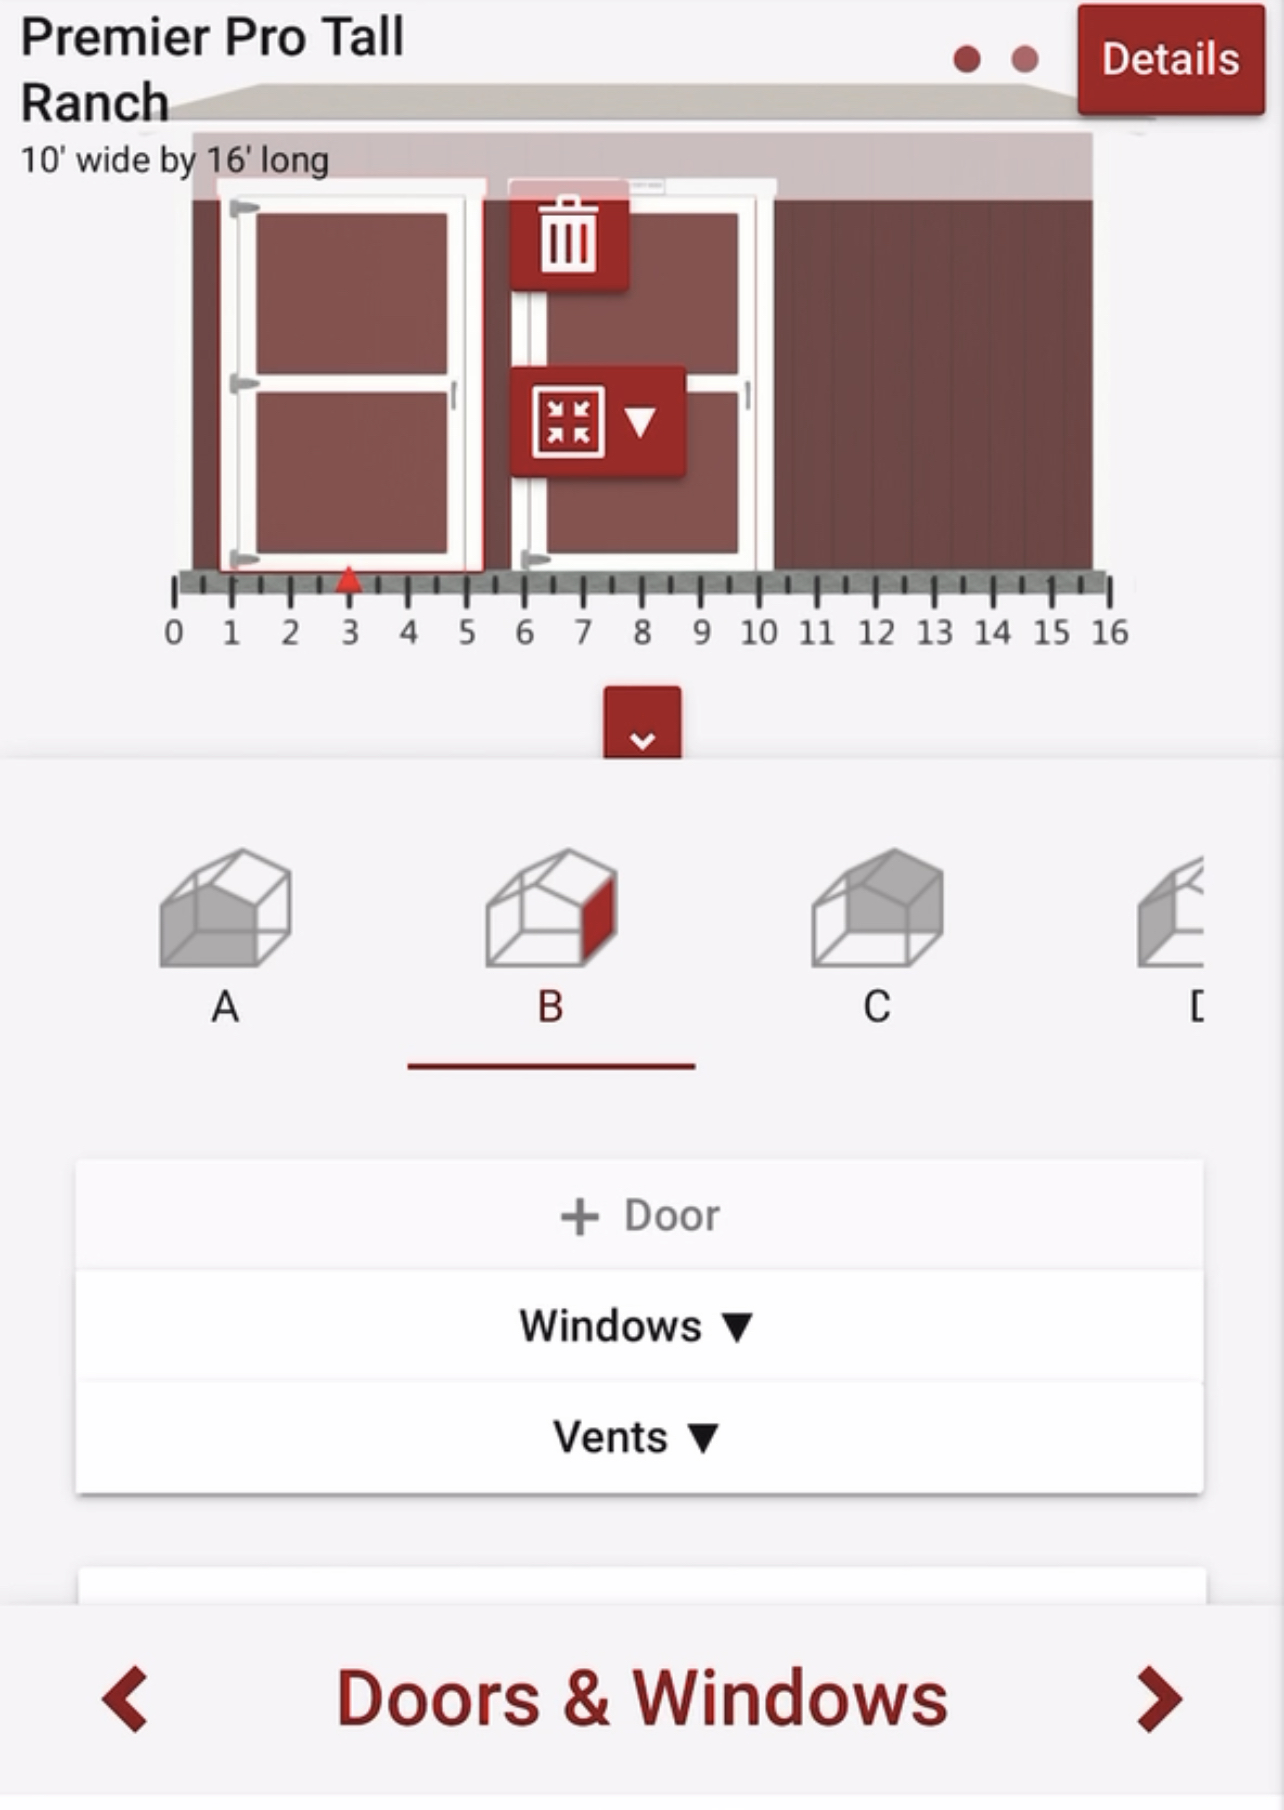
To customize my future shed/workshop…I used the online shed building program on Tuff Shed’s website. It allowed me to completely customize my building the way that I wanted it!
My Future Tuff Shed Workshop
Here are the details on the shed I chose:
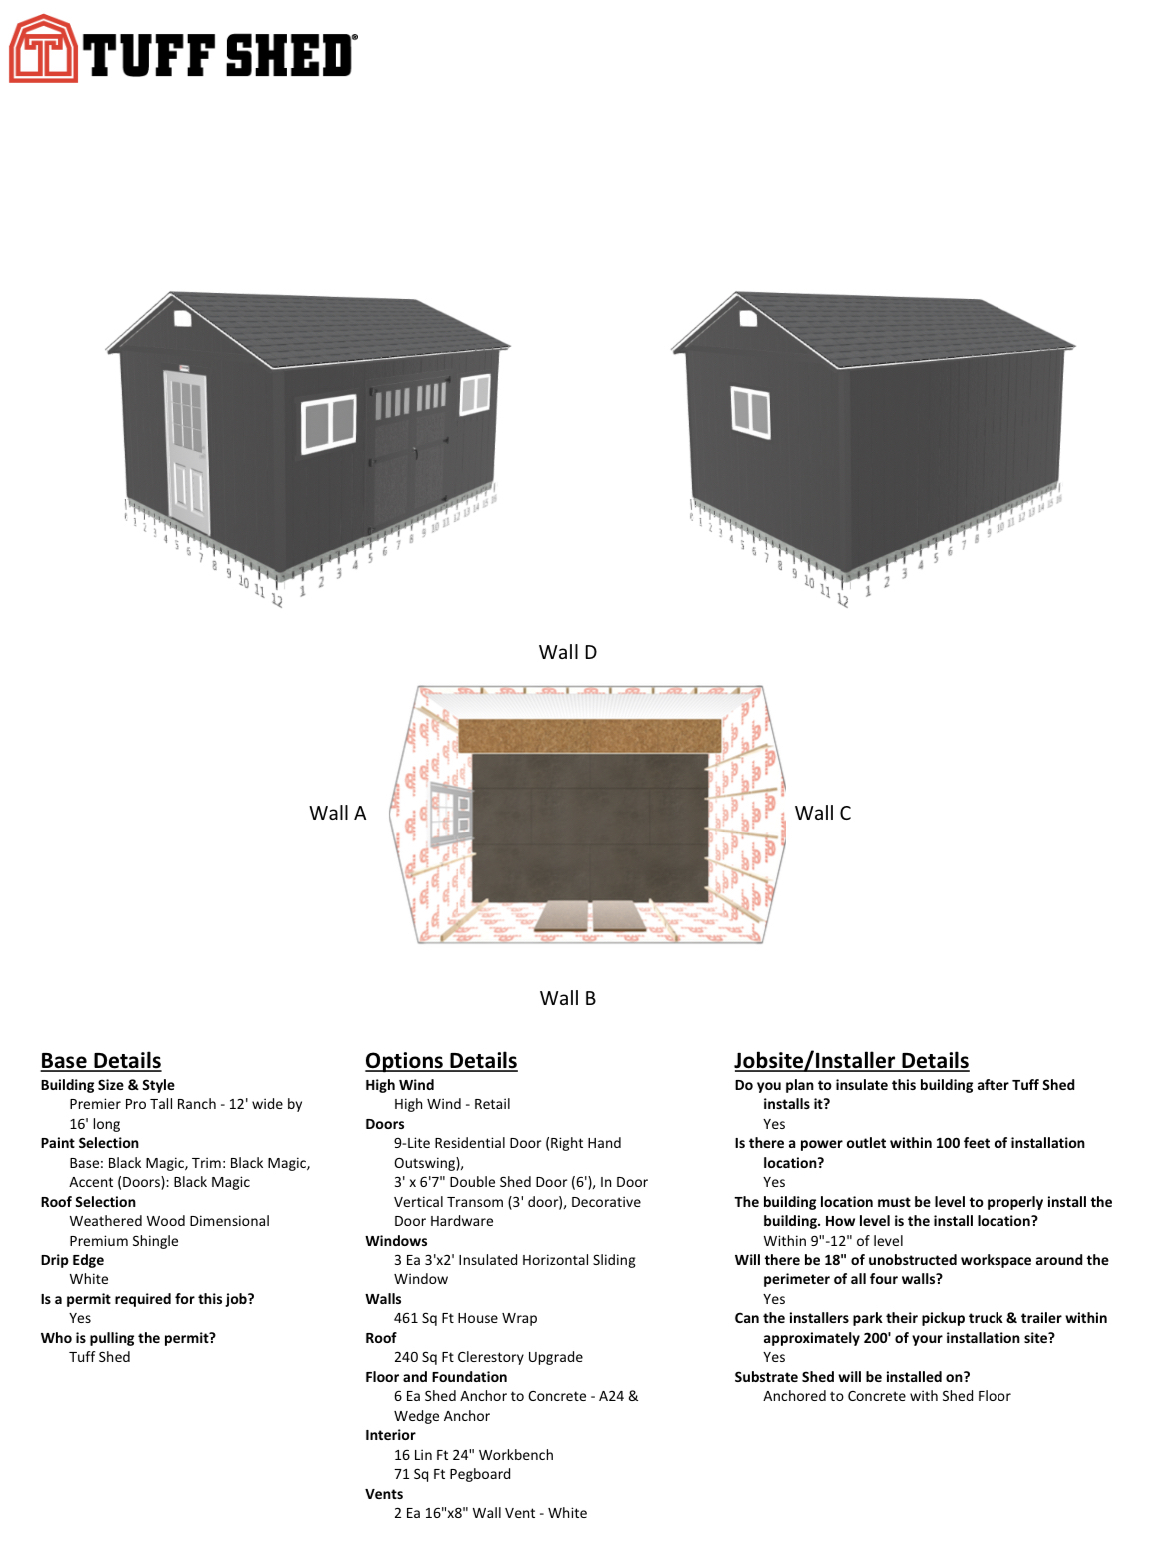
Premiere Tall Ranch
12′ x 16′
Clerestory Upgrade (windows on pitch of roof)
Double Shed Doors on front
Single Residential Door on left side
Paint Color : Black Magic
Trim Color : Black Magic
Roof : Weathered Wood Dimensional Shingle
Windows : 3 3’x2′ Horizontal Sliding Windows
Tuff Shed Building Process
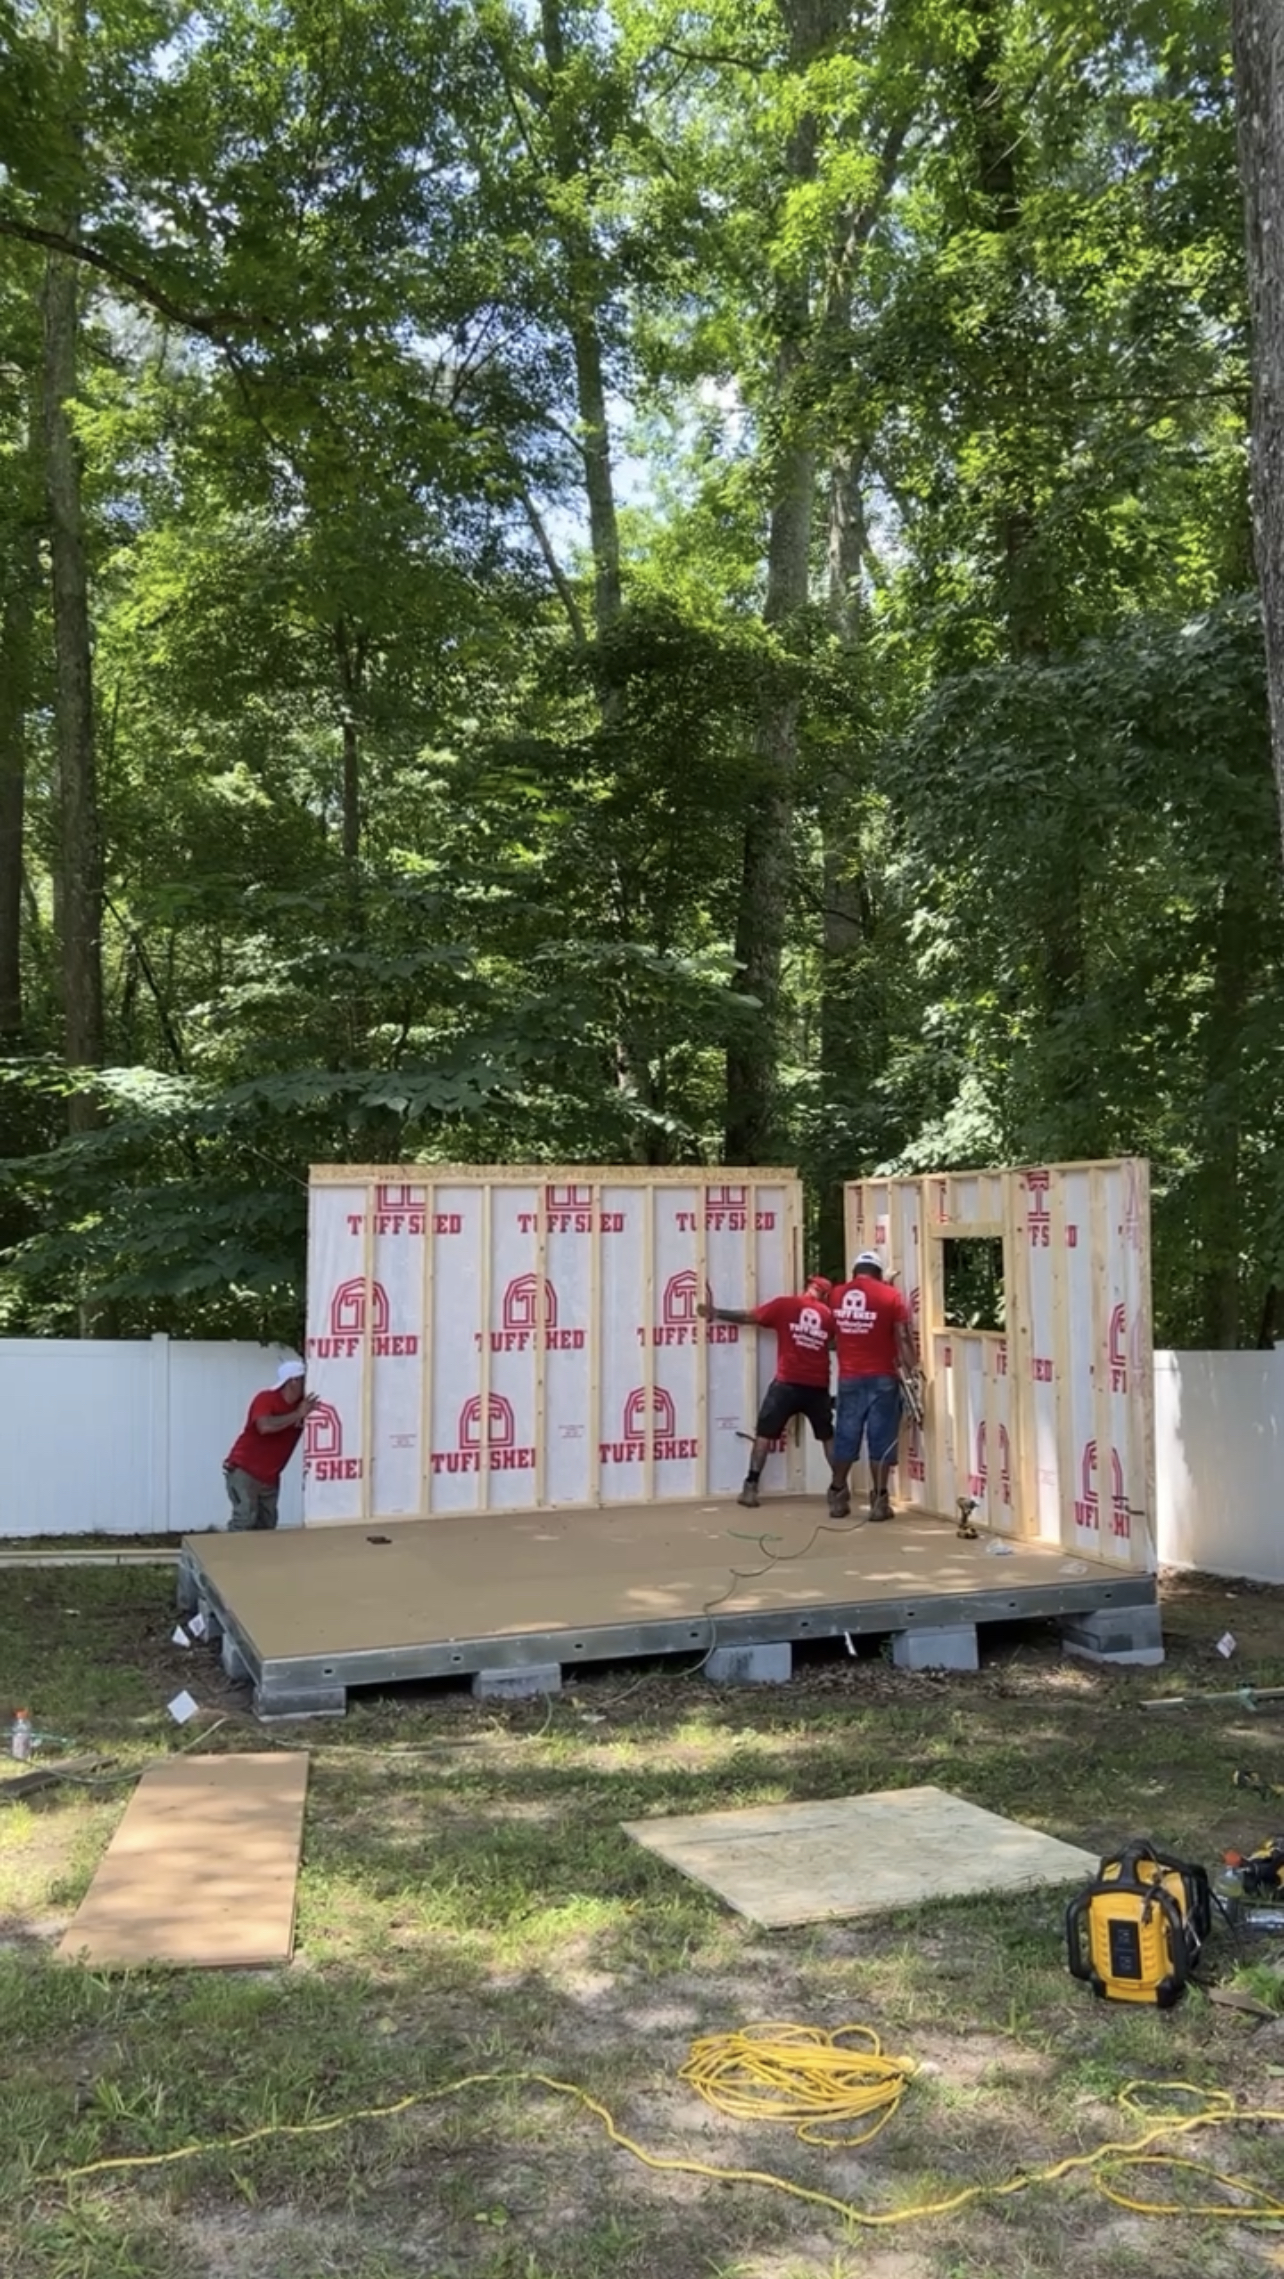
I was beyond shocked when the TuffShed team let me know that the shed would get delivered and built all in one day. The whole team rolled in with a big trailer that had my whole shed deconstructed into a “kit” on the back. Once the team was here, we decided on the exact location for placement and they began to unload all of the pieces.
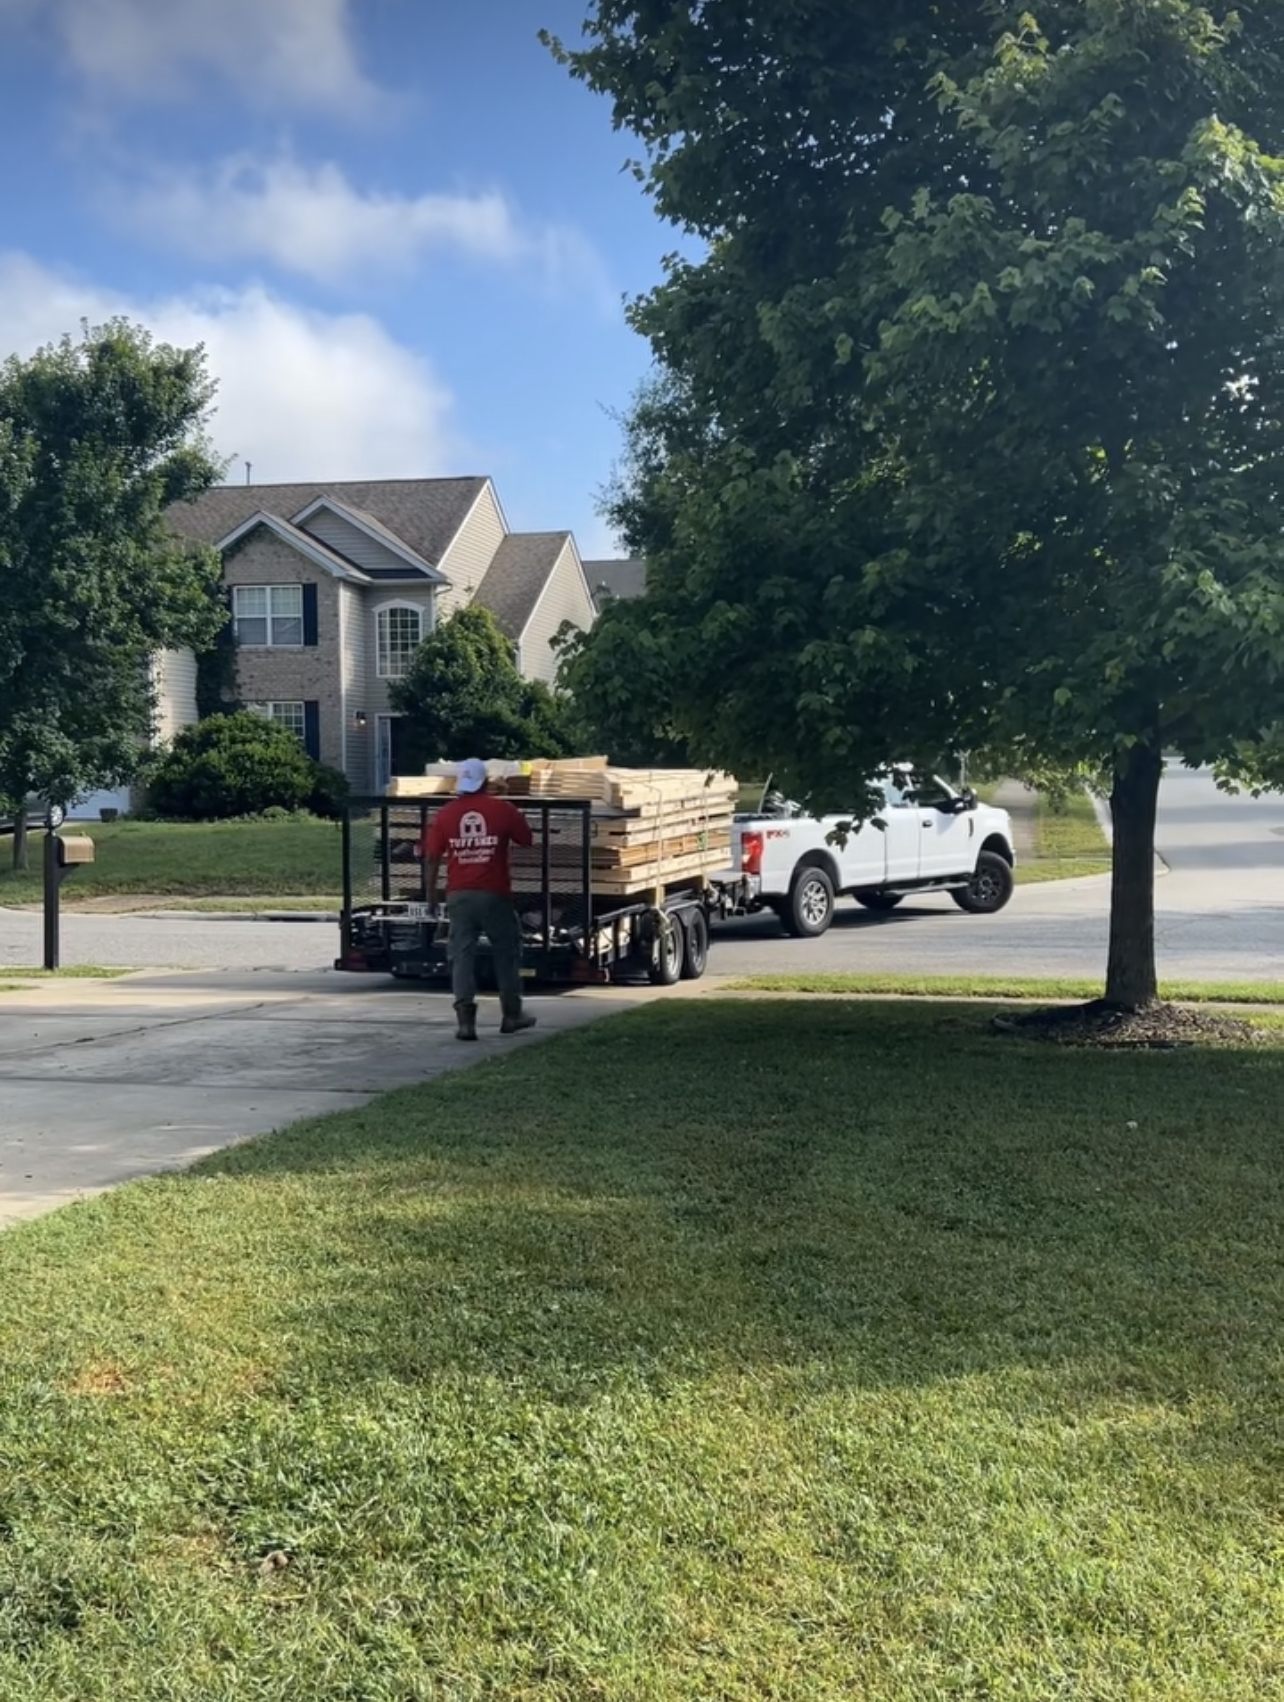
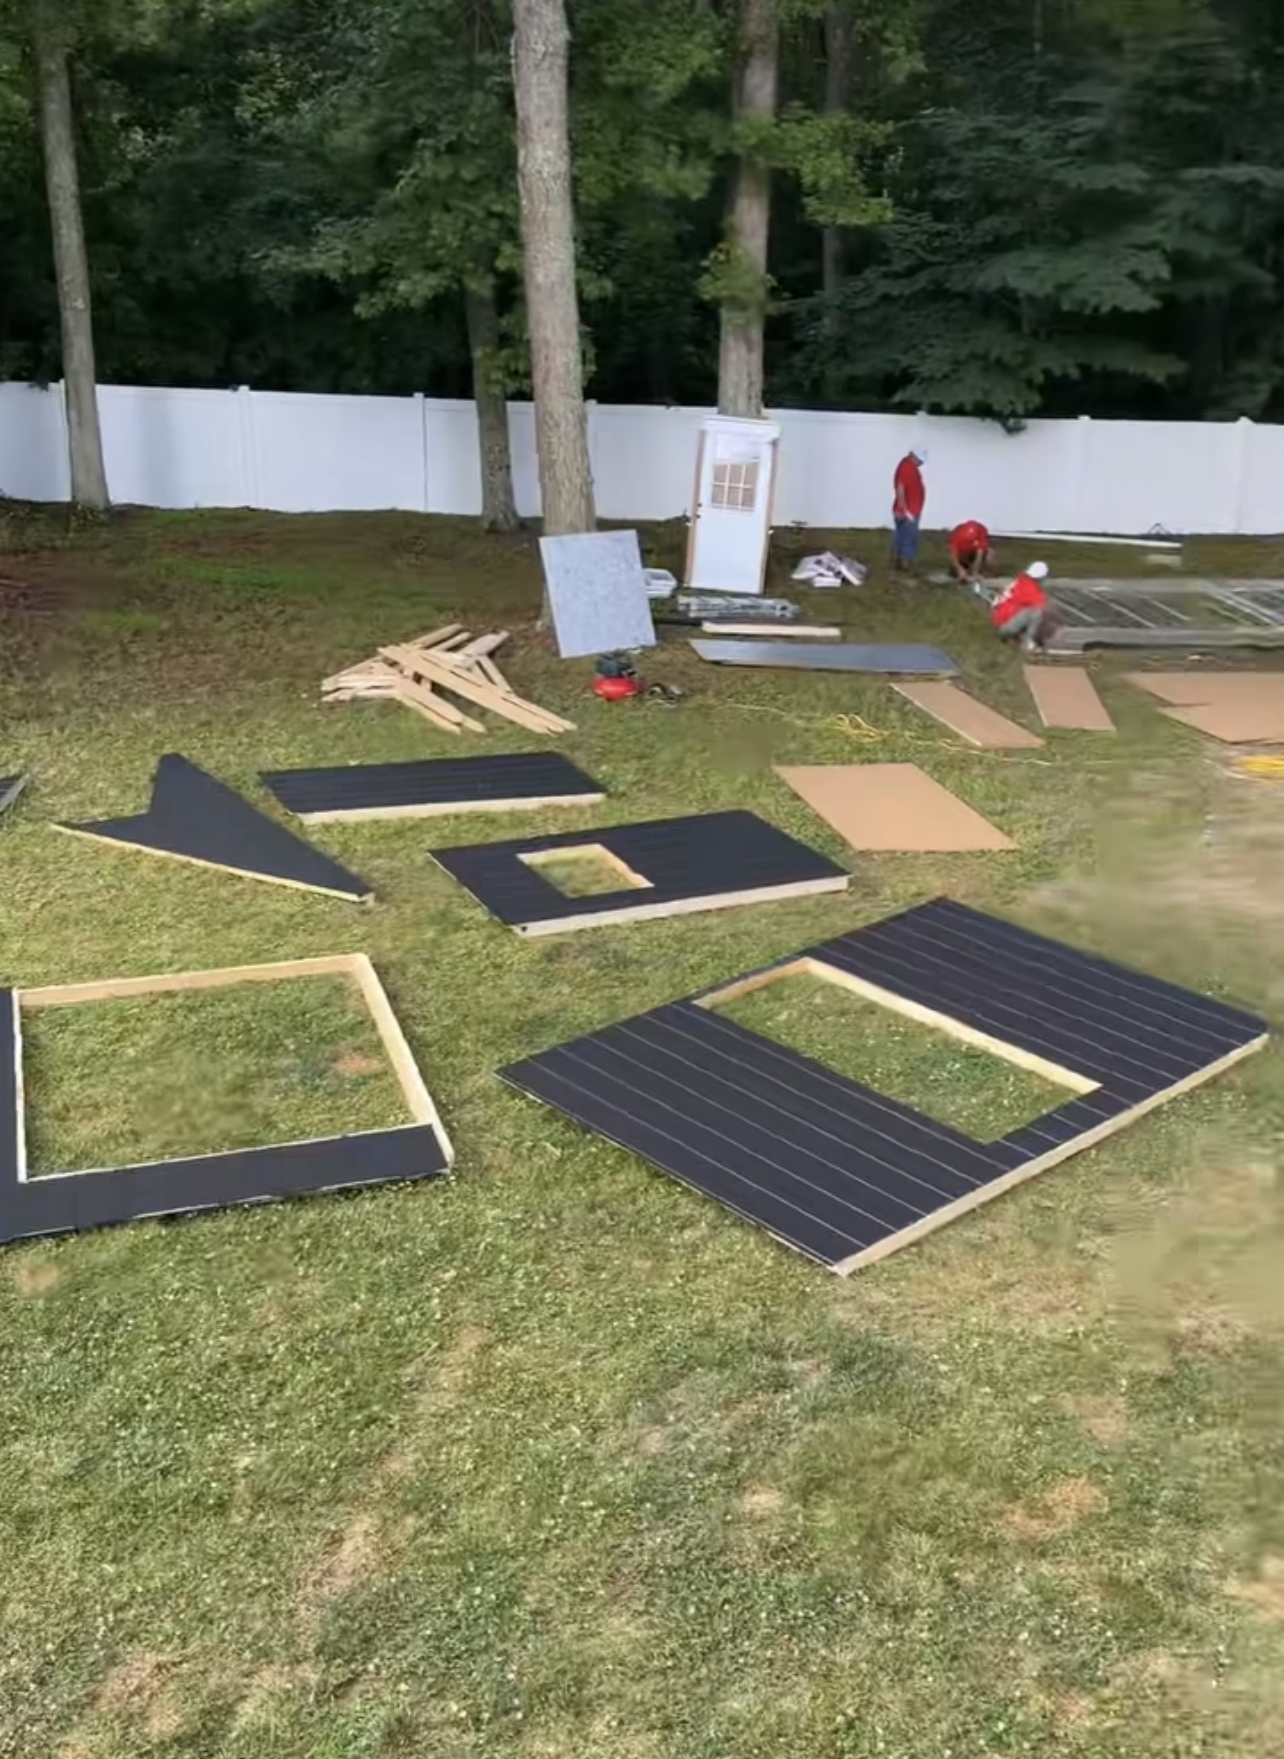
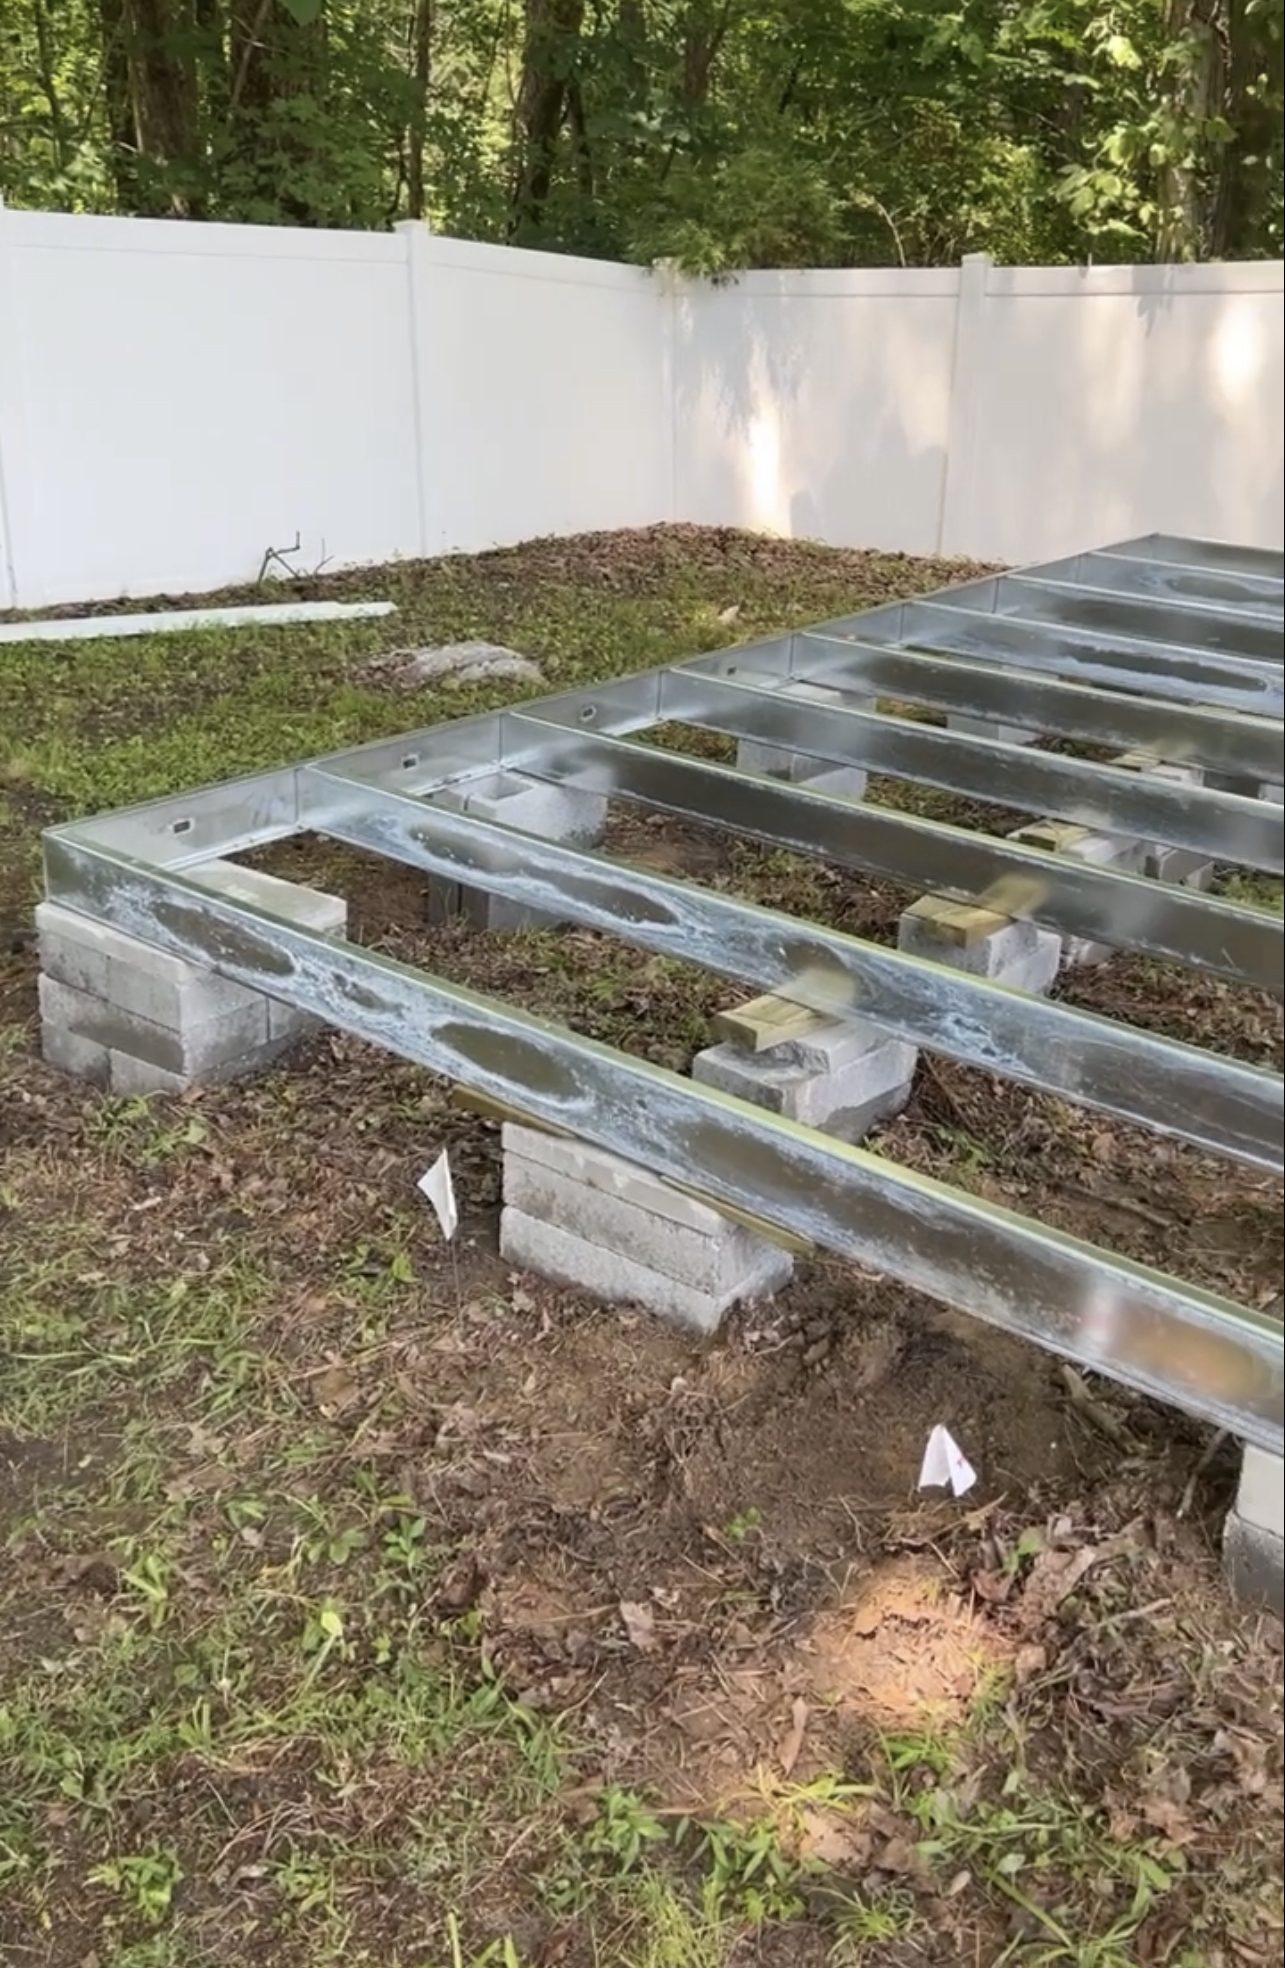
After building the metal frame (base) of the shed, the team worked to level it out. My ground had a pretty intense dip toward the back of my property. They assured me that they would be able to figure out the best way to make it work. Using concrete blocks, they began stacking and leveling the entire shed frame.
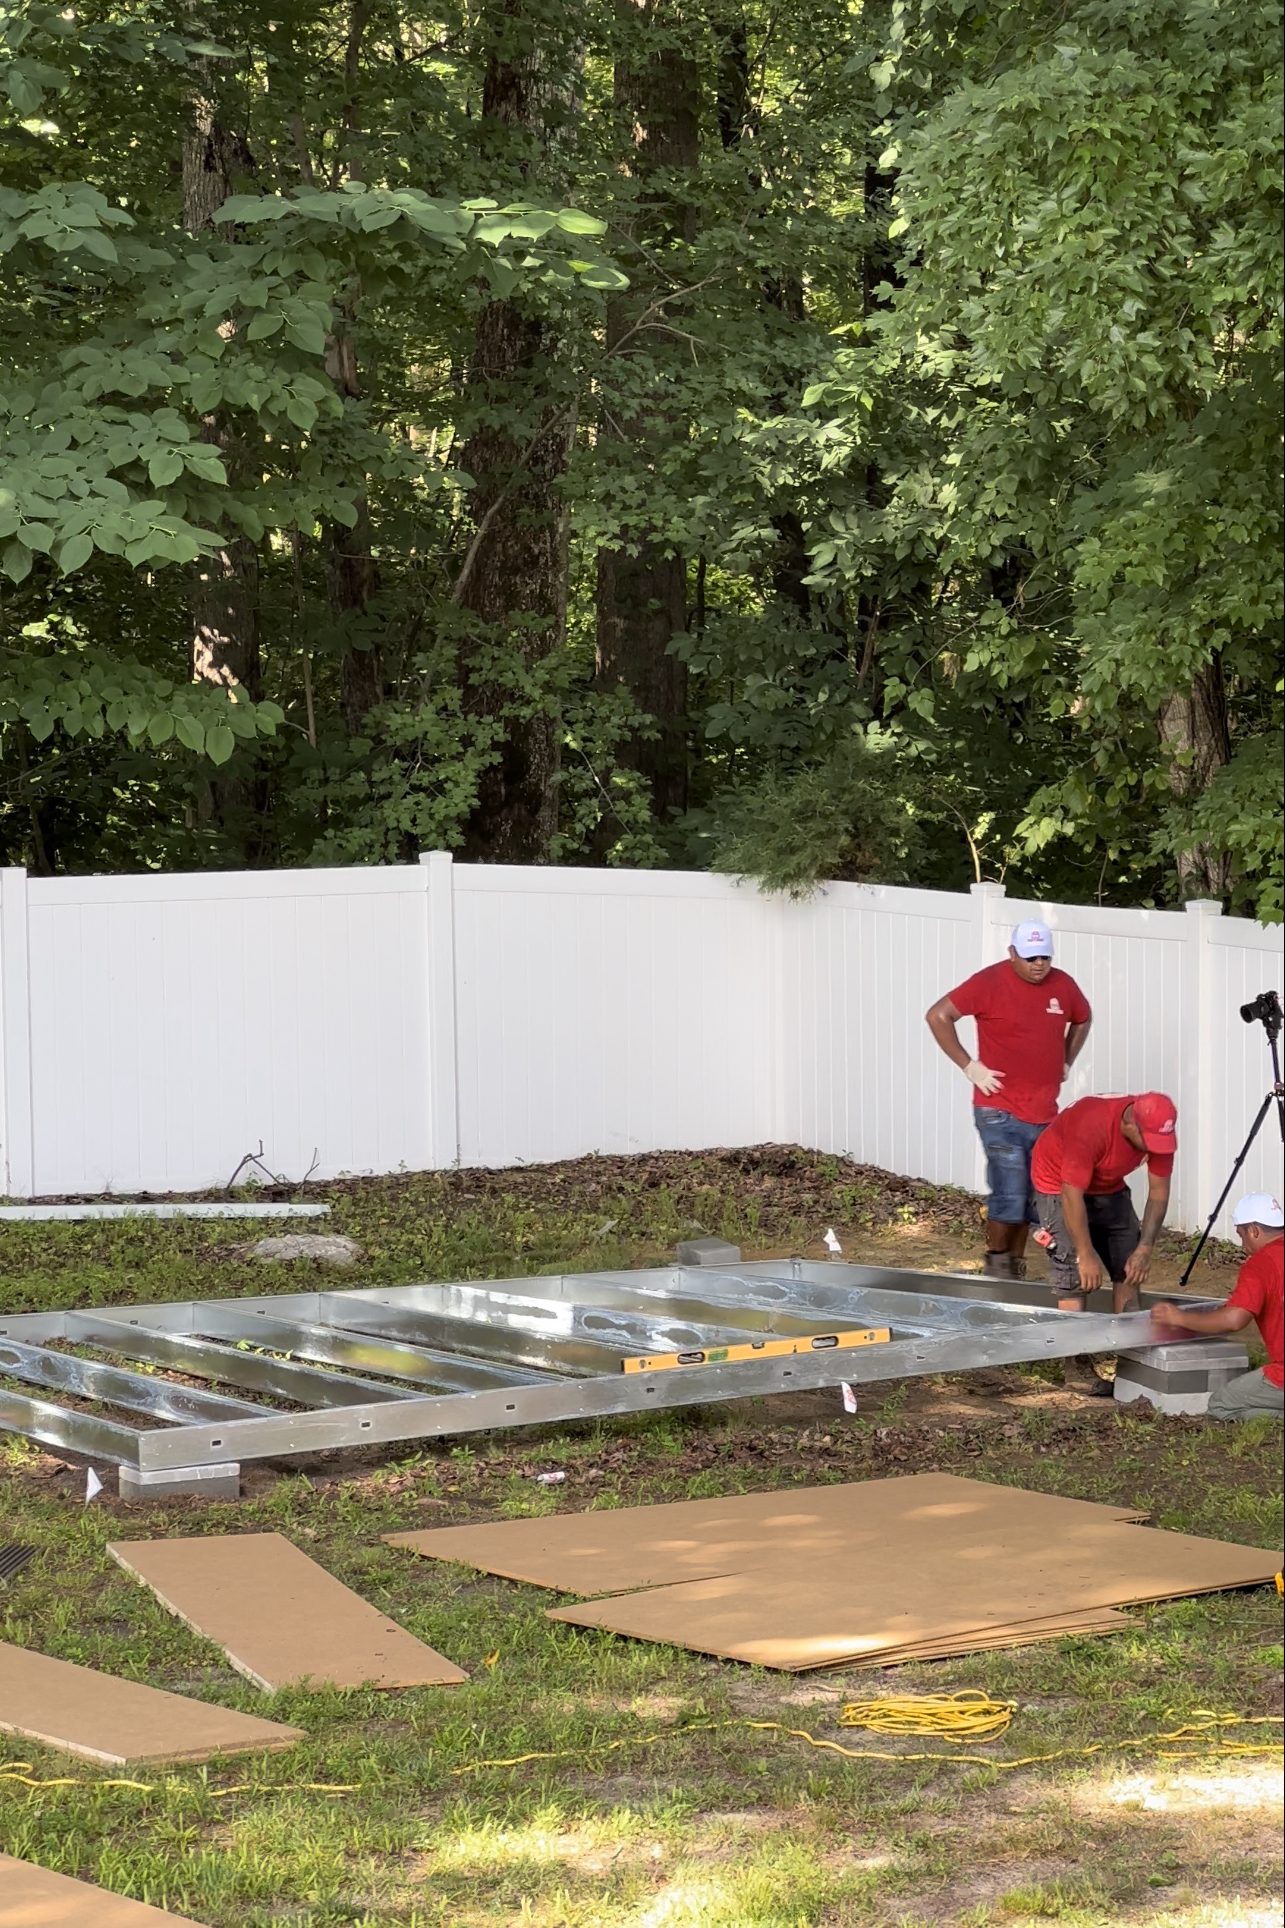
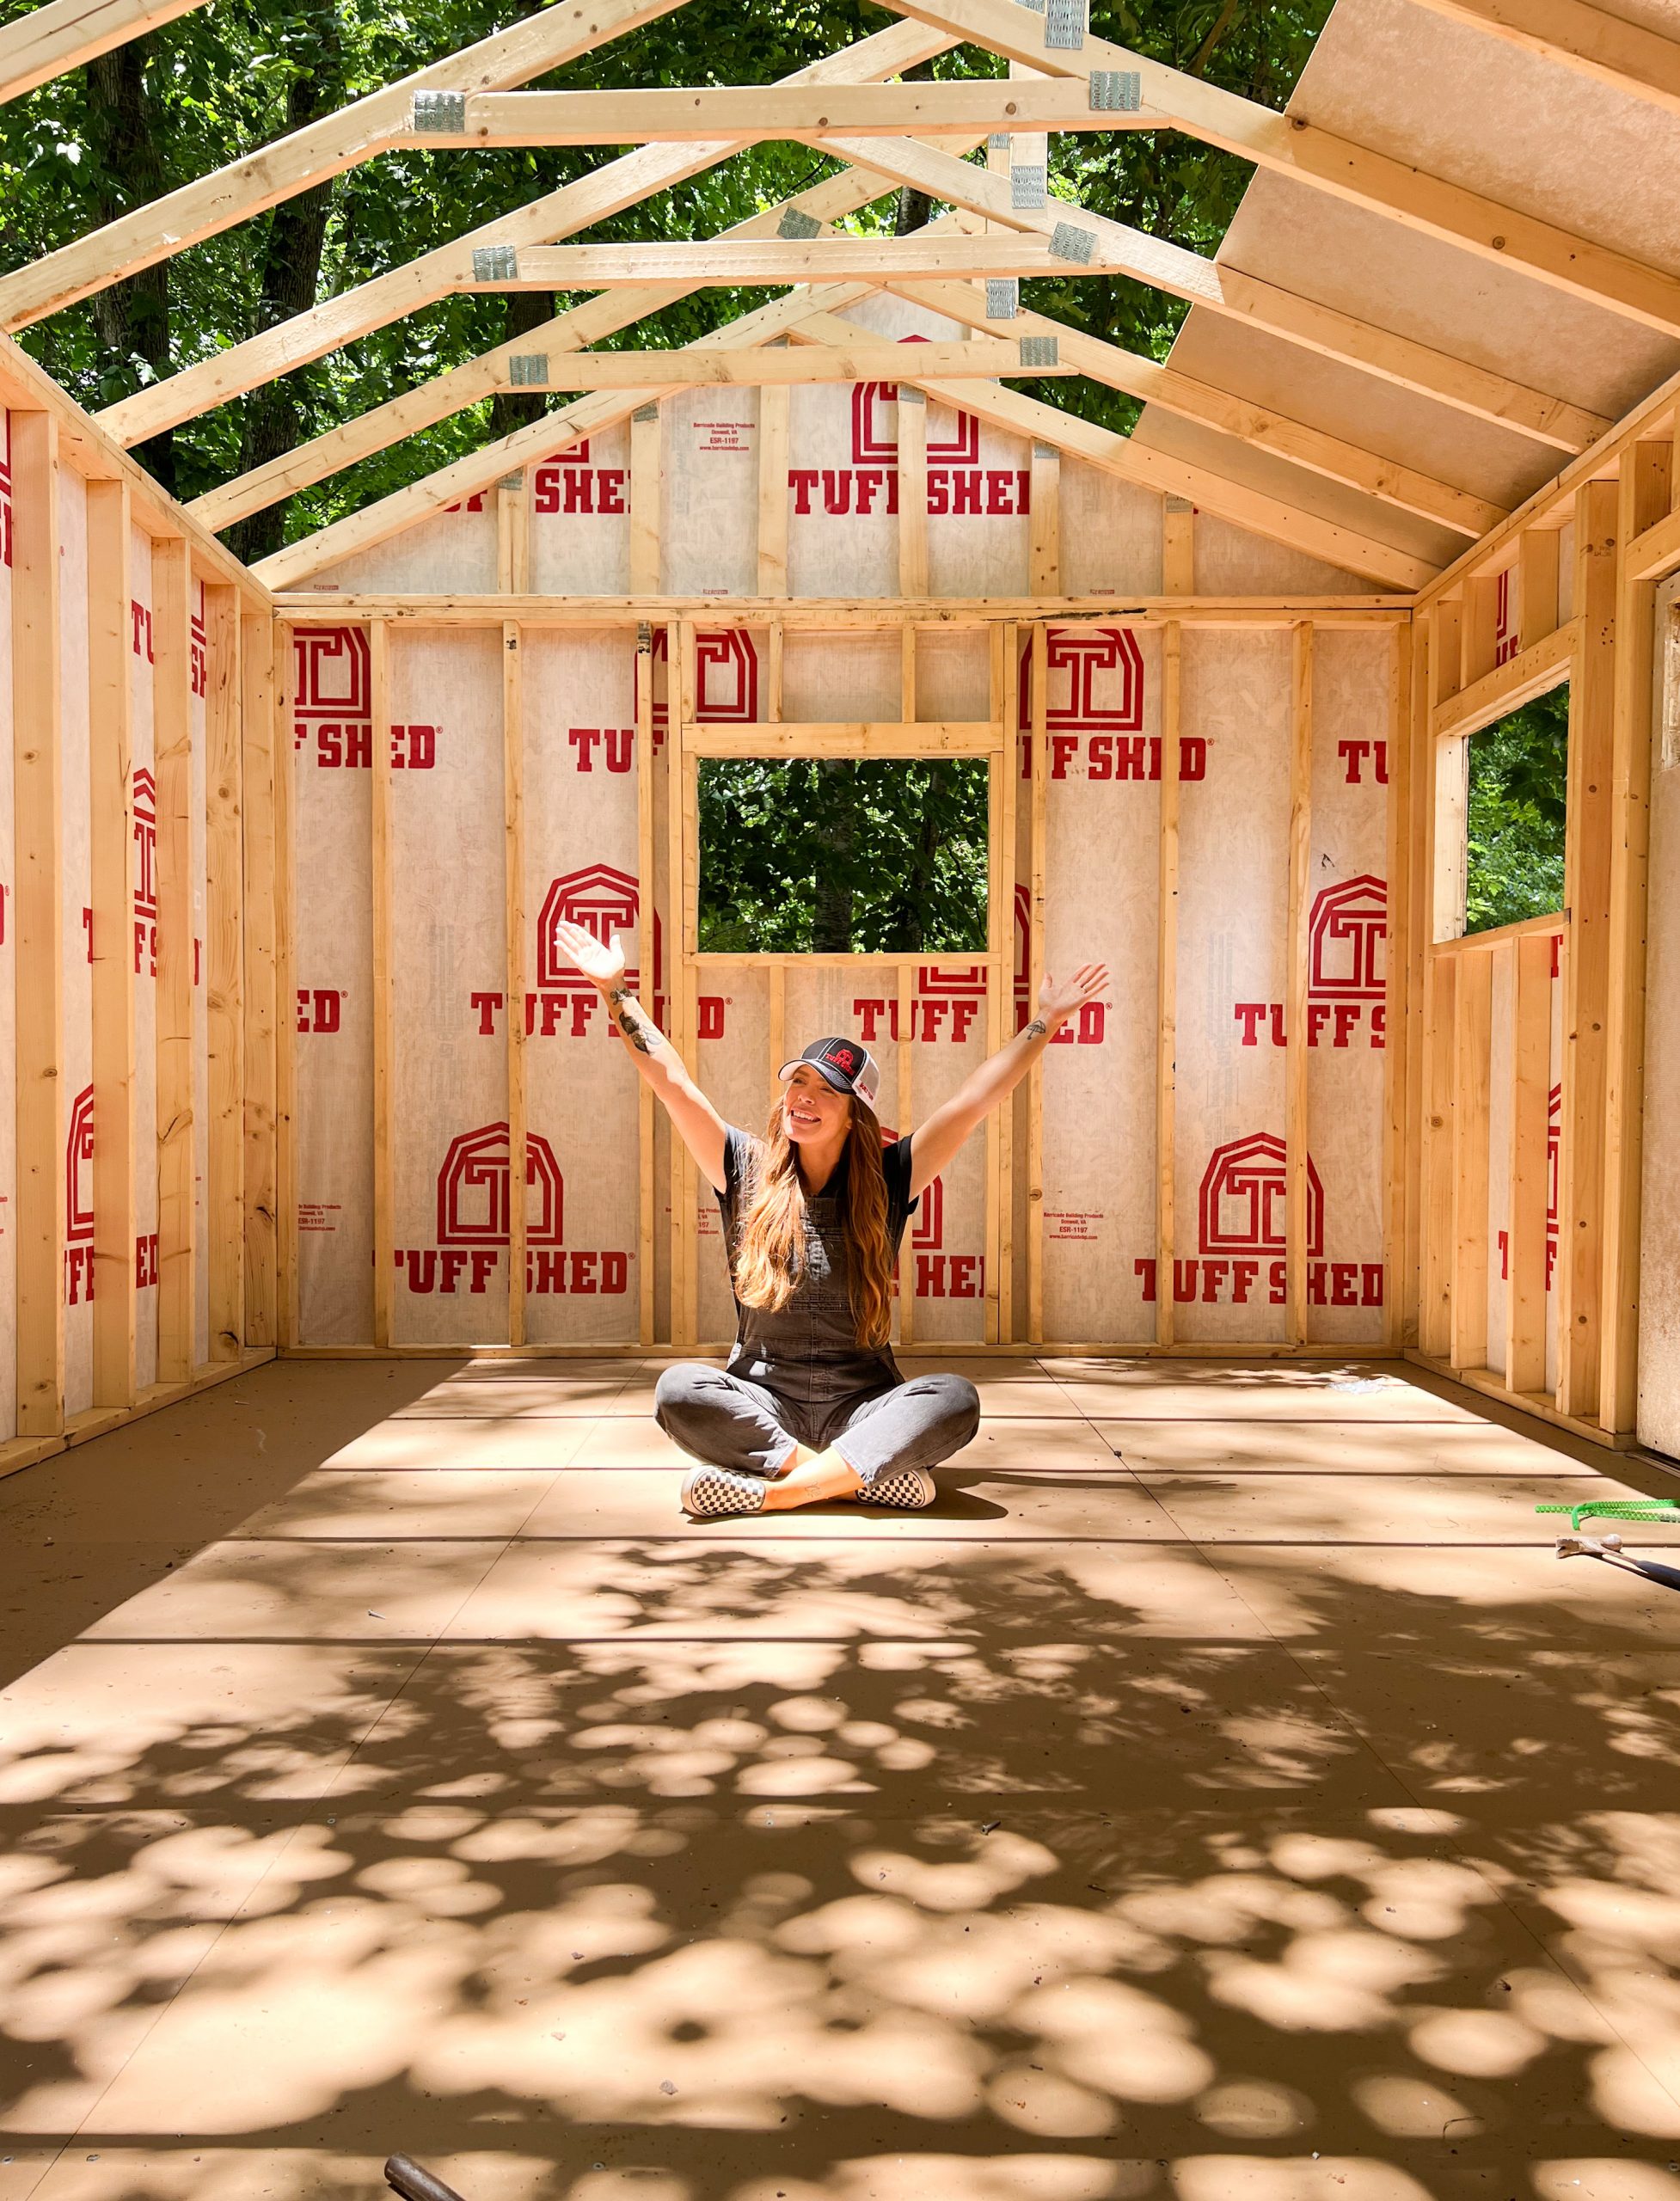
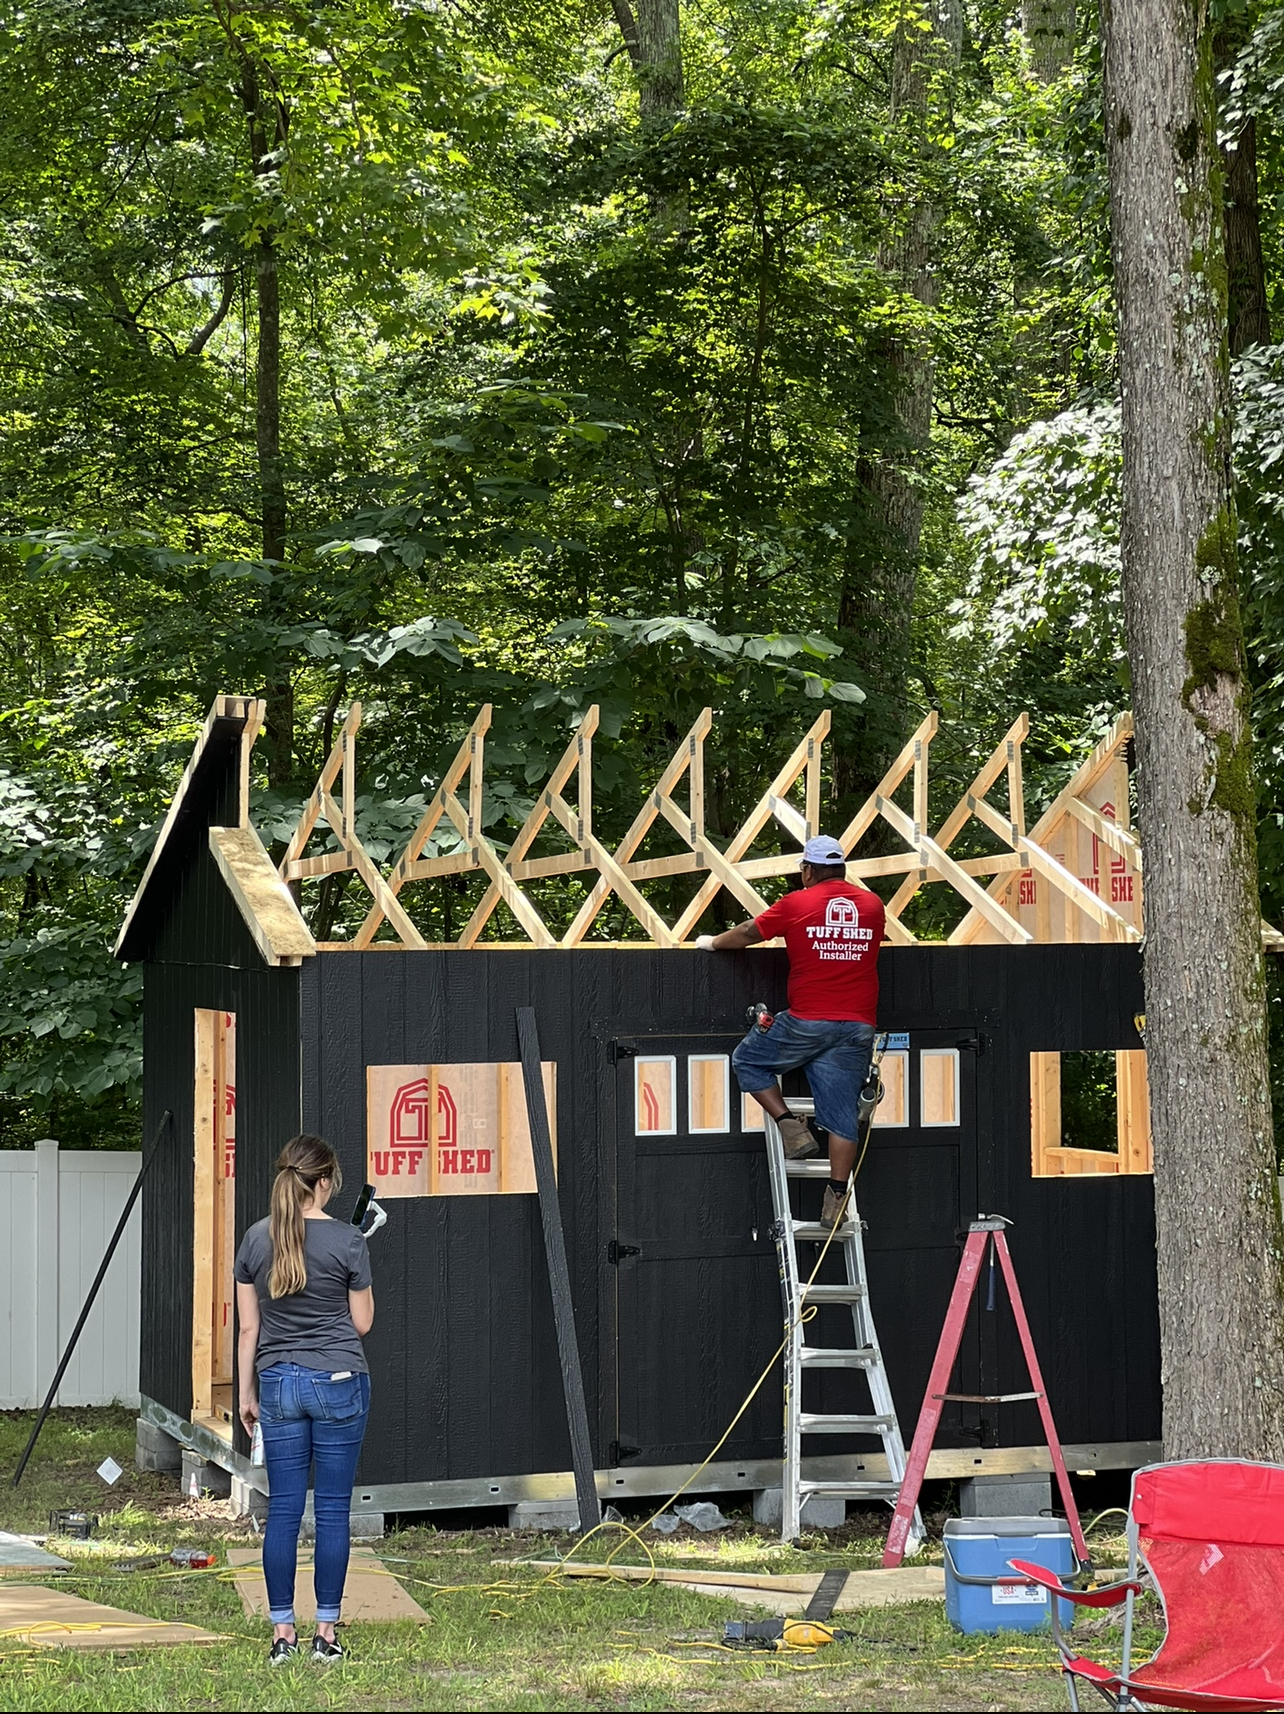
After the base frame was leveled, they team got work on building the remainder of the shed. From the floors to the walls and then the roof. Within a few hours, we had a shed! And I got to sit back and watch it all happen which was SO COOL!
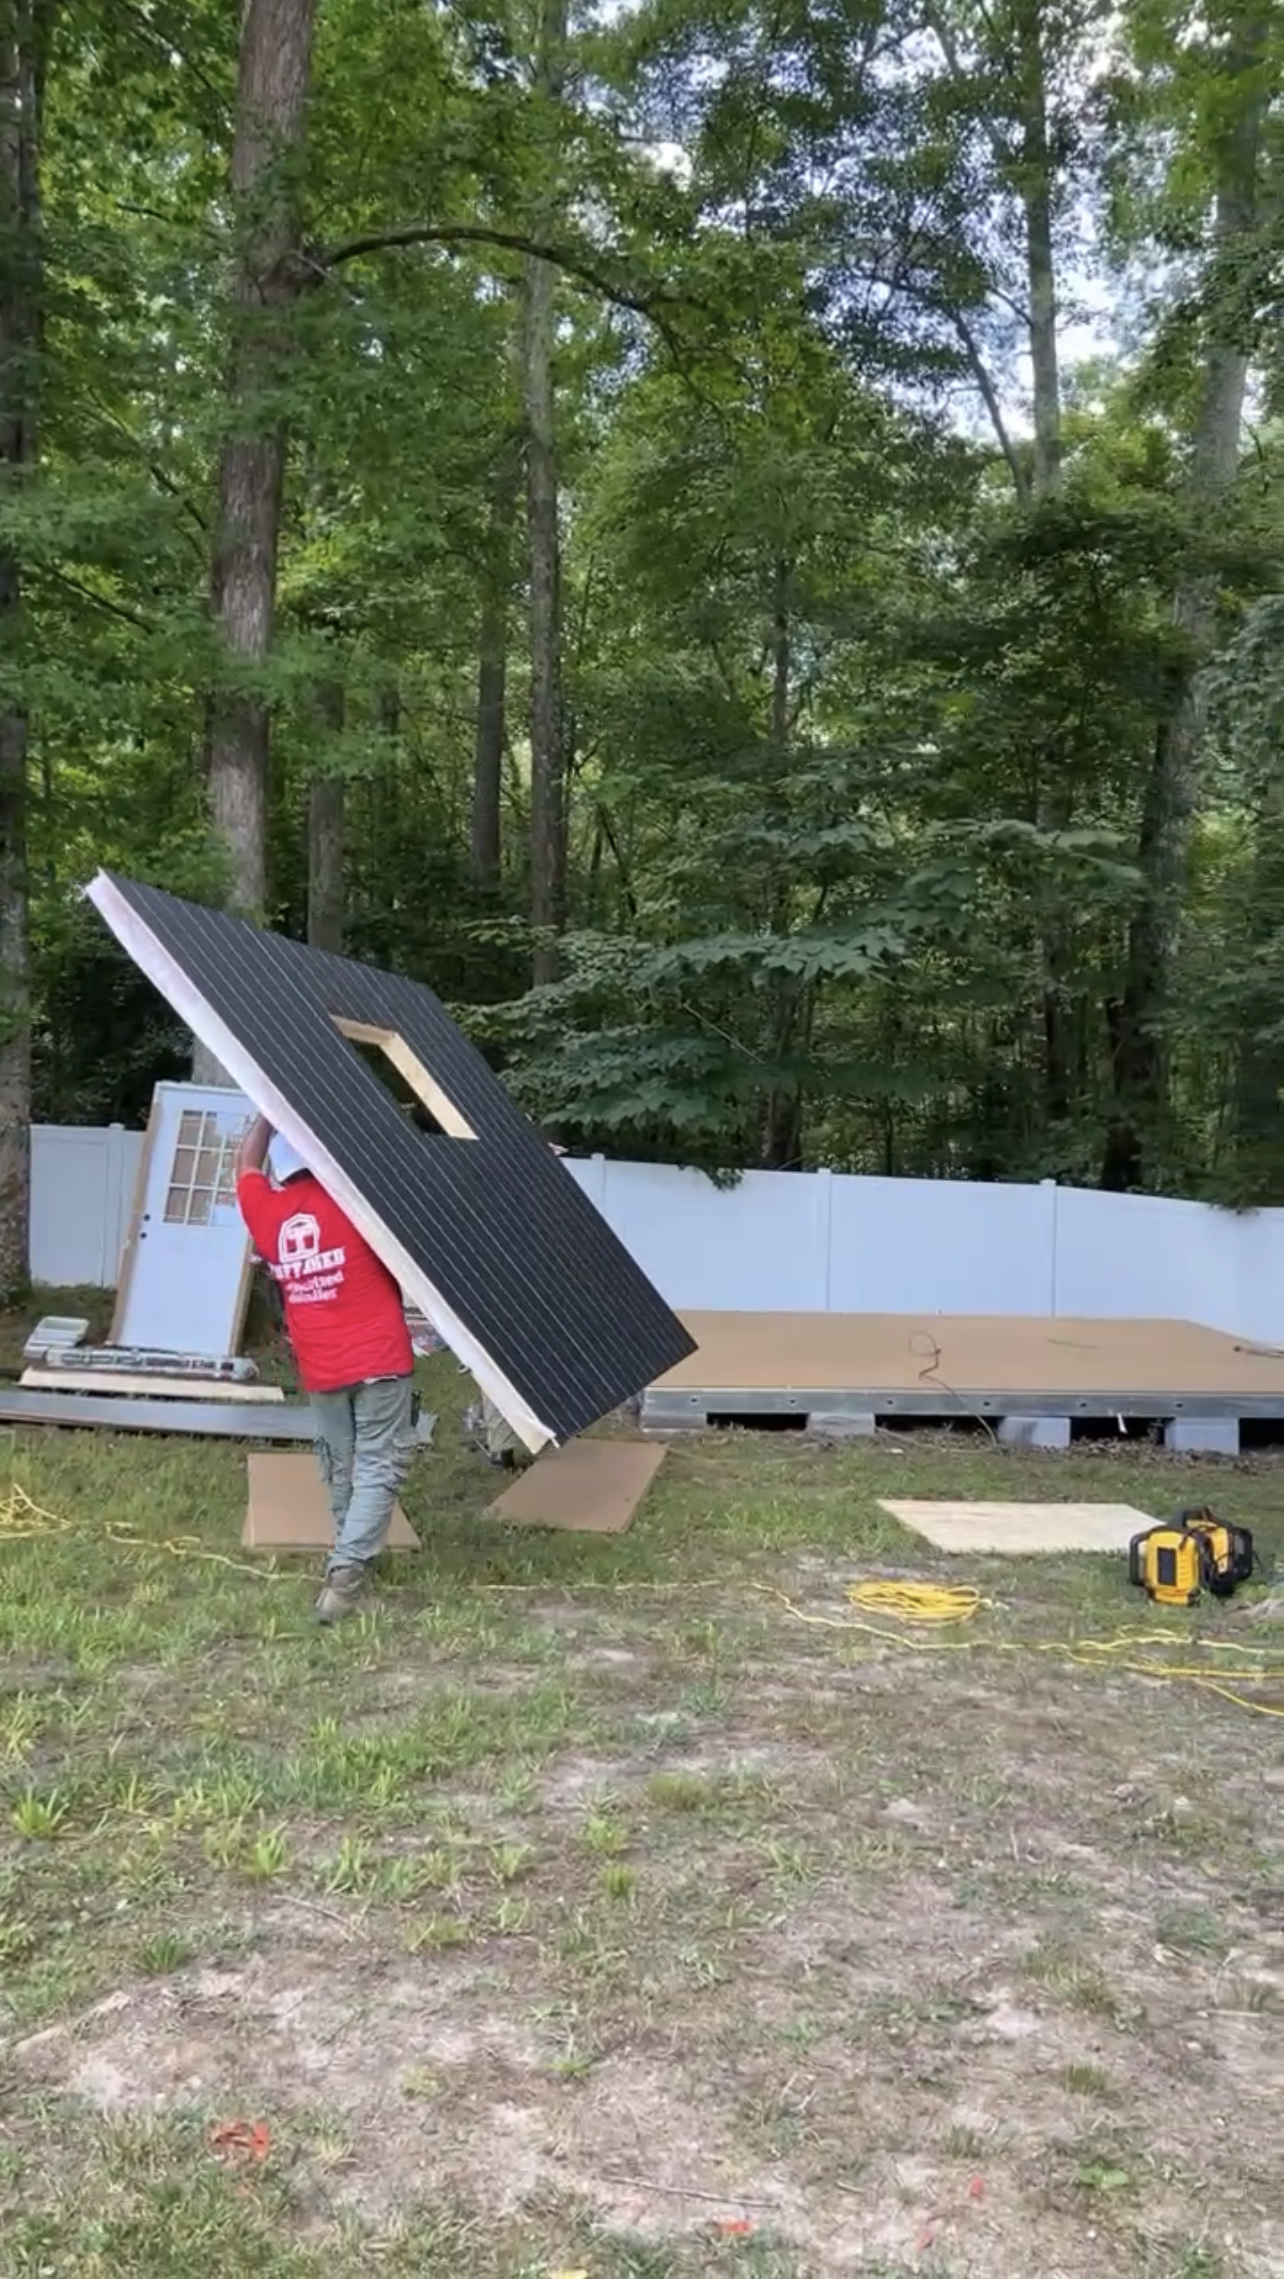
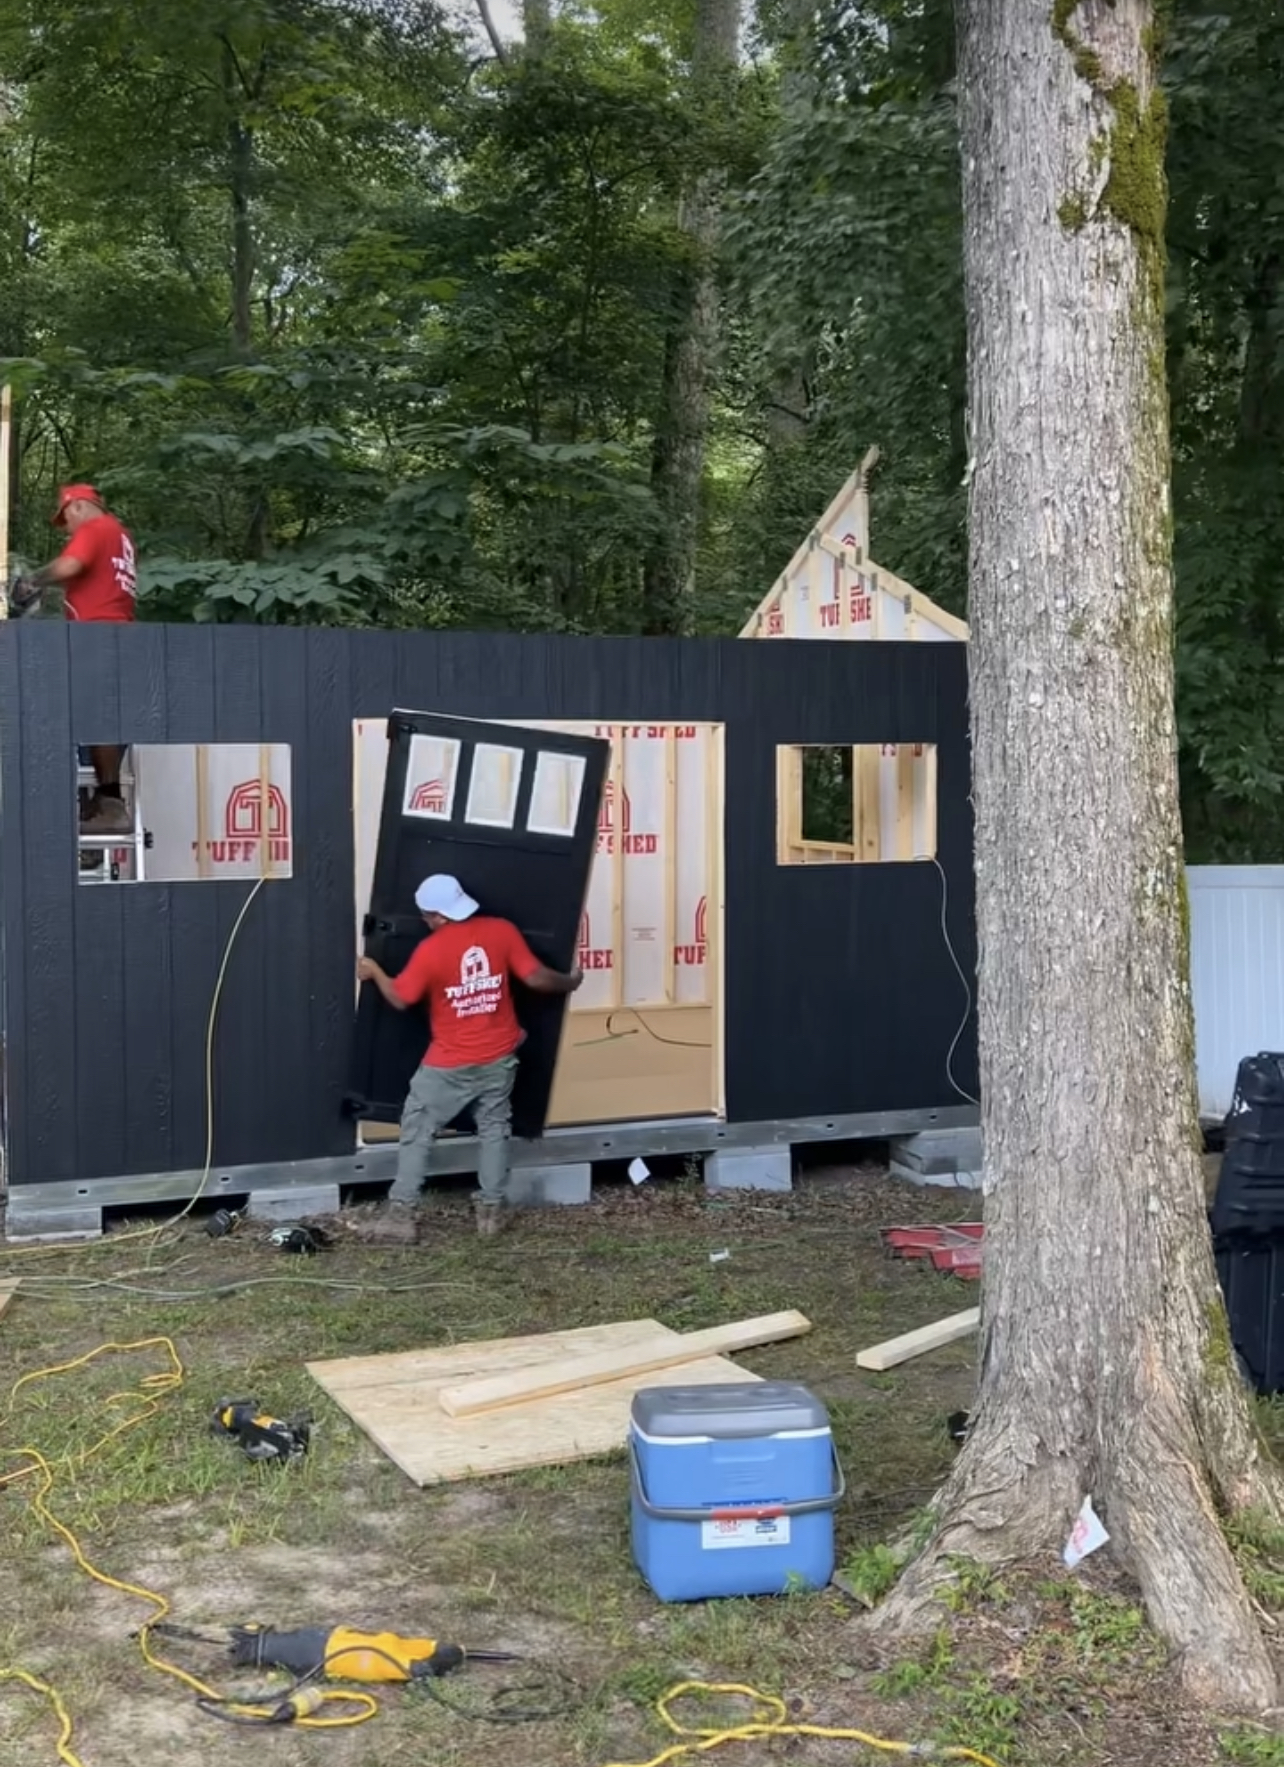
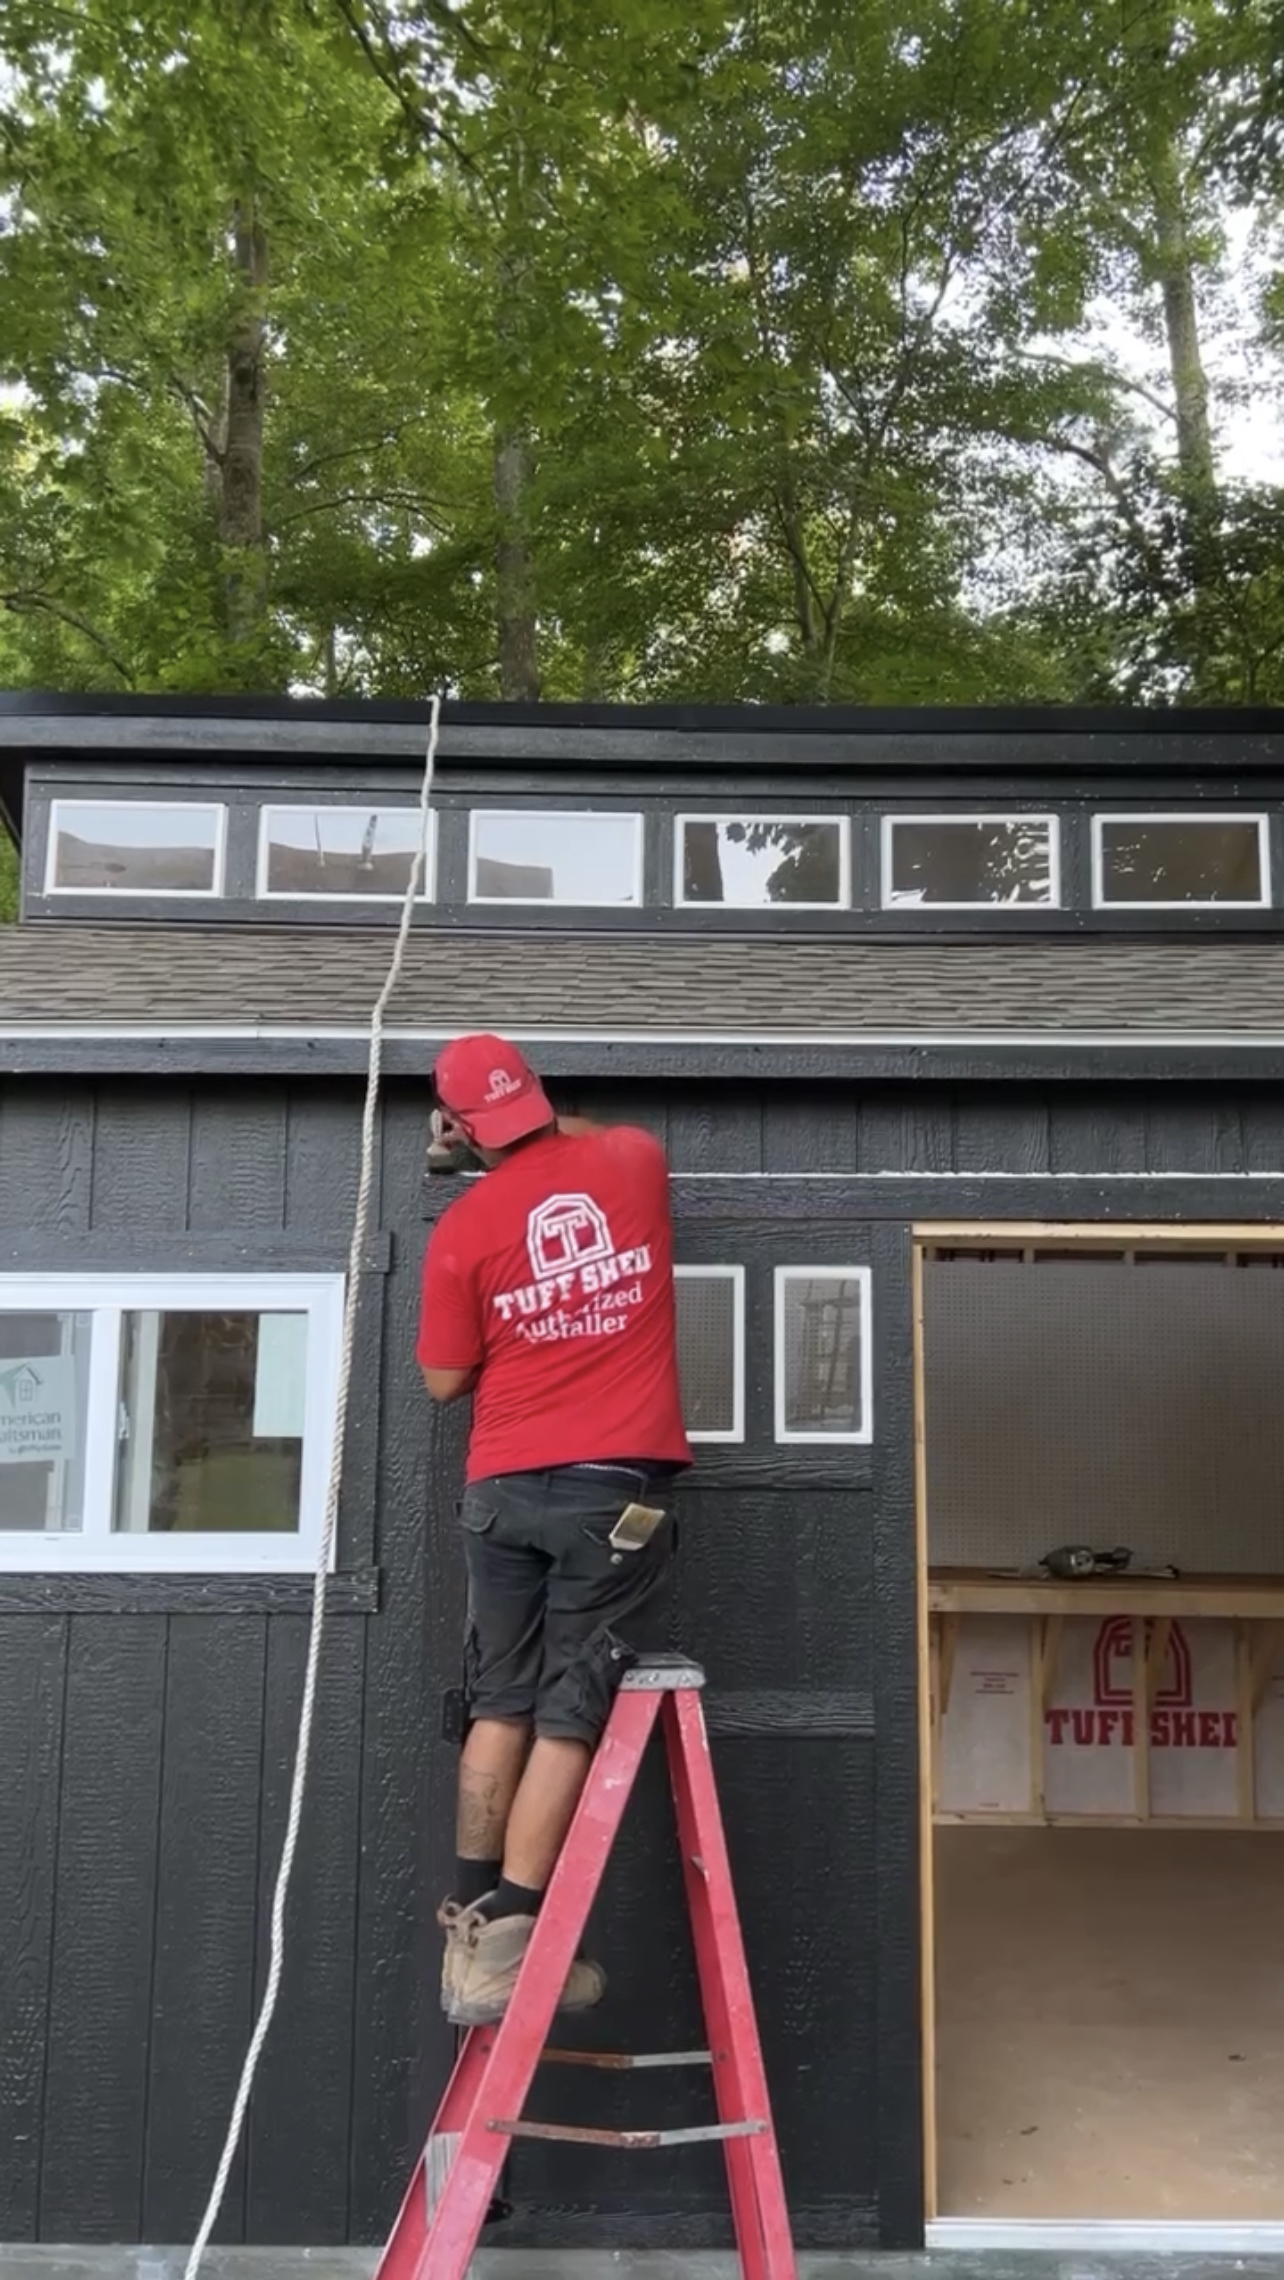
Once the walls were up, they began on the roof. It all just happened so quickly. After the shed frame was built they installed the finishing trim on the building and then went behind to touch up paint and caulk. By the end of the day, I had a beautiful finished shed and there was not a single thing that I HAD to do to it. Amazing!
My plan is to turn this shed into my DIY workshop. A place for all of my projects to happen and for my tools to be stored.

You can read more about my progress here!
[…] This is my 12’x16′ shed from Tuff Shed. It is incredible quality and I was able to customize it through their website. The Tuff Shed team built it on my property in ONE day! You can read more about this here. […]
[…] have been working to transform my new backyard Tuff Shed into my own DIY workshop! So far I have run the electricity with the help of my father-in-law, […]
I wanted to purchase a tuff shed for my back yard.I live in Cape Coral-The internets price was 4899.00-Tuff shed of ftmyers wanted-6300.00-My neighbor put the same she’d up 18 months ago for -3300.00
If the shed is not available through Home Depot for 4899.00. and available at the tuff shed showroom for 6300.00-and 18 months ago for 3300.00–What would you think?-I live in Capecoral Florida and the homedepot said the 10×12 shed isn’t available in capecoral and 100 miles out but you have the 10×12 Tahoe shed in Ft Myers which is approximately 5miles from my home and the tuff shed wants 1500.00 more is so wrong and so dishonest-I will speed the word as I am an employee of home depot
Interested. Please send catalog.
I live in a 10x8ft tuff shed it’s not ideal but it’s what I was given. My brother and his wife bought it for me. They didn’t know what they were doing at all. It was a nightmare at first my brother did the insulation himself and didn’t fill all the space in between the wall studs so it was still hot as hot can be. They eventually got a professional to come do the foam insulation but the portable AC unit had been overheating because of the heat so once the insulation problem was taken care of i was still getting heat because the ac wiuld overheat abd blow hot air for 30 mins and cold air for 5 mins. So we had to do a window AC and now it’s all good. I wish it was bigger but I’m happy now.
Did you have to get it anchored? My county requires anchoring but not sure where the anchors attach to on the metal base?