Main Bathroom One Room Challenge Week 5 – Arches


If you’re new here…Hi! I’m Cass!
I’m a mom, wife, and fearless DIY’er. I live in Eastern Virginia with my little family. I’ve been passionate about the idea of homemaking since I was a young girl. I started trying to make our house a home when my husband, David, and I bought our first house. This started with painting and small home decor crafts.
My visions started becoming bigger but our budget was still small. Once my husband began leaving home on long deployments, I realized that if I wanted to make those bigger projects happen, I would have to just do it myself. I then began, little by little, trying out new things and teaching myself to use new tools. Now, in our third home together, I have learned how to tackle MUCH larger projects. Making my home with my own two hands has become my PASSION! I love taking my big ideas and making them come to life and I hope to inspire others to do the same!
*This post may contain affiliate links, which means I may earn a small commission if you purchase through my links, at no extra cost to you. I only share products I genuinely love.
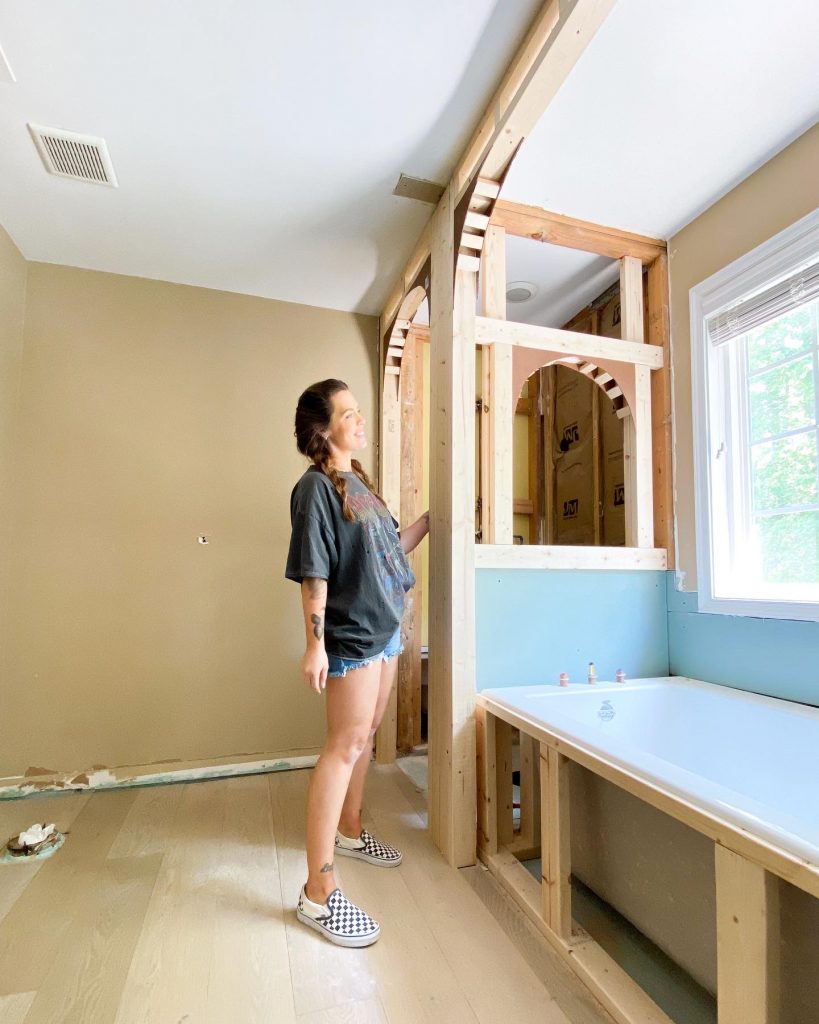
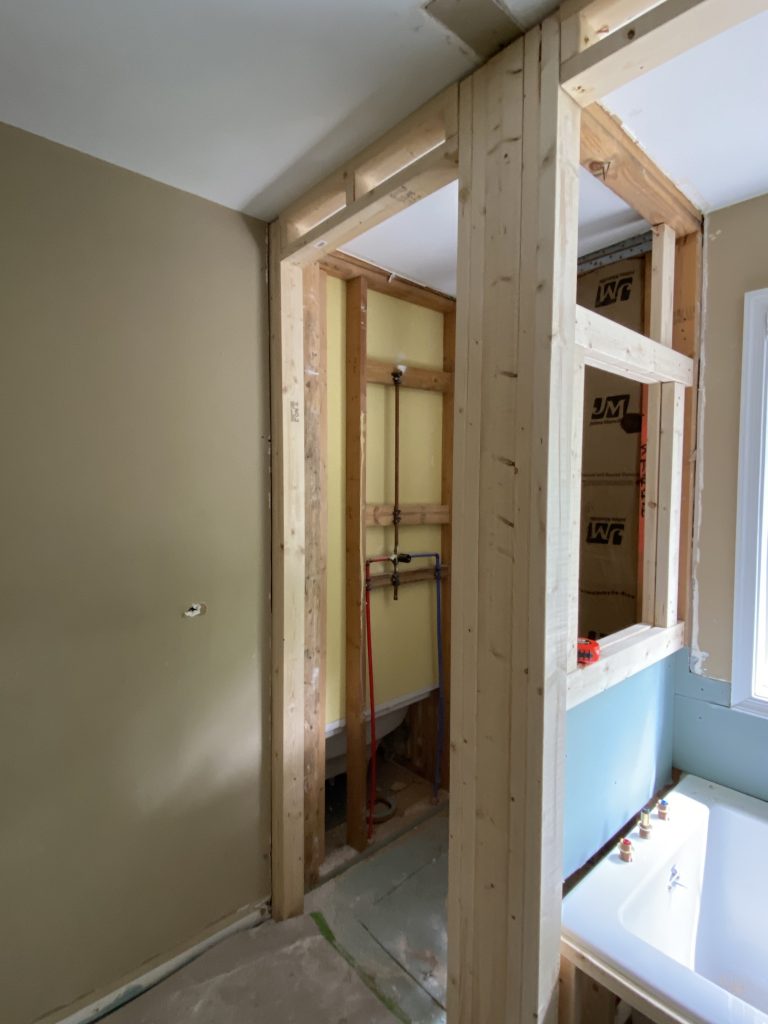
This week during the One Room Challenge, I made some arches! This is something really special that I wanted to add to this space to give it character and make the bathroom design tie in with the rest of my house. The plan was to frame in the tub and shower with arch doorways.
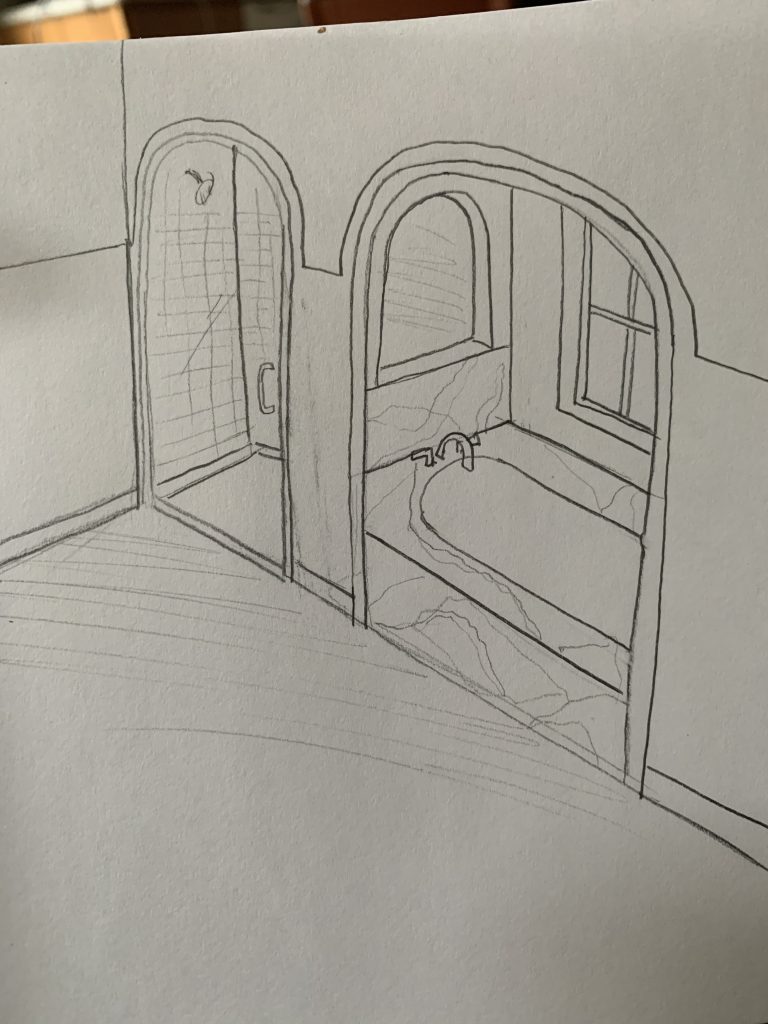
As a reminder, here is my original sketch by my sister.
FRAMING
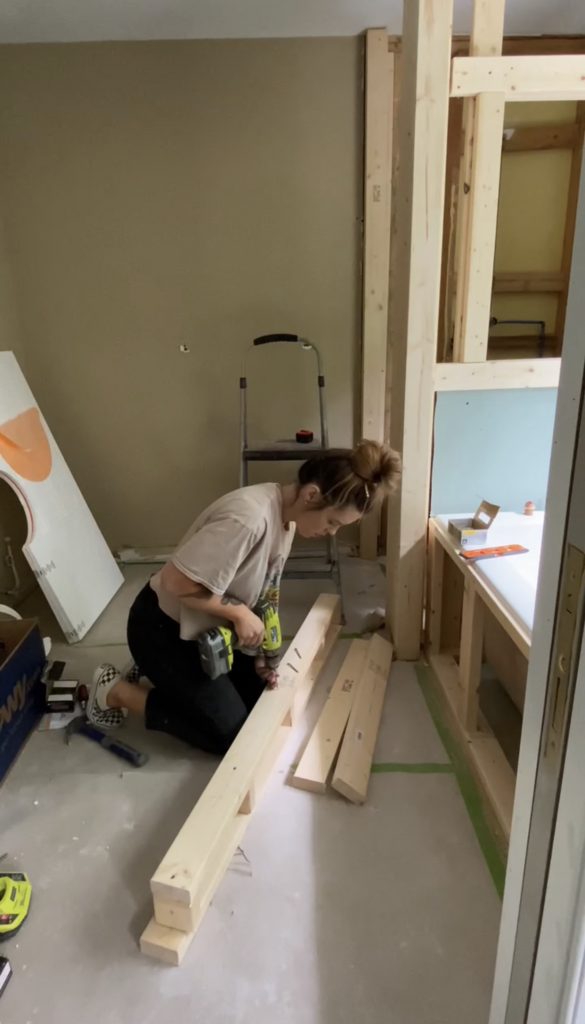
Before creating the arches, I made the enclosures for the doorways. I used two 2×4’s for each side. Each was screwed into studs in the wall and matched up evenly with the wall that I shortened during week 2. The framing is made with 2×4’s. I cut two pieces the length of each door opening, and several 3 in pieces. Then, I screwed the pieces together to create a header box to go on top of each doorway. Each frame box was screwed into the studs.
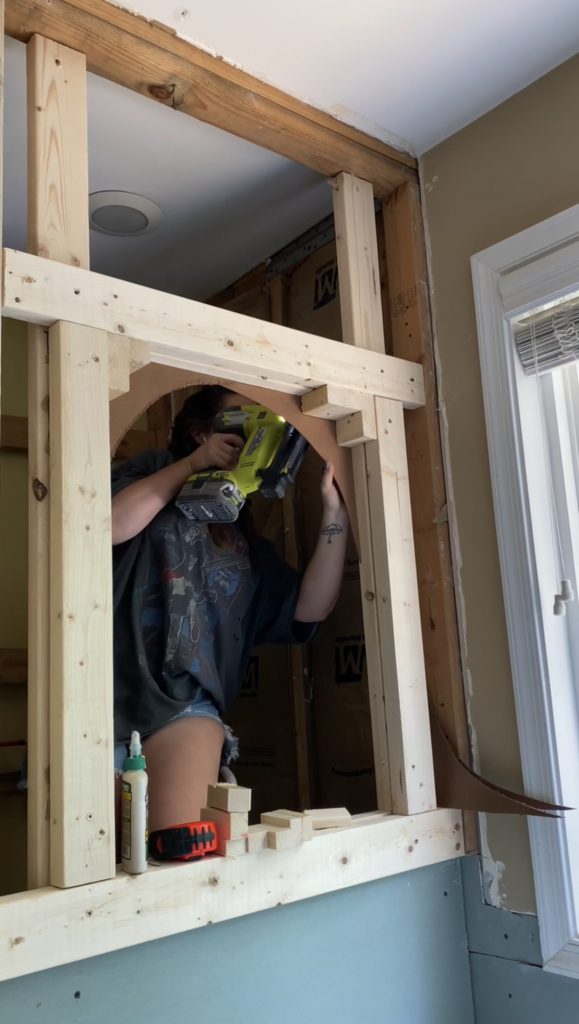
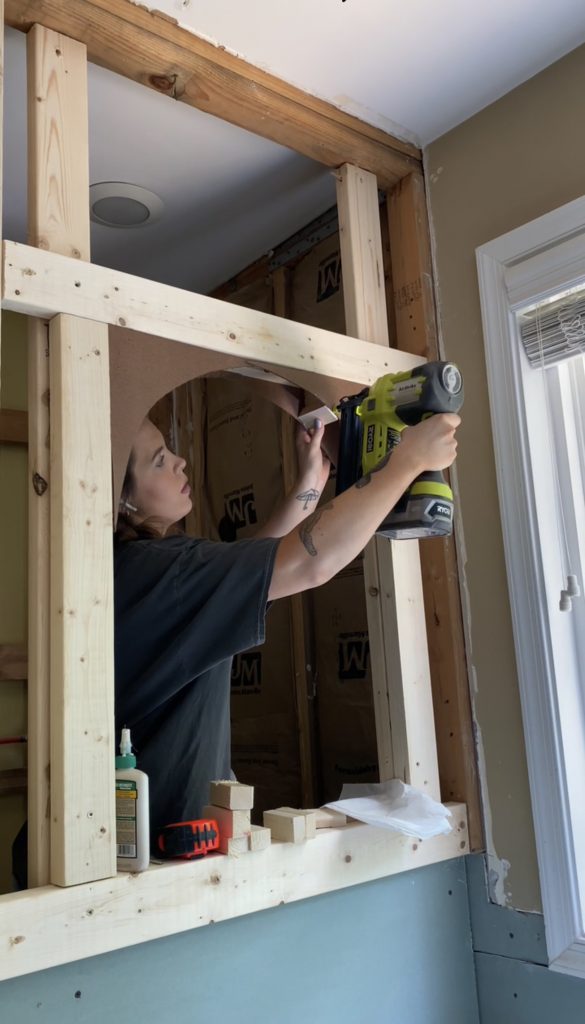
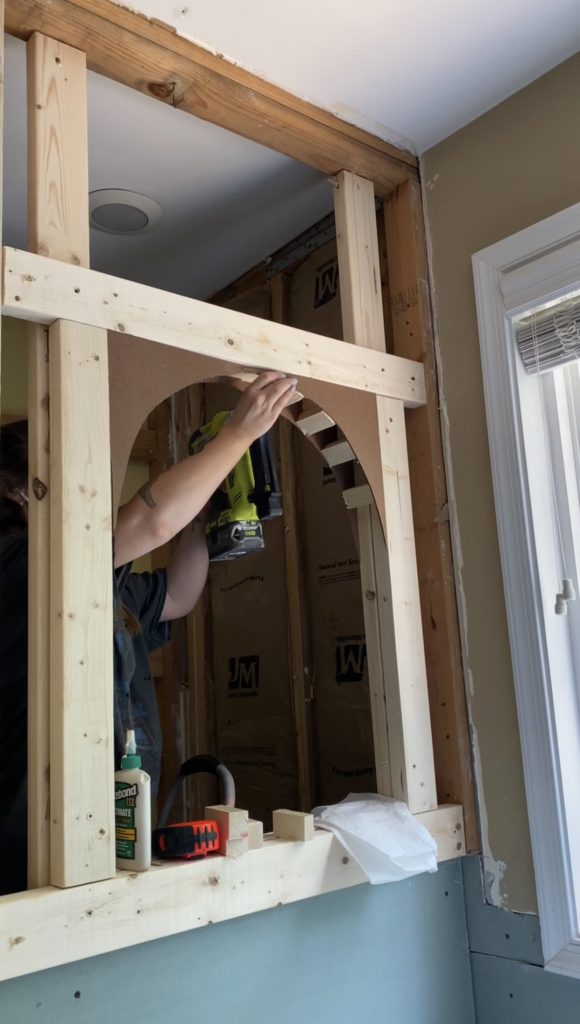
ARCHES
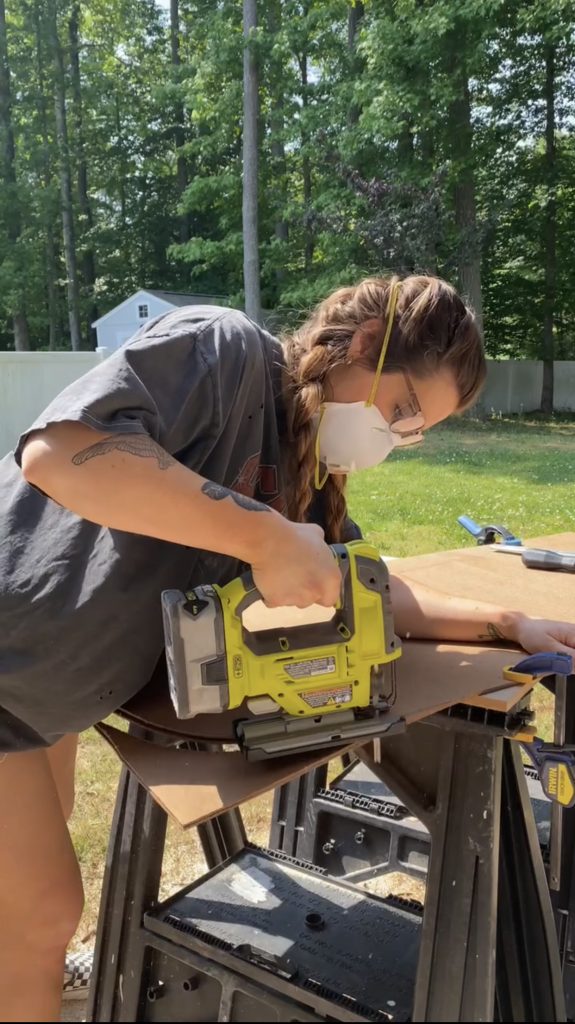
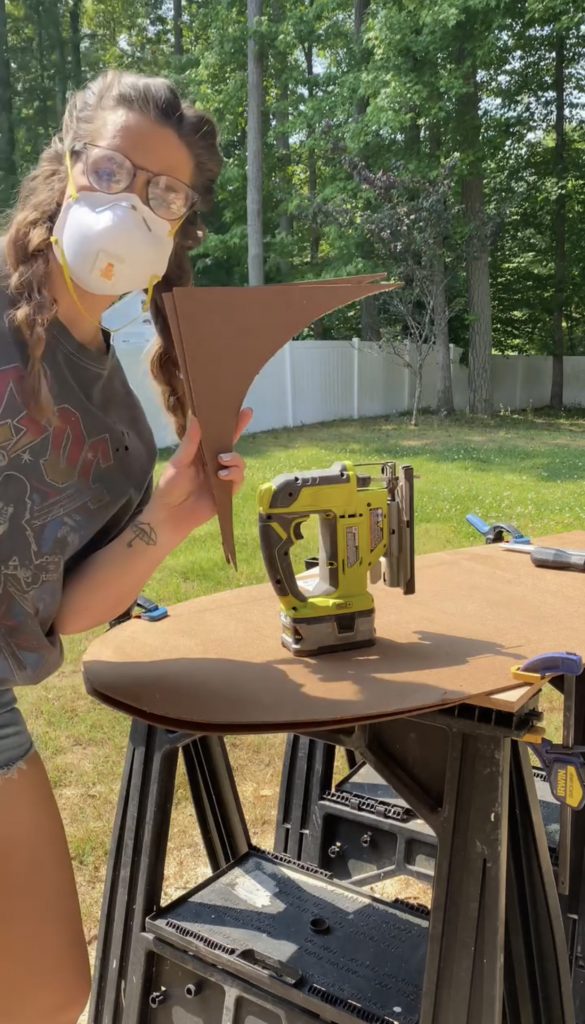
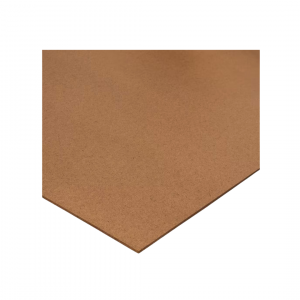
I purchased several pieces of tempered hardboard from Home Depot to use for my arches. Other materials could be used for this, but I preferred to use this because it was super cheap!
Holding up my hardboard to one of the archways that I have in my house, I traced the arch radius onto the hardboard to use as a template for my arches. I did this to stay consistent with my arches throughout my home. There are other great tricks for creating a perfect curve (I found lots of options on google), but this was perfect for me! I ended up trying this a few times to get it right. Eventually, I held the edges of the board up to the arch sides and traced so that the arch line was in the outermost corner of the hardboard.

Using my jigsaw, I cut out twelve arched corners from my hardboard. I was able to get two from each piece easily (I could have taken more time to get more from each, but this was the most simple way).
I grabbed some scrap 2×4’s and 1×2’s and cut lots of 3 1/8 in pieces. When sandwiching these blocks between my hardboard arch corners, it should be the exact width of the doorway studs. Once my pieces were cut, I used two of the 2×4 blocks in each doorway corner to make an L shaped bracket. This would be the mounting blocks for my arches.
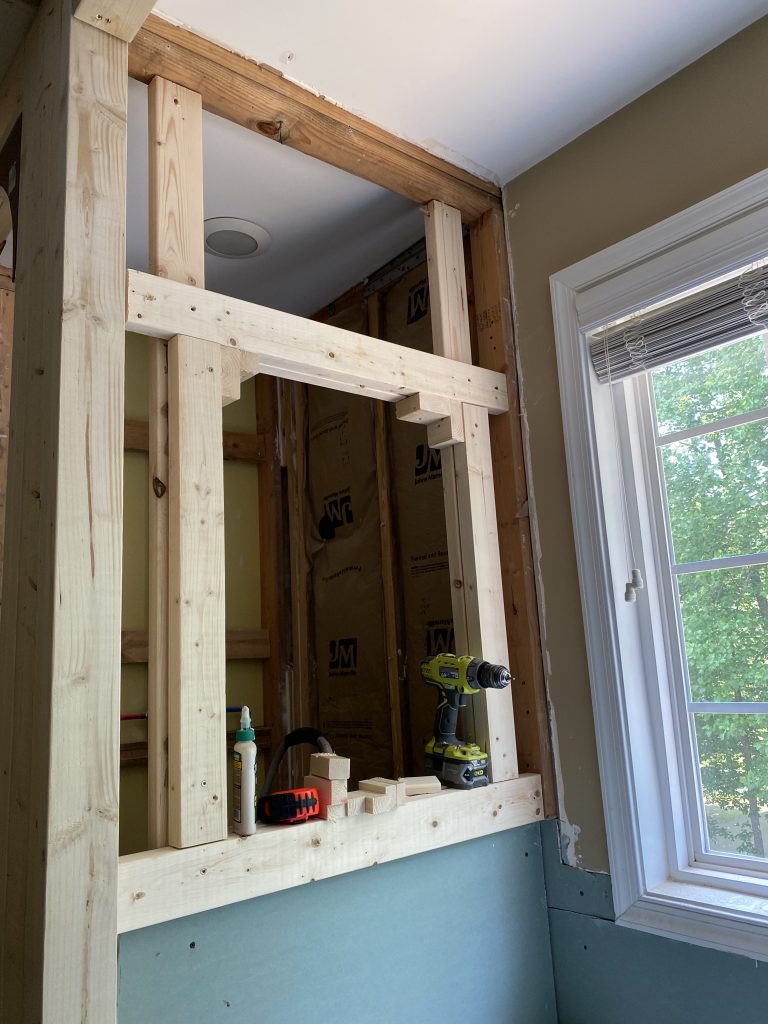
Attaching Arch Corner Pieces
I then used my nail gun to attach the arch corner pieces to each side of each block, making sure that they were flush with the outside of the drywall. Once they were all secured, I began inserting my 1×2 blocks between the arch pieces. I added a dap of wood glue to the end of each piece, and stuck in 4 per arch. I made sure that the outside of the blocks were flush with the inside of the arch curve and secure with my nail gun from each side. These would act as a back for the drywall to be screwed into.
DRYWALL
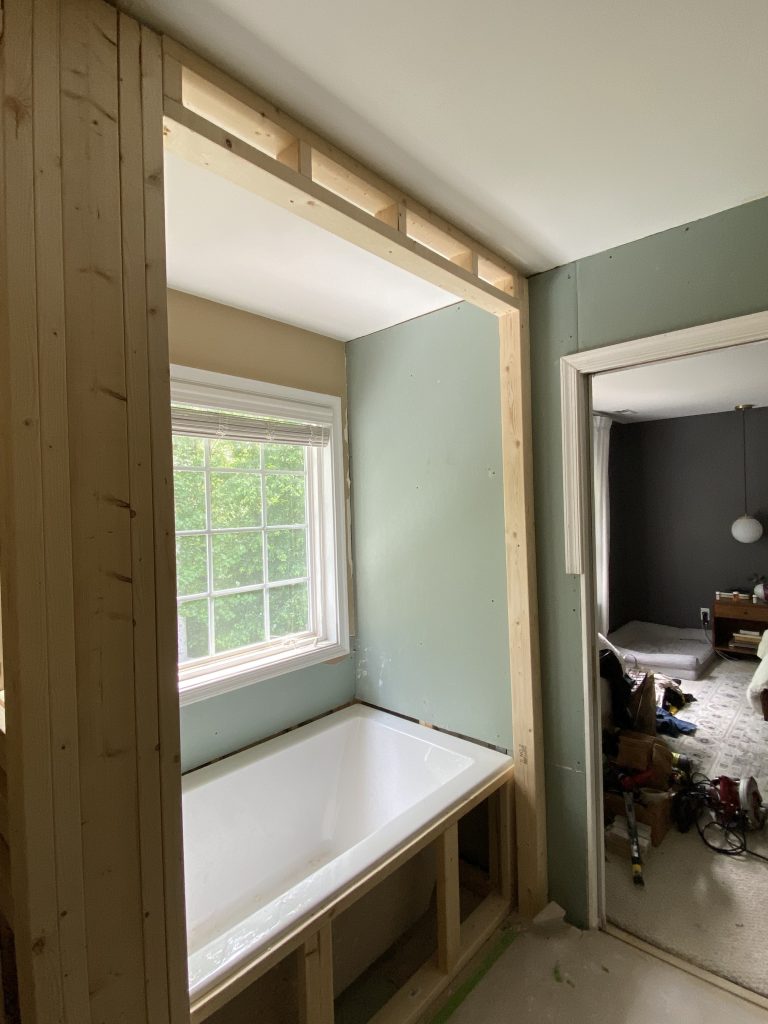
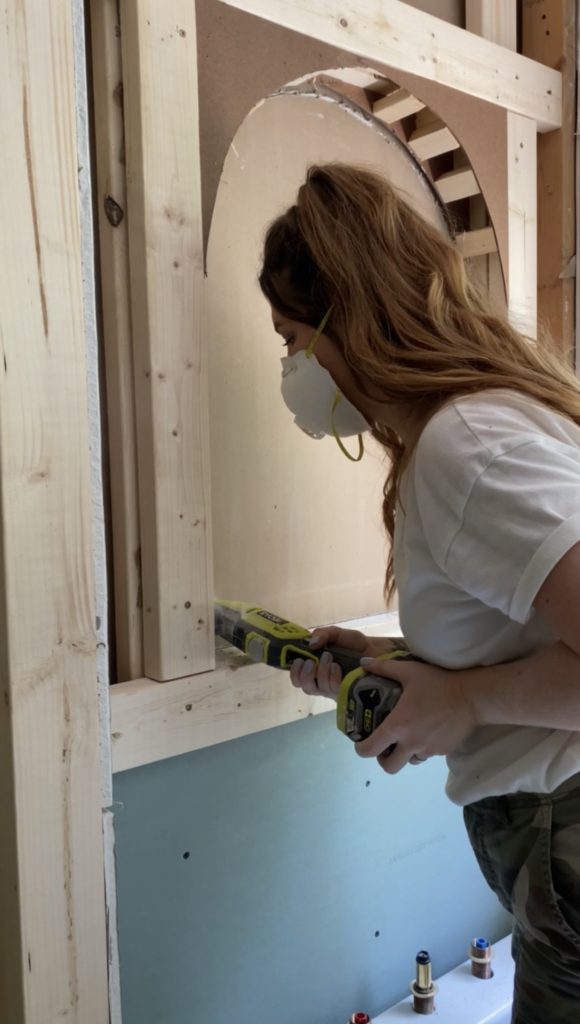
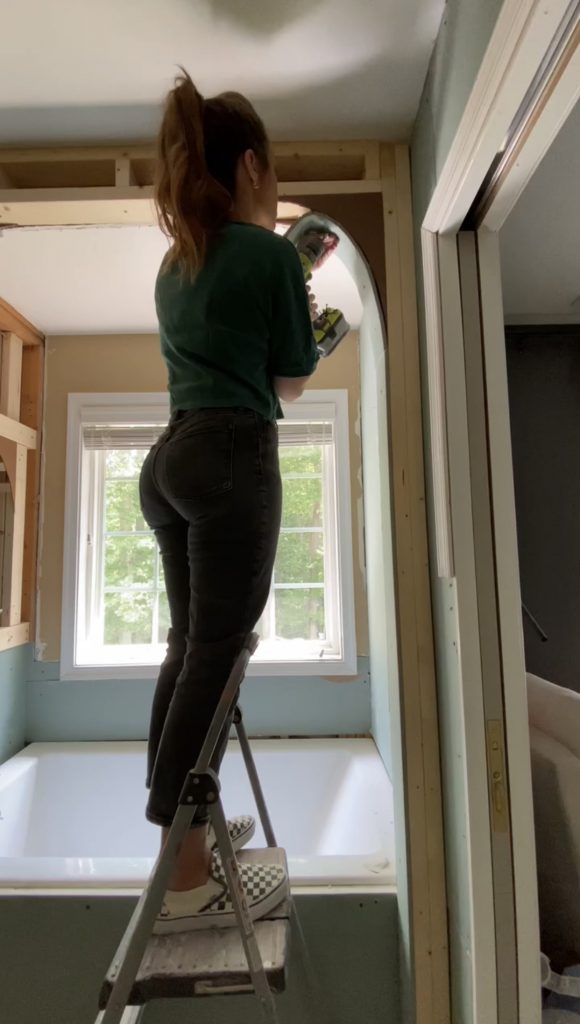
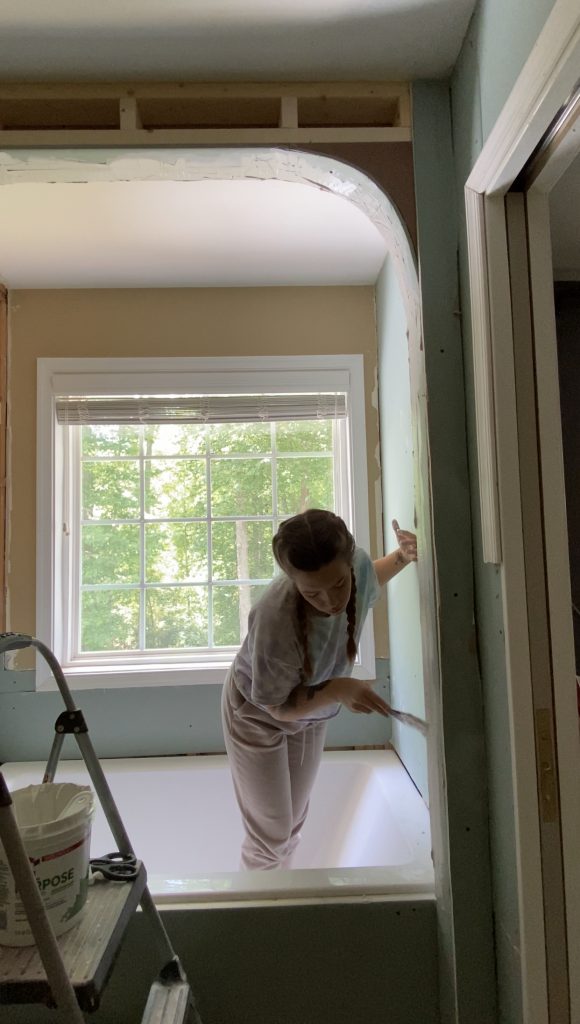
Now that my arches were made, I attached the drywall. For the window in the shower, I added a large piece and used my multi-tool to cut out the window shape. I used this same technique to attach the additional drywall on the outside of the arches. You may have noticed that I have not installed any drywall yet on the outside wall of the arches. That is only because I will be installing my tile next week, and I will have to but the edge of my tile into drywall in the shower arch (I will share more on that next week).
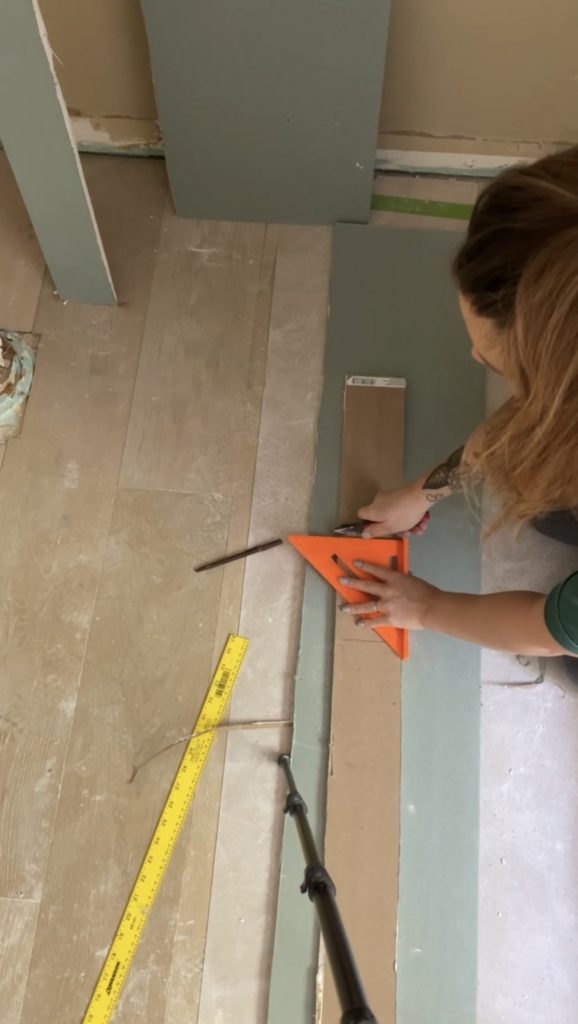
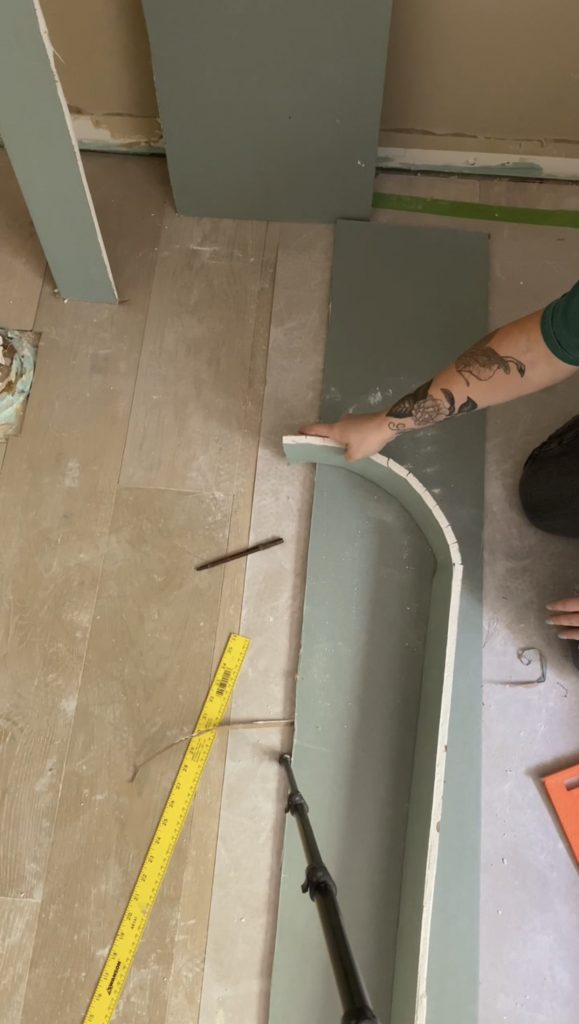
To install drywall in the arches, I cut several pieces that would be the width of the arches after installing drywall on both sides (in my case I have to do this the opposite since I will be waiting to install the outside drywall). I measured up to where the doorways started to curve and placed a mark at that measurement on each piece. Using a straight edge and utility knife, I scored from there every 1 inch or so on the BACK of the drywall piece. I was then able to snap each score line to create a bendable piece of drywall!
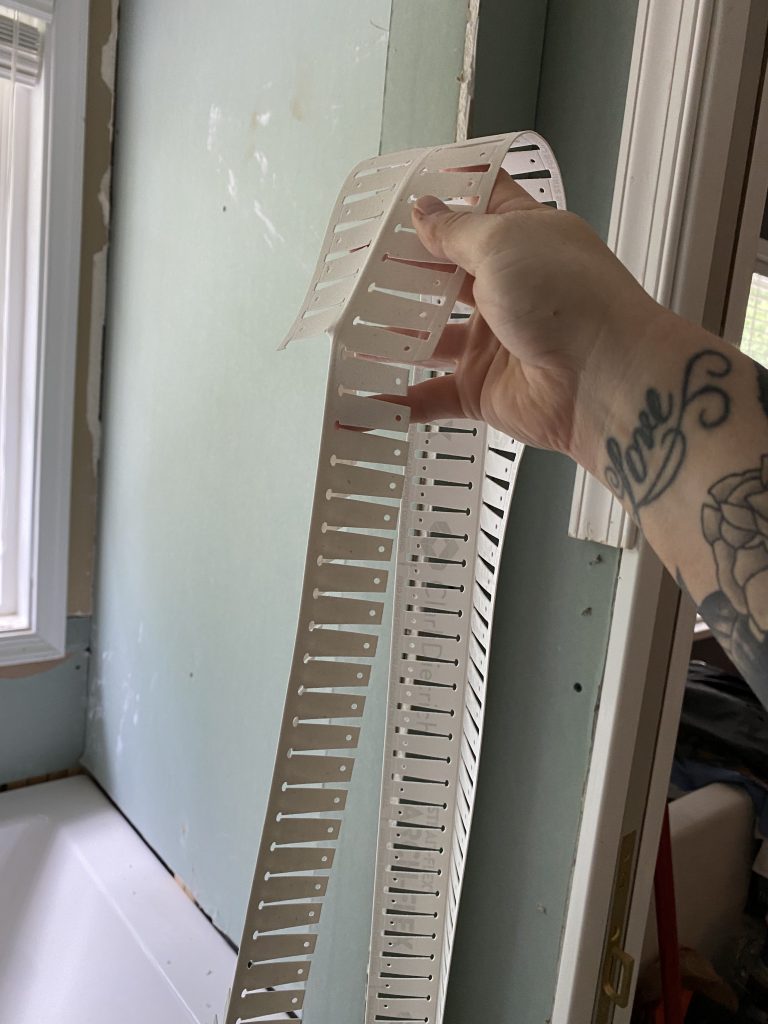
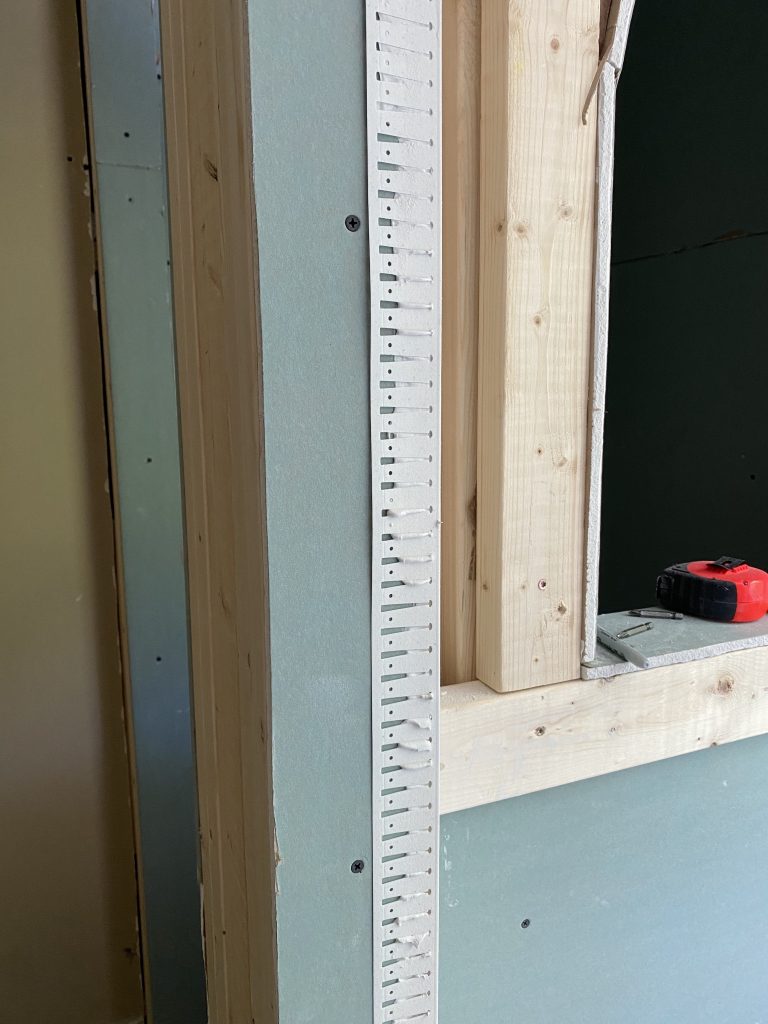
To finish off the corners, I used this arch corner beading. I used a putty knife to apply joint compound along the edges of each area and applied the corner bead. This stuff has a tearable strip on the edges for the curved parts of the wall you are applying it to.
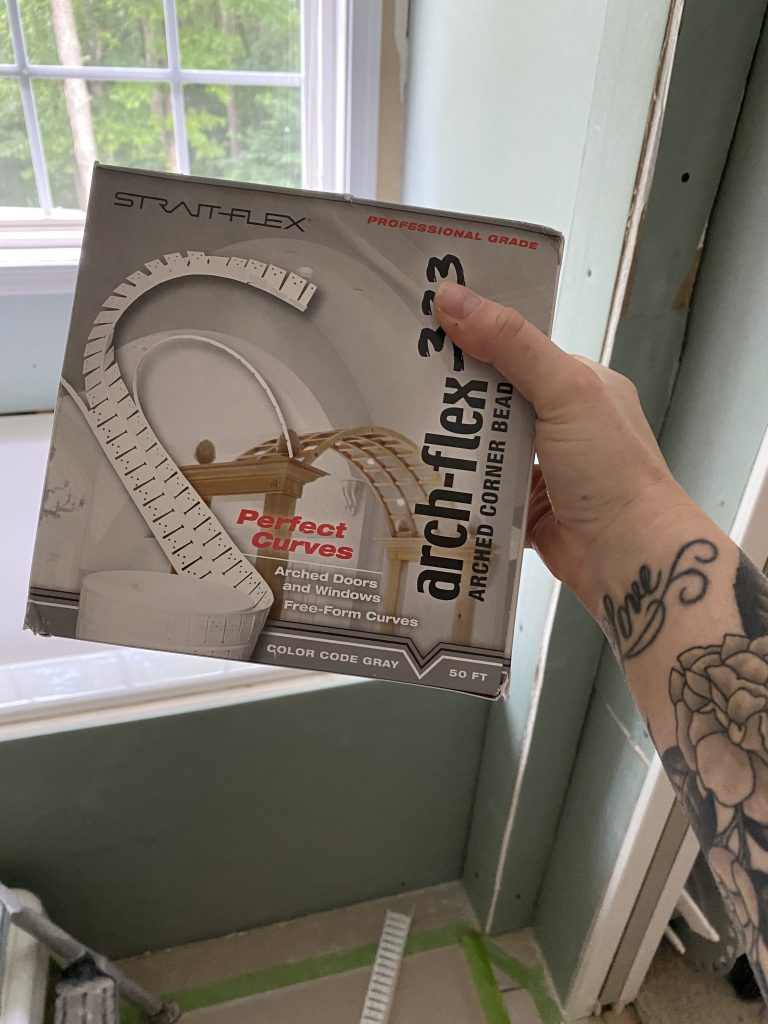
After applying, I applied more joint compound along each side of the tape and smoothed it out. After it dries, I will add an additional layer of joint compound before sanding smooth.
Here’s everything I used for the arches in my bathroom!


Be sure to check out what the other Featured Designers are up to this week during the One Room Challenge!
Ariene C. Bethea | At Home With Ashley | Banyan Bridges | Bari J. Ackerman | Brit Arnesen
Brownstone Boys | Dominique Gebru | Gray Space Interiors| Haneen’s Haven
Home Ec. | Nile Johnson Design | Pennies for a fortune | Prepford Wife | Rachel Moriarty Interiors
Sachi Lord | Susan Hill Interior Design | This Is Simplicite | Tiffany DeLangie | Victoria Lee Jones
This is looking SO GOOD! Really appreciate the step by step breakdown of all of this. I’m hoping to do a bathroom remodel soon and I’m taking lots of notes! 🙂
Thank you so much!!
Dang girl, you are seriously inspiring!! It’s great to see a female role-model doing tons of hands on renovations. You rock!!
I think it’s amazing! You set a high goal 3 arches!
I have learned to do arches first to install an arched window. But went on to do one into the kitchen. Still working on that and the same time working in the only bathroom with an arch as well. I like how you got two plus a niche built in your bathroom.. all great arches!! You’ve shown how to accomplish the arches, plus your added skills for framing too!!