DIY Dresser AKA Big Poppa

How I made my DIY Dresser

*This post may contain affiliate links, which means I may earn a small commission if you purchase through my links, at no extra cost to you. I only share products I genuinely love.
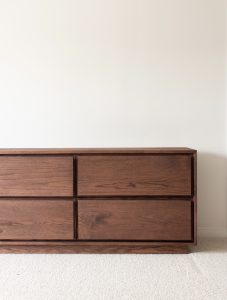
After searching long and hard for a long dresser to go in the girl’s playroom for toy storage, I realized that there was nothing that I liked enough, within my price range. During my search I fell in LOVE with this modern dresser from CB2. It was perfect in every way, but not nearly large enough for what I had envisioned. It also was out of stock and pretty expensive, so I decided to sketch it up and build one myself!
Inspiration
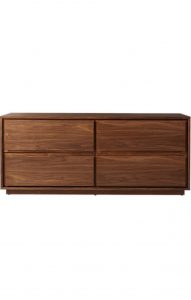
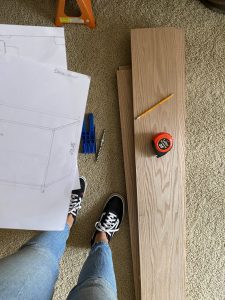
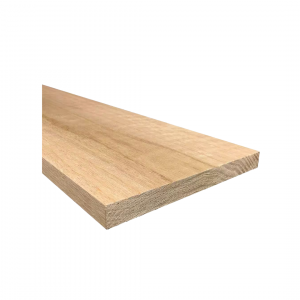
While deciding on wood species for this project, I landed on red oak. This was easily accessible (sold at Home Depot and Lowe’s), and also similar in grain to the inspiration CB2 dresser (this dresser was walnut). While I probably could have saved some $$ going a different route (perhaps using plywood instead)I really wanted to make a quality piece of furniture to stay in my family for years and years. I decided to invest in this piece and go with the nice wood.
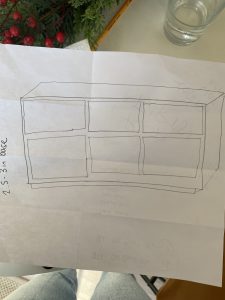
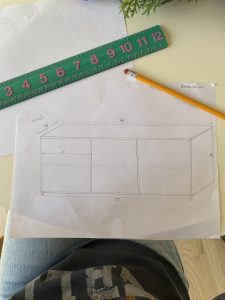
I started with a rough sketch. This gave me a general idea of what I was going to need and do. I used the dimensions on CB2’s website from the inspiration dresser to come up with some loose dimensions. I then looked at the oak boards on the Home Depot and Lowe’s sites. Doing this helped me to come up with my actual dimensions and materials list. I then took some time to make my detailed and fancy sketch! This is the part that really helped me understand the process.

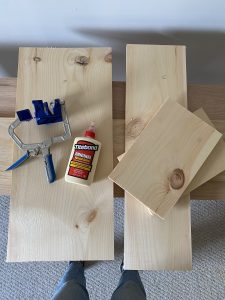
Next, I purchased my wood and supplies! Here is the list of materials that I purchased for this dresser:
- Red Oak Boards 8 in. width (8 ft long) x 8
- Red Oak Boards 12 in. width (8 ft long) x 4
- 8 in. width (8 ft long) x 4 Select/Premium Pine
- 2 in. width (8 ft long) x 6 Select/Premium Pine
- 12 in. width (8 ft long) x 2 Select/Premium Pine
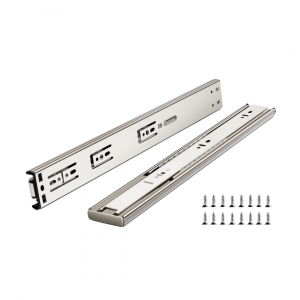
- Drawer Slides x 6 pairs
- Stain/Supplies
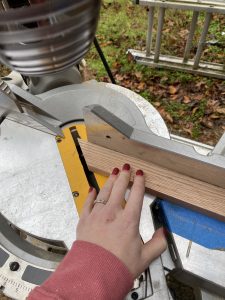
Cuts

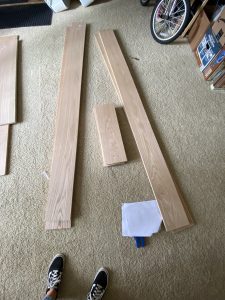
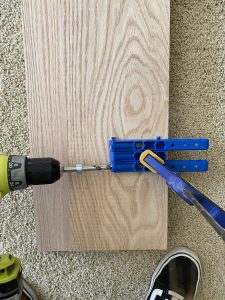
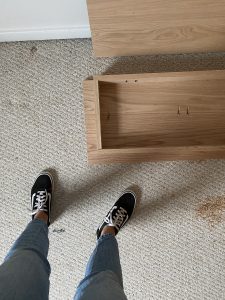
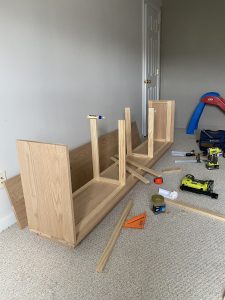
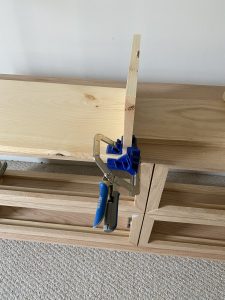
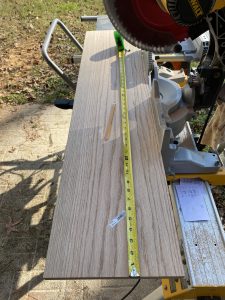
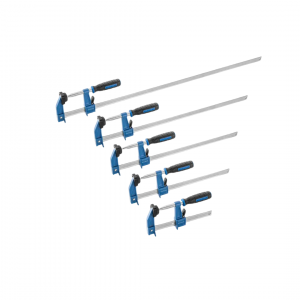
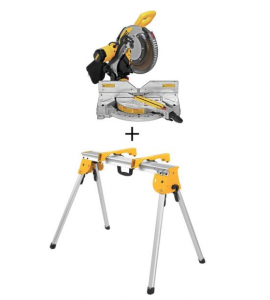
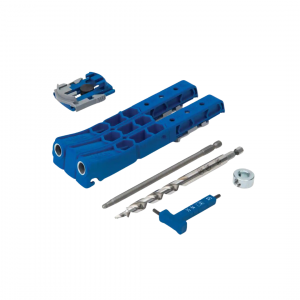
To start, I grabbed my 8 in Oak boards. I cut four of these down to length at 93 in. by using my miter saw. I then using my Kreg Pocket Hole Jig to drill pocket holes along the length of two of those boards. Using a flat surface and an F Clamp, I began joining each one of those pieces to the other two boards with wood glue and pocket holes screws (I used 1.25 in. indoor hardwood). I moved my clamp as I moved down the boards, making sure that the pieces were flush before screwing them together.
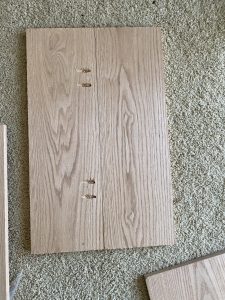
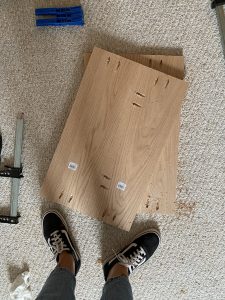
This gave me two 14 in wide pieces that were 93 inches long. These would be the top and bottom of my dresser. I then cut down another of my 8 in Oak Boards to 23 inches long x 4 pieces and followed the same steps as above. This gave me my two sides to my dresser. Once the sides were glue and screwed together, I drilled four pocket holes along the bottom of them, and two pocket holes along the top (both on the same sides). The holes would allow me to screw in the top and bottom of the dresser from the inside.

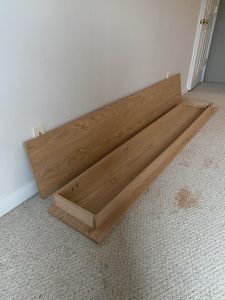
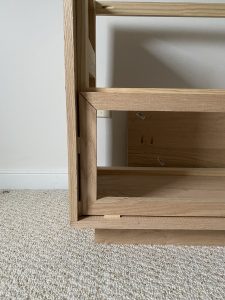
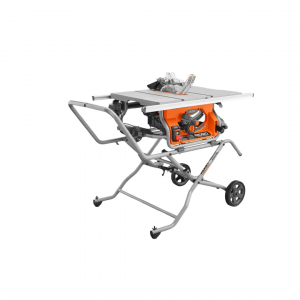
This dresser has what is called plinth base. This was made by cutting down a piece of my 8 in red oak boards with my table saw to 3 inches wide. I cut down two of these, and then cut them both to length at 93 inches. Them I down cut another 8 in oak board with my miter saw to 11 inches length, and ran that piece through my table saw to make two more 3 inch wide pieces for the sides of my base.
Pocket Holes
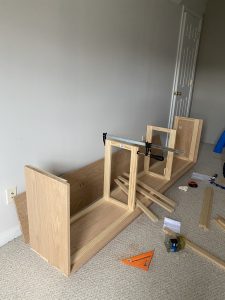
I drilled pocket holes along the length of each of my 3 inch base pieces. Then I centered and aligned one of my long pieces to flush along the edge of the bottom of my dresser and screwed it in. Next, I placed and screwed the short pieces square against it, and then repeated with the last long piece, creating a rectangular base on the bottom piece of the dresser.
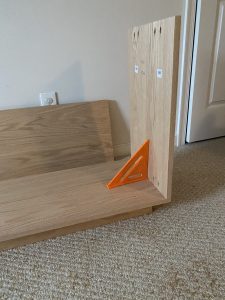
Next, I flipped over the base and screwed in the two sides of the dresser with pocket screws. I used a carpenter square to make sure that it was a perfect 90 degrees. Using a tape measure, I marked 1.5 inches in side of the bottom and side pieces. I then marked a straight line all the way across at my marks. This was the line in which my inside framing would end, which would allow for my face framing and drawer fronts (both 3/4 in thick) to meet flush with the edge of my dresser when completed.
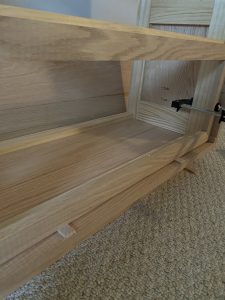
FRAMING


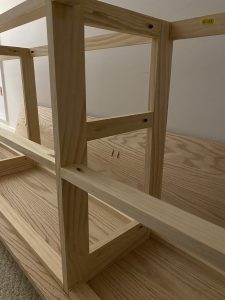
Then, I began my internal framing. This would support the strength of my dresser and provide a brace for all of my face framing. I used 1×2 select pine pieces for this (I had lots of these pieces left over from previous projects). First, I cut down several pieces to length to frame out each side of my dresser, and repeated these again for the middle. Then I spaced out the middle framing by measuring from side to side (including the framing) and subtracting the width of the framing to be installed x2, then divided by three. Once I had that measurement, I cut down 6 pieces of the pine to use as framing along the bottom. I used the same measurement to cut down the same pieces for the top of the framing.

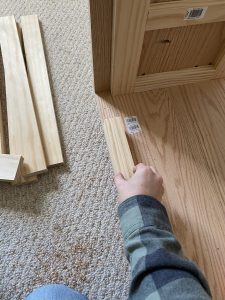
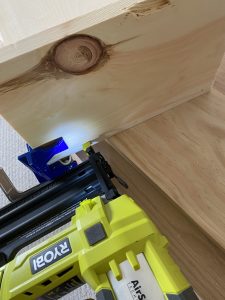
All of my pieces that were installed flat against the oak were nailed with my brad nailer. For the other pieces that were suspended, I drilled pocket holes and used clamps to screw them each in.

Face Framing
Next, I prepared to install the face framing. I wanted to have a 1/8 inch gap around each frame. To find the width of each frame, I measured from inside to inside of the dresser and subtracted 1/2 inch (1/8 in x 4) and then divided by 3. Then, I measured from inside of the bottom to the top of the dresser and subtracted 3/8 in (1/8 x 3) and then divided by two to find the height of the frames.

Next, I used my remaining 8 in oak boards for this. I cut down about six long pieces of my oak with my table saw to 1.5 inches width. Once they were all cut to width, I used to miter saw (set to 45 degrees) to cut each of my frame pieces to length using the measurements that I had just taken. Each measurement was cut 12 times, for a total of 24 pieces. I additionally cut several 1/8 inch spacers with my scrap select pine.


Using my 1/8 in spacers, I began gluing, placing and clamping my cut frame pieces. Once each frame was clamped, I use my brad nailer (1.25 in nails) to secure each piece. I worked along the bottom of the dresser first. Then, I continued to the top row, using my spacers placed along the top of the bottom row of frames. Each frame was then installed with a 1/8 inch gap around each side.
DRAWERS
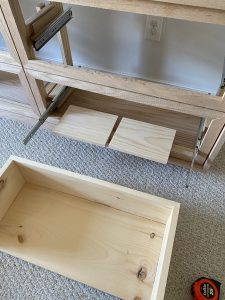
Before installing my drawer slides, I had to make sure that the sides of each drawer section were at least flush with the inside edges of the installed face framing so that the drawer slides would be able to function. I used scrap pieces of wood that I had on hand already (3/4 in pine and 1/2 in plywood). Then I nailed them to the existing framing until each side was flush. Although, I was not proud of how this looked, it worked! A better method would have been to cut down tall pieces of the pine and 1/2 in plywood to cover the entire sides.
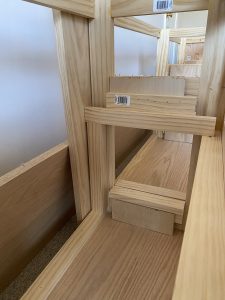
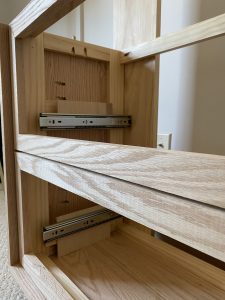
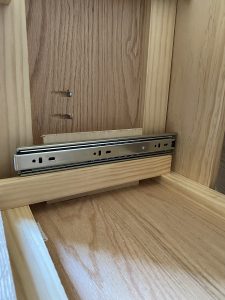
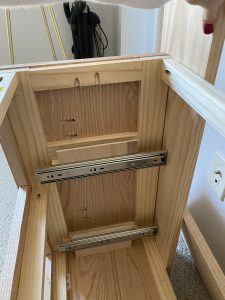
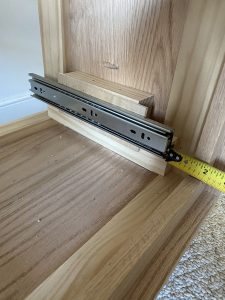
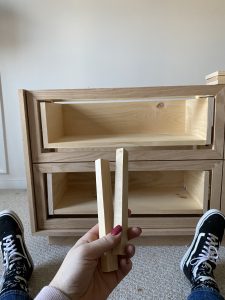
Now my drawers slides were ready to be installed! I created spacers to install these using my scrap pine. One piece was cut to the inside depth of the dresser (between framing), and the other was the exact height of the framing piece that is pictured below.
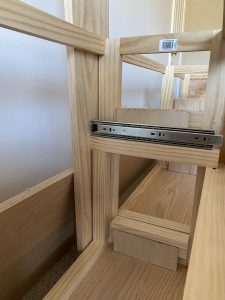
To install the top row I used both spacers stacked to create a shelf. Also, I used a piece of wood placed flush on the back of the dresser to act as a block to keep my slides at the same depth while installing. I placed each slide on the spacer shelf and push the slide back until it sat flush with the backer board. Then, I opened the slide to screw it in. Next, I repeated this for each of the top slides. For the bottom slides, I used one single spacer turned on its side as a shelf and repeated the same process.

Drawer Boxes
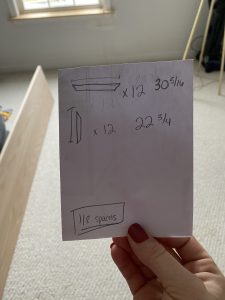
Next, I prepared to build my drawer boxes my measuring from slide to slide (inside). This gave my my drawer box width. Because each drawer section was very slightly different (by about 1/8 of an inch), I made a numbered list for each section and wrote the measurements for each by corresponding number. When cutting my wood for the drawers, I numbered each piece of wood to make sure that they did not get mixed up.
Here is an example of my drawer box dimensions:
Sides – 11.25 inches (8 in pine) x 12
Back – (8 in pine) x 6
Bottom – (12 in pine) x 6
I used 8 in select pine for the back and side pieces, and 12 in pine for the bottoms. Using these helped save some time since I did not have to cut them to width before building. I used the width of these boards to help figure out my drawer box dimensions.
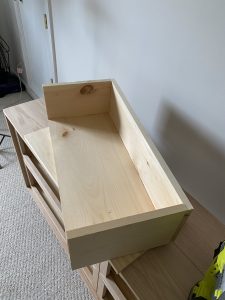
Assembly
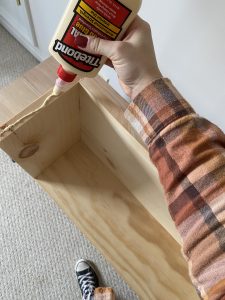
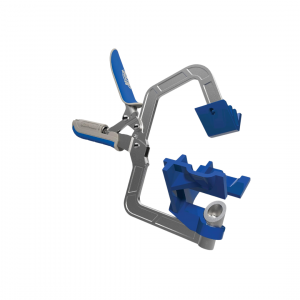
After each of my pieces were cut with my miter saw, I began to assemble the boxes. I began with my bottom piece and each side piece. Using my Kreg 90 degree corner clamp, I glue and clamped each side piece on the outside of the bottom piece. While clamped, I used brad nails to secure (1.25 in). I then turned the box onto it’s face and glued, placed, and nailed in the back piece. Each piece was built around the edges of the bottom piece. Once my boxes were built, I drilled in two pocket holes along front of the boxes to attach the drawer fronts. I only drilled on the bottom and used wood glue, but adding additional holes on the sides would also work!


Using a large block of pine as a spacer placed on the bottom of each drawer section frame, I began installing my drawers to each corresponding section. Before installing, I measured from the face of the dresser to the front of the drawer slides. I then marked this measurement on the front sides of each box help with installing the slides to the boxes evenly. I then would open up the drawer slides and place the box flat onto the spacer block. Lining up my slides with my marks and making sure that the box was flat on the block, I began to screw in the slides to the boxes.

DRAWER FRONTS

For the drawer fronts, I used the 12 in oak boards. To find my dimensions, I measured each frame for each drawer section individually. For each measurement, I subtracted 1 inch (1/2 inch on each side). All of my drawer faces were the same height. However, they varied slightly in width (by about 1/8 in each), so I numbered a list for my cuts. I made my cuts to length with my miter saw. Because the boards were pretty thick, I cut and flipped them to continue my cuts with the miter saw. Once my cuts were complete, I used the table saw to cut each one down to height. I probably could have flipped the order on these two steps.

I wanted my drawer fronts to have a beveled edge for easy opening, so I set my table saw to 30 degrees and ran each front through. To make sure that I did not lose any length, I cut at 1/8 in further than the actual cut depth.
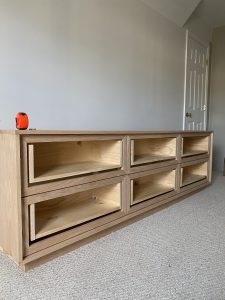
Now my drawer fronts were ready to be installed!


Using some leftover select pine, I cut a few long spacers at 1/2 in wide. To install my fronts, I used these along the edges of my dresser to ensure that my drawer faces were evenly placed before installing. I attached another spacer with my nail gun to a loose scrap board to hang over the edge of the dresser to act as a spacer for the top drawer fronts. I did this without the top installed. While each front was placed, I applied pressure and reached behind with my pencil to trace out the drawer box. I then removed the drawer box and placed it on top of the drawer face flat on the floor. Then, I lined it up with my pencil marking. I then was able to apply glue, pressure down, and screw in with my pocket screws!
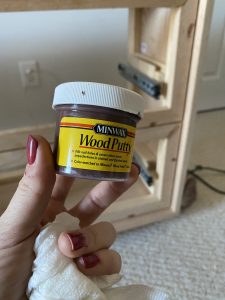
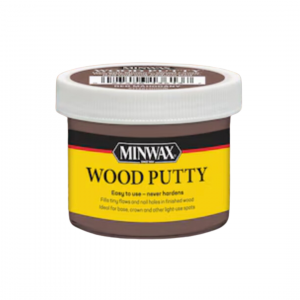
Now that my drawers were installed, I finally screwed in the top of the dresser with the pocket holes that I drilled in the beginning of the build. I filled any nail holes on the face framing with this colored wood putty. I lightly sanded everything down with my mouse sander and 220 grit sandpaper to give everything a smooth and even finish.
STAIN
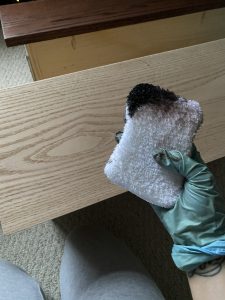
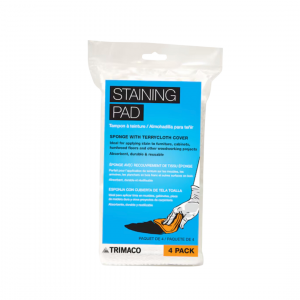
After cleaning up the sanding dust, I used some staining pads to apply Minwax wood stain in Red Mahogany. After wiping the stain onto the wood, I continued smoothing it. It needed to be even in coverage. The stain needs to dry completely before applying a poly coat with my foam roller for extra protection and an even smoother finish!
I plan to use some L brackets on the back of this to mount it to the wall. There needs to be extra safety since this piece will be living in the playroom.

I’m so proud of this DIY dresser!
-Cass


Big Poppa was such an amazing build and project. In awe!
Thank you so much! I am so happy with how it turned out!
Loves this build so much! Curious.. did you put a back in it and I missed that?
I love this dresser, but I am also enthralled with, you got it, the carpet? Do you know the brand/color/etc.? It looks very neutral and sleek. Thank you!
How did you come up with that complete interior and the measurements. I dont see any detailed plan sketch. This looks to complicated to simply do by going along the road
Thank you very much for share your designe, I try to copy becuase I loved and I am very happy with the results. I can send you a pic
Is there any way of getting detailed DIY plans? It’s absolutely stunning and I’d love to build it myself. Would be happy to pay!
Oh my goodness I need to do a post about it!!!