A DIY Chess Table!

Before doing this room makeover for my best friend, I asked her and her husband what they wanted functionally in this space. The envisioned a room for gathering/hosting, Christmas, reading, and playing games. Knowing that they play chess, an idea struck me to place a DIY chess table in an un-used corner of this room! I’ve always loved a chess table.
I then remembered that I had several boxes of checkered marble tile leftover from my laundry room renovation…. and I love coming up with ways to re-use and be resourceful! This tile was laying around just WAITING for me to put it to good use. And then the idea was born. LET’S MAKE A DIY CHESS TABLE!

*This post may contain affiliate links, which means I may earn a small commission if you purchase through my links, at no extra cost to you. I only share products I genuinely love.
The plan:
Use a router to make a square cutout in a table top, and then glue in the tiles so that it’s all flush!
SUPPLIES:
*all images are clickable


- Table
- Marble Tiles
- Straight Router Bit
- Adhesive
- Sandpaper
- Gloves
- Minwax Gel Stain – Coffee
TOOLS:


The Table
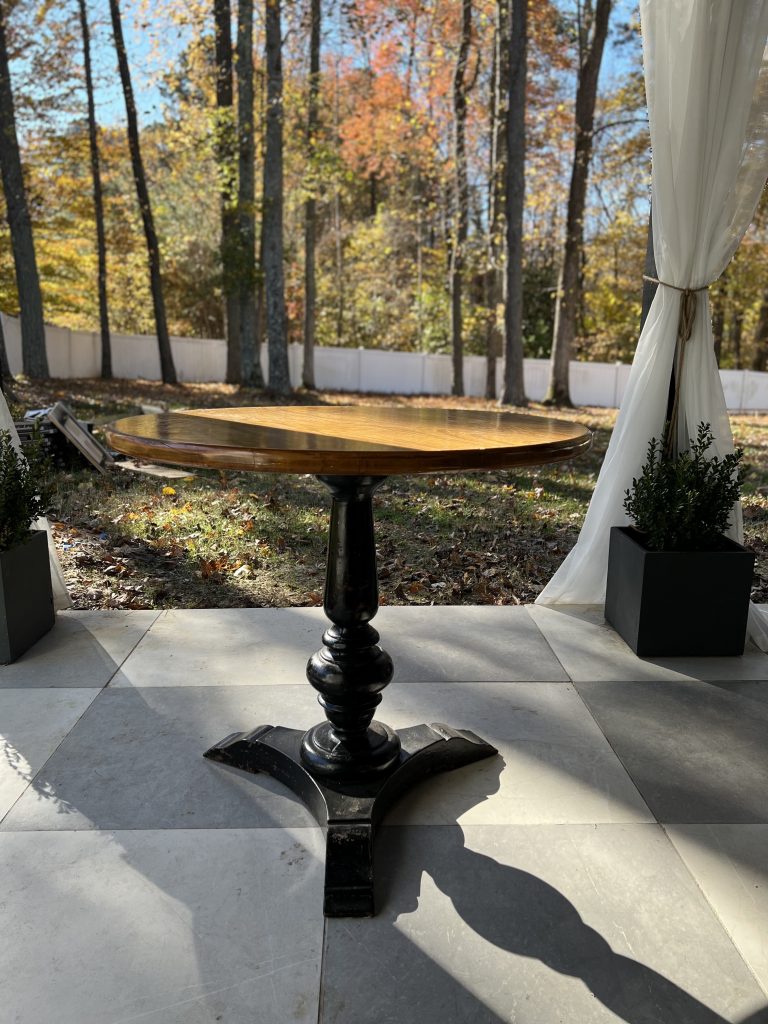
First, I began hunting for a table on Facebook Marketplace that would be suitable for playing chess on. My requirements were that it is at least 25 inches in diameter (big enough for the chessboard with 2 inch tiles), and no larger than 34 inches (too big for the space). After quite some time, I found this little table which is honestly PERFECT. The seller informed me that he and his wife previously owned a Pizza Shop in New York and this was one of the tables from the restaurant. How cool! And now it gets to have a whole new life!
Plans
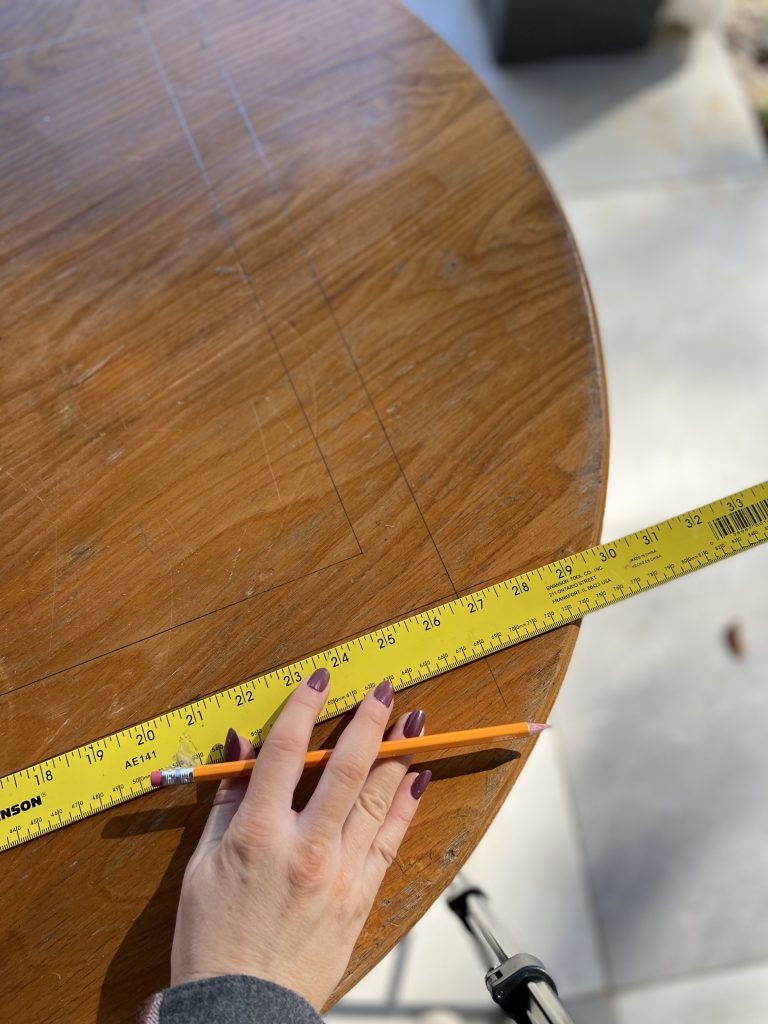
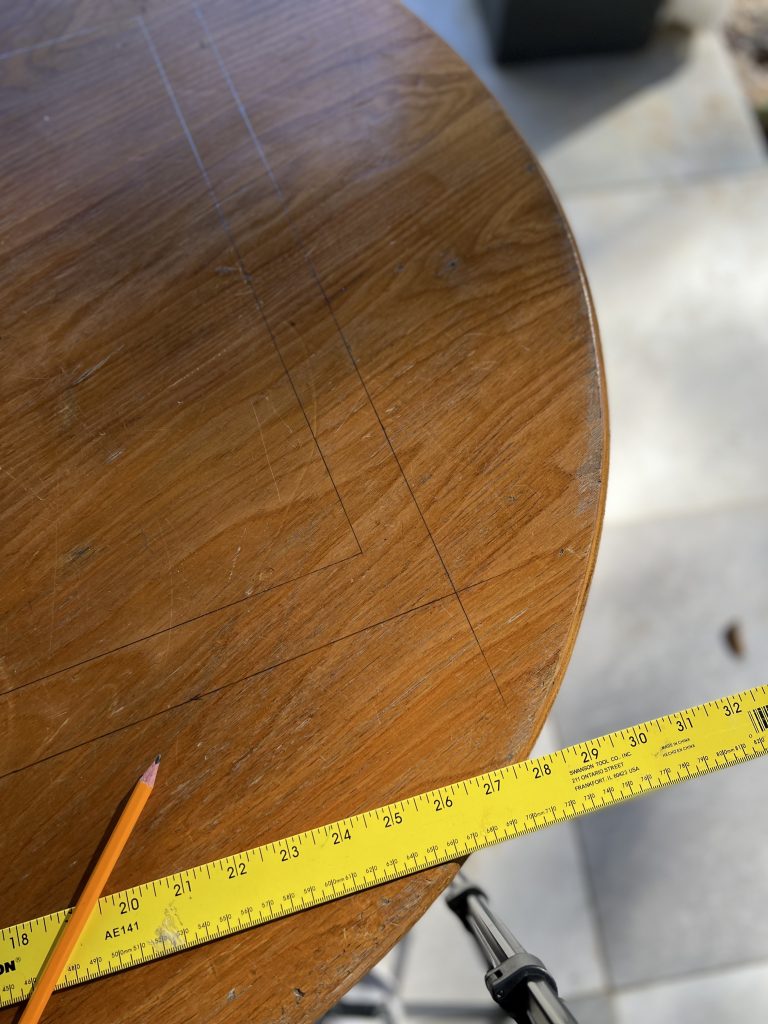
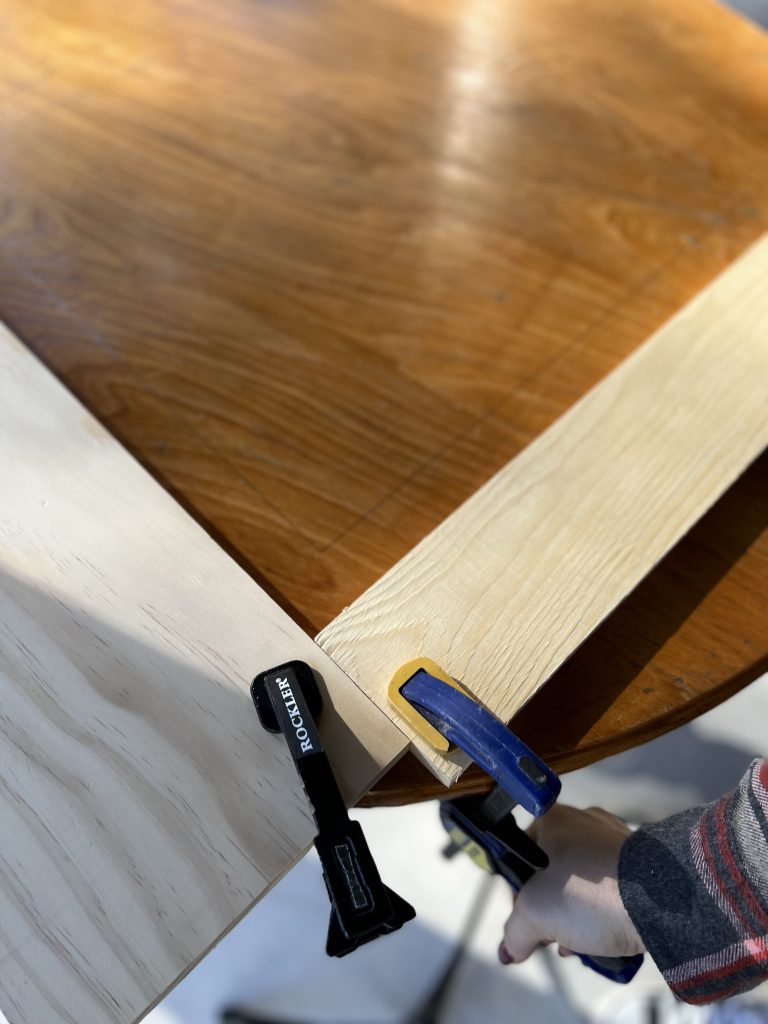
I brought the table home and began mapping out a plan. Starting by finding the enter of the table and making a mark there.
From here, I used the measurements of my chess board and a carpenters square to mark out the sides of the chessboard square from that center point on the table top. I marked and drew out the lines.
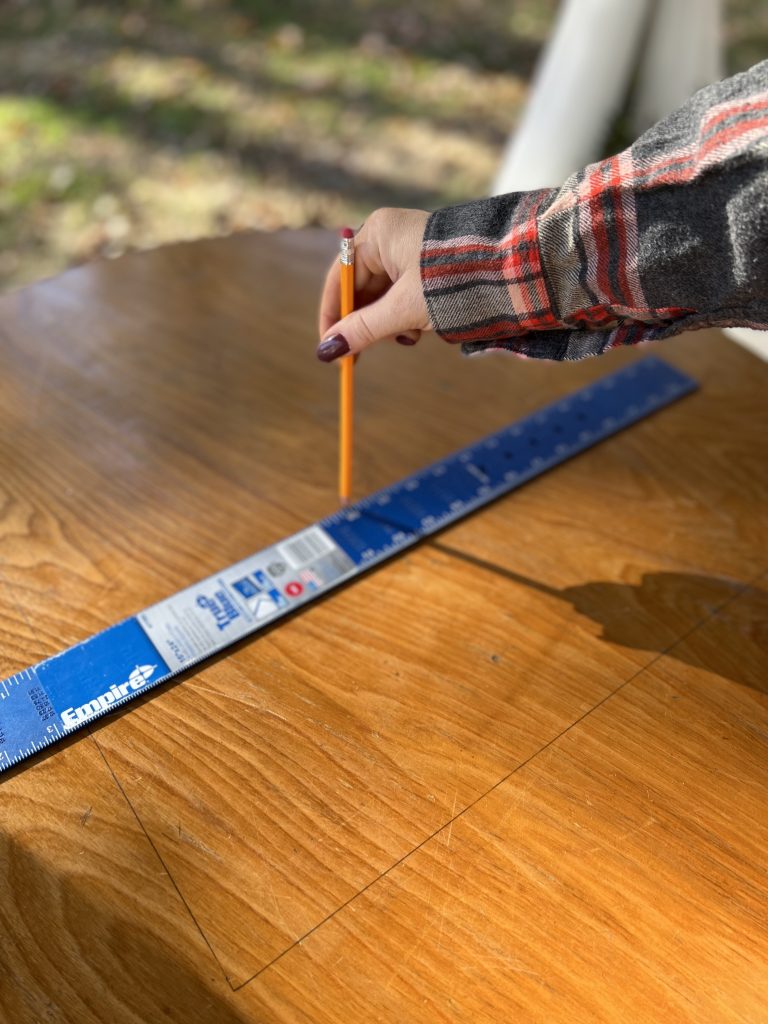
I grabbed a straight router bit that is made for cutouts and inserted it into my router (PS I would not recommend the router that I used in these photos. I’m linking a much better one!). Then, I placed my router on my table top and lined up the outside edge of my bit with the line that I just drew out. From there, I straightened the router and marked at the edge of the router fence. This gave me the measurement for my routing guide, which will help me to cut the square perfectly.

I marked 1.5 inches (the width of my router fence from the edge of the bit) around the entire square and drew out lines to connect them. This line is where I would clamp down pieces of wood to act as my routing guide. I clamped down pieces of scrap wood around those lines on the table. I started with just three of the four sides.

Then, I grabbed a single tile to adjust my router before starting. I made sure that the bit was about 1/16-1/8 in taller than the tile when placed next to it. This allows for a bit of space for the adhesive!

Let’s begin!
I started by placing the router edge up against the routing guide and turned it up at an angle slightly. Turning on the router, and then slowly flattening the tool, I started cutting. I began moving the tool down the guide. During this process, I learned that the best way to make the cutout is to move in a consecutive line so that the router always has something to rest on (even if it’s just one side). If you move all over the table (which can be easy to do), there will come a point when you don’t have a piece of table left to rest the router on in some areas.
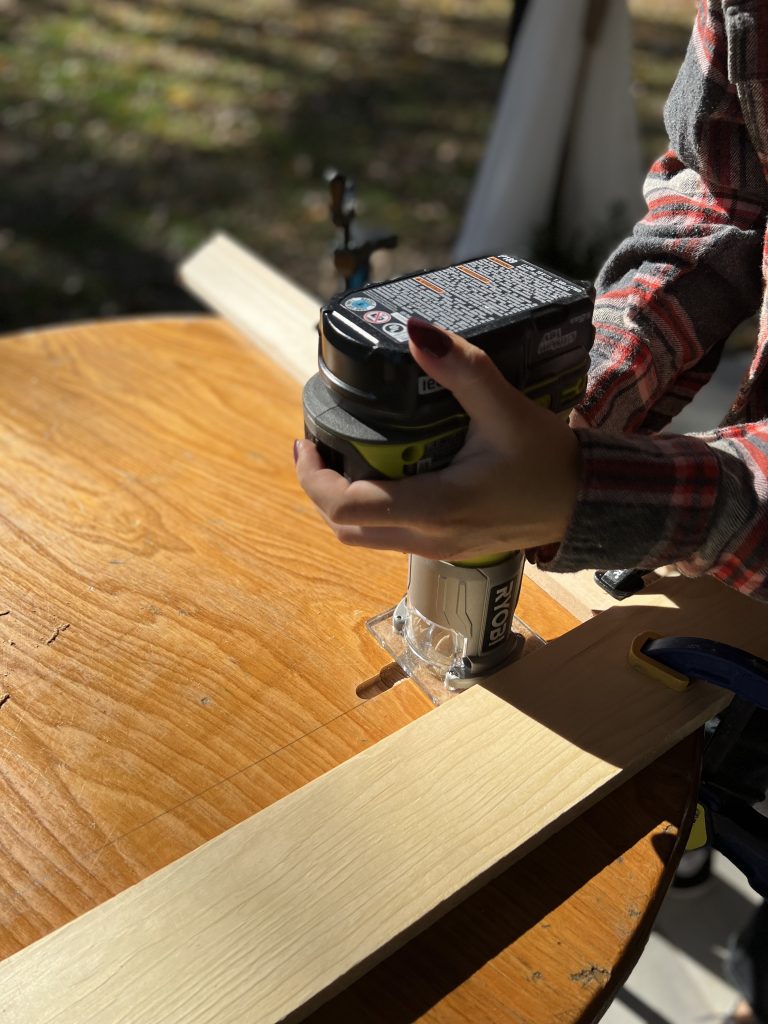
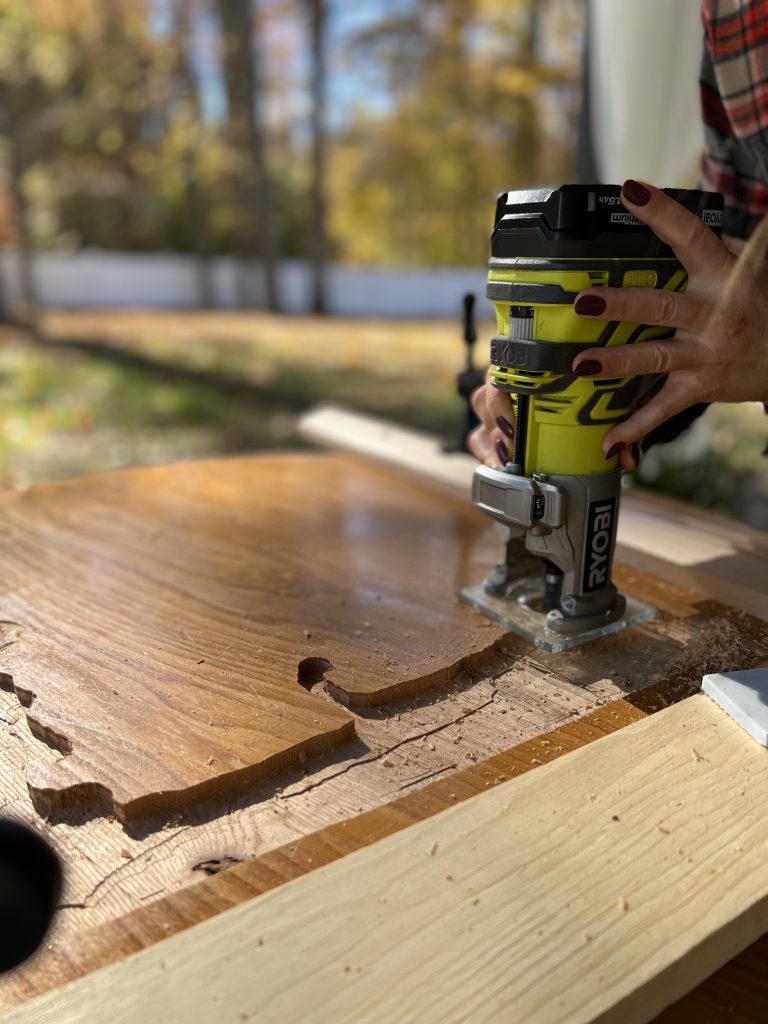
Then, I continued cutting consecutively down the table. I had to stop every few minutes to suck up wood shavings with my shop vac.
Also, I had some issues with my router. See how the cutout is very bumpy?? It should NOT look like this. Somehow, every time I used the router for a few minutes, the router bit would shift deeper which made my cut out uneven. I heard from some followers that they had the SAME issue with this specific router. Therefore, I will recommend a different one for you guys here!


Once I got about halfway..
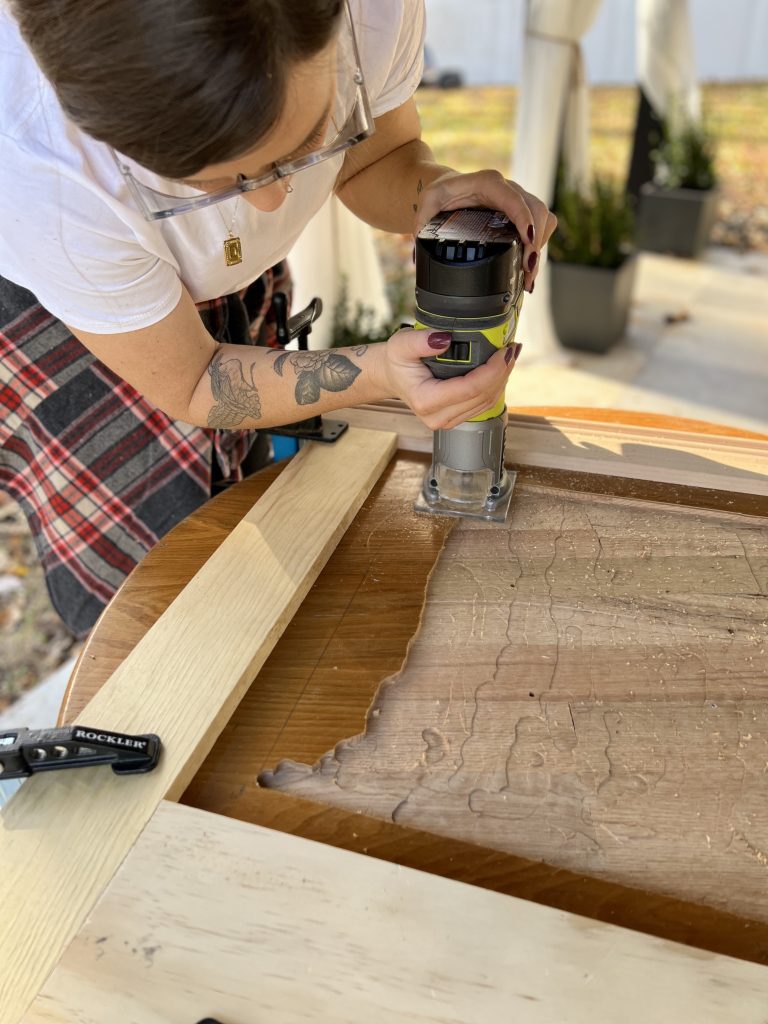
I moved a guide rail from the finished side, to the opposite side. You could totally take extra steps to cut these pieces and fit four perfectly at once, but I thought it was not necessary to make extra work.
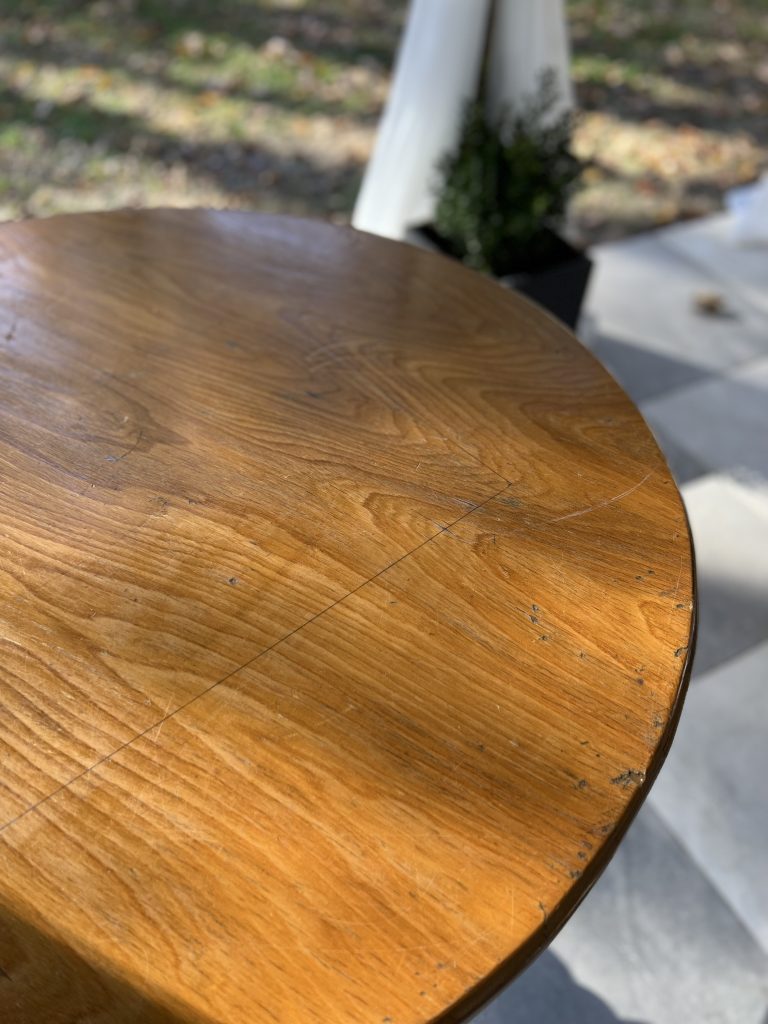
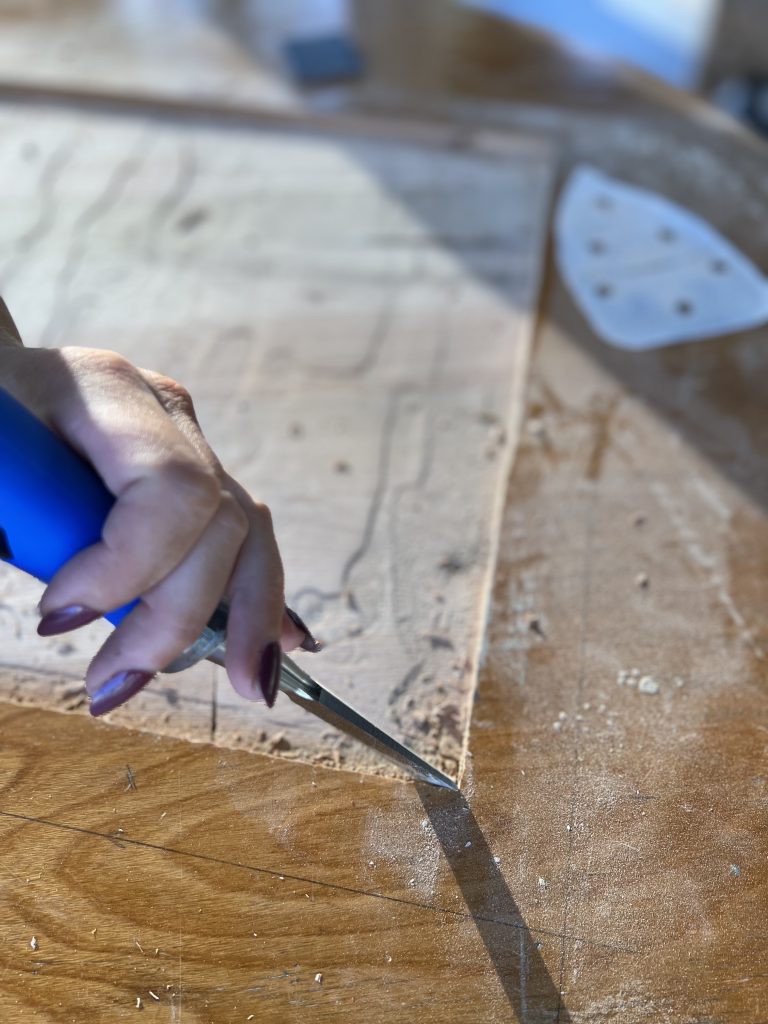
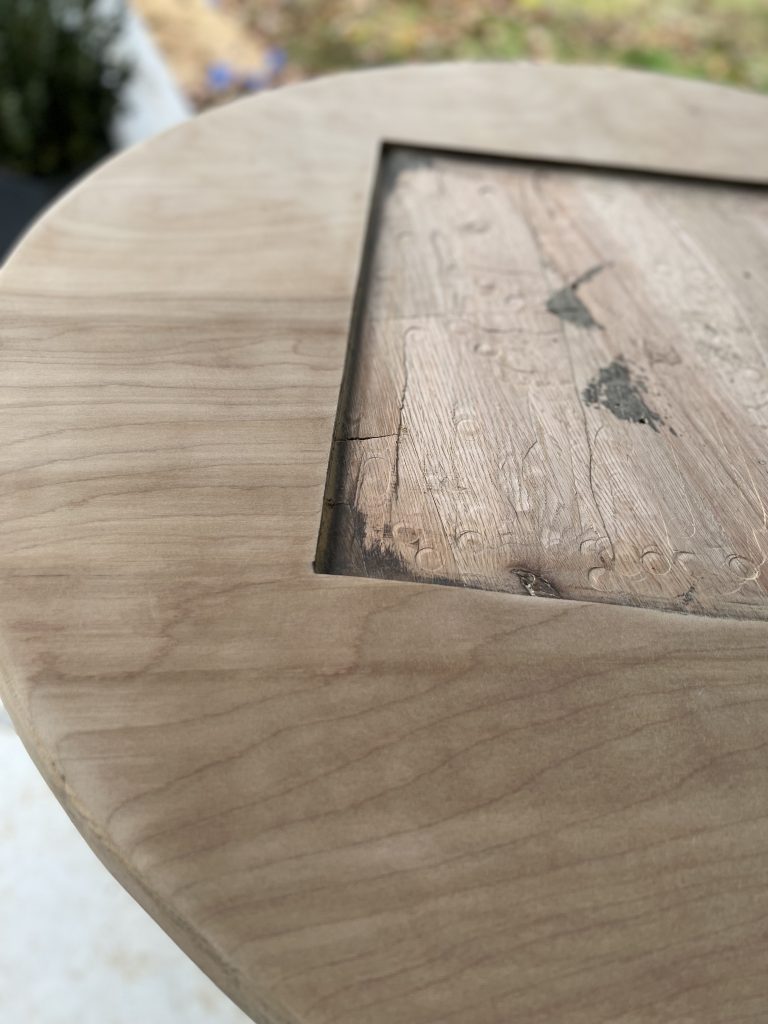
I worked my way all the way down to complete the cutout! Once it was complete, I made sure to clean up any edges. I then used a chisel and hammer to clean up the corners so that they were squared off.

The next step : SAND!
I sanded down all of the rough edges of the cutout and anything rough/uneven inside of the cutout.


At this point, I realized that I made a big mistake… I failed to measure my tiles which so happened to be just short of 2 inches (I thought they were 2 inches exactly). This meant that my cutout was about 3/4 in TOO BIG. Whoops.
My plan to fix this was to create a border using additional tile to fill in the extra space, like this mock up photo below. This did create a bit more work and is totally an optional step..but it ended up being a happy accident!

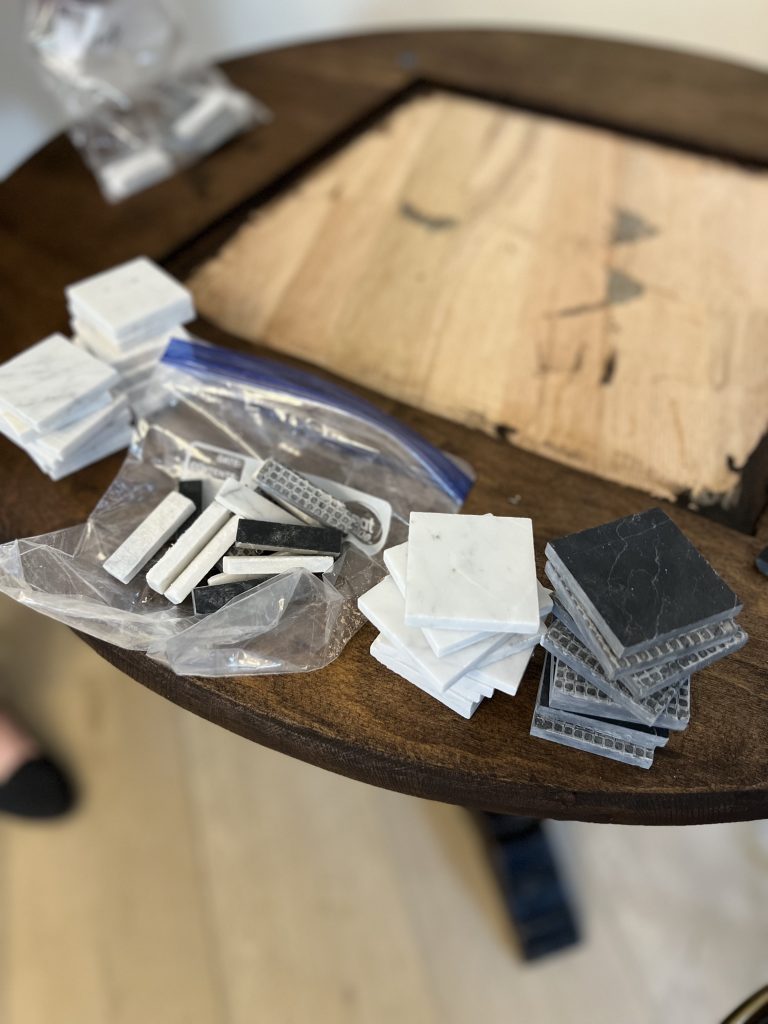
The Tiles
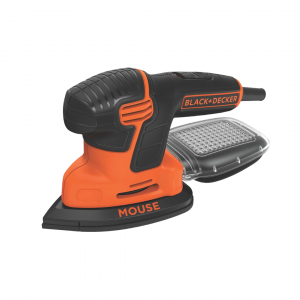
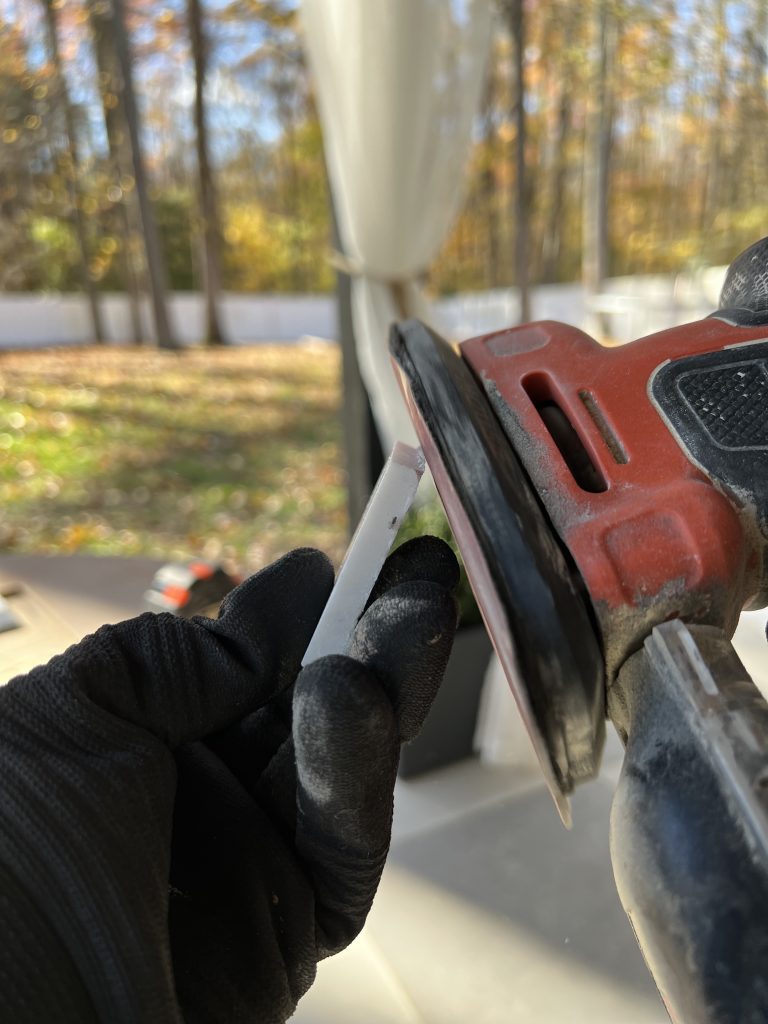
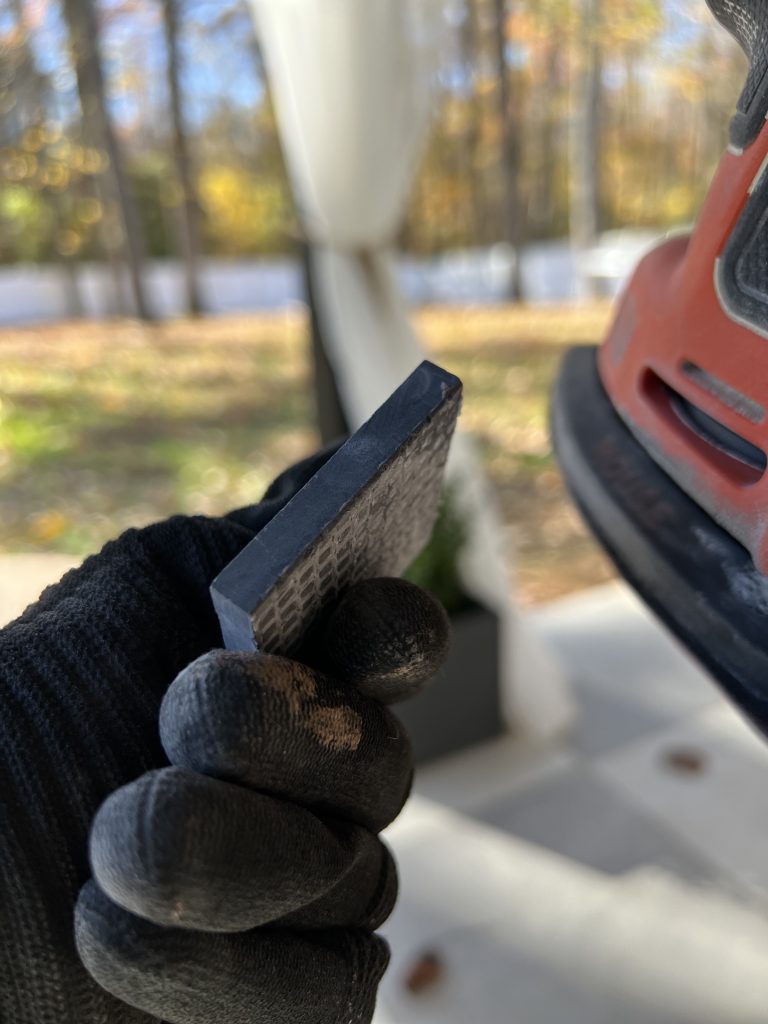
To prepare the tiles, I had to remove them individually from the mesh sheets. The chessboard itself requires 64 squares (32 of each color). And the border needed 24 pieces (12 of each) with 4 squares for the corners. After removing them from the mesh, I used my mouse sander to smooth the edges of each tile.
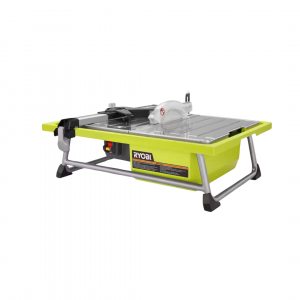
I then used my wet tile saw to cut down the border pieces, which ended up being about 7/16 in wide. I cut 18 of each black and white tiles. After they were done being cut down to width, I took two of those (one of each color) and cut those down into four squares to fit in the corners of the border.

Stain
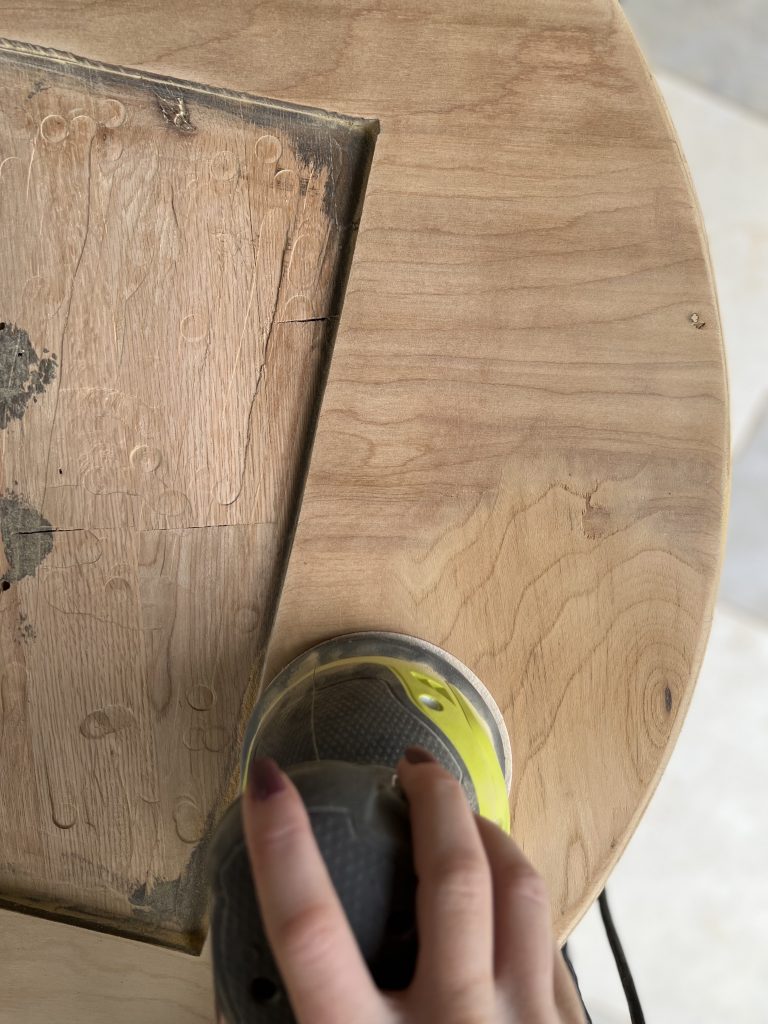
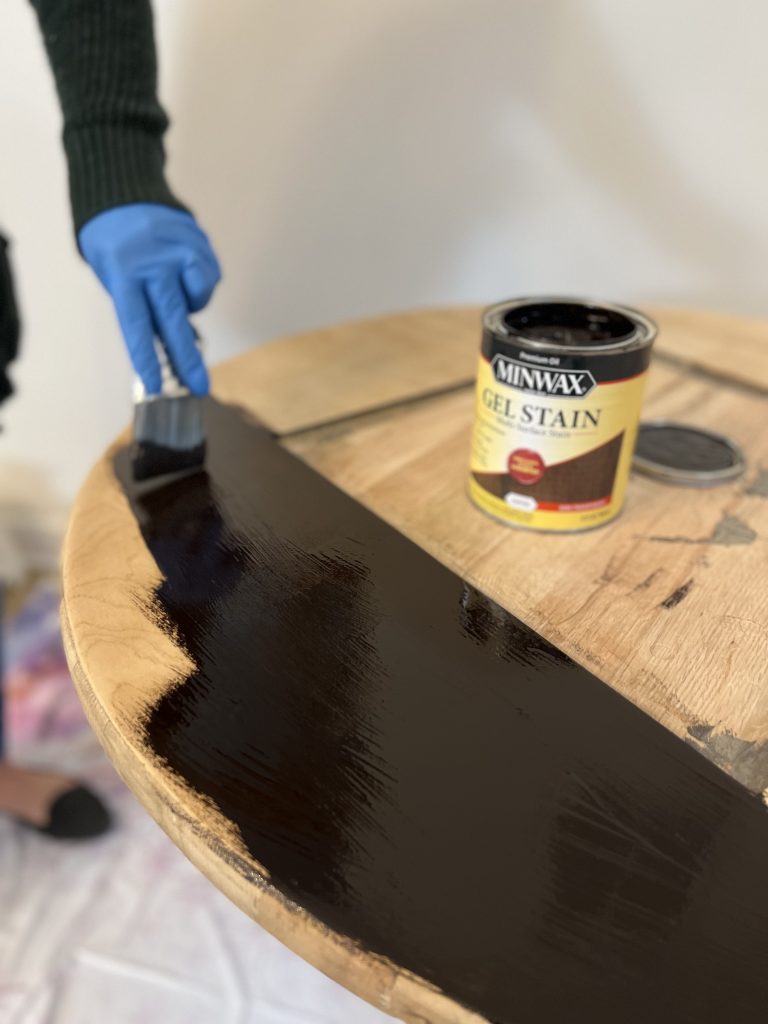
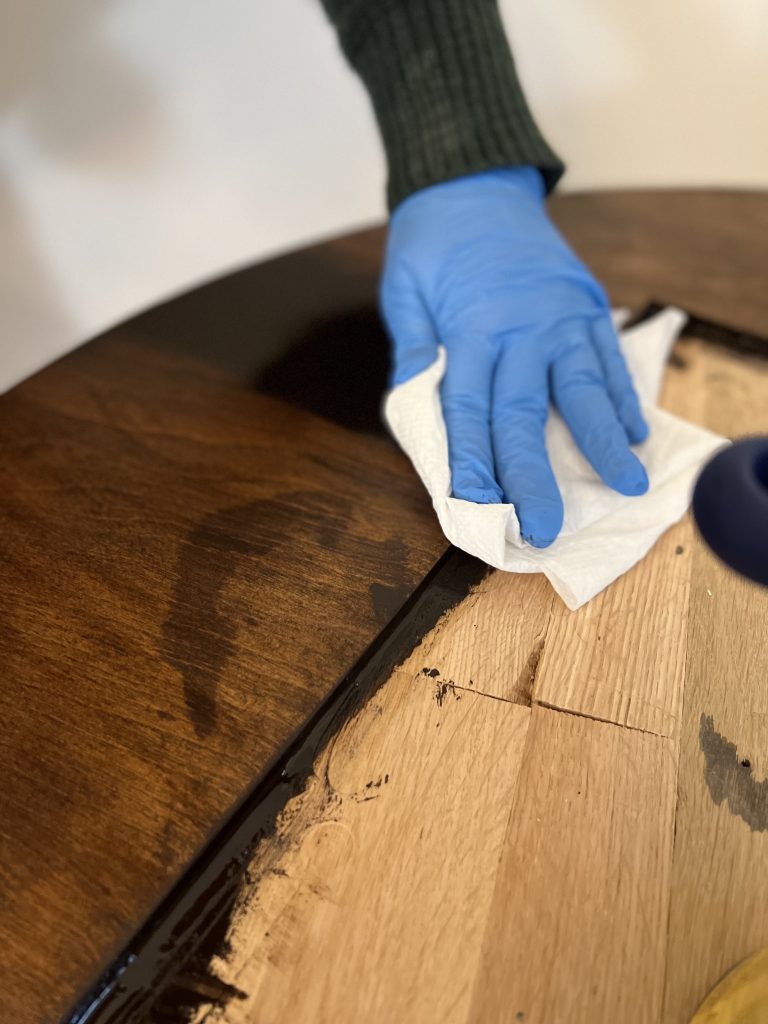
Next, I began sanding down the table top to prepare for stain. During this process I found that the wood was not sanding very evenly. It was still very blotchy, which meant that there was probably a sealer applied previously that had settled down into the grain of the wood. After sanding very heavily, I saw that I was sanding through a veneer. To fix this, I looked to find out what was underneath the top layer of veneer. I saw that it was also wood, so I decided to sand all the way through the veneer. I used 80 grit with my orbital sander. Once I was done, I was left with a beautiful layer of even wood to stain!

I used Minwax Gel Stain in Coffee to stain the wood. I brush it on with a stain brush and let it sit for a few minutes, then wiped off the excess. After the stain cures completely, I will apply a clear polyurethane to it to protect it.
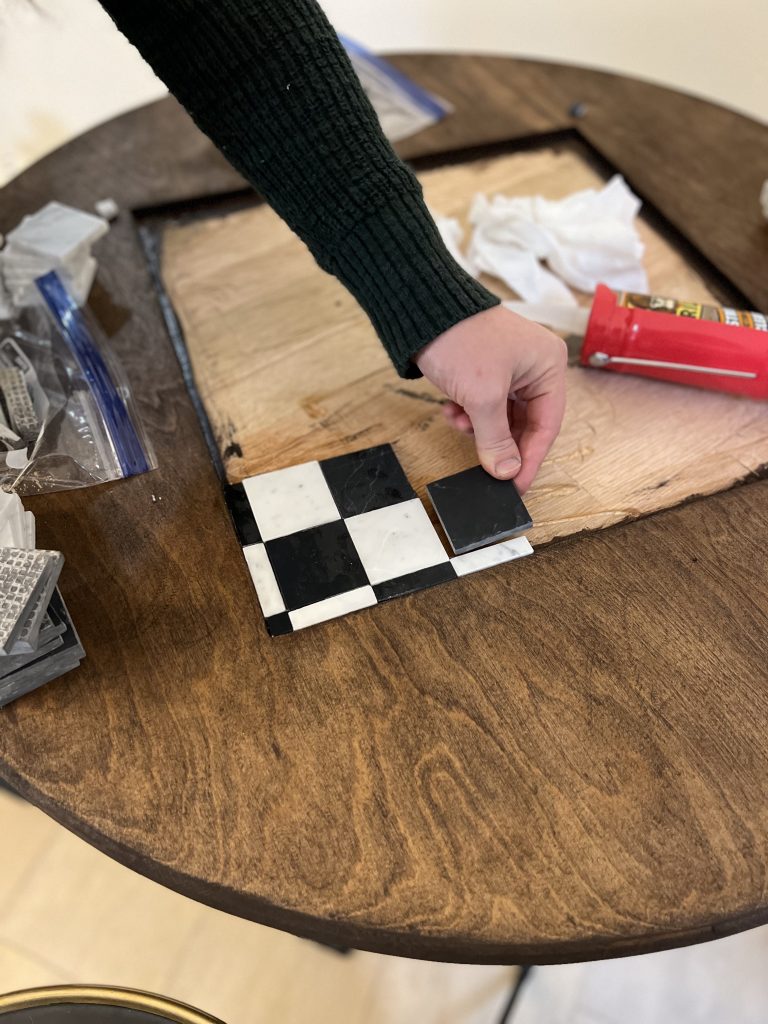
Installing the Checkerboard
I then got ready to install the checkerboard! Using some clear construction adhesive, I began placing each tile one by one. It does not take much glue! In fact, too much glue can create quite a mess. I made sure that the tiles were even and flush with each other before the glue dried completely.

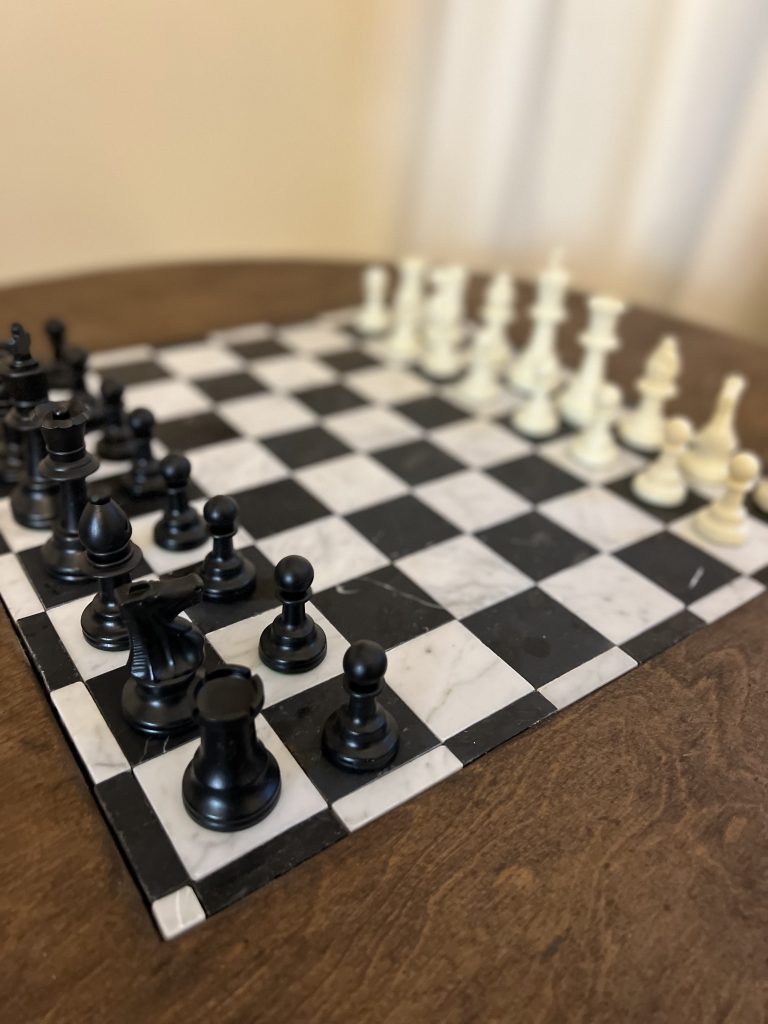
A DIY CHESS TABLE!
This DIY chess table turned out so beautifully! And the coolest part is that Tiffany and her husband, David, love to play chess already. They were thrilled to have this special little table in their home. And now…I WANT ONE TOO!

-Cass
Here’s everything I used for my DIY Chess Table:

[…] and mounted it to the fireplace. I also created this large scale “faux vintage” art (tutorial here) to place here along with a small abstract piece that I created using leftover […]
Damn. This is cool! My father and I love playing chess during our free time. I like your design; very functional. It adds a timeless vibe to the interior while providing a perfect spot for playing chess. Can I use it as a coffee table if we’re not playing? I guess my round table is a little bigger than what you used. Should I adjust the tile size? Or should I stick to 2-inch tiles?