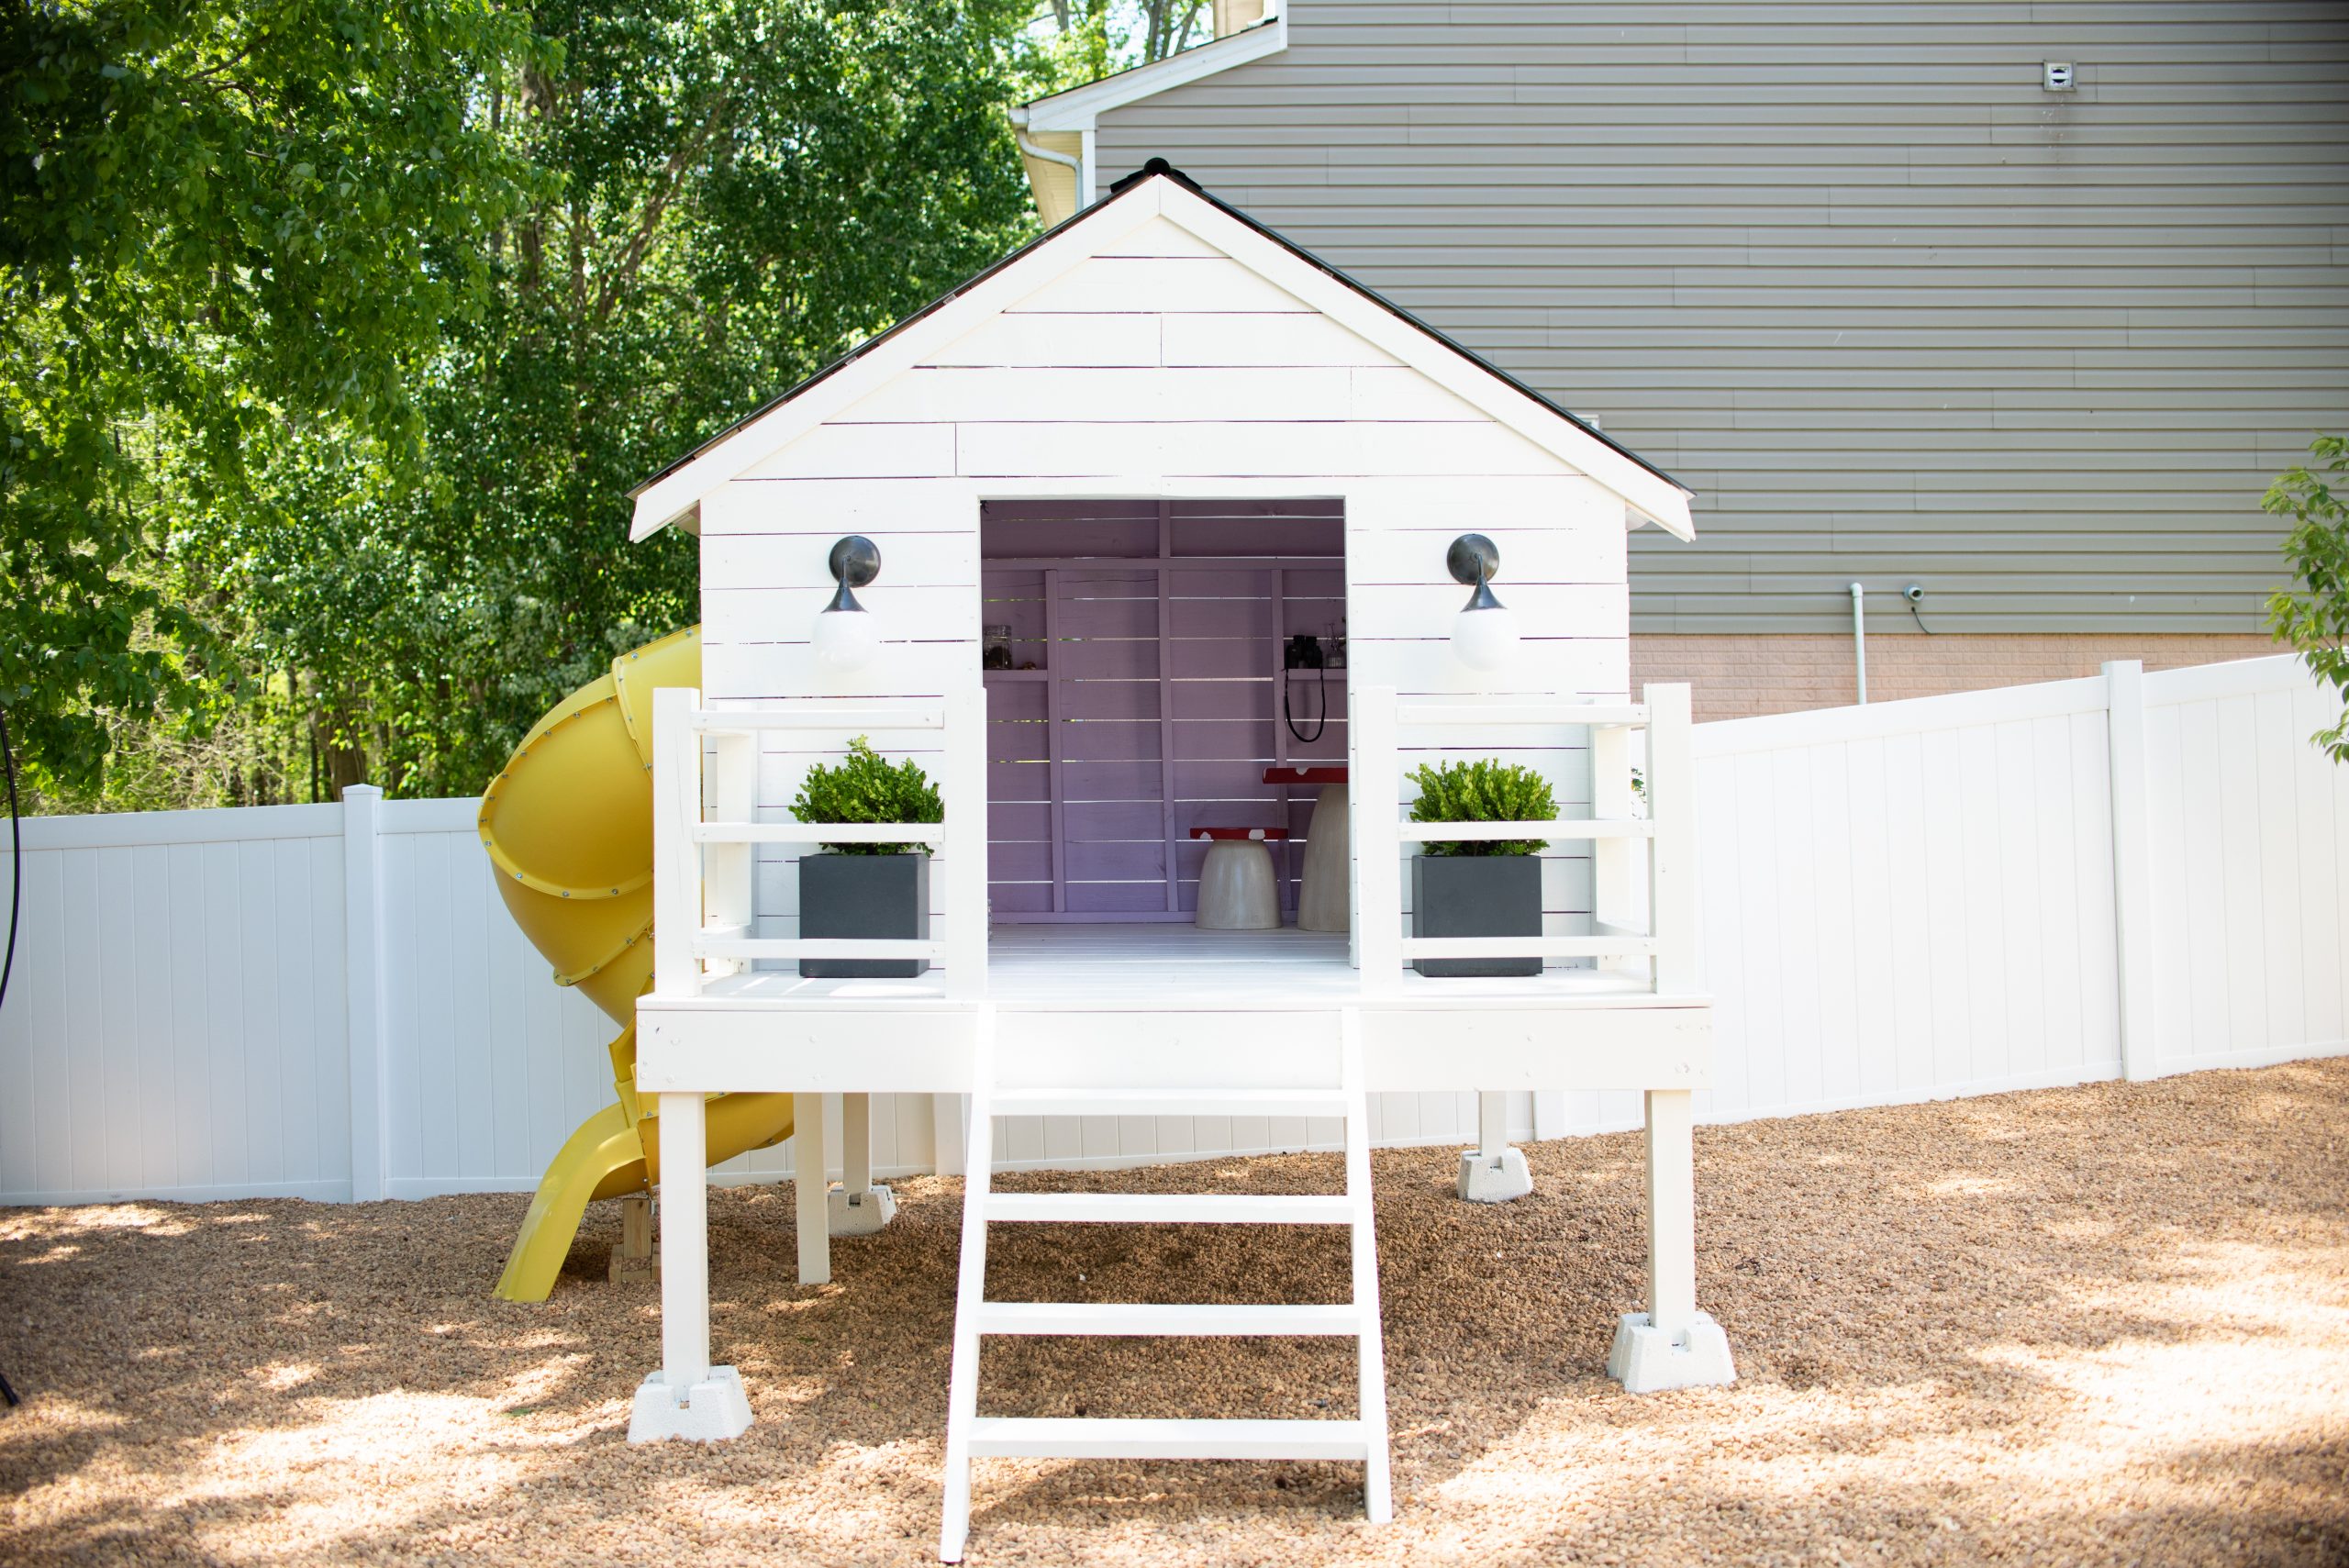
The Playhouse Build

I decided to build a super magical little playhouse for my girls! I’m so happy with how it turned out. I did make some mistakes in the process, but I made sure to outline those so that you don’t have to make them too. I have also included some sketches and measurements from mine at the bottom of this post. Please be sure to read all the way through if you are wanting to attempt this yourself!
MATERIALS
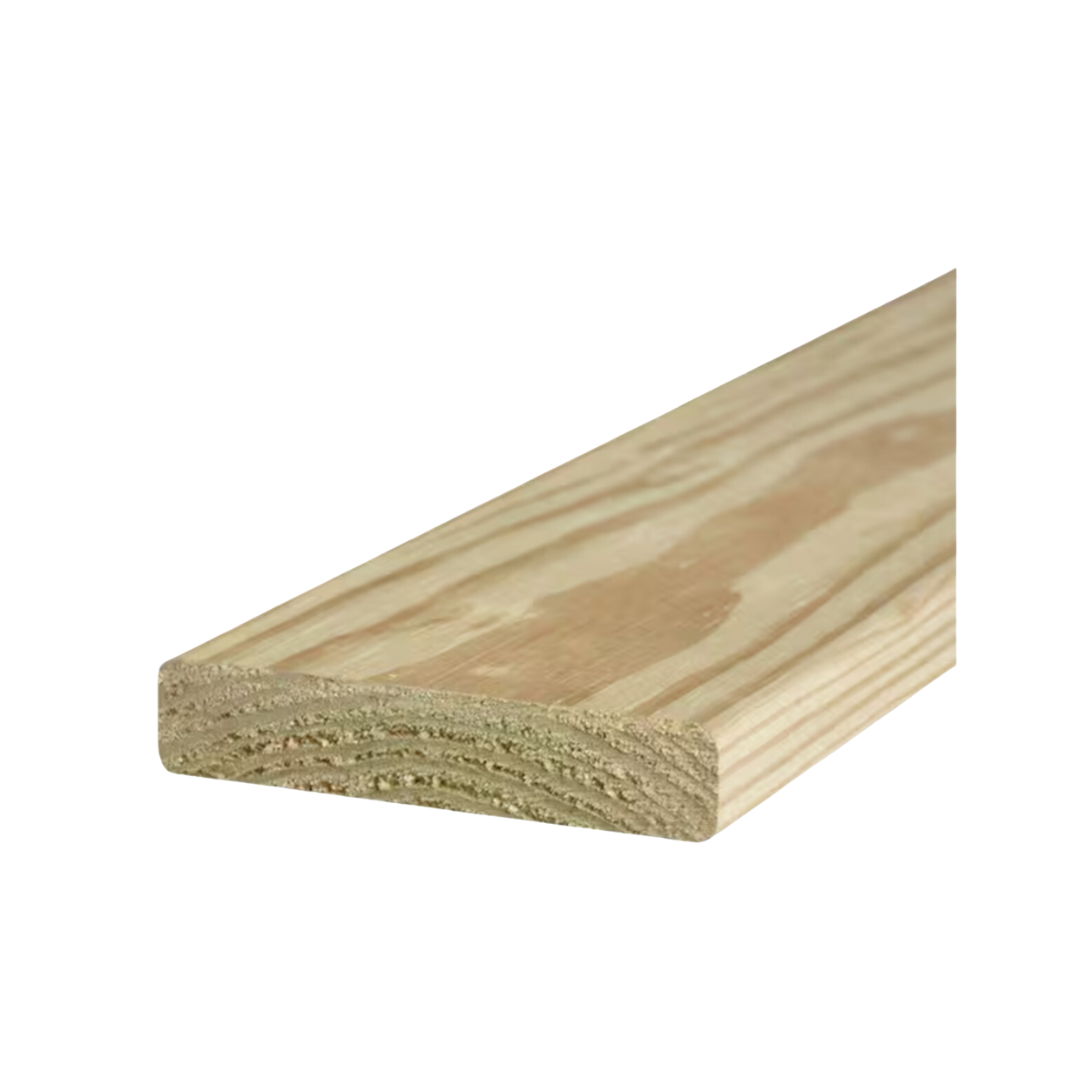
*All lumber should be pressure treated*
Base
2x8x10 – 7
2x8x8 – 2
4x4x8 – 2
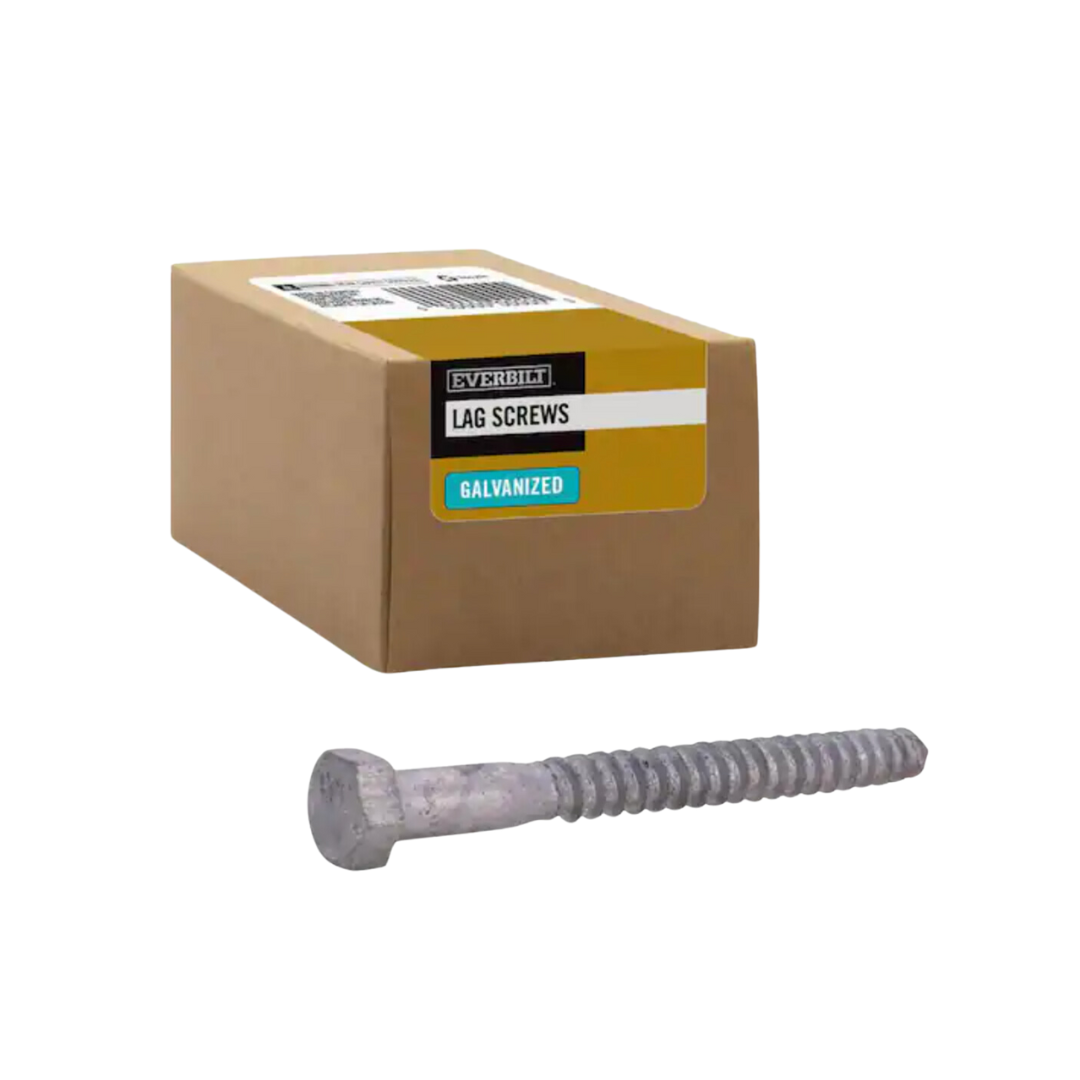
Lag bolts – 44
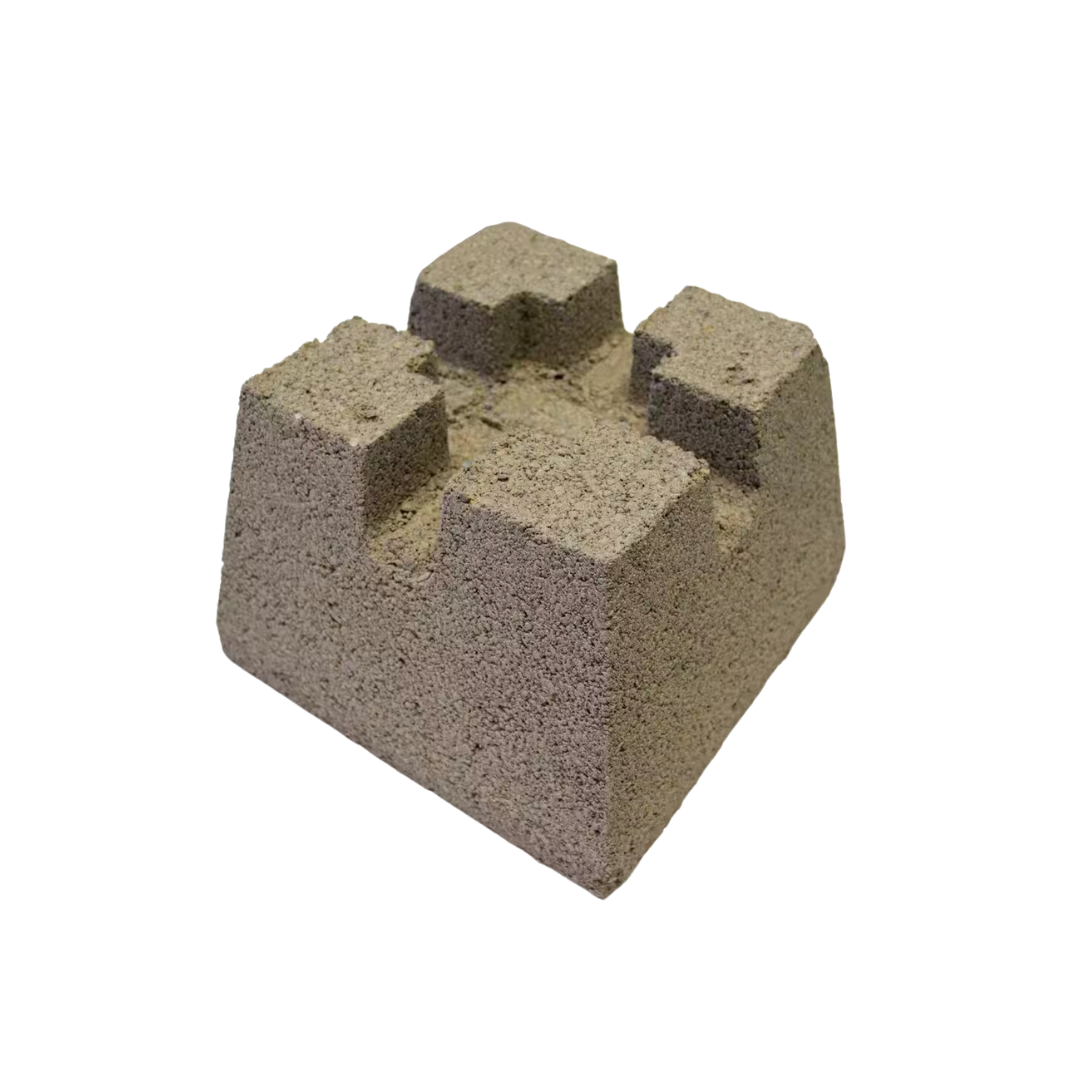
Deck Blocks – 4
Deck Boards – 22
Wall/Roof Frame
2x4x8 – 18
2x4x6 – 6
Slide
2x4x6 – 2
4x4x6 -1
Siding
Pine Fence Pickets (siding) – 60 *I may be off on this number because I bought them in small batches and lost count 😆
Pine fence Pickets (ceiling) – 44
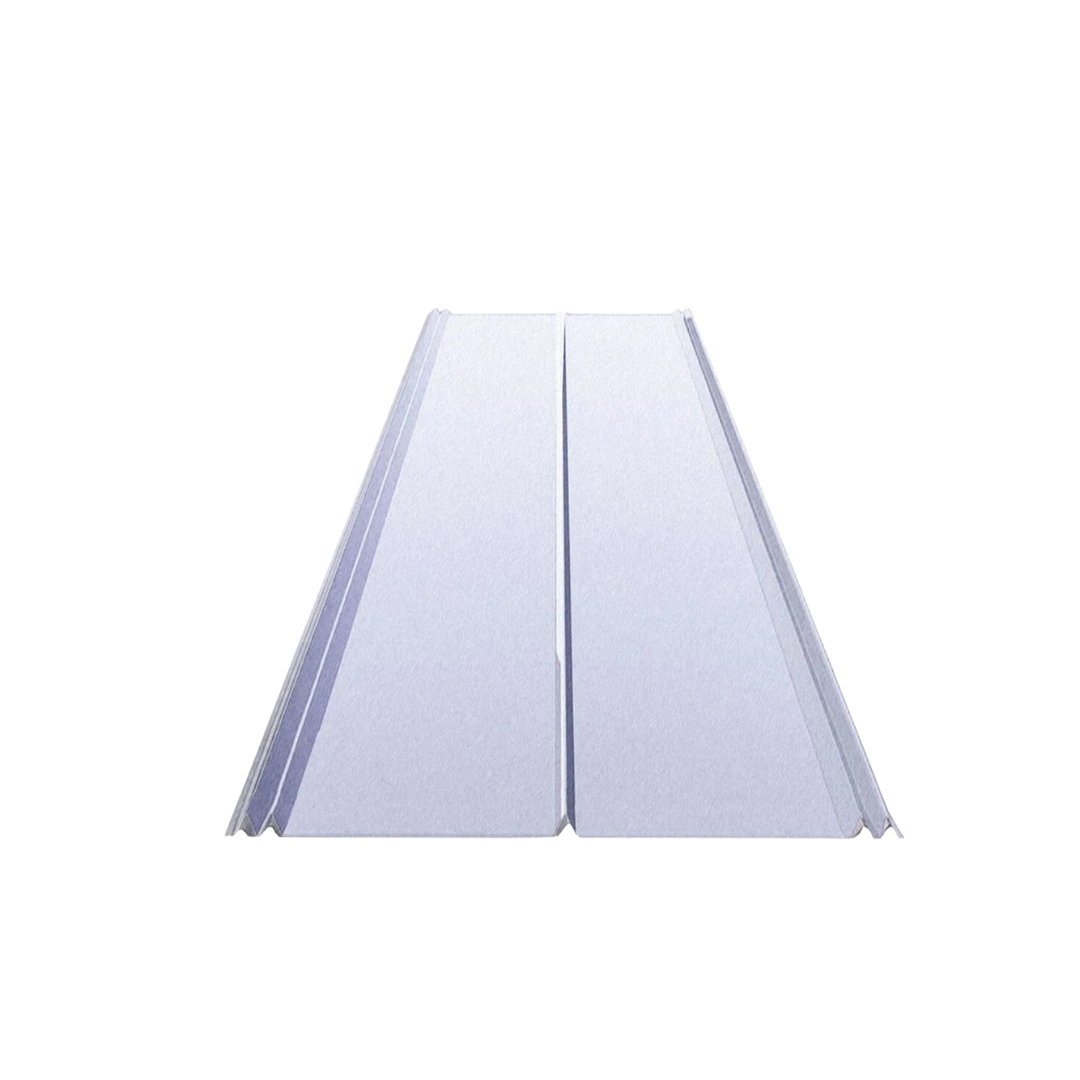
Roof
5V Metal Roof Panels 12 ft – 4
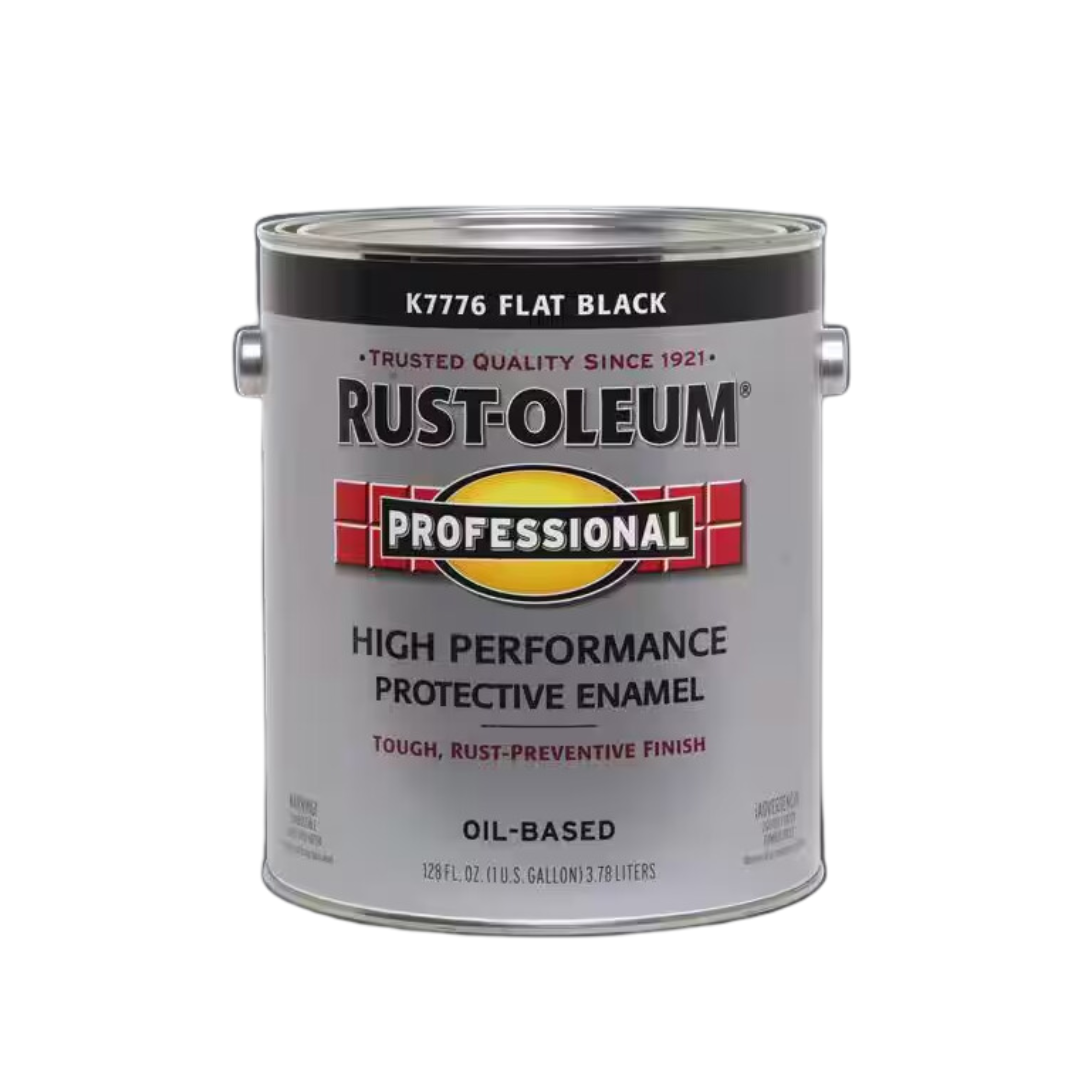
Rustoleum High Performance Enamel

Porch/Steps
2x6x8 – 3
4x4x8 – 2
2x4x6 – 4
Paint
Behr Porch & Patio Paint
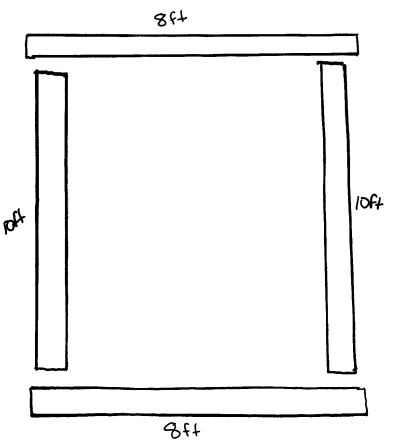
Building the Base
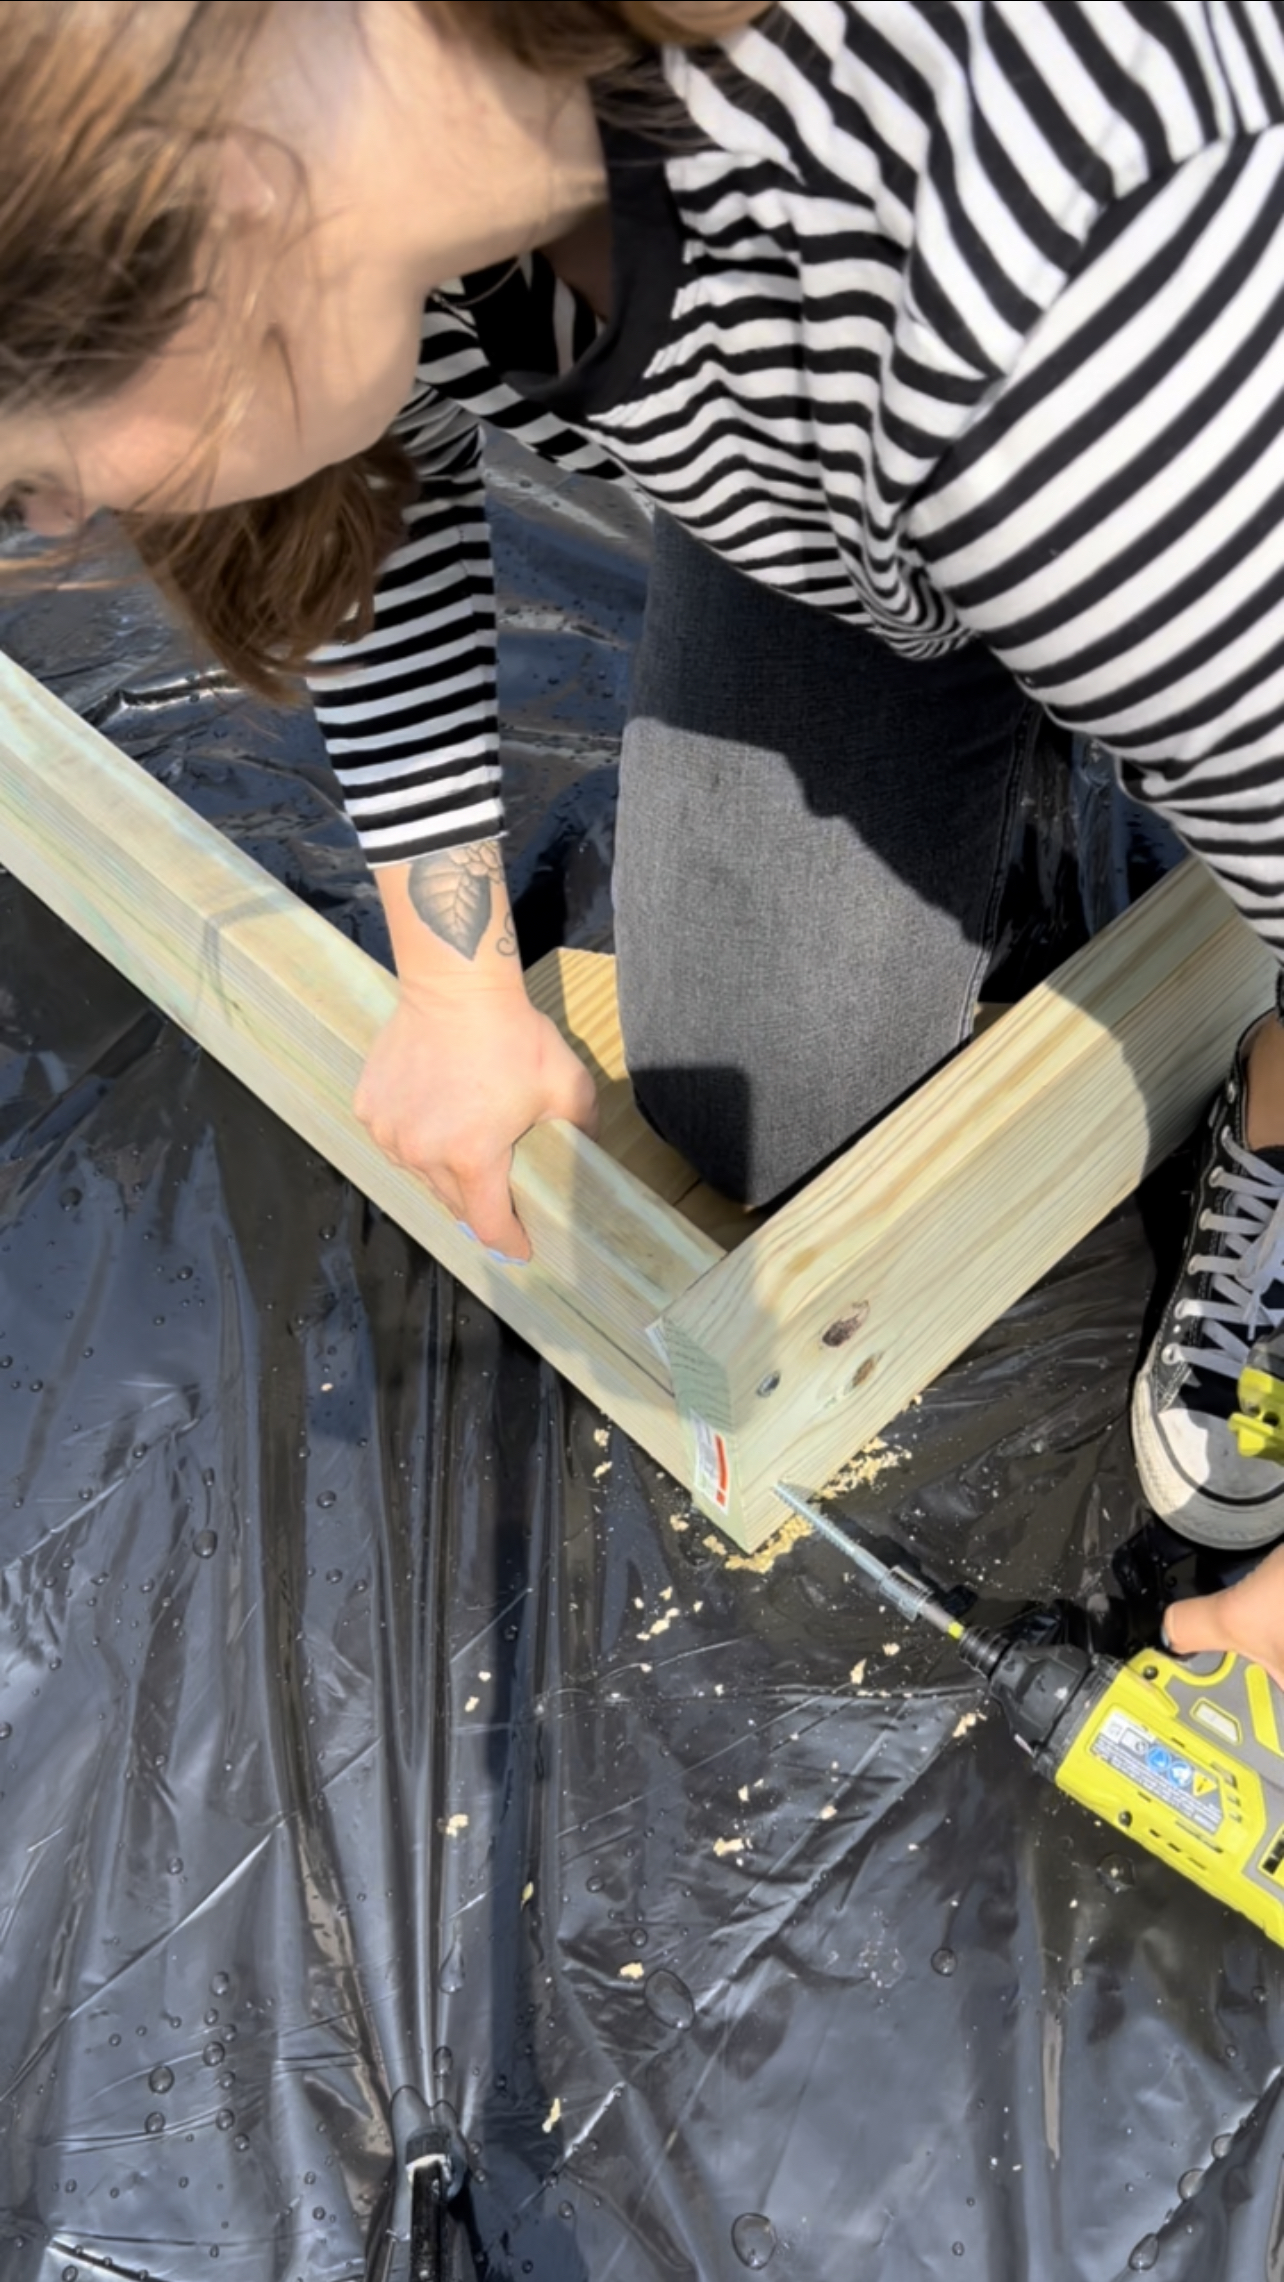
The first step is to build the base frame. Starting with two 8 ft boards and two 10 ft boards, I squared each corner and used lag bolts to secure (2 at each corner) making sure to place the 10 ft boards in between the 8 ft boards so that all of the 10 ft joists will fit perfectly. It is also very important to check the length of the boards first. Sometimes they are slightly different in length. I had to cut down at least two of my boards after realizing this!

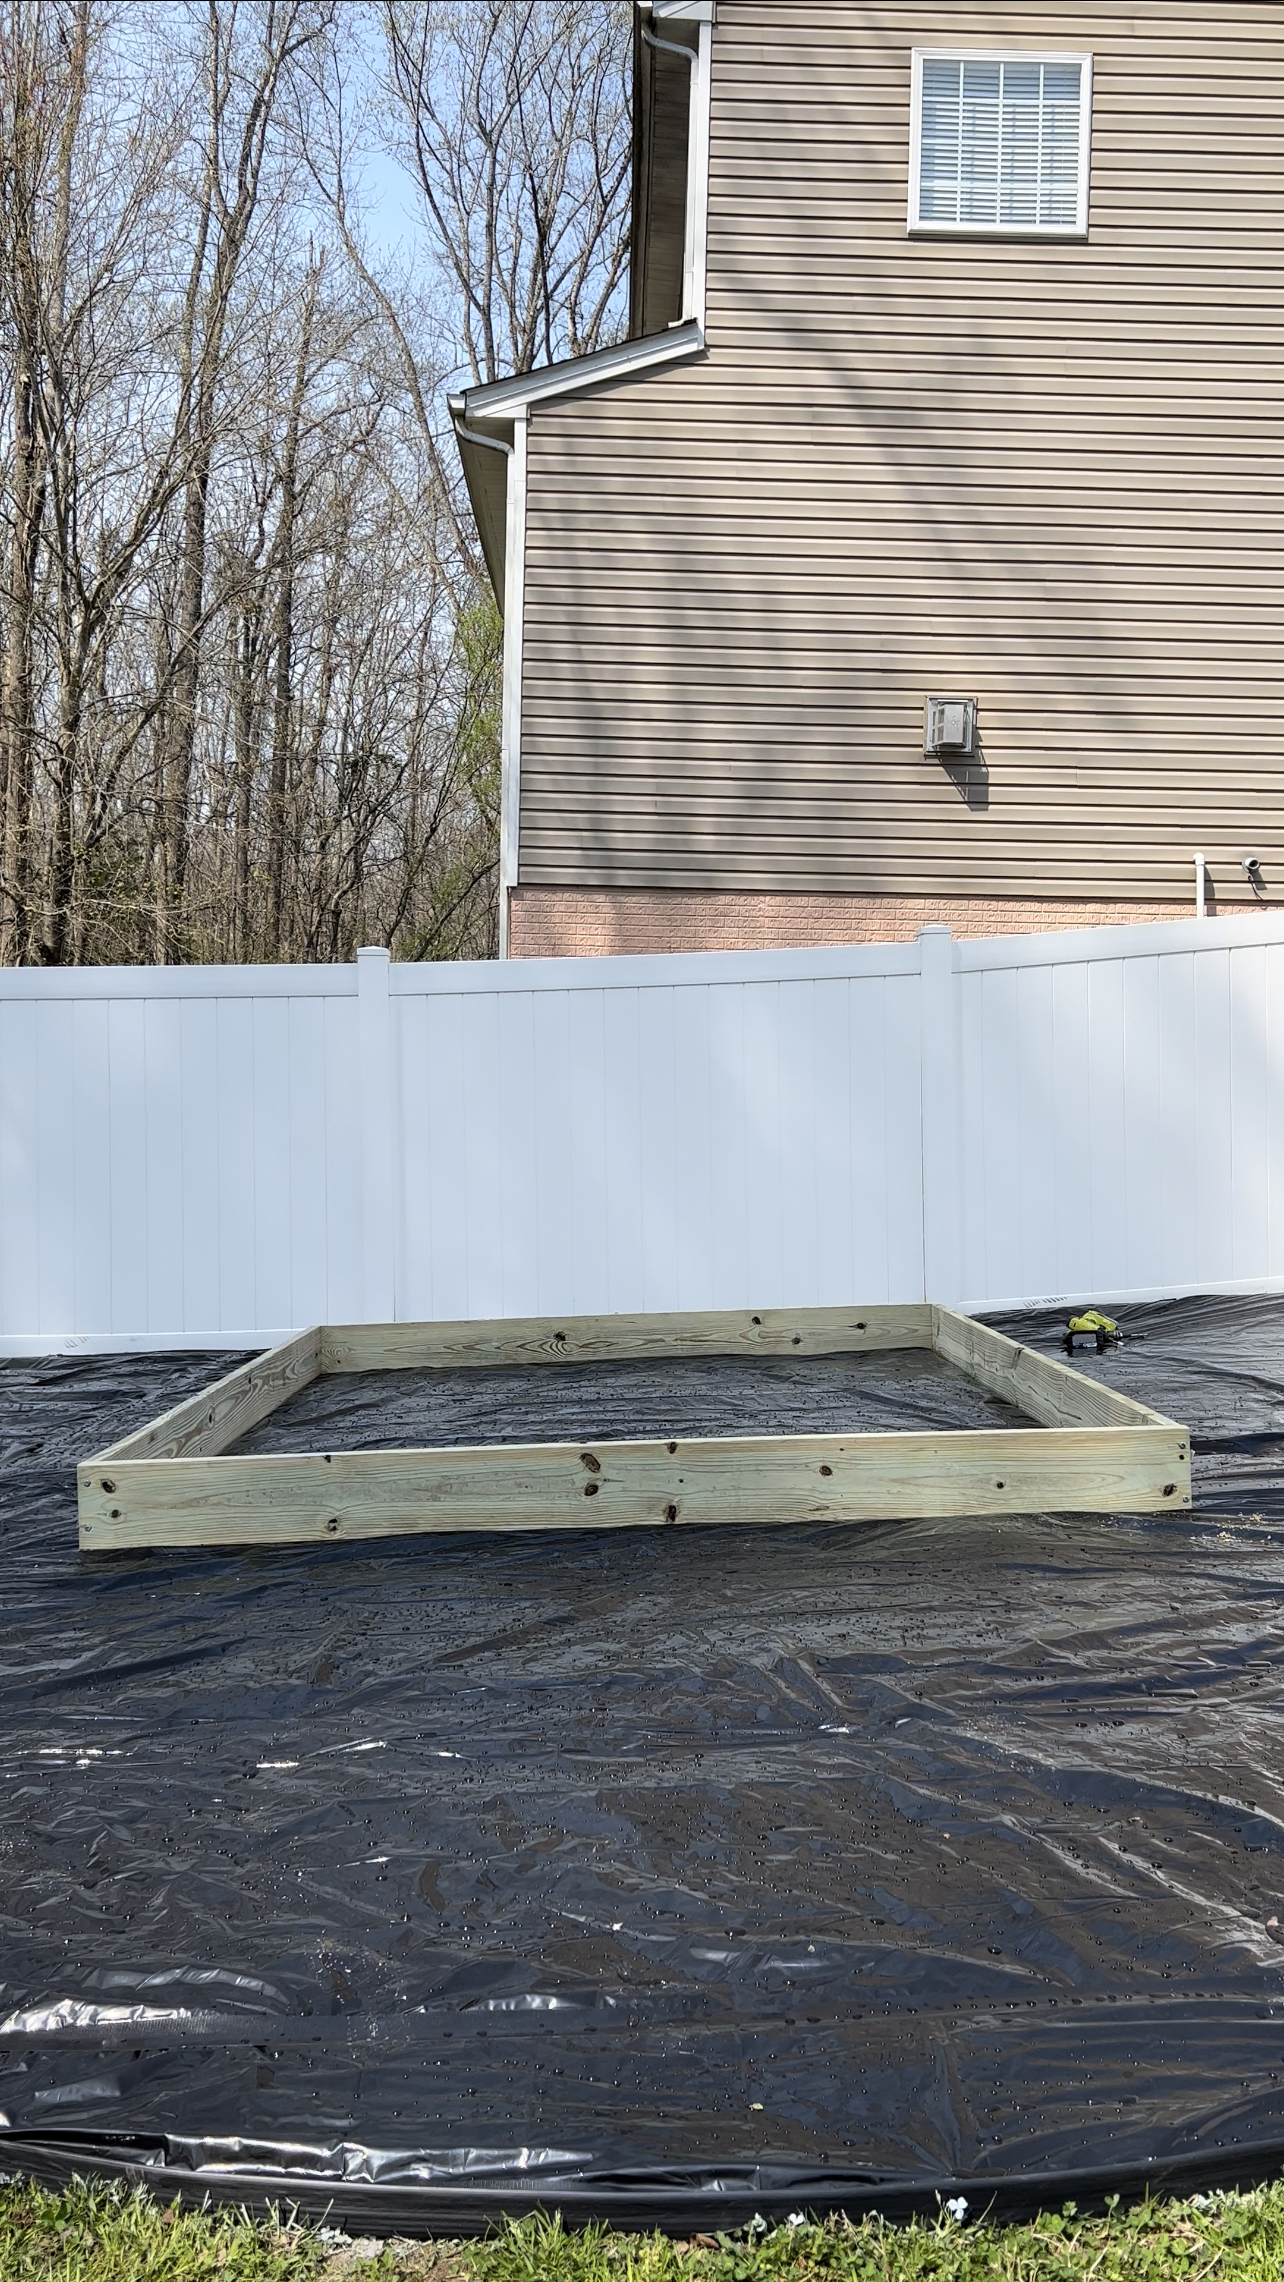
After the frame of the base was built, I began attaching the joists. HOWEVER….


*important note
*** I would highly recommend waiting for this step. Once the joists are installed, the base becomes insanely heavy and difficult to lift (even with two people). I would highly recommend adding the legs first! I mistakenly added the legs after the joists. David and I had an insanely difficult time trying to flip it (and it almost snapped a leg off in doing so). Swapping these steps will make this process a whole lot easier, I promise! DO NOT ATTEMPT TO FLIP IT!
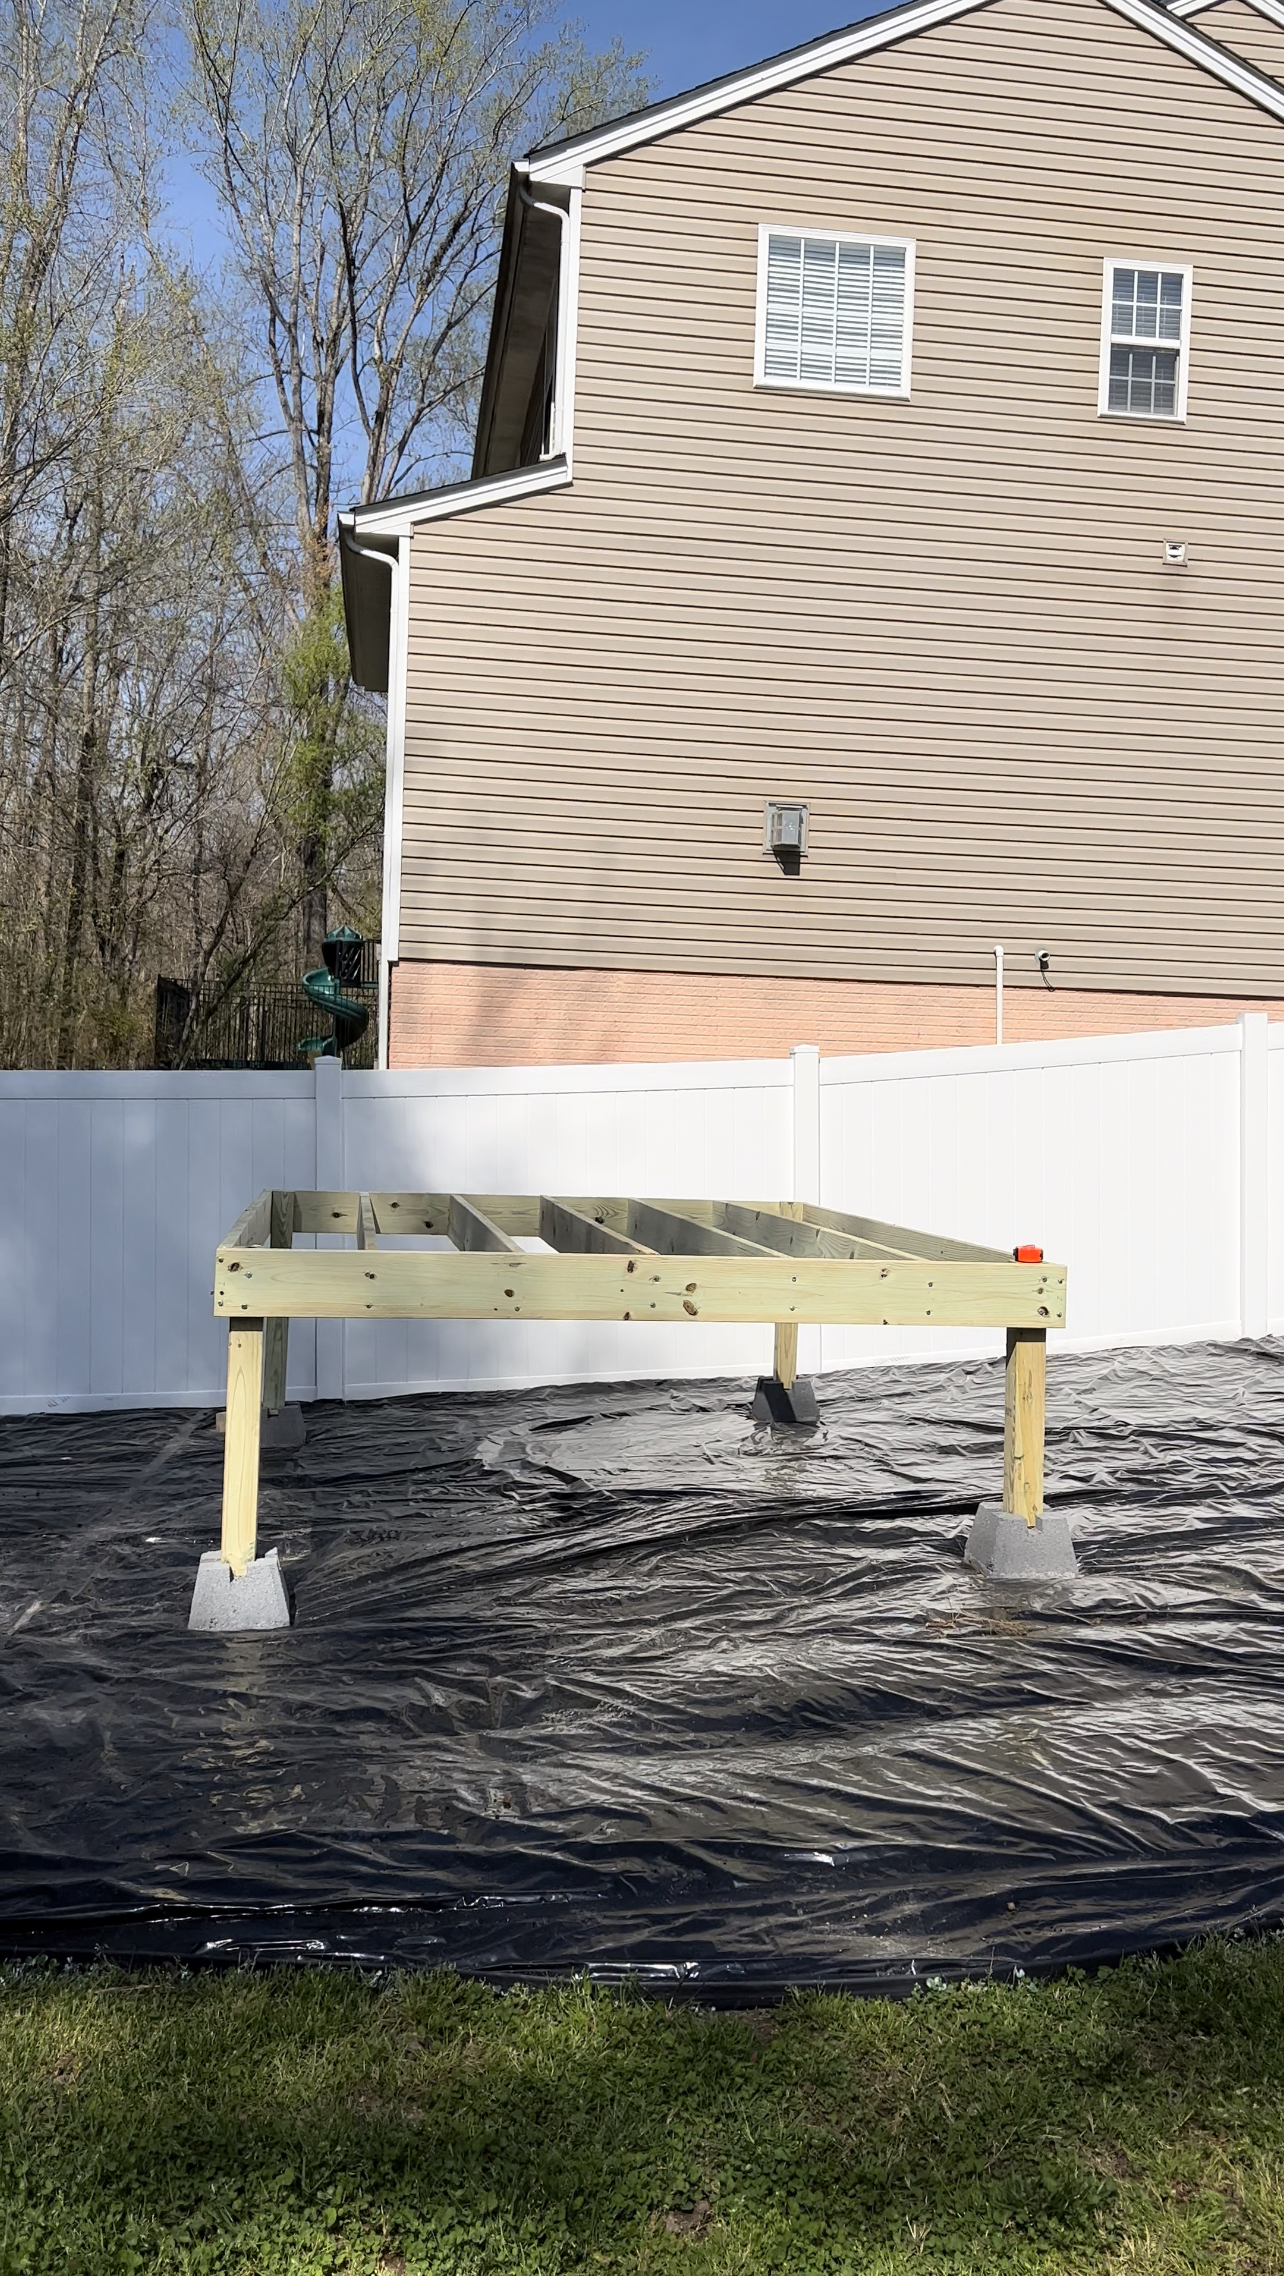
To do this, you will want to place your frame in the exact location that you want your playhouse to live and make sure the corners are square. Then you would lift up one side off the ground and prop it up or have someone else hold while adding the two posts on that side, and repeat for the opposite side. If you are using deck blocks, this would be the time to position them under the legs. I used 4 lag bolts for each post (2 on each side). Once the legs are on and your base is level and in place (with deck blocks set) you will then want to add the joists.
In my case, I had very un-level ground. To level the base, I used scrap wood pieces (under each corner) to make the entire platform level before adding the post legs. I made sure to leave the corner on the highest part of the yard resting on the ground to be my base measuring point for the leg length.
Legs
Once the entire frame was leveled out using the scrap wood pieces, I picked the length that I wanted my shortest leg to be (including the deck block). This ended up being 30.5 inches. The corner resting on the ground without scraps would get this leg, which would be 24.5 inches long, 30.5 total with the deck block. To find the measurement of the other legs, you would measure the height of the scrap wood stacks under each corner and add that to the shortest leg length to find the length of that leg. For example, the highest corner had 7.75 inches of scraps under so the leg length for that corner was 38.25 inches (24.5 + 7.75). Then repeat for the remaining two legs!


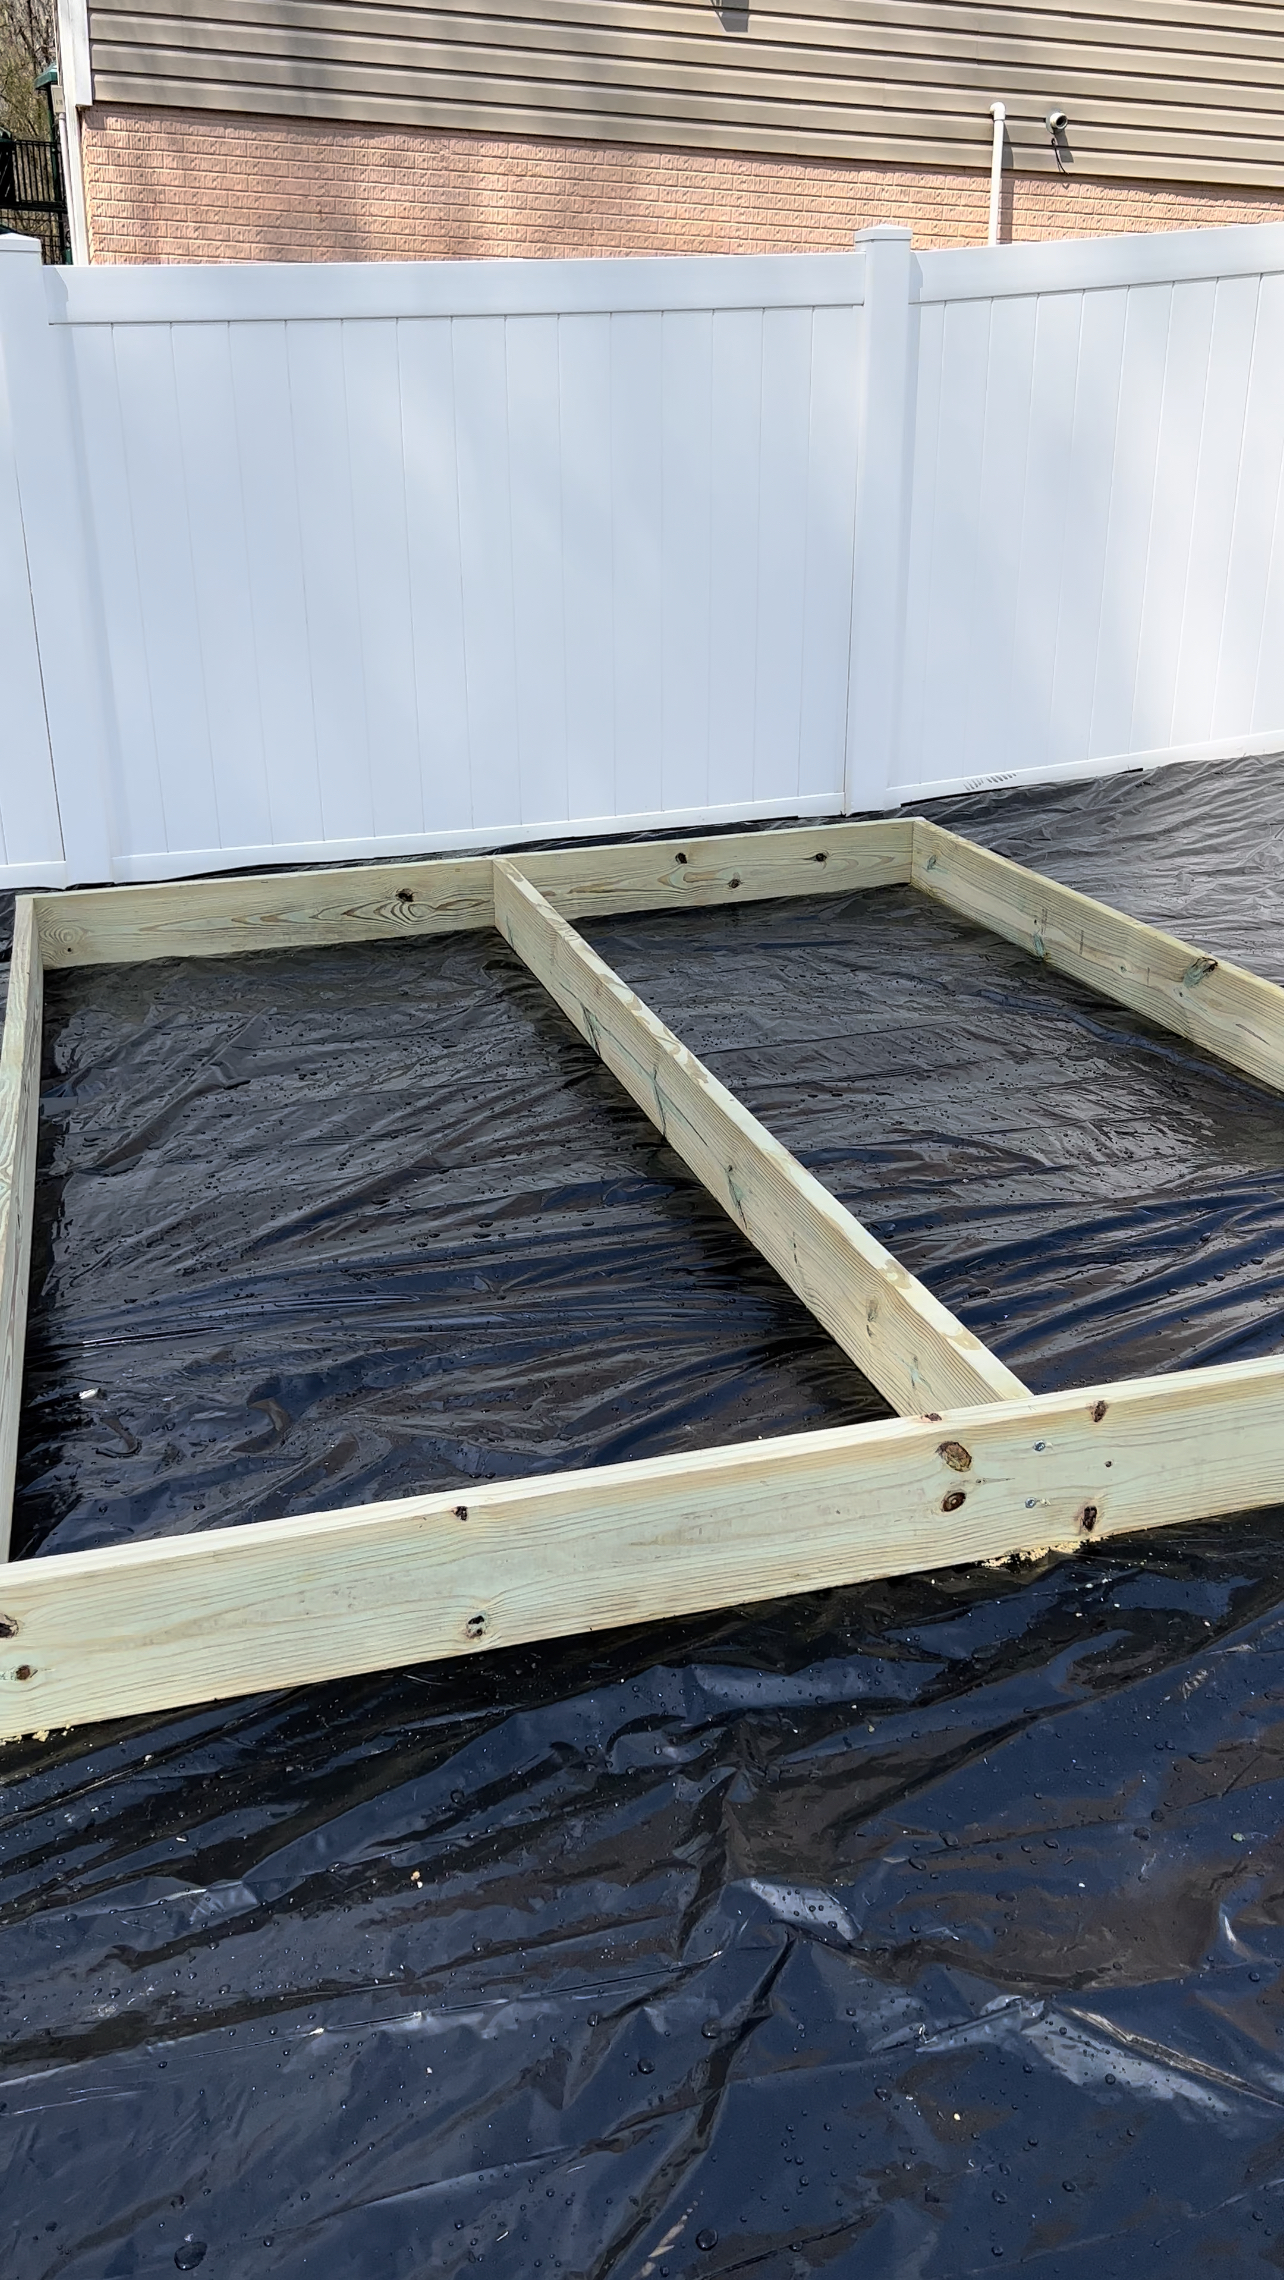
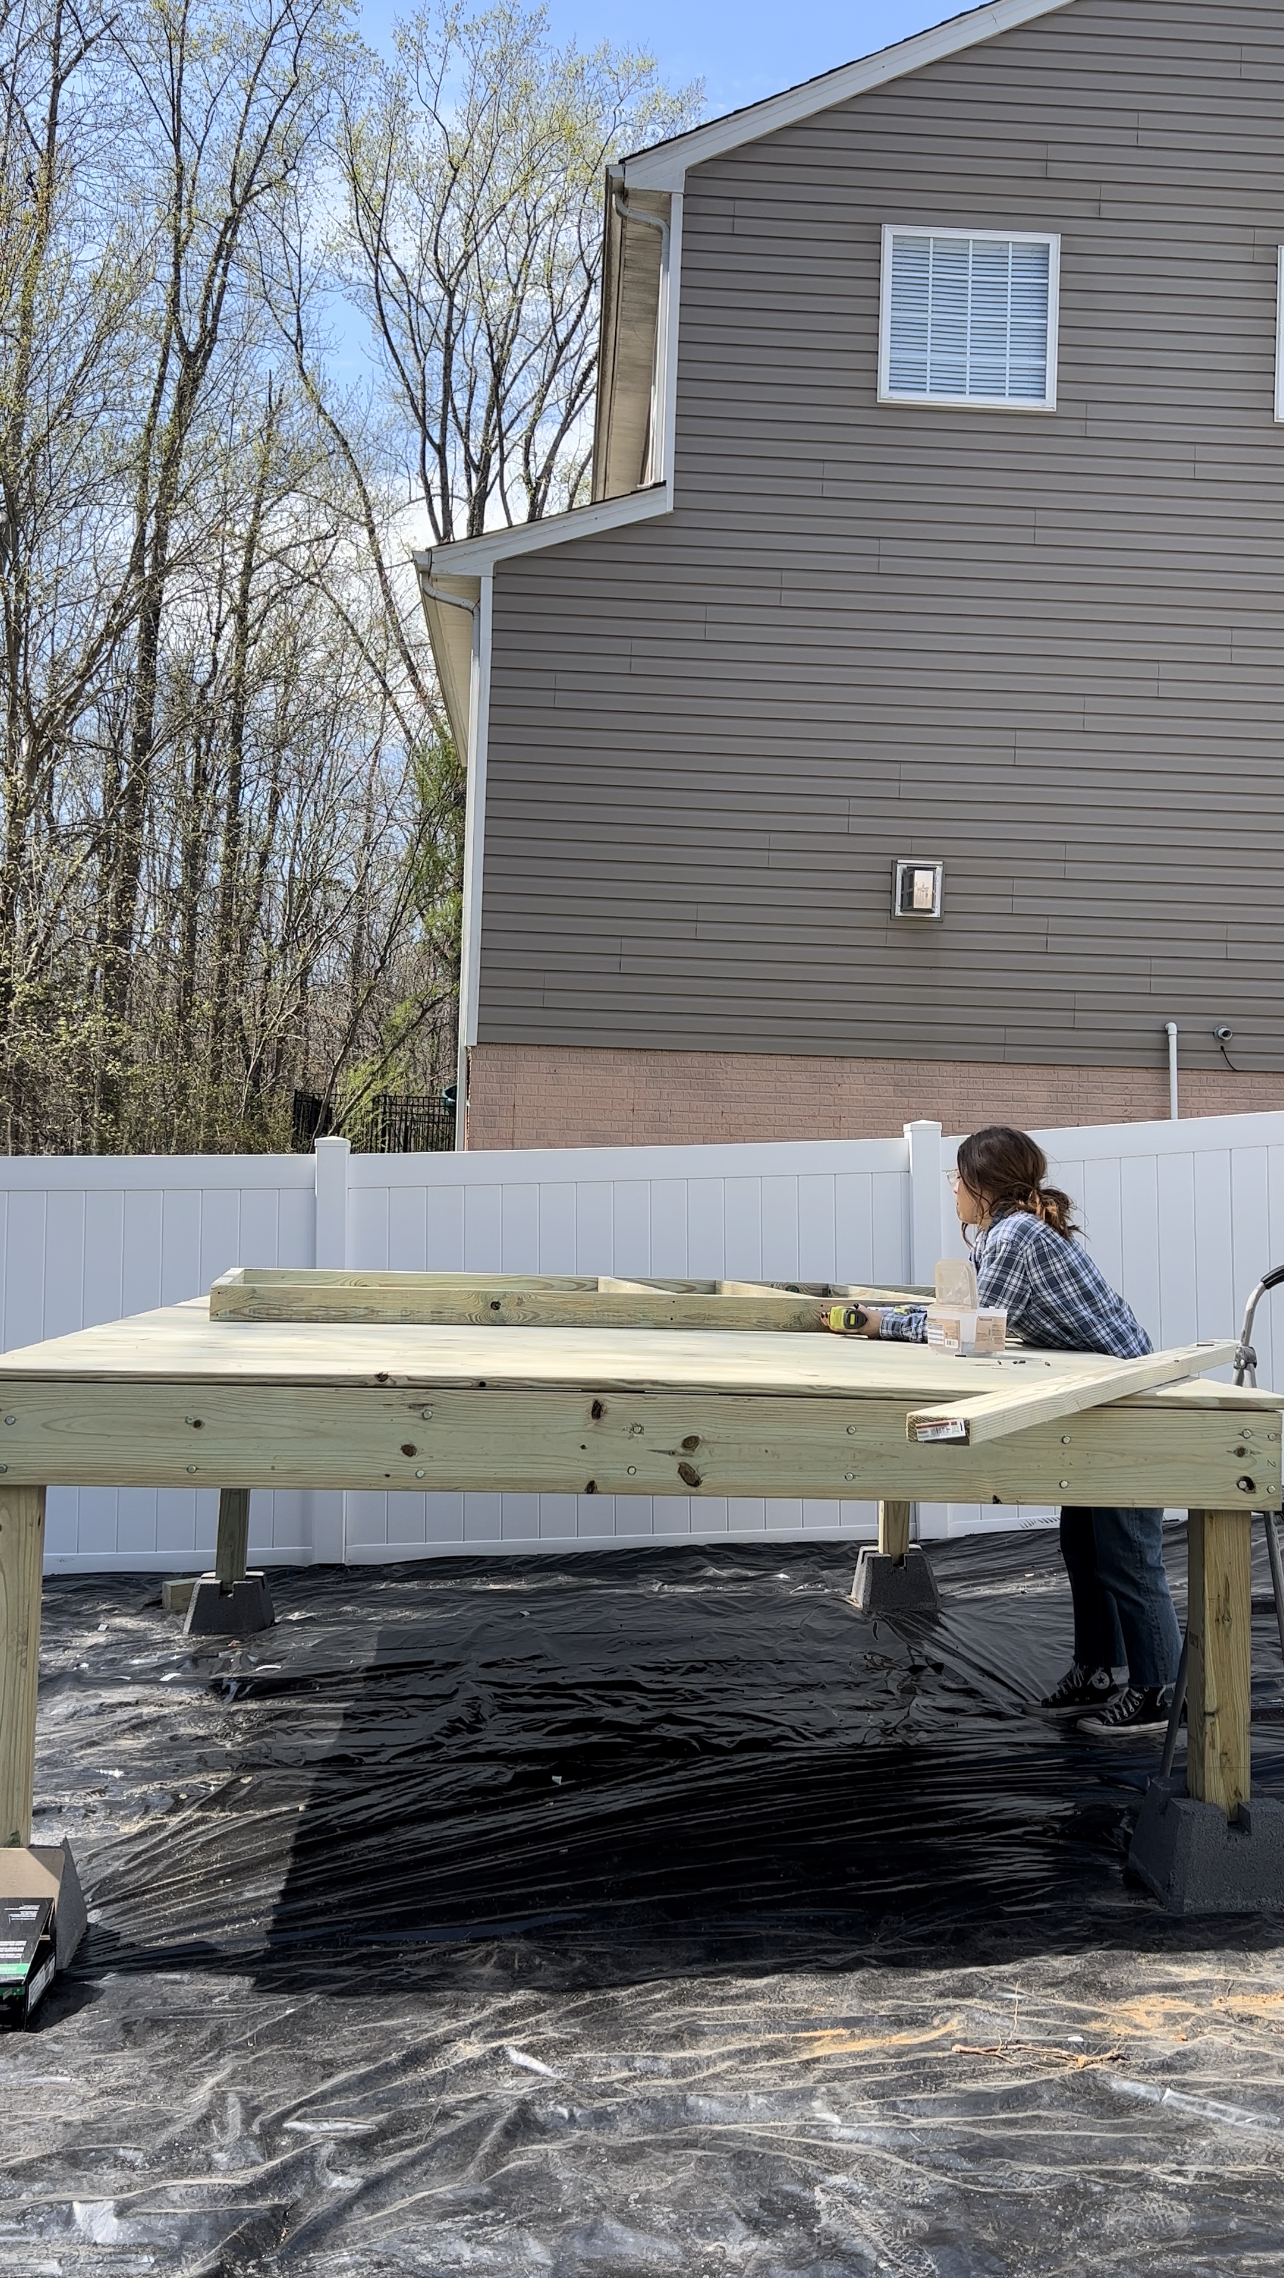
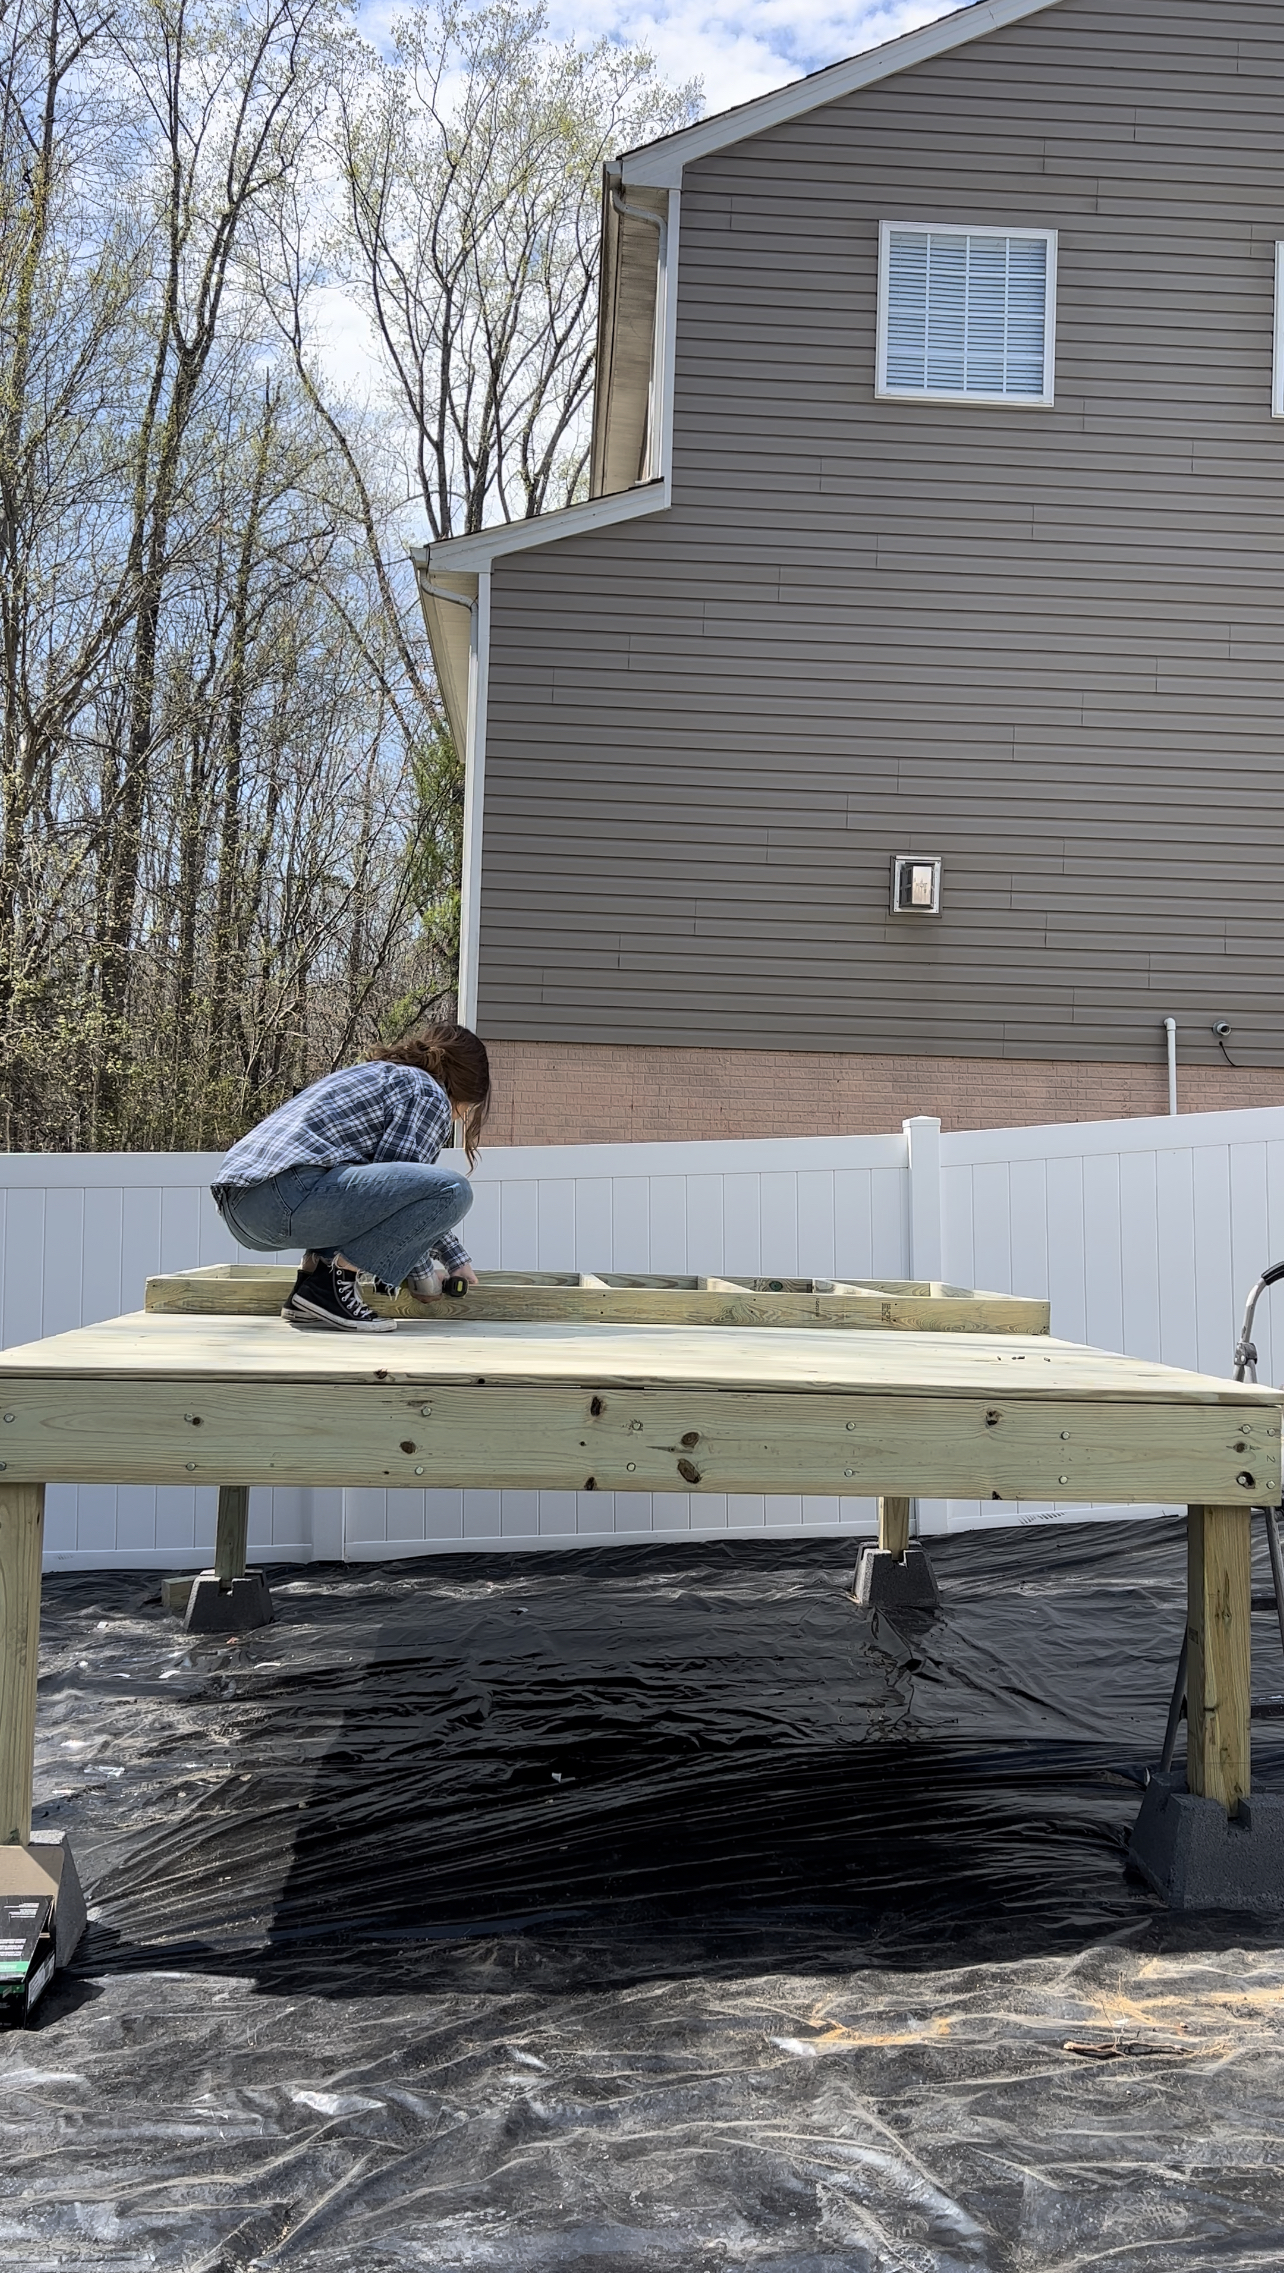
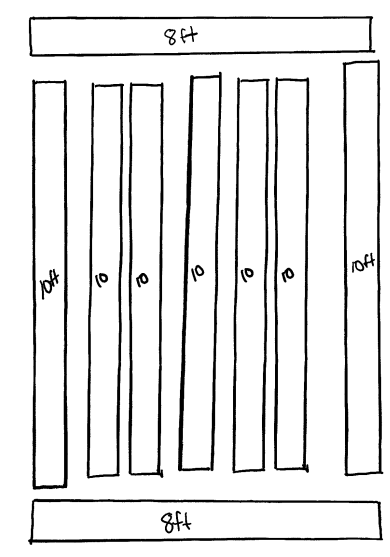
After lifting and securing each leg to the frame using lag bolts, you can now install the joists! I installed the middle first, and then two on each side using 2 lag bolts on each end of each board.
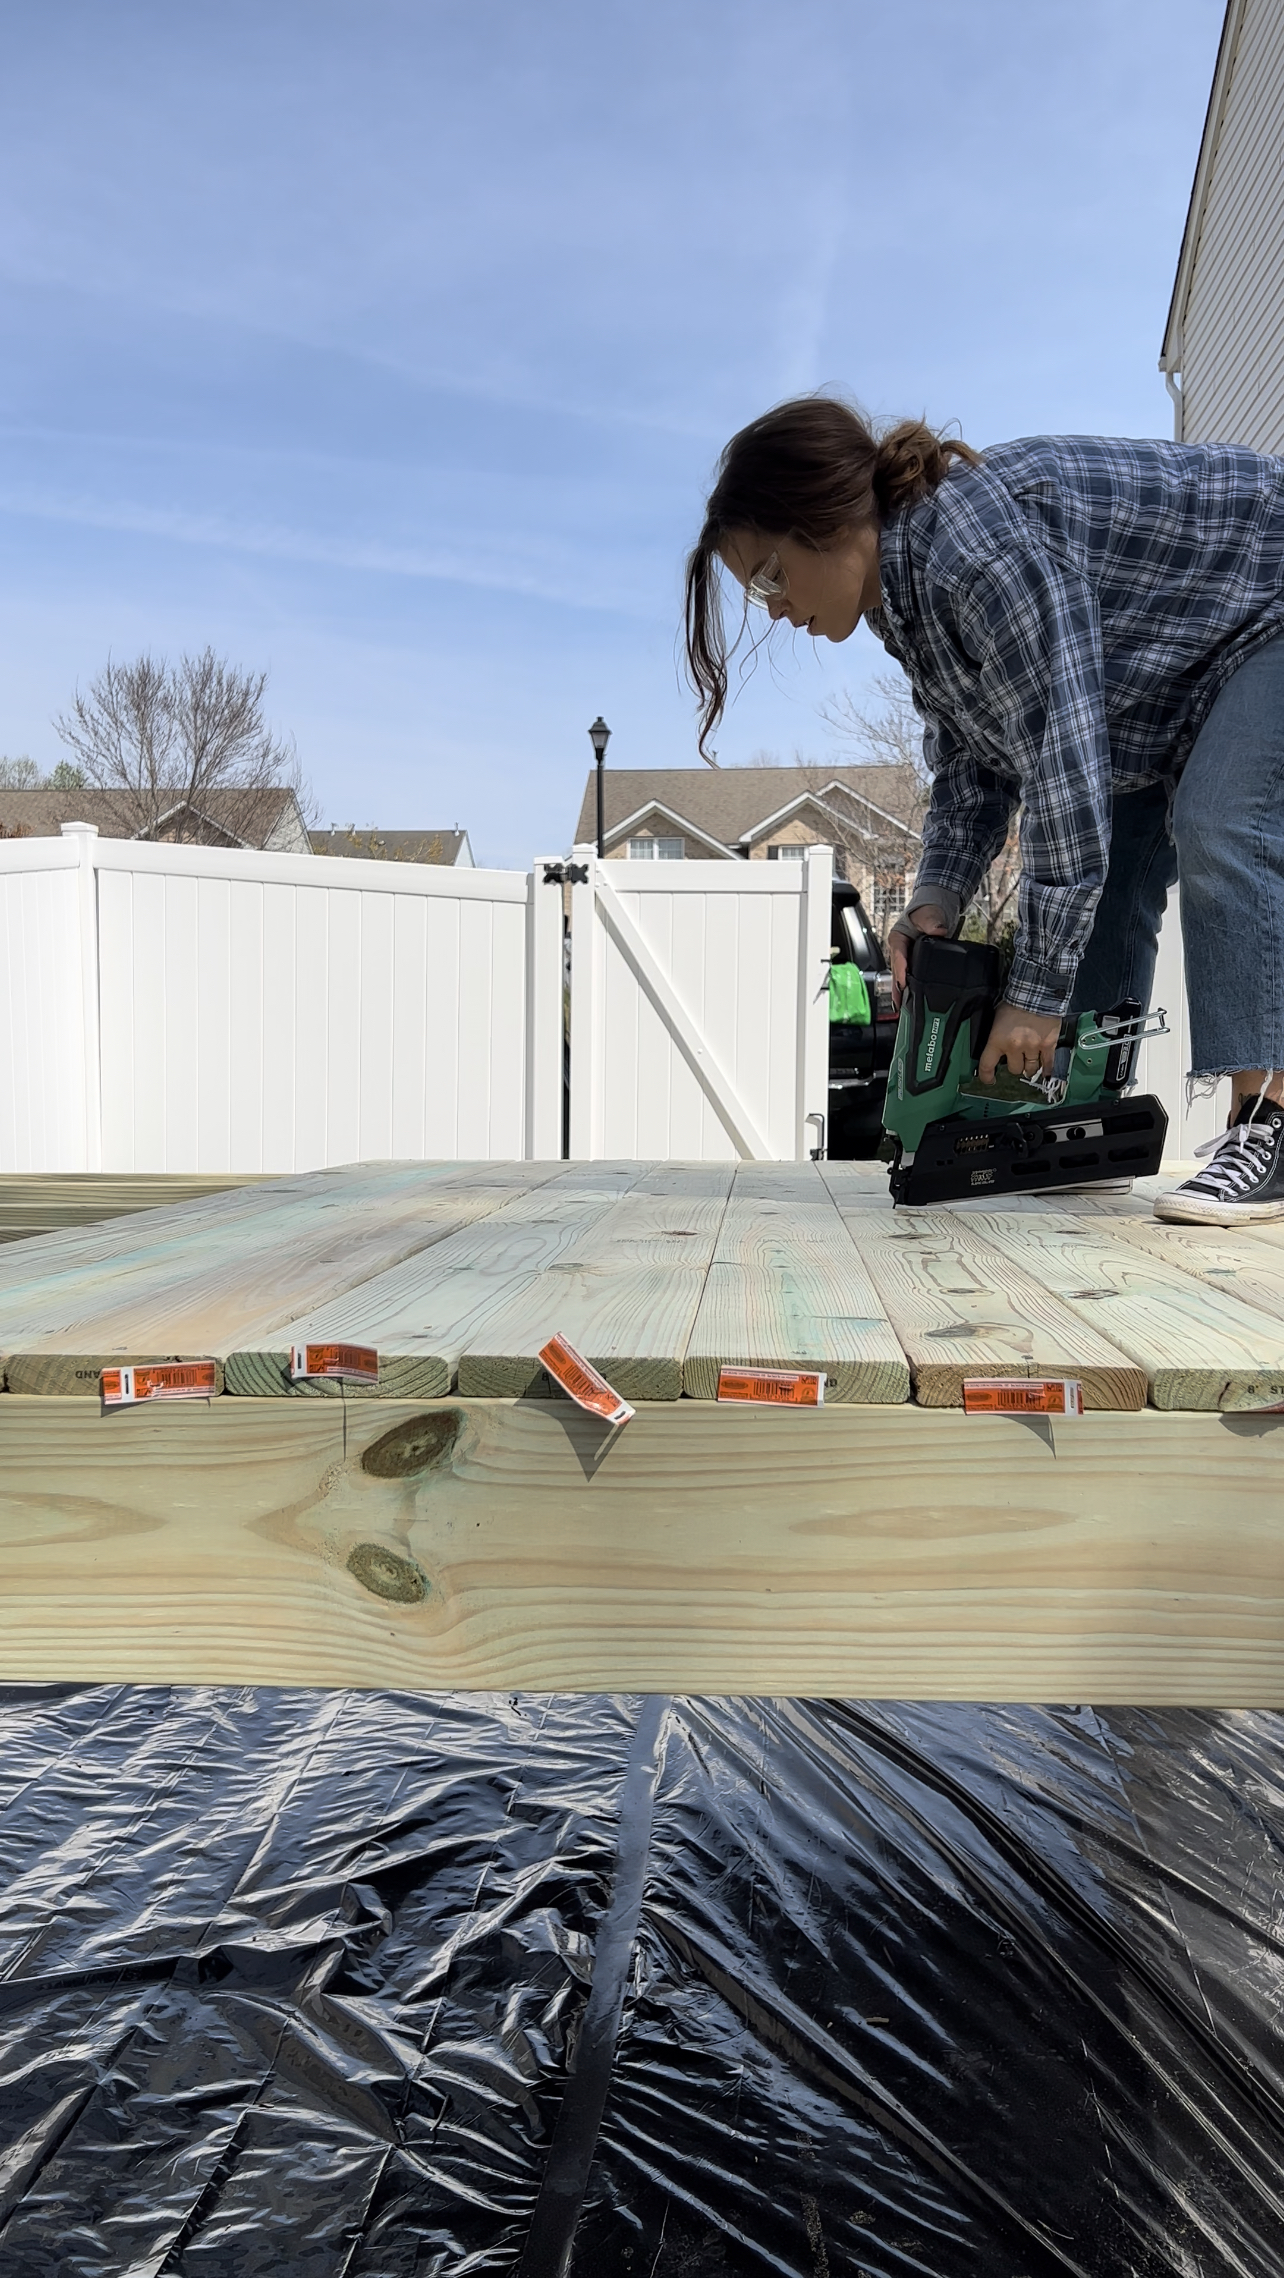
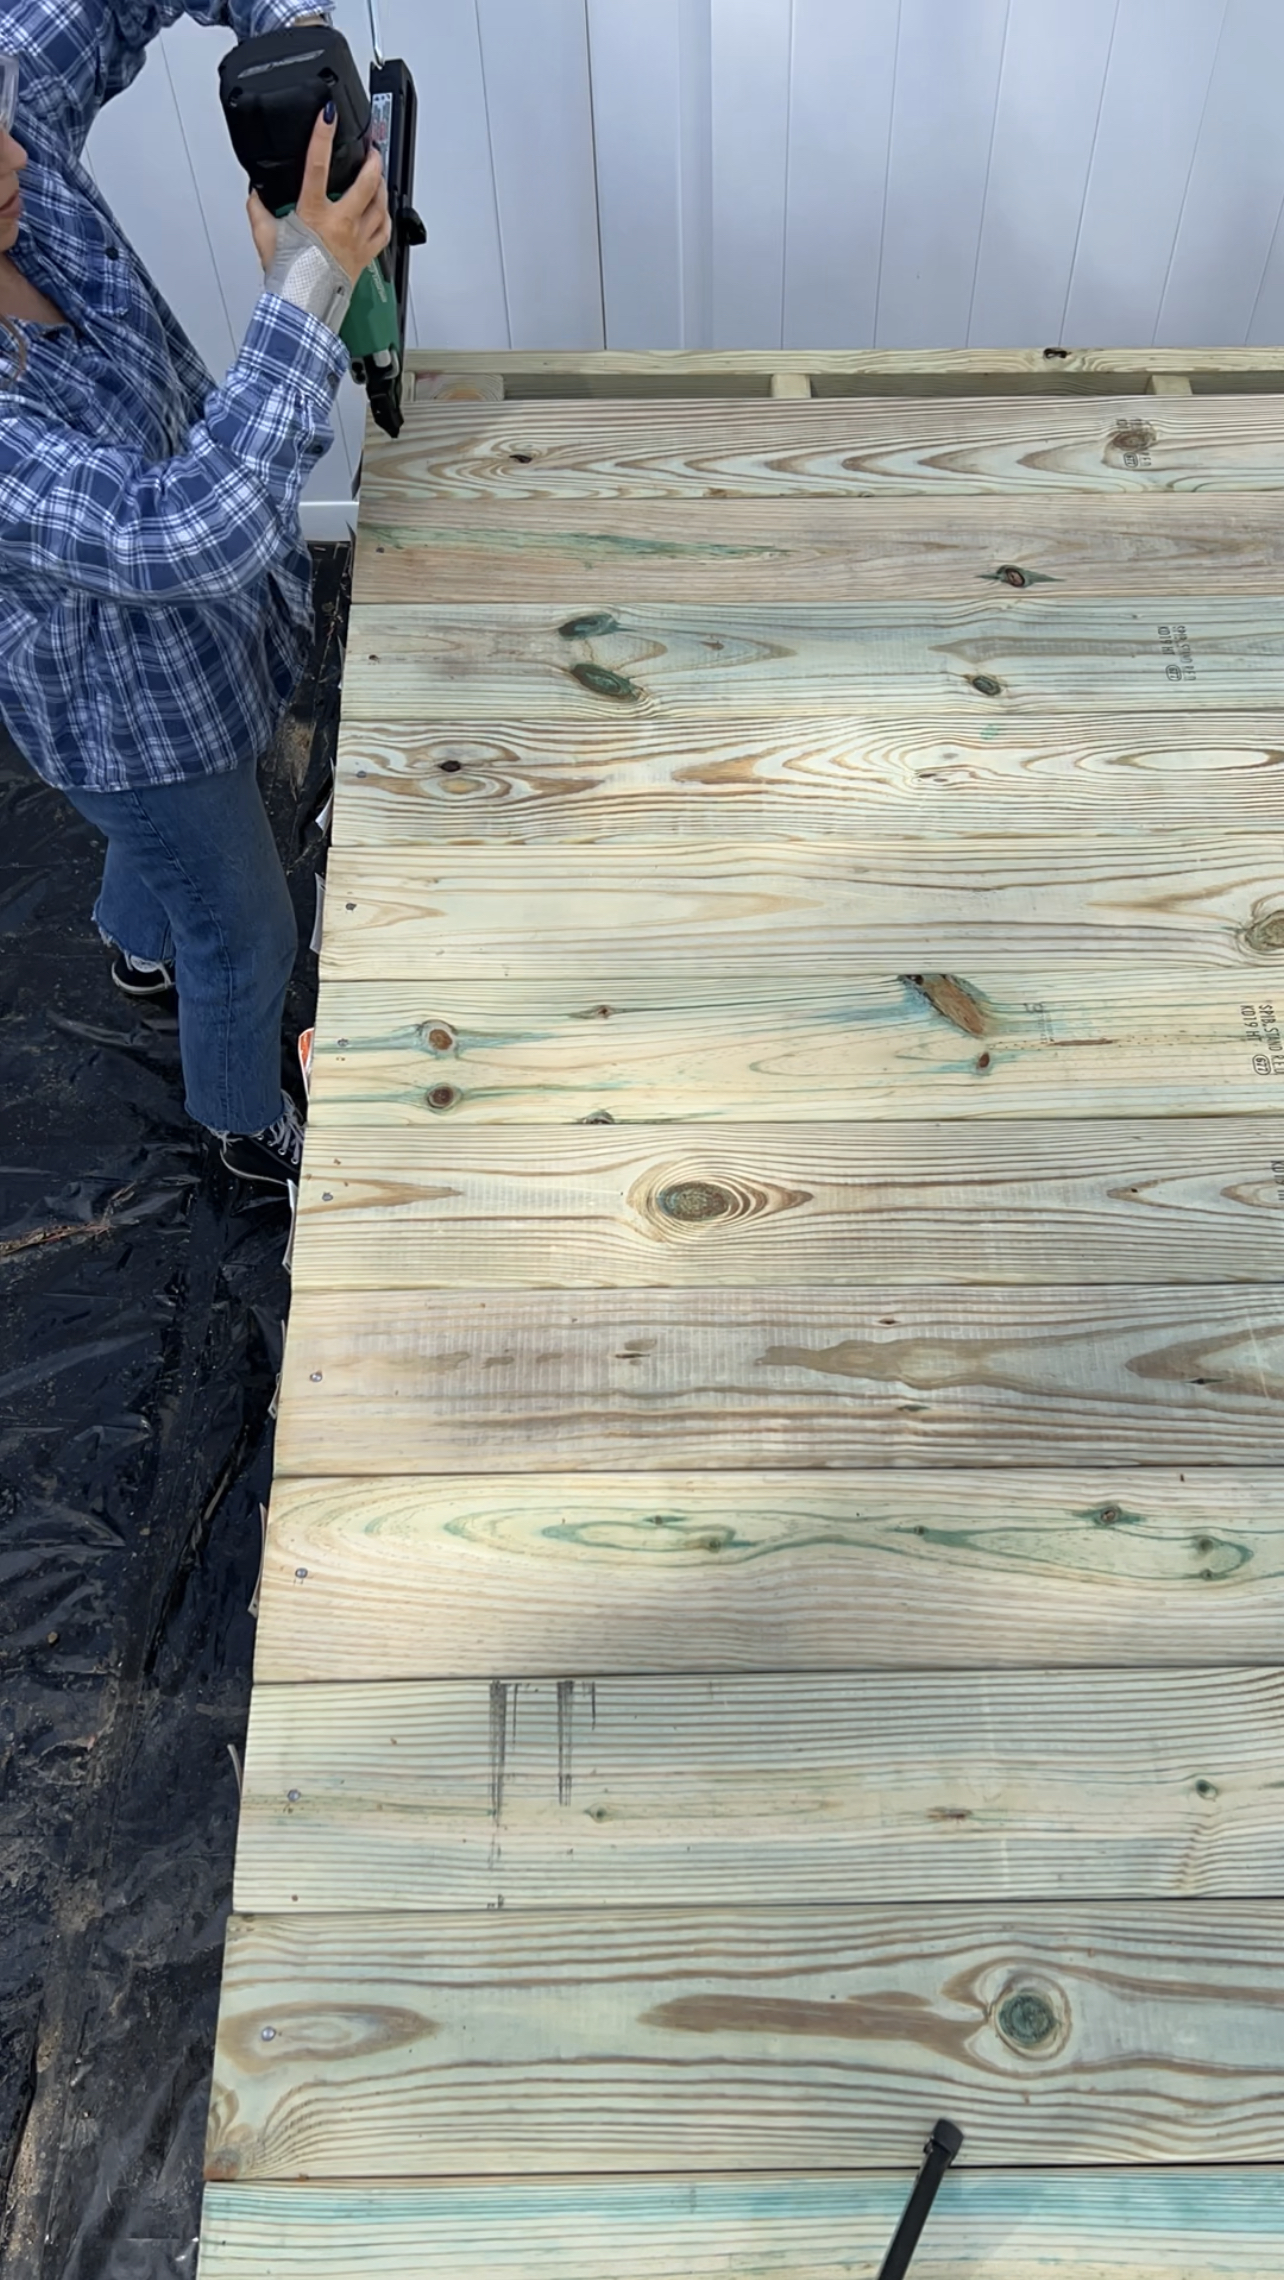
The next step was to add the decking boards. I purchased 22 8 ft deck boards from Home Depot. Lowe’s also carries these but they are just under 8 ft long. The Home Depot Deck boards are the perfect length to fit this platform without needing to be cut! If you overlap the first deck board over the front end by about 1/2 in, you should also not have to cut down the last deck board.
I used a framing nailer to secure each board into place. A drill and screws would also work. I nailed into each end and also on the middle joist, but later had to go back and add more nails. I would recommend nailing/screwing into at least 2 of the joists in addition to the ends.

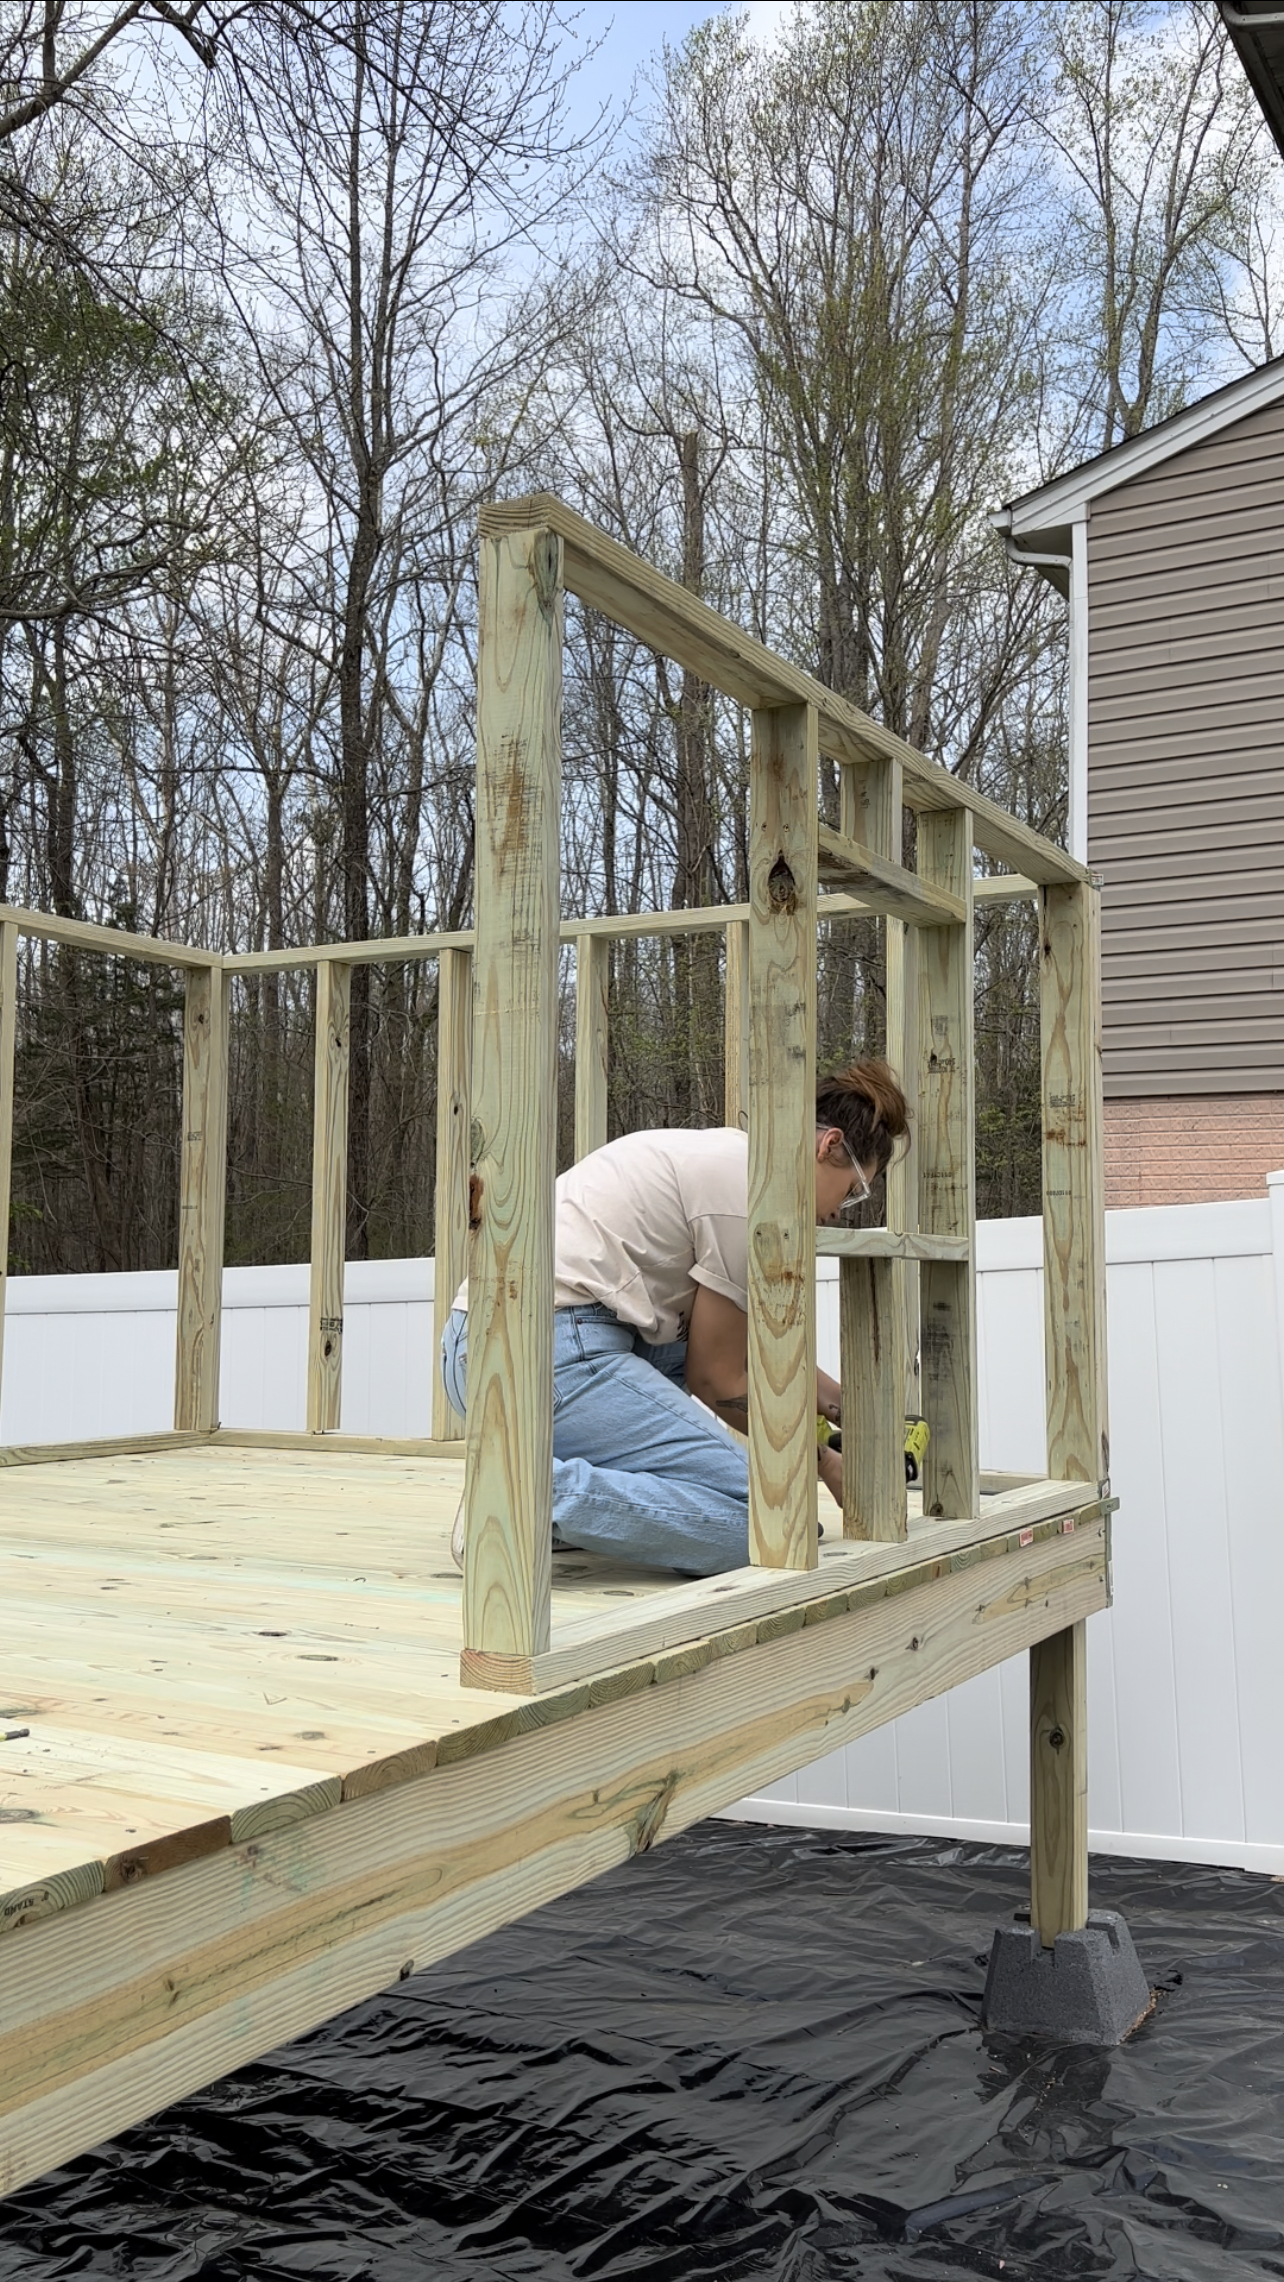
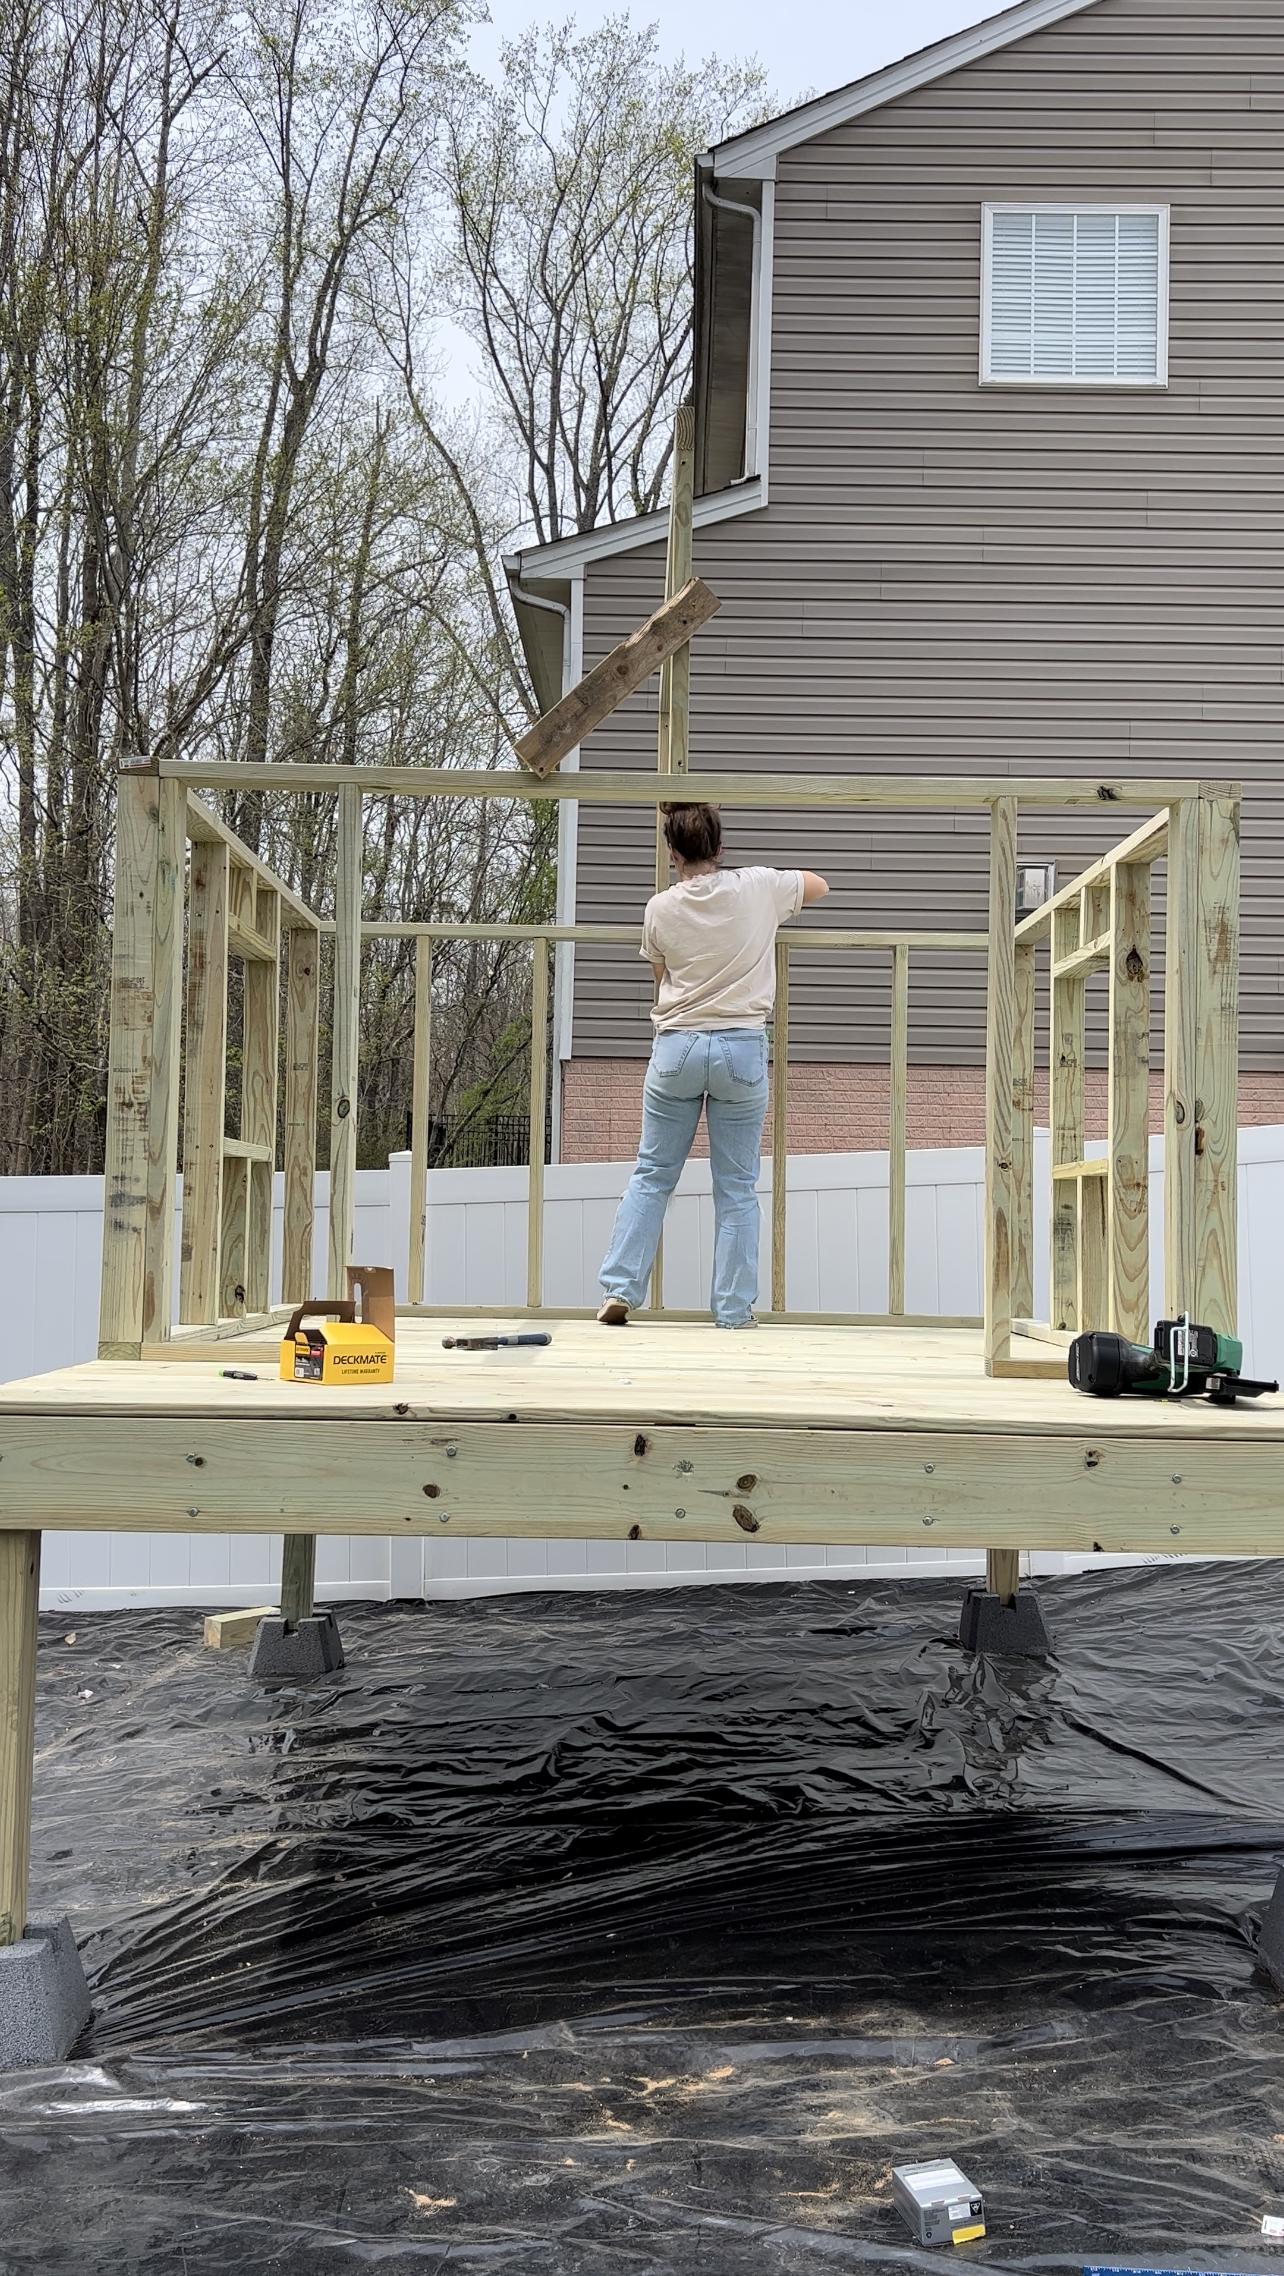
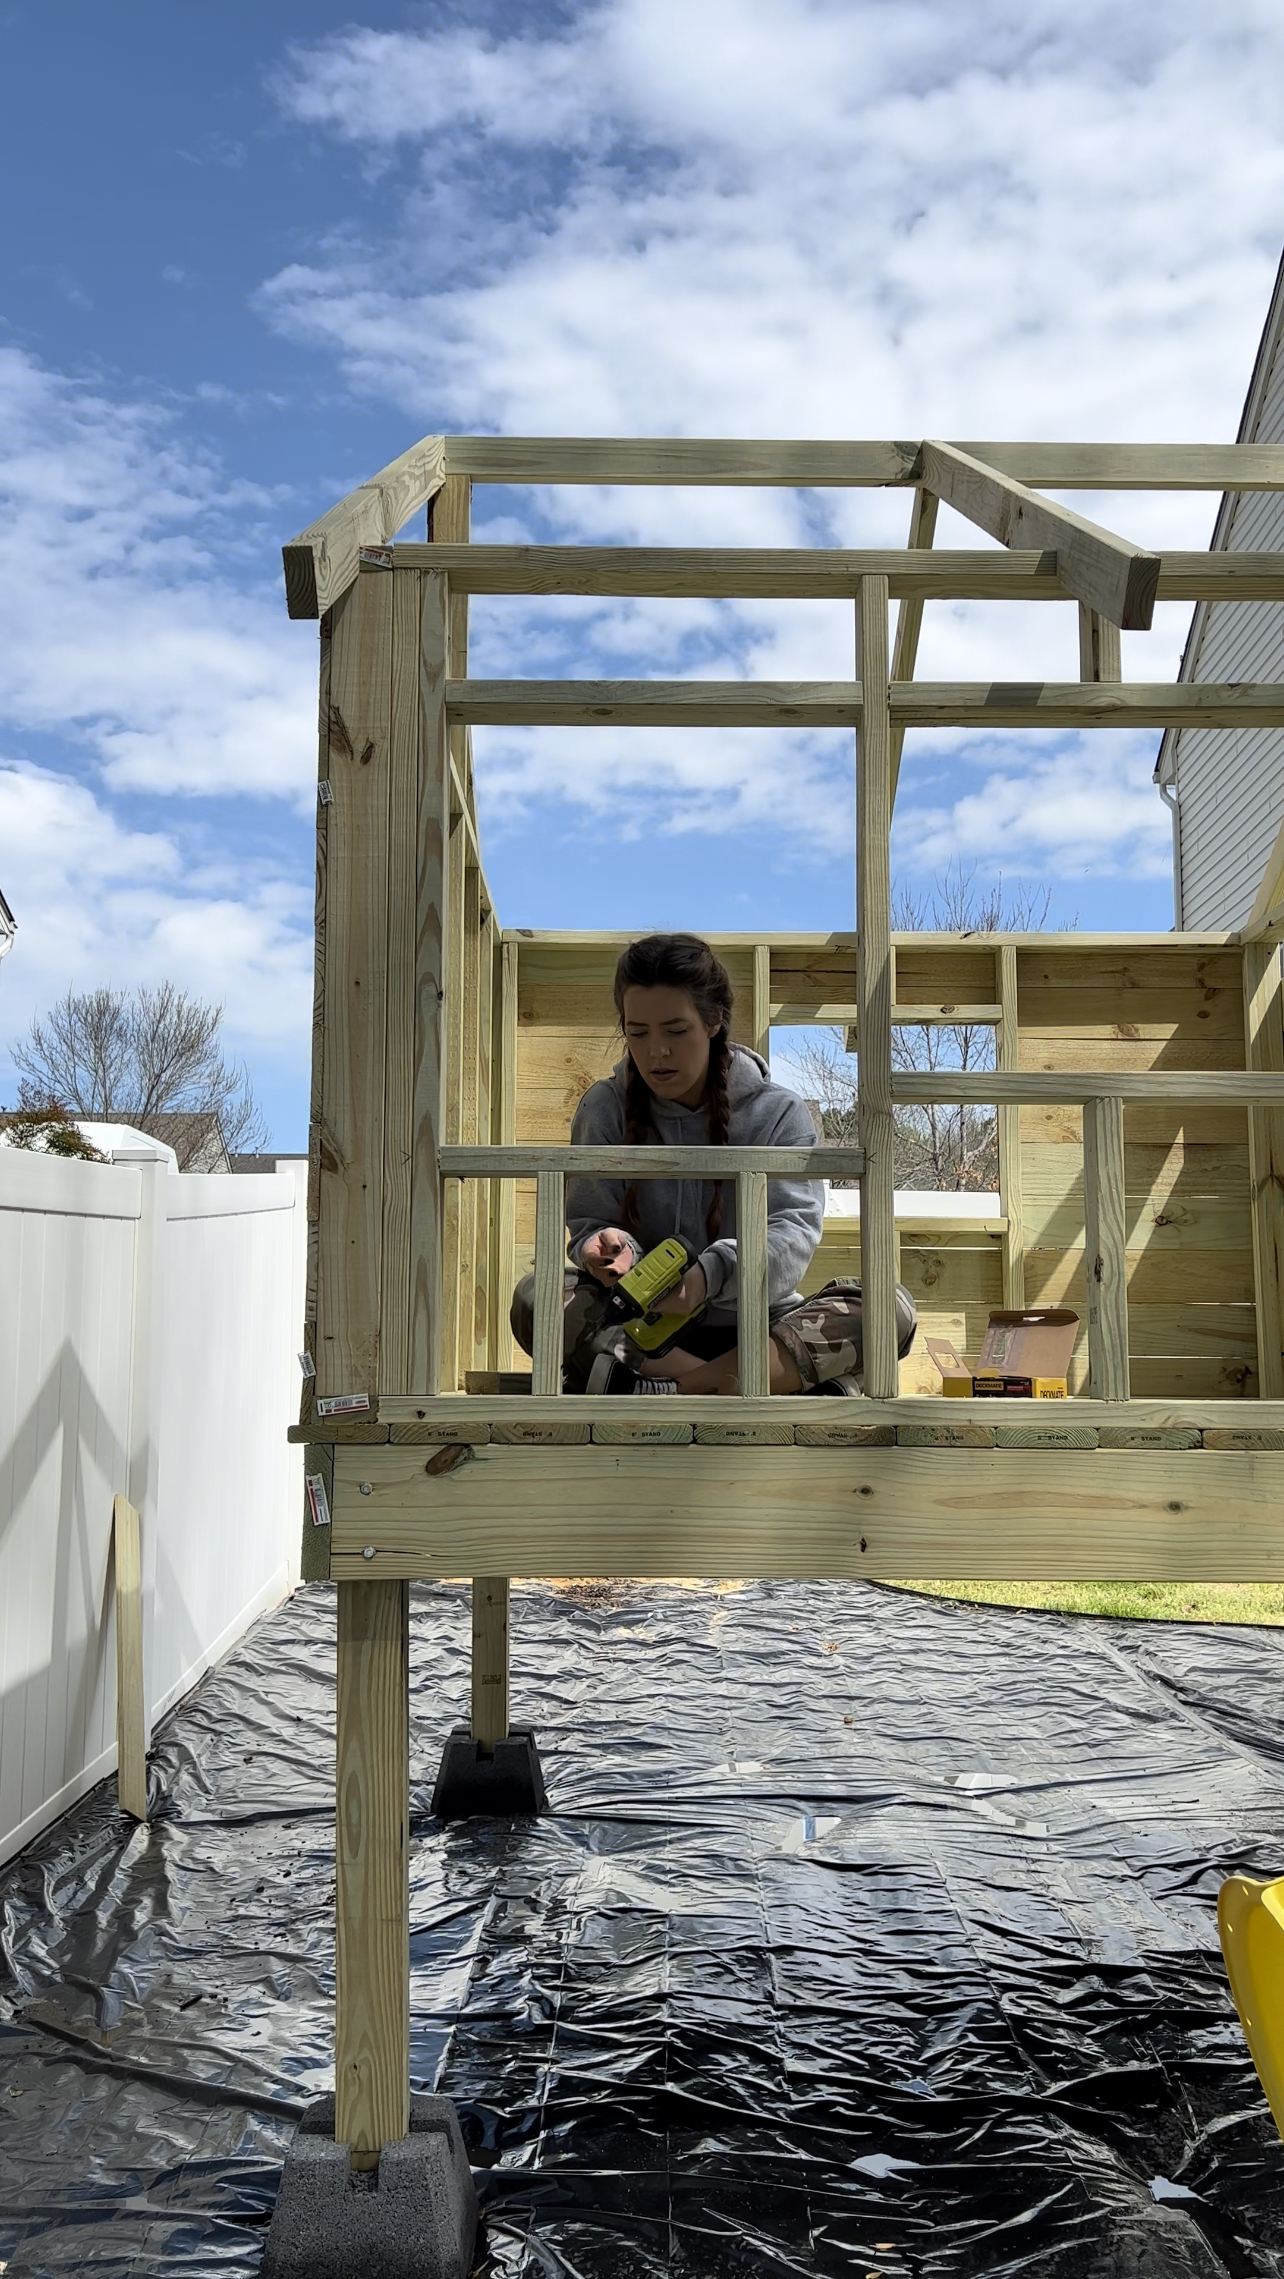
Wall/Roof Framing
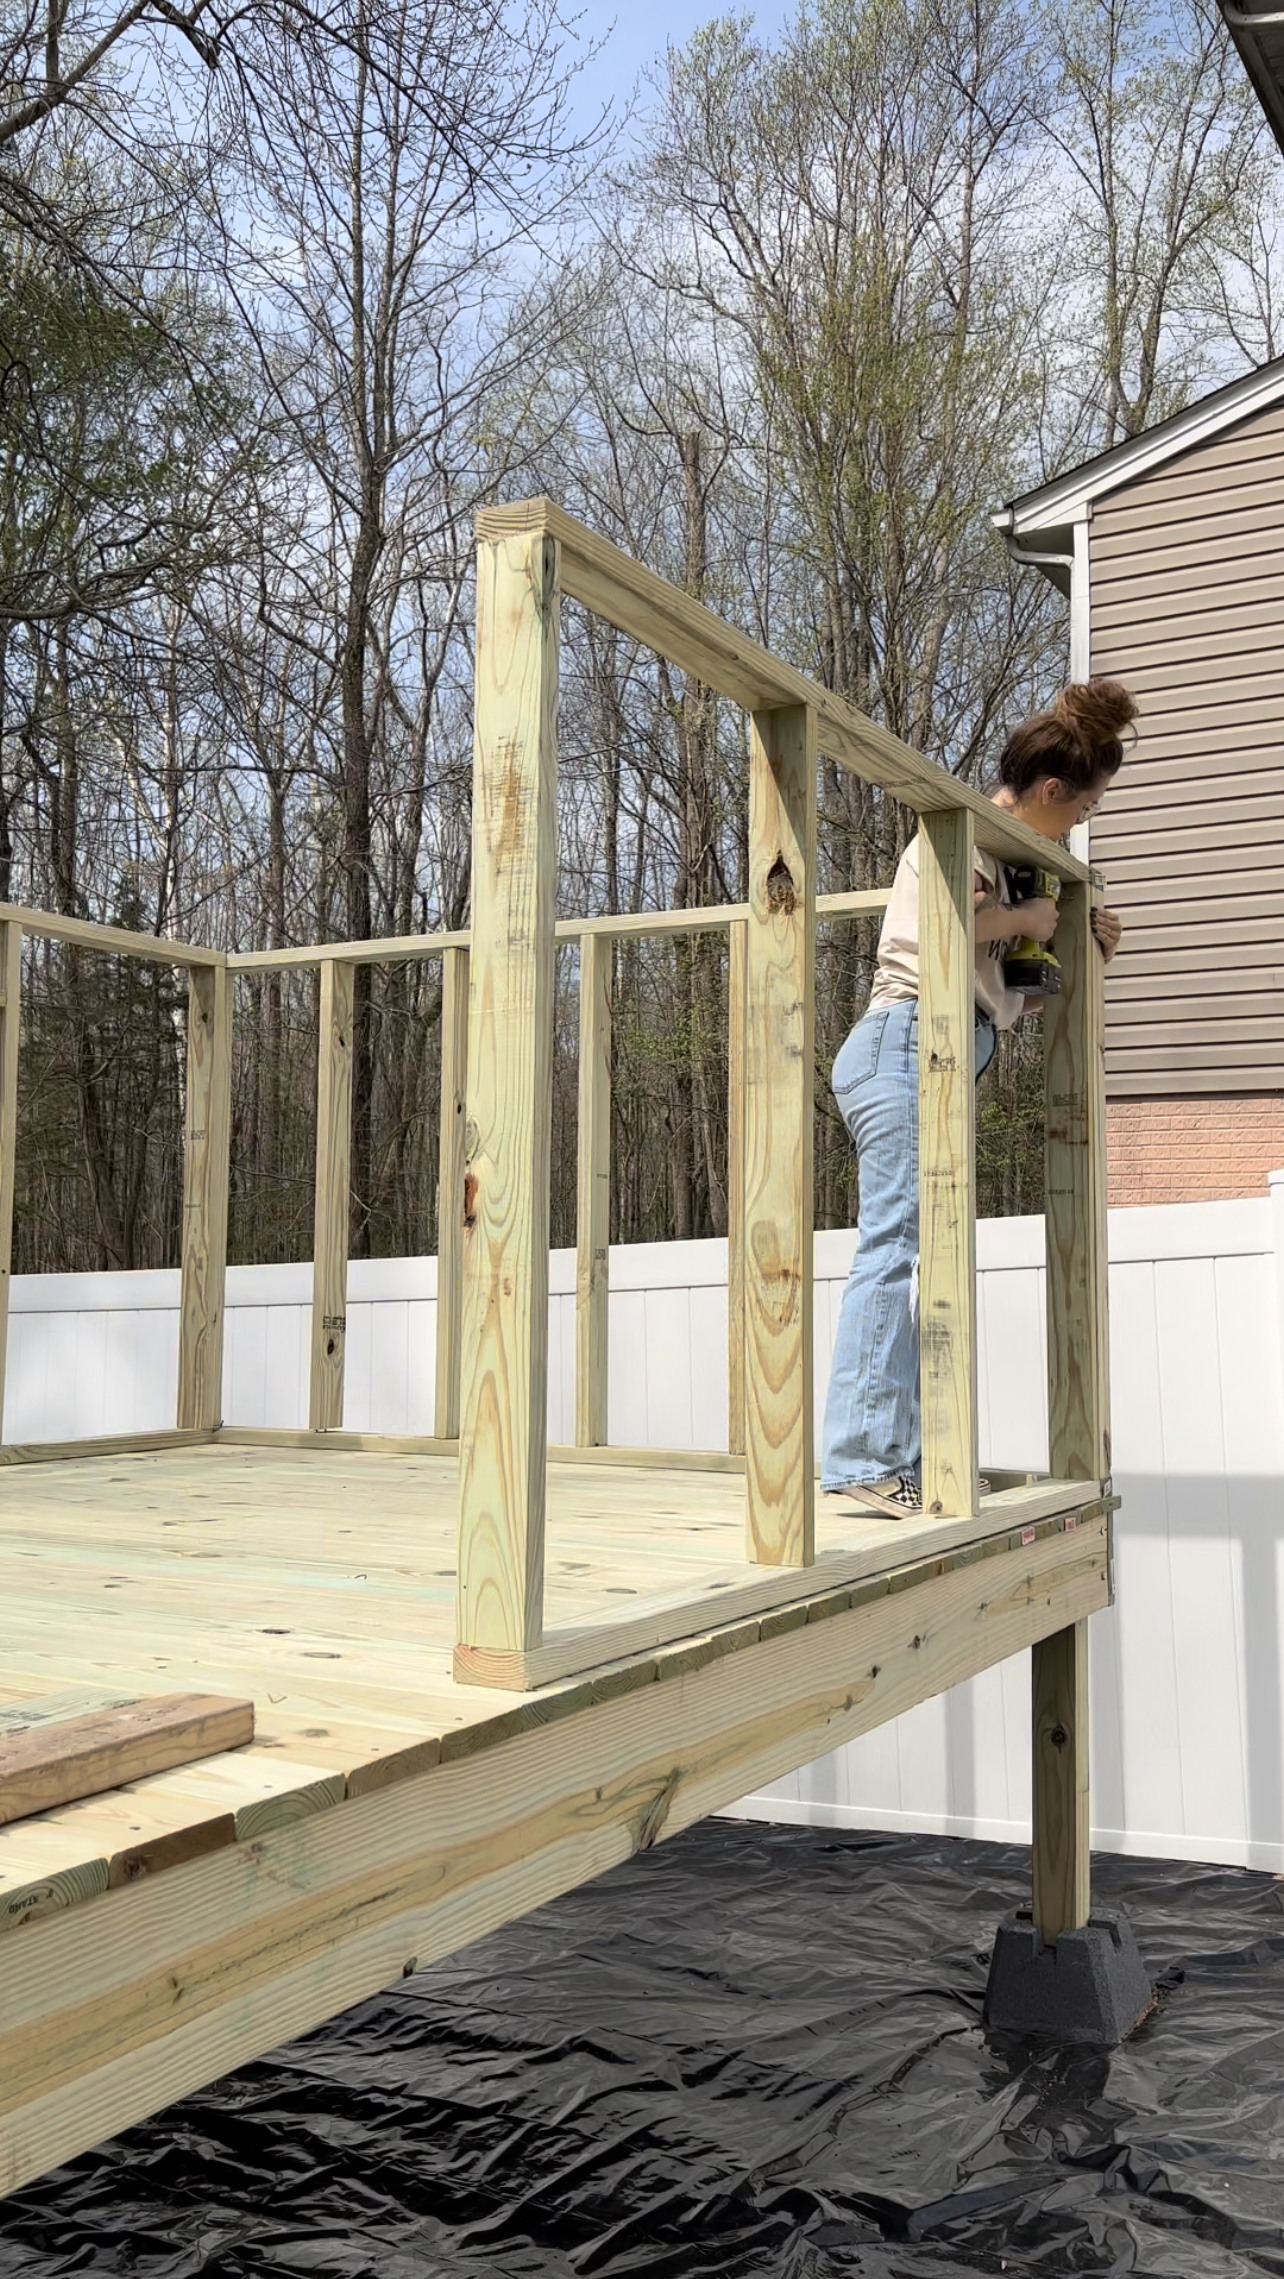
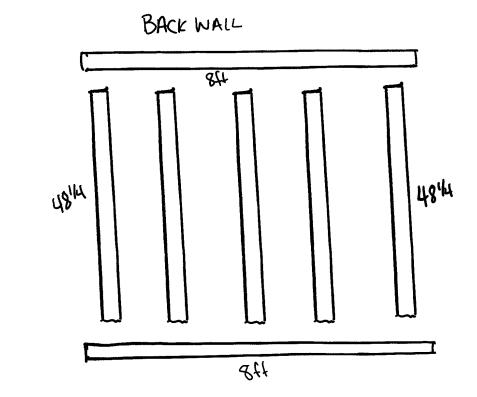
To frame the walls, I began by laying out two 8 ft 2×4 boards. I then cut another in half to use on each end between the two boards. I screwed these together using coated 3 in screws to make the outside frame of the back wall. Using another board cut to the sam length as the end boards, I attached it to the middle of the frame. I then cut two more 8 ft boards in half and screwed them evenly between the middle and end boards. I then had the full wall frame for the back side of the playhouse.

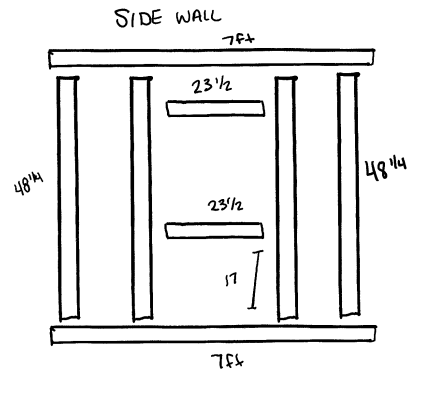
Side Walls
For the side walls I cut down some 8 ft boards to 7 feet for the tops and bottoms. I cut 4 more boards in half and screwed in one on each end. To frame the windows, I cut 2 pieces at 23.5 inches and sandwiched them between two of the halved boards. My windows are 23.5 in wide by 21.5 in height and 17 in off the bottom board. I also cut some support pieces to center on the top and bottom of the windows.
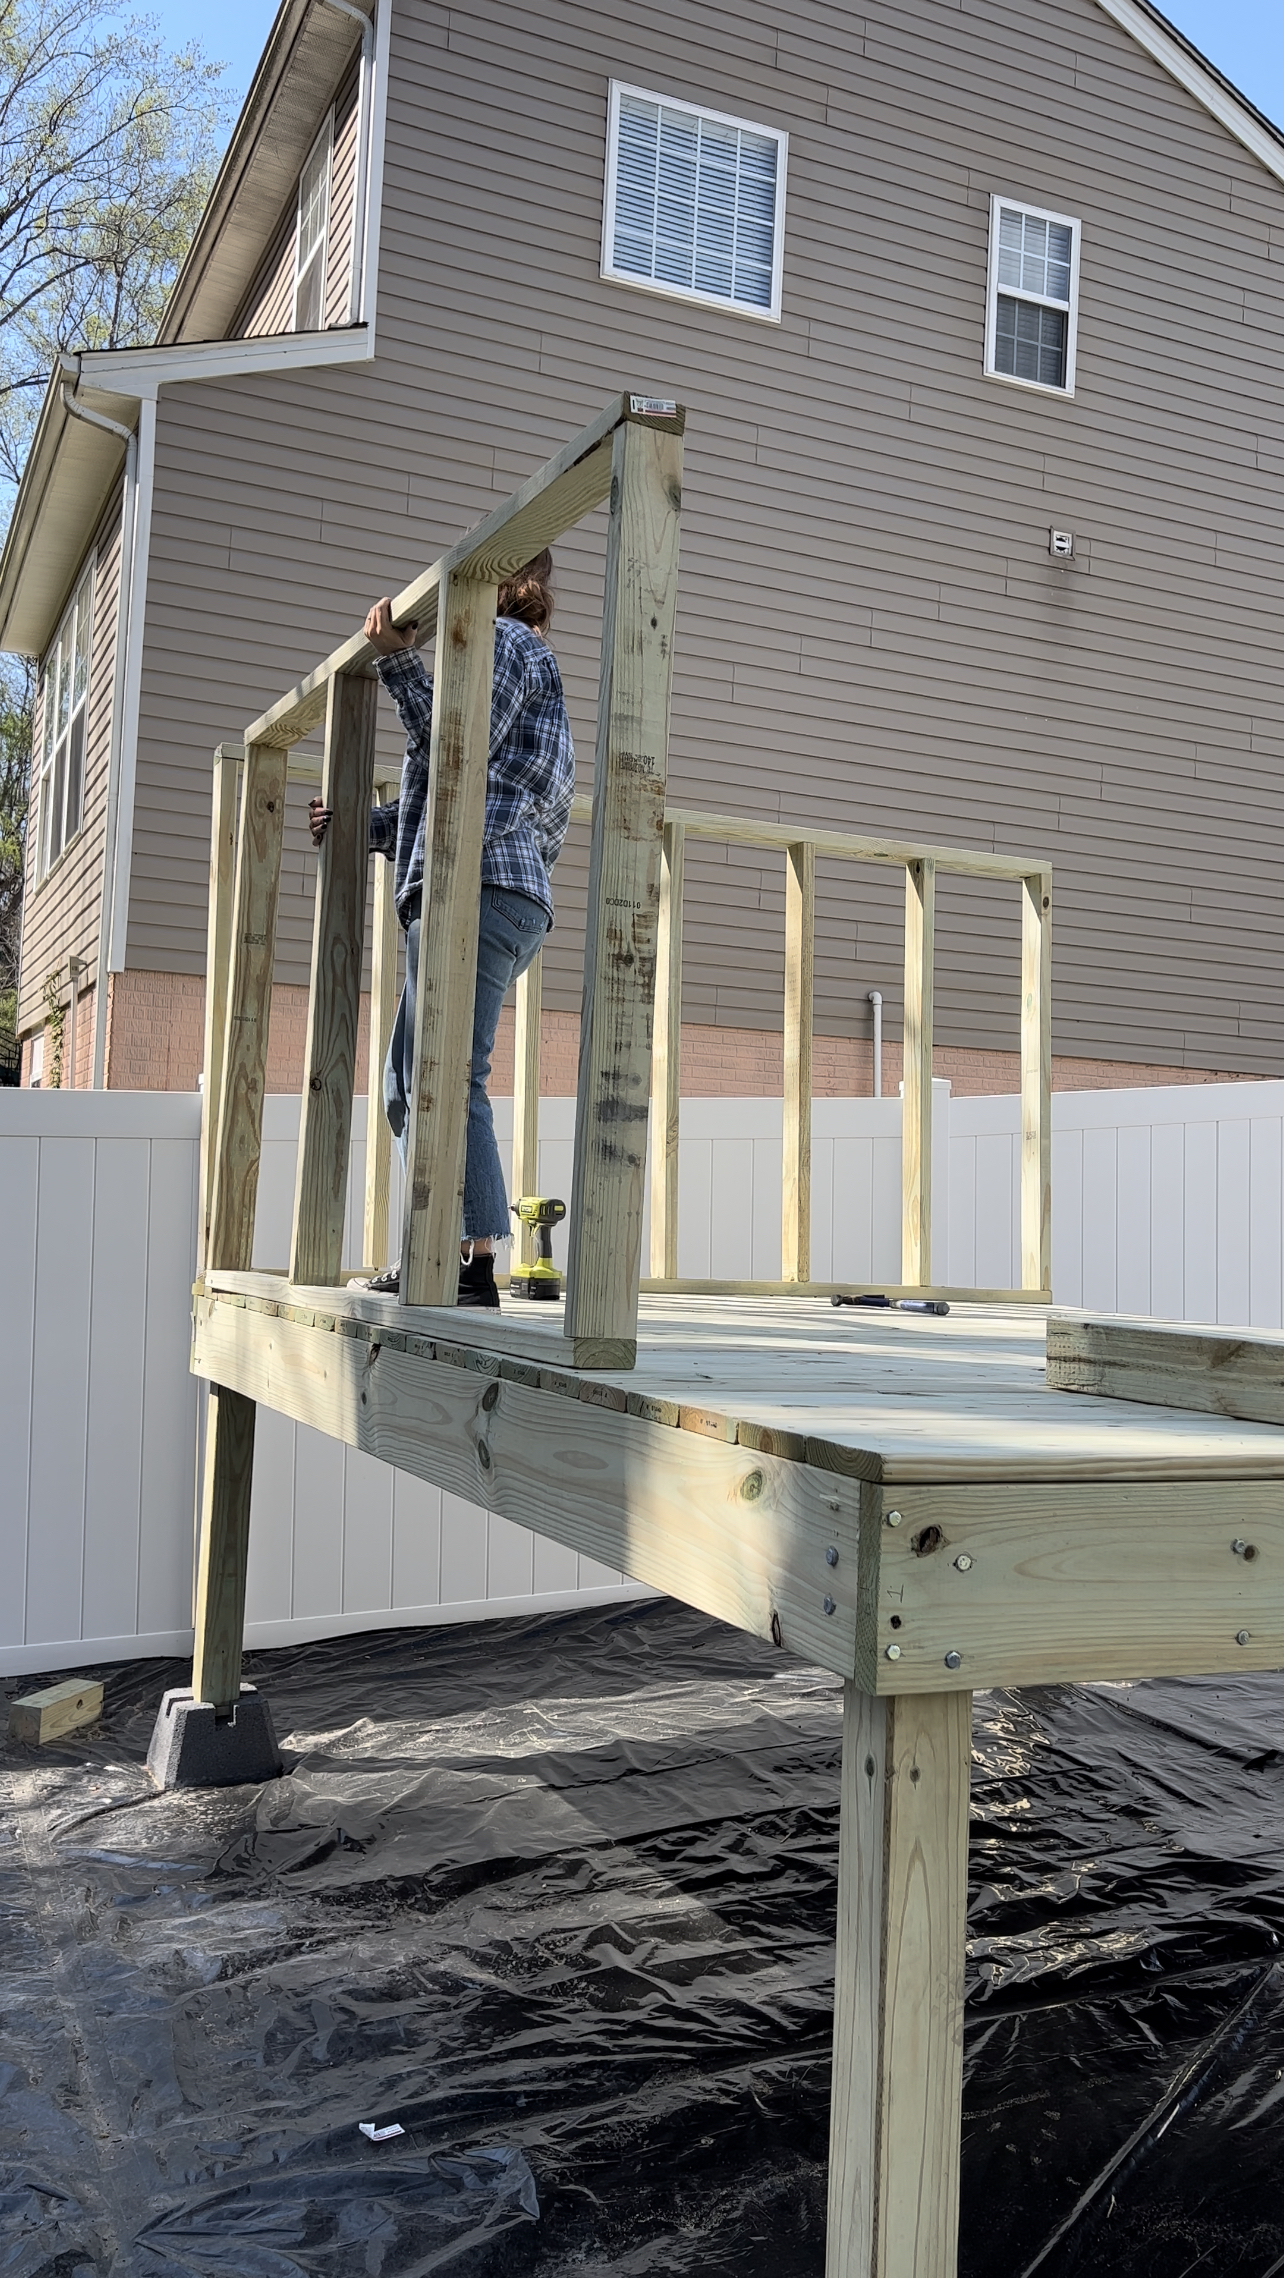
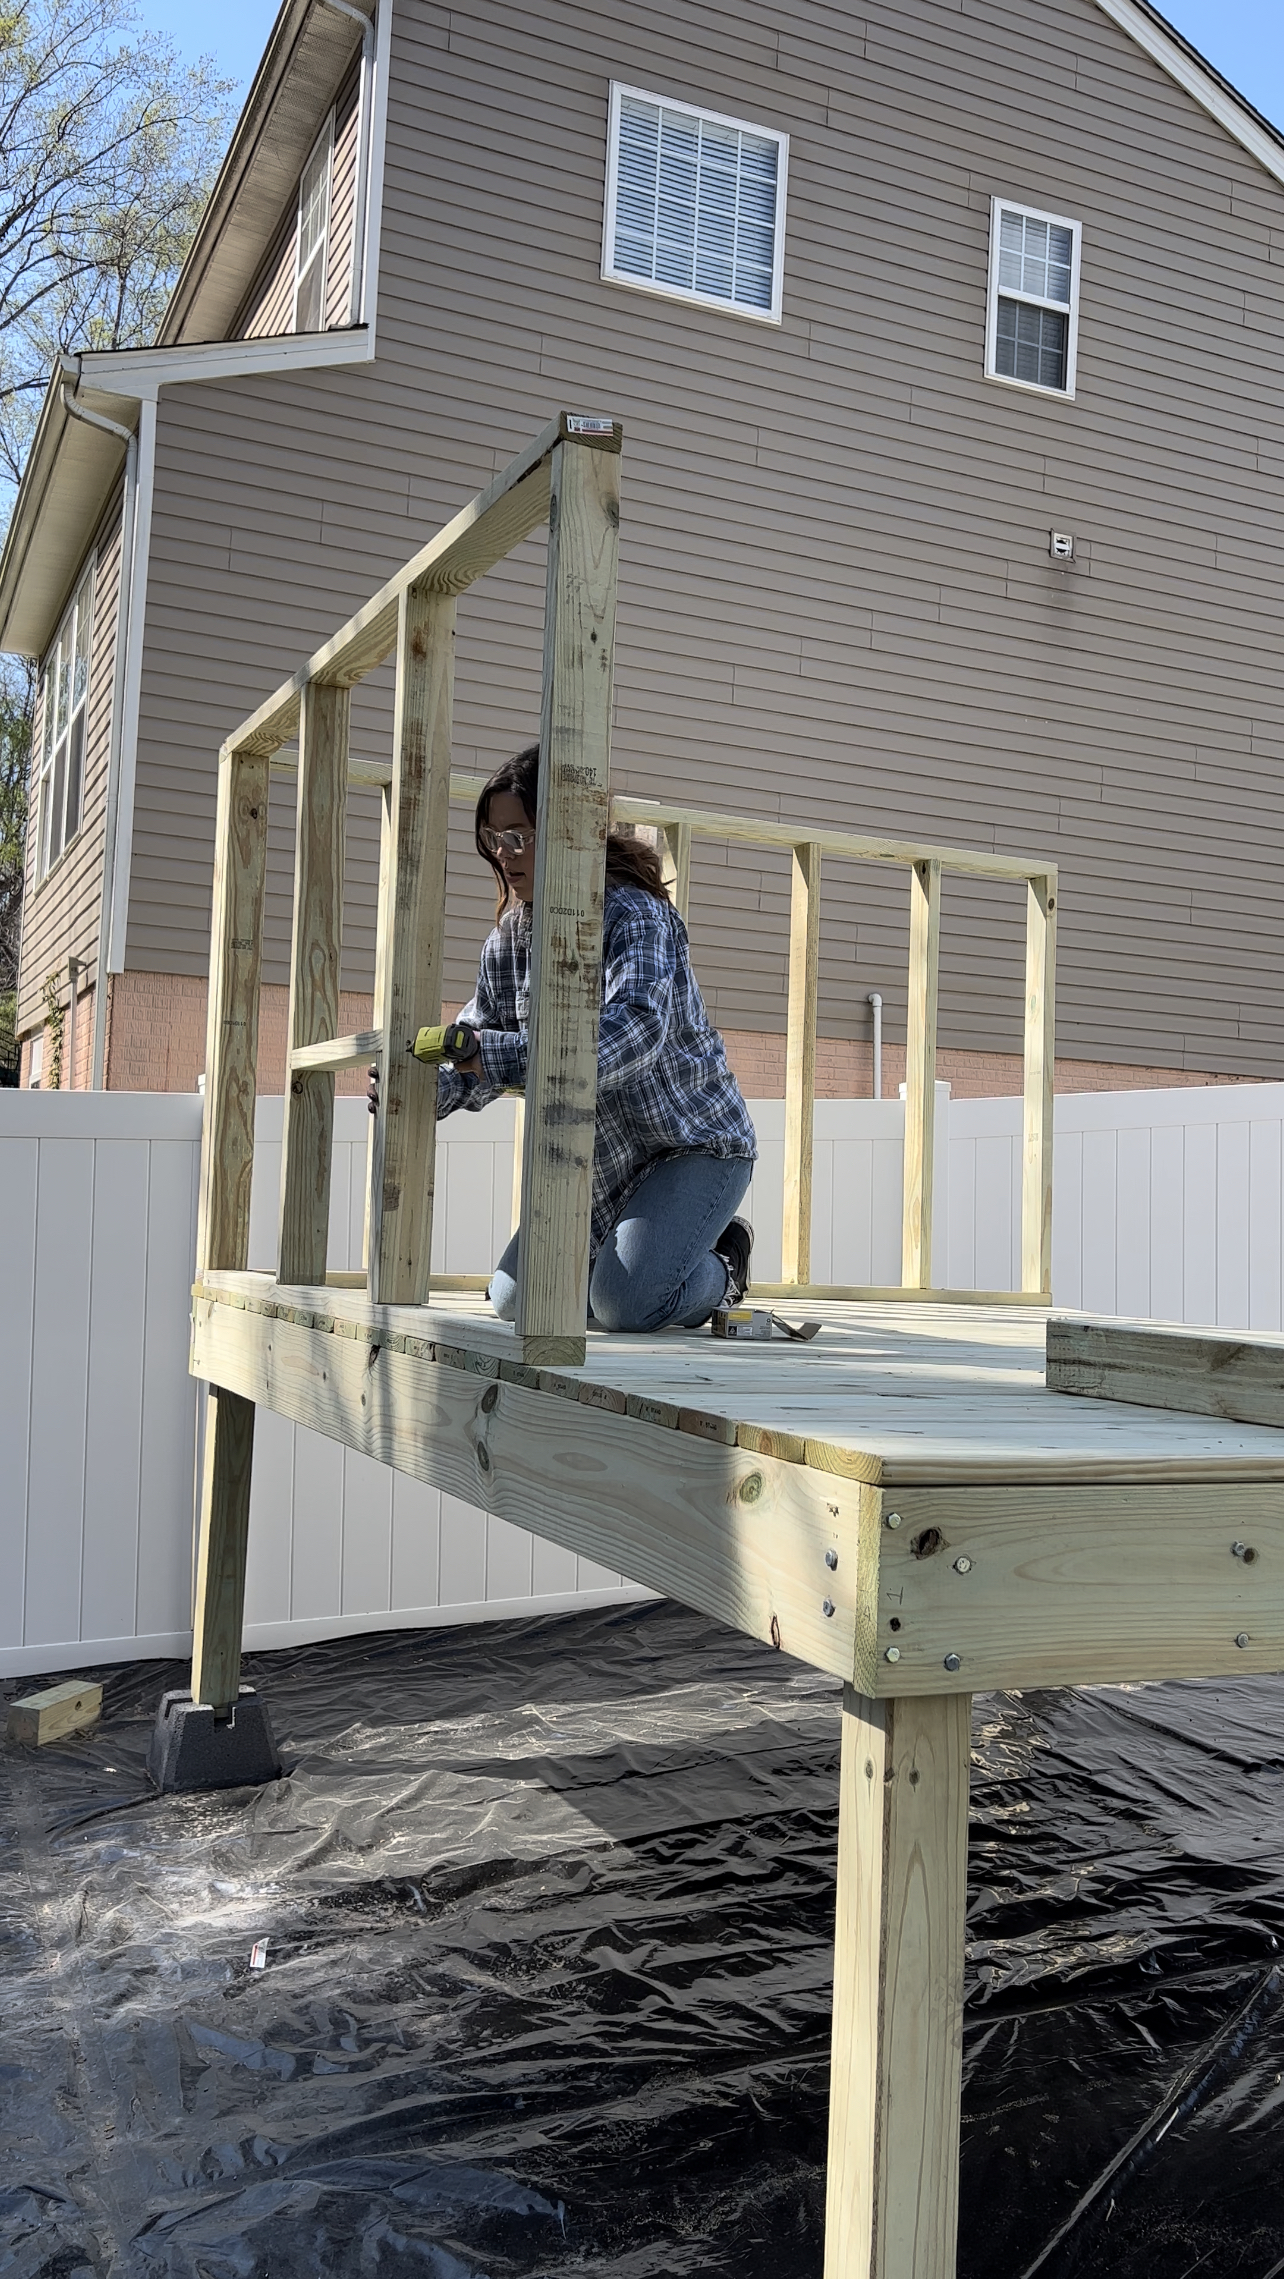
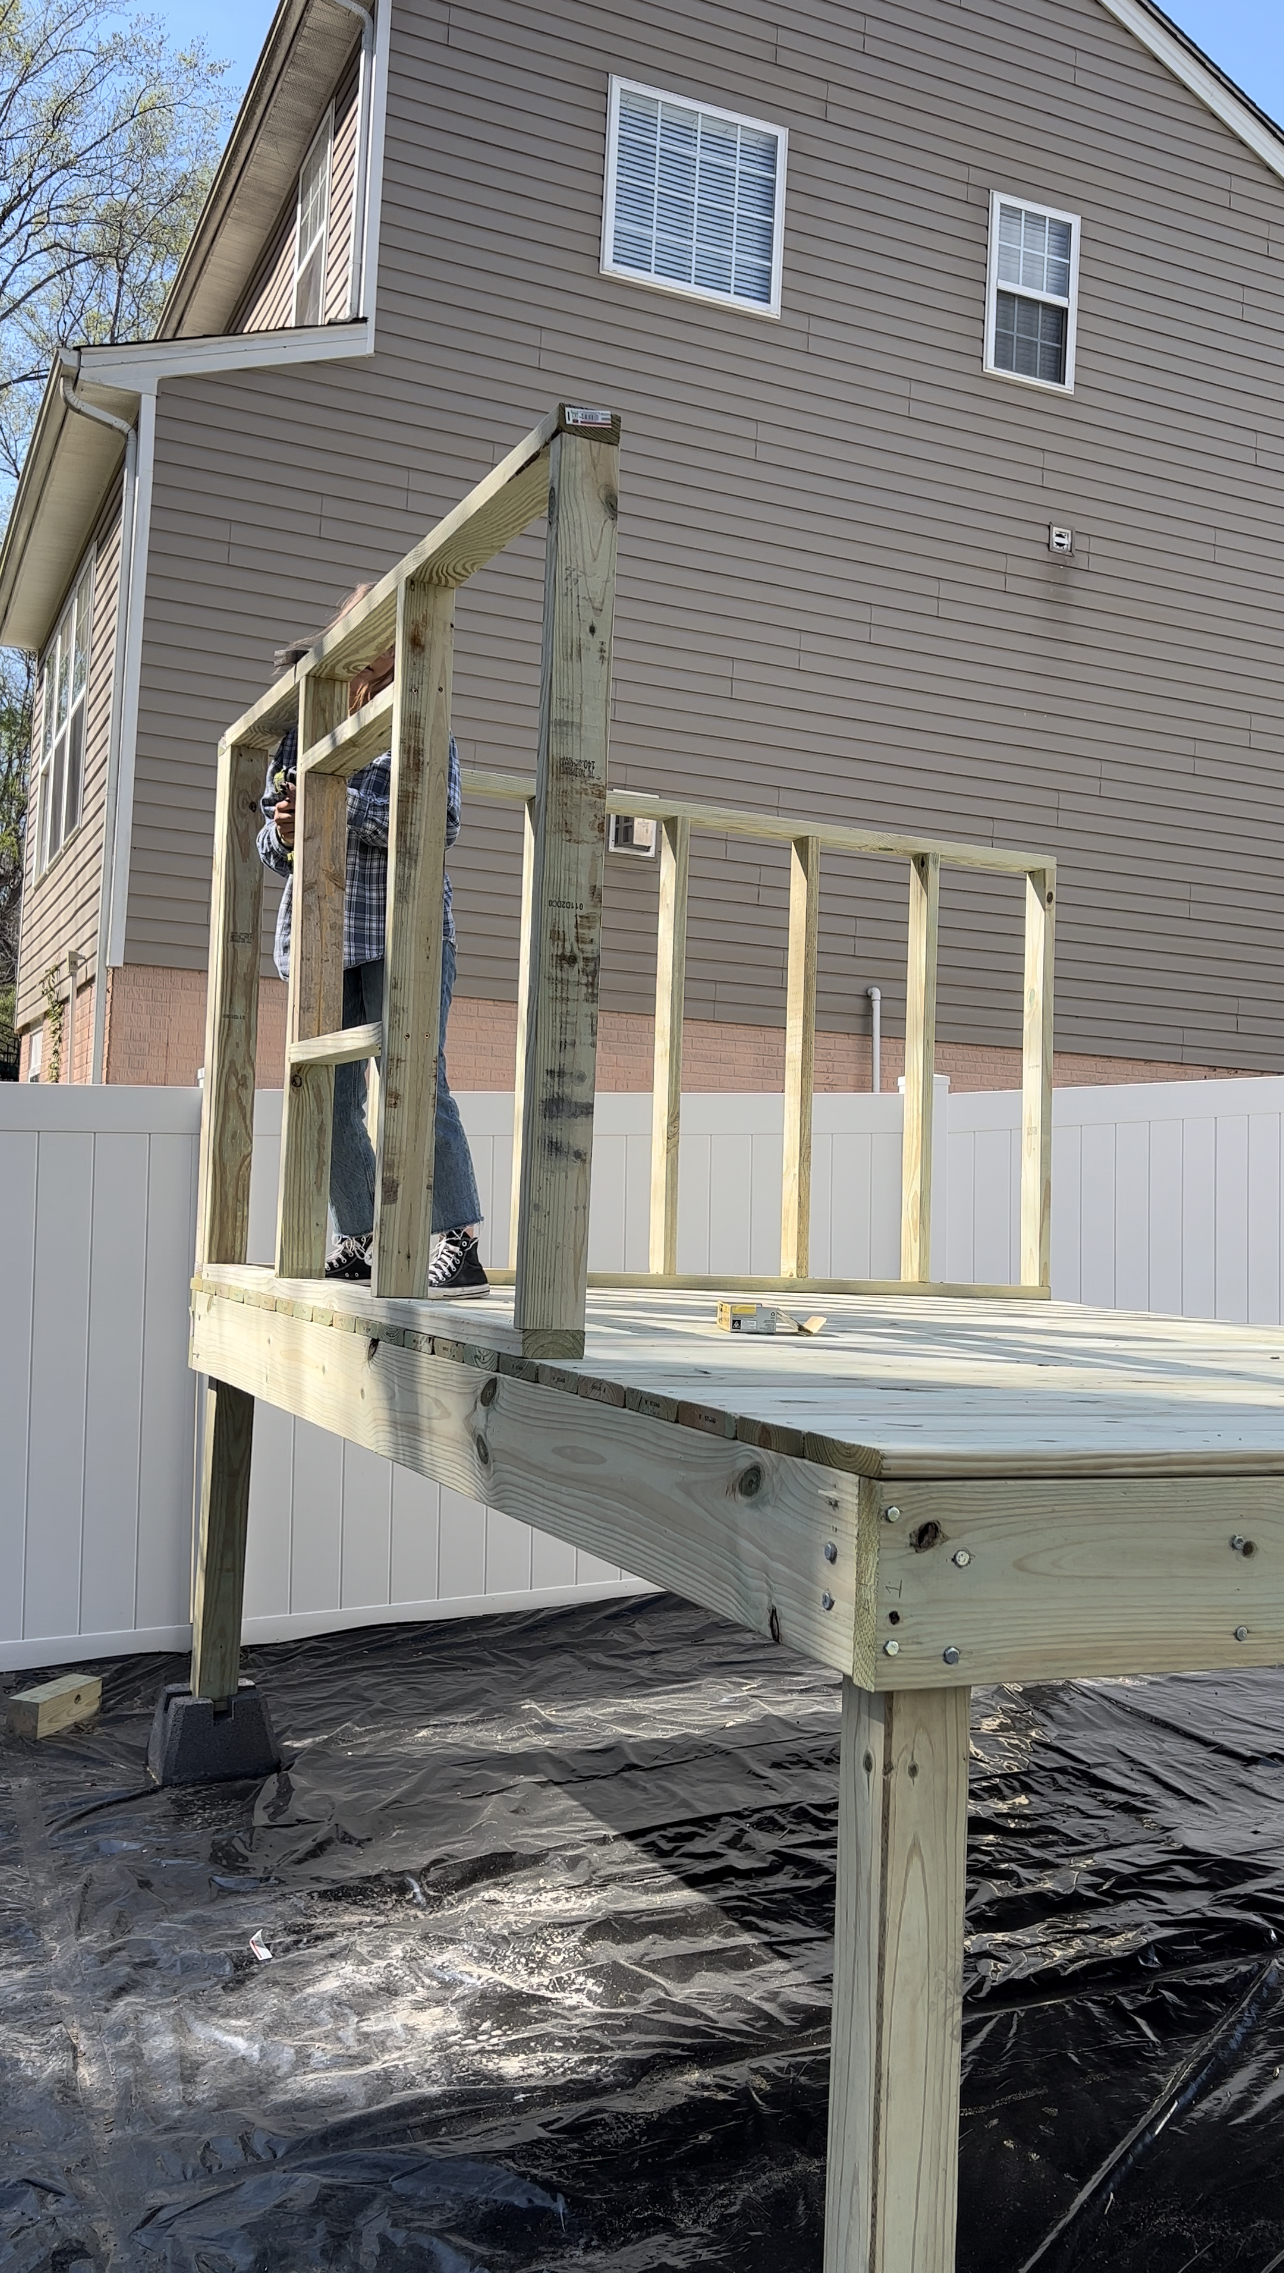

Front Walls
For the front two walls, I used one full 8 ft board for the top and connected four more studs (48.25 inches) on each side on the ends and to frame out the doorway along with a 17 in piece on the bottom. I eventually added more to close this in a bit making the total wall width 25 inches on either side of the doorway.
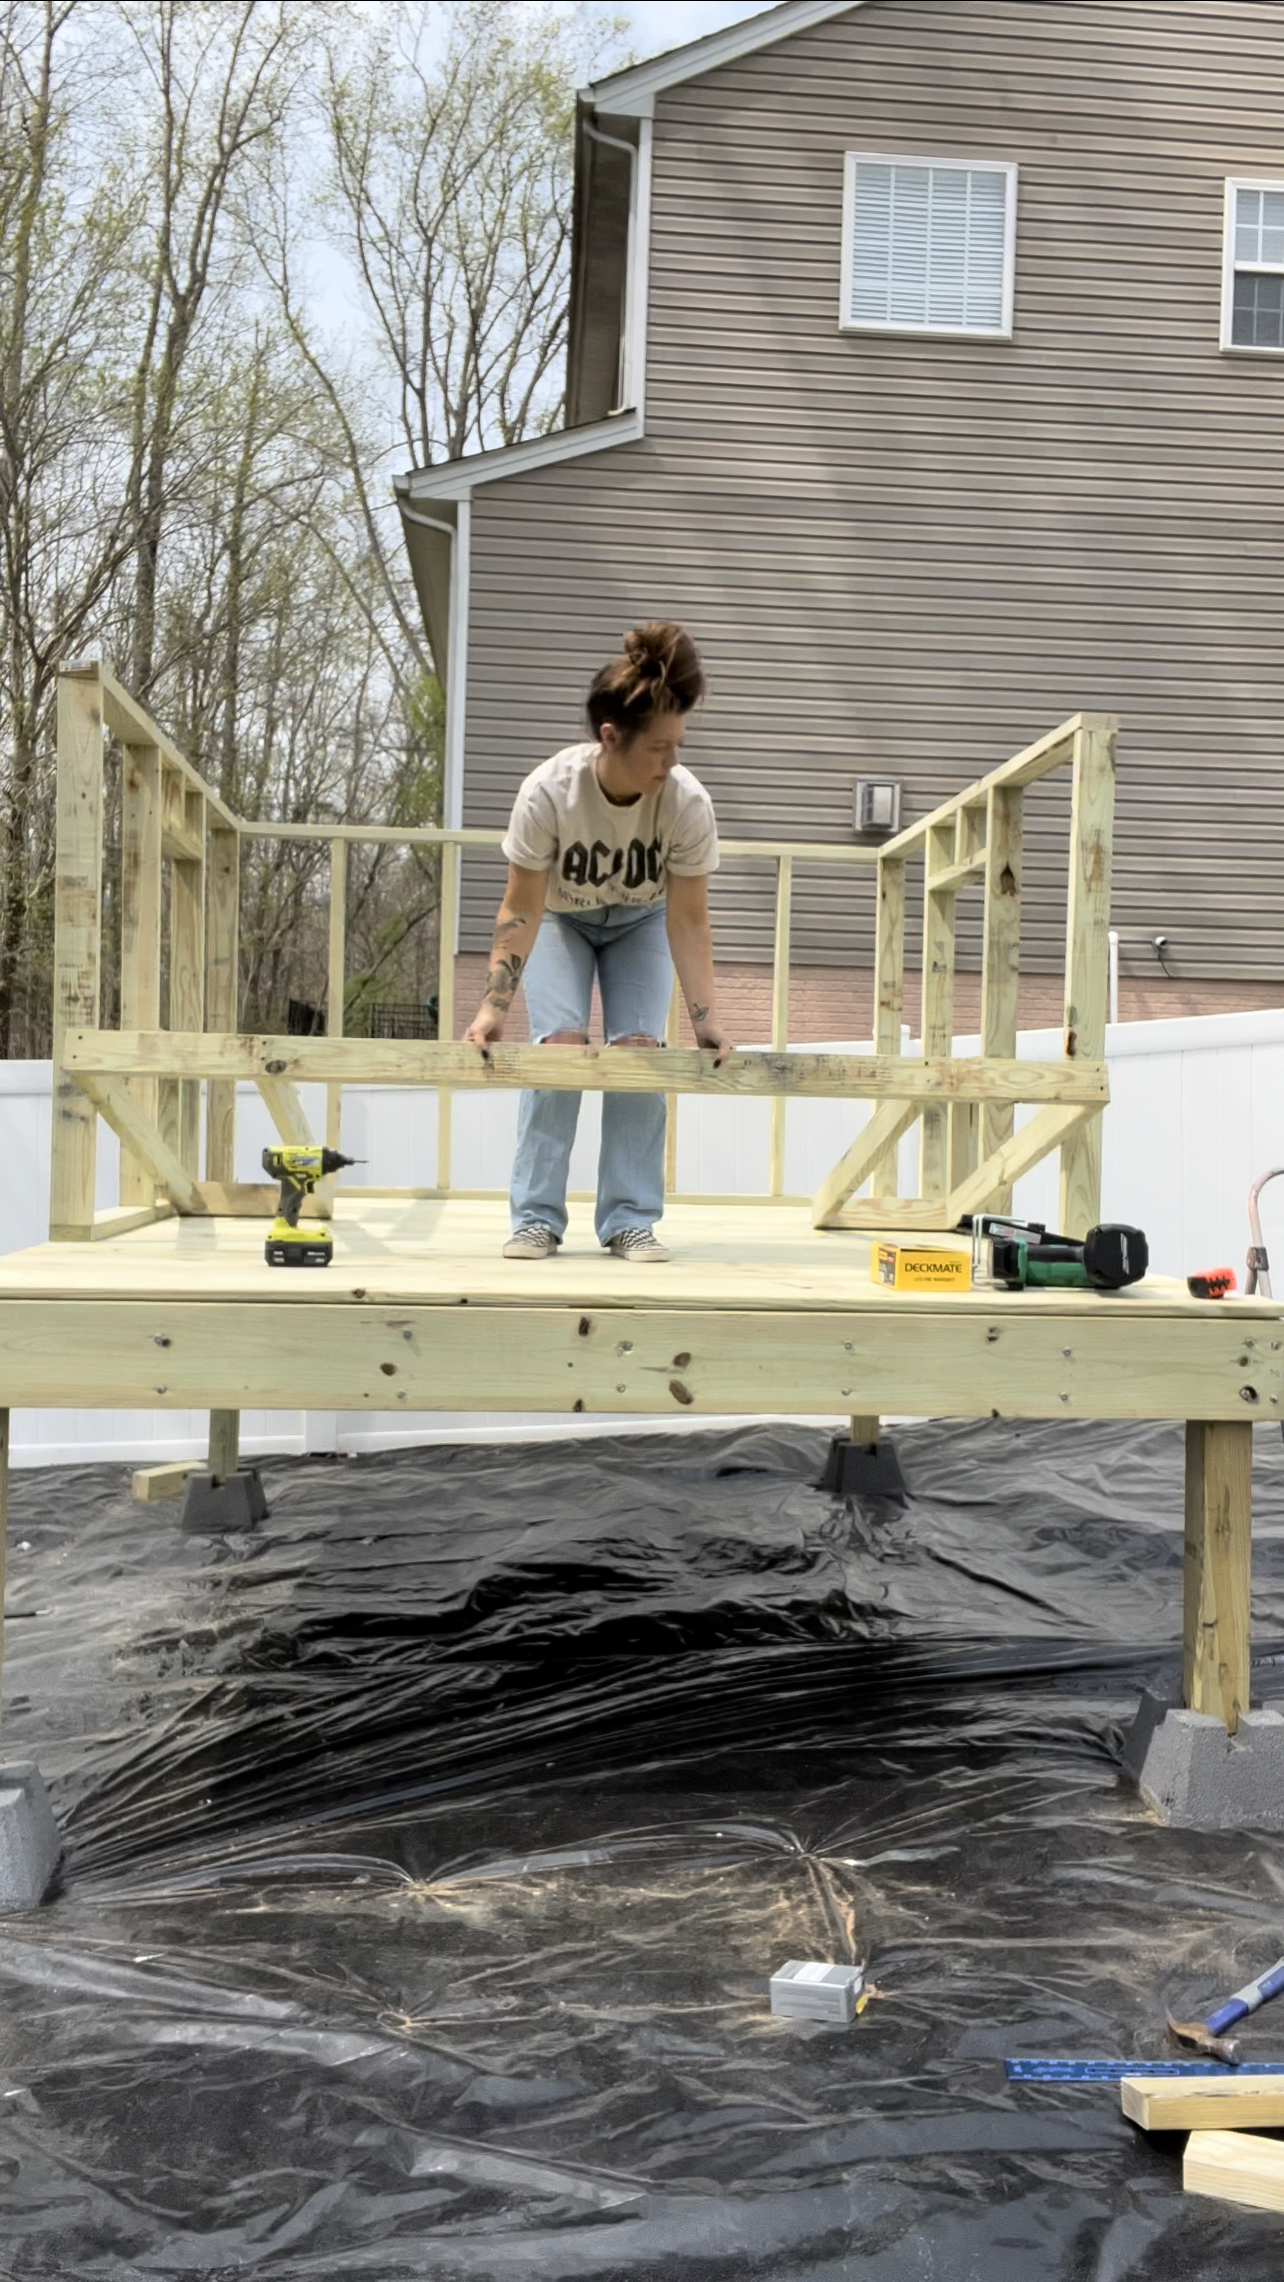
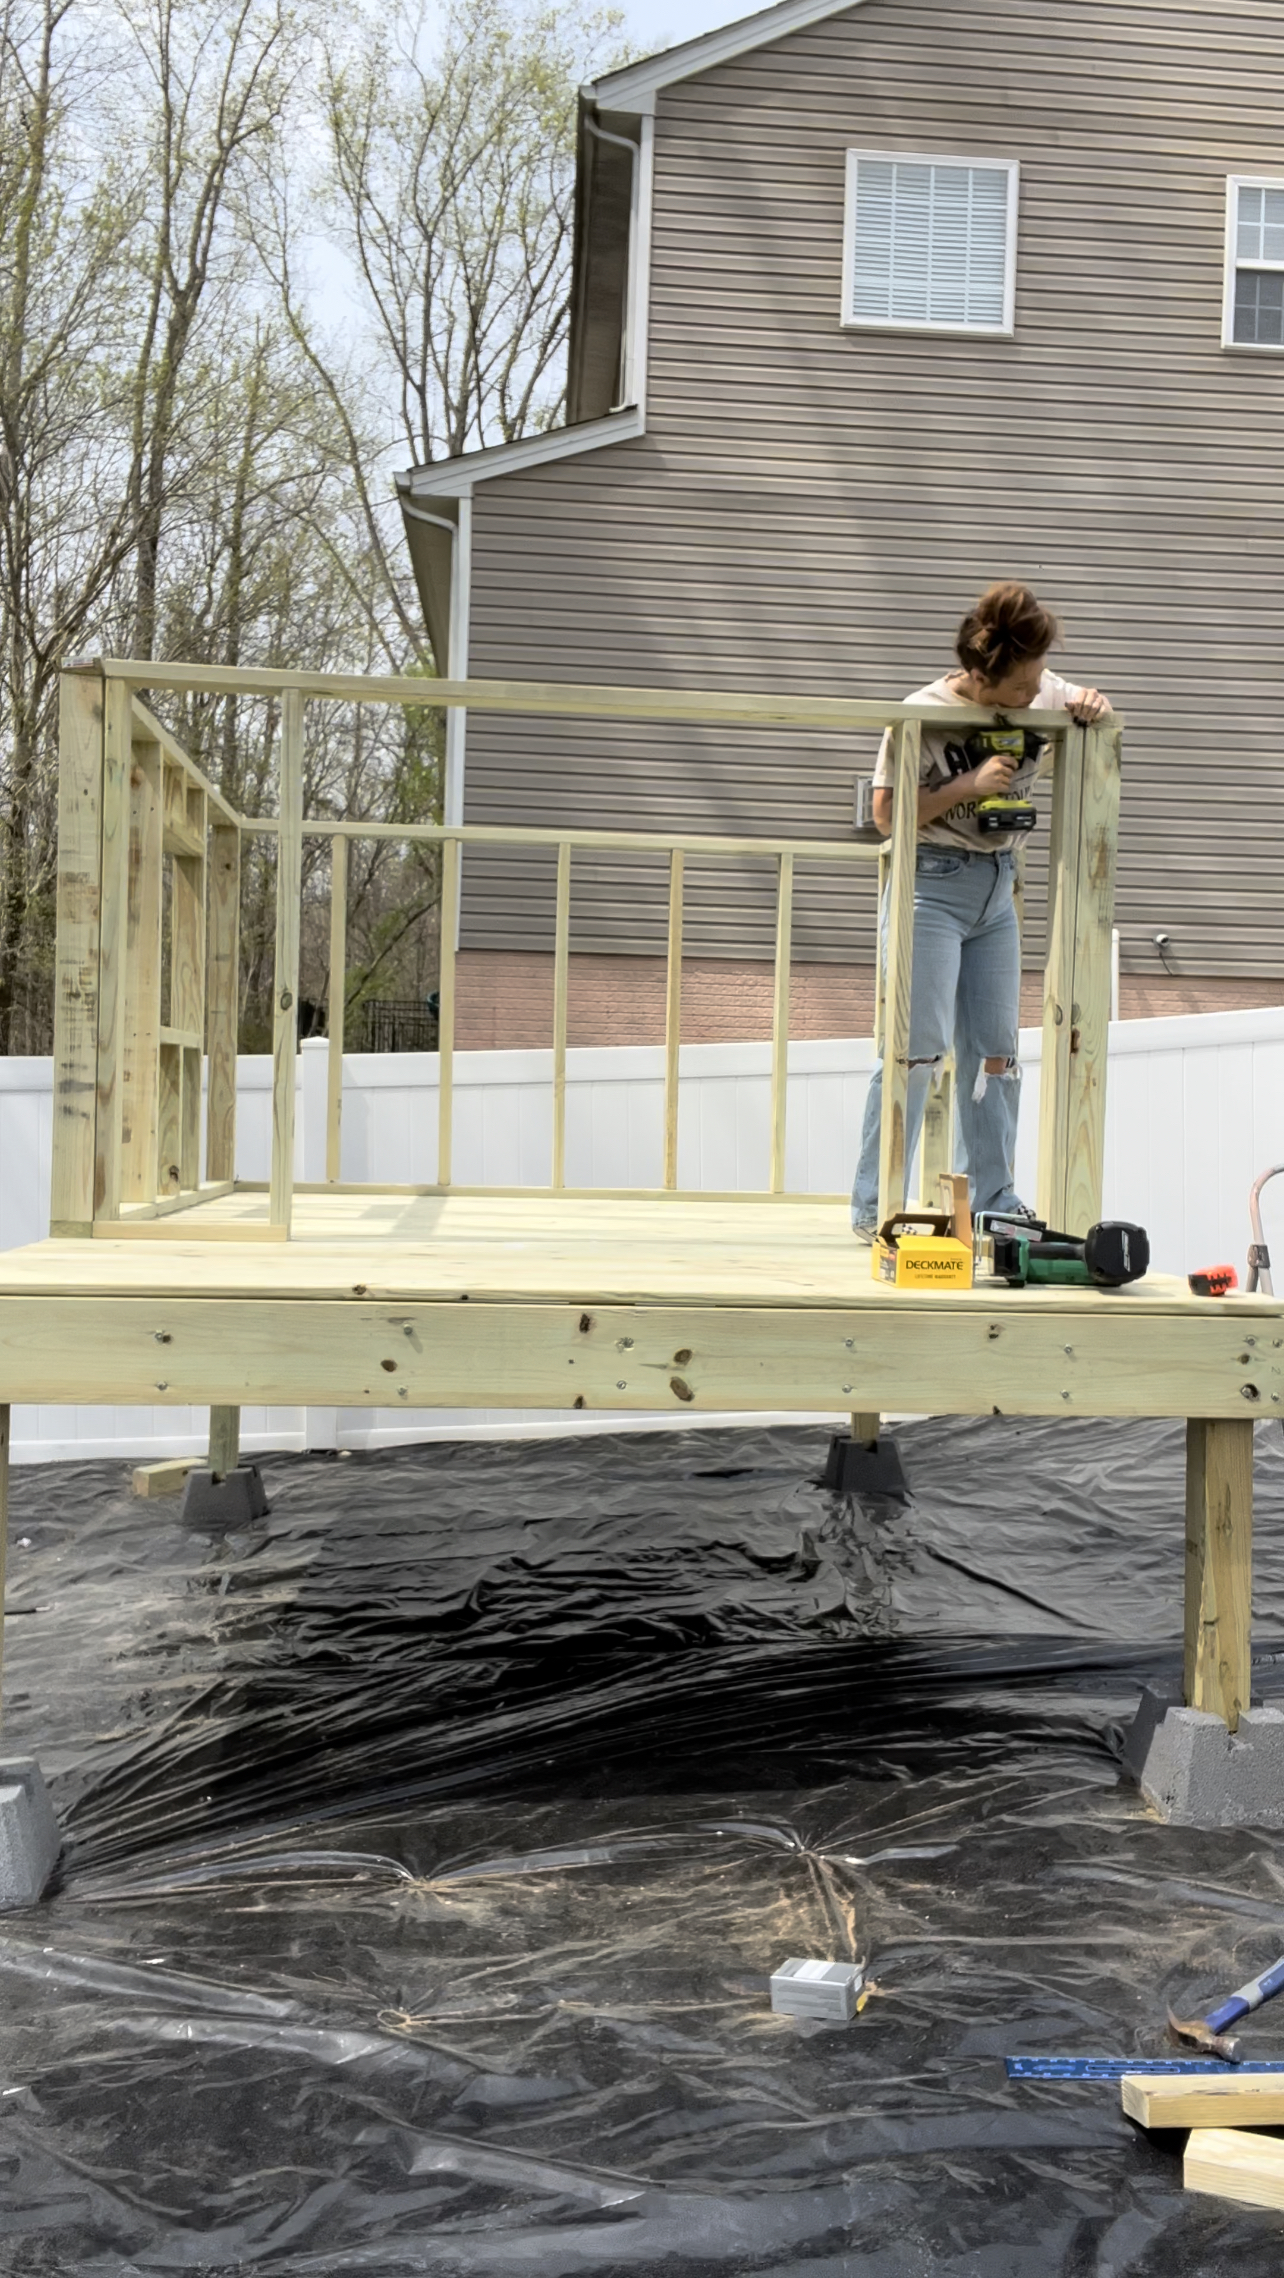
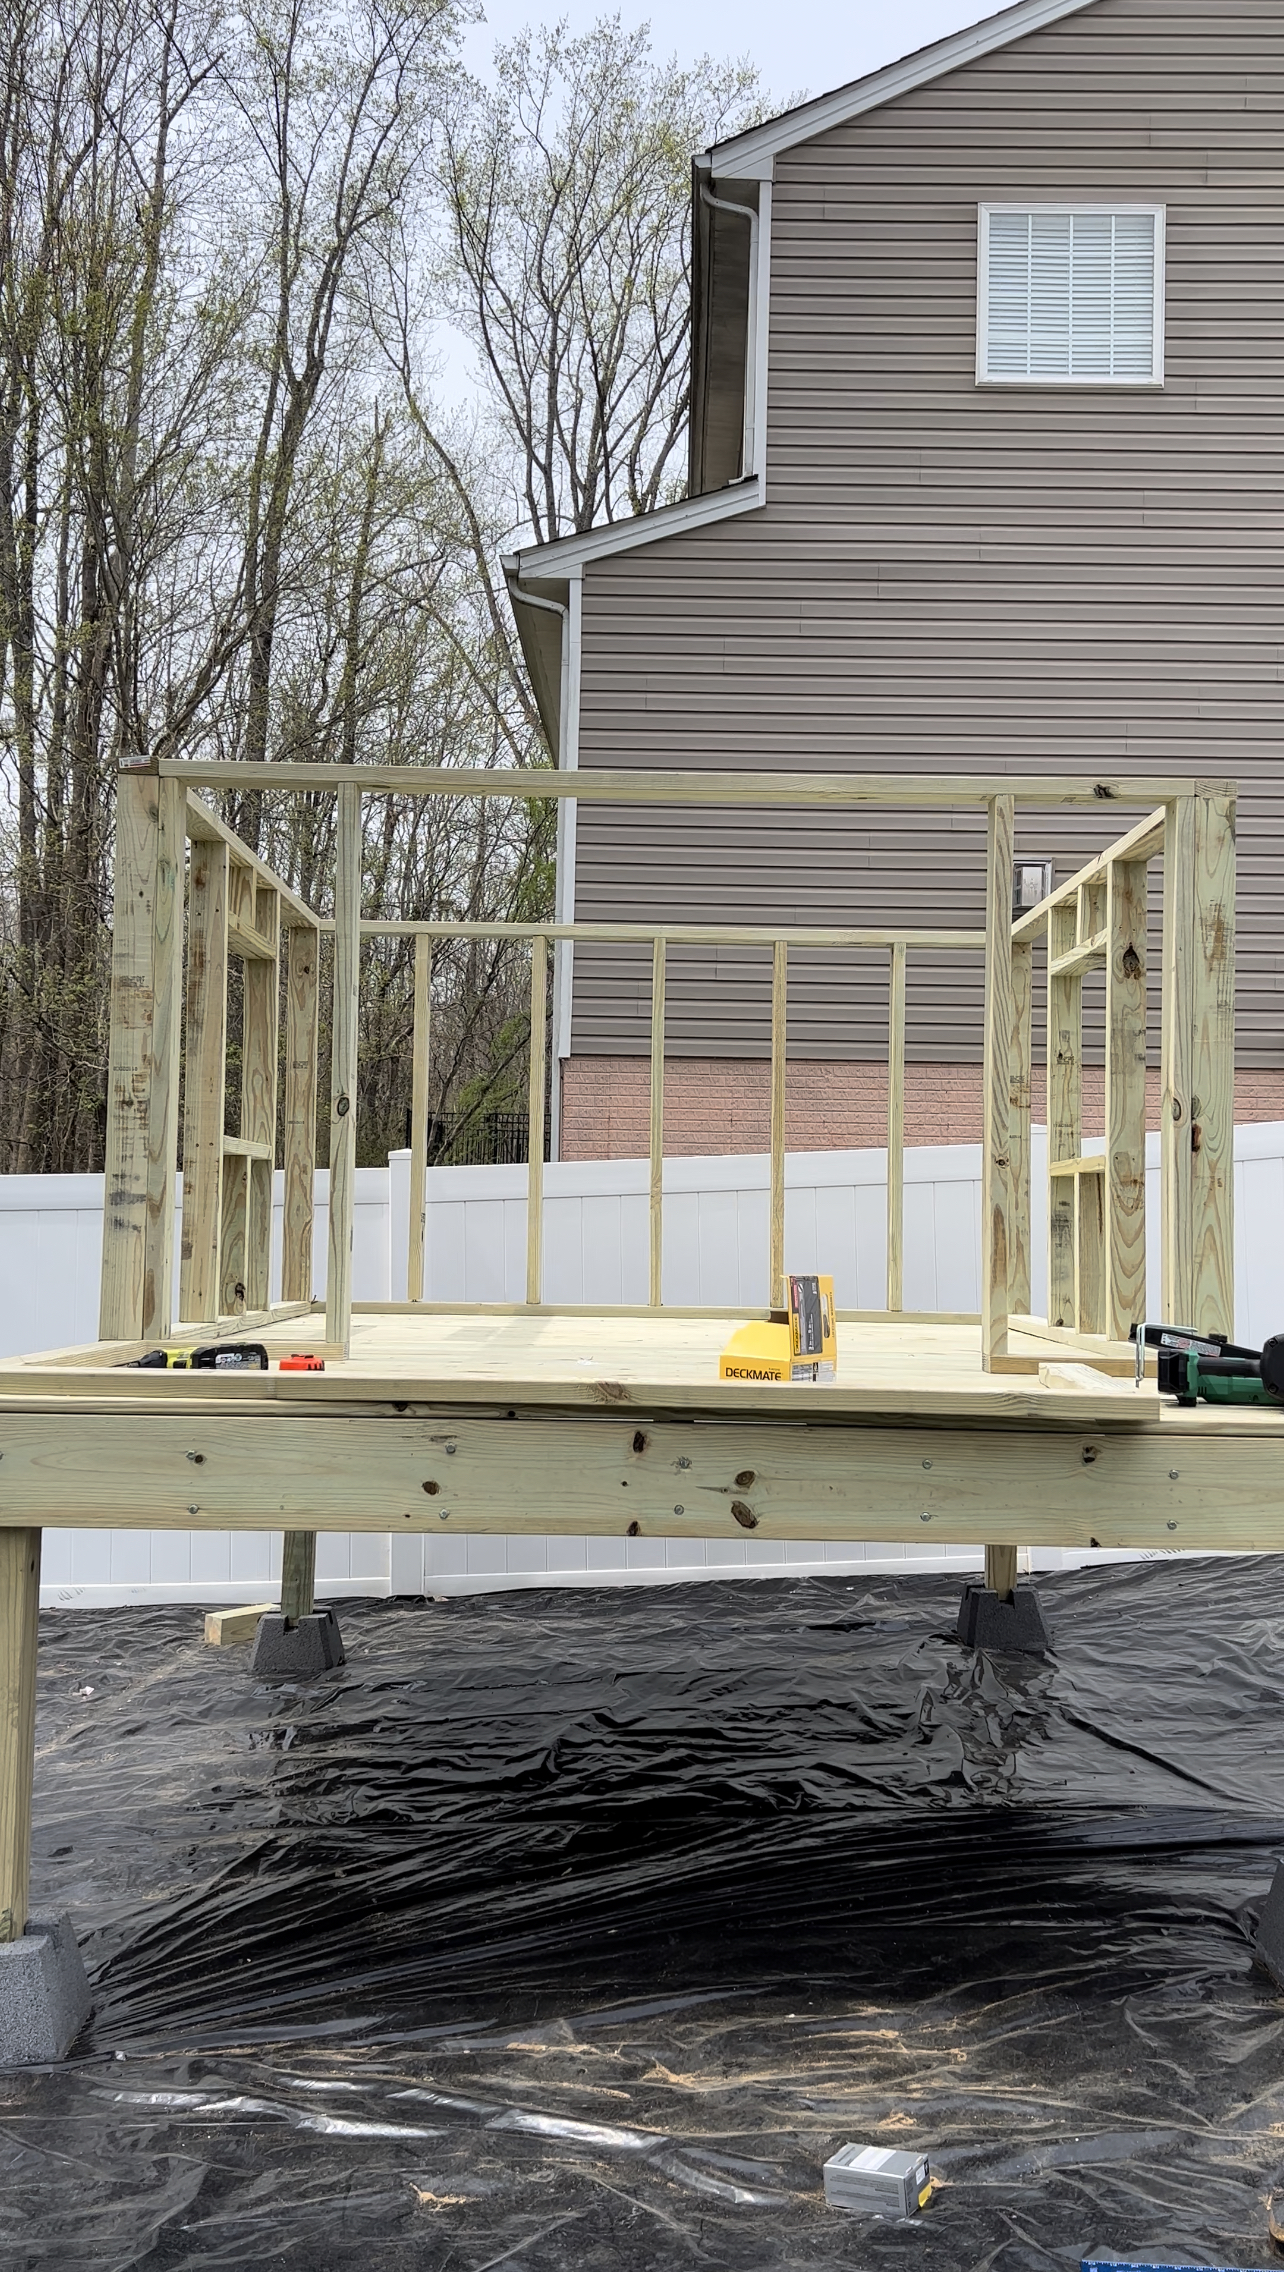
To mount the walls, I held each one up making sure that it was square and used 3 in screws to screw it into the base frame. I then screwed the wall frames together.
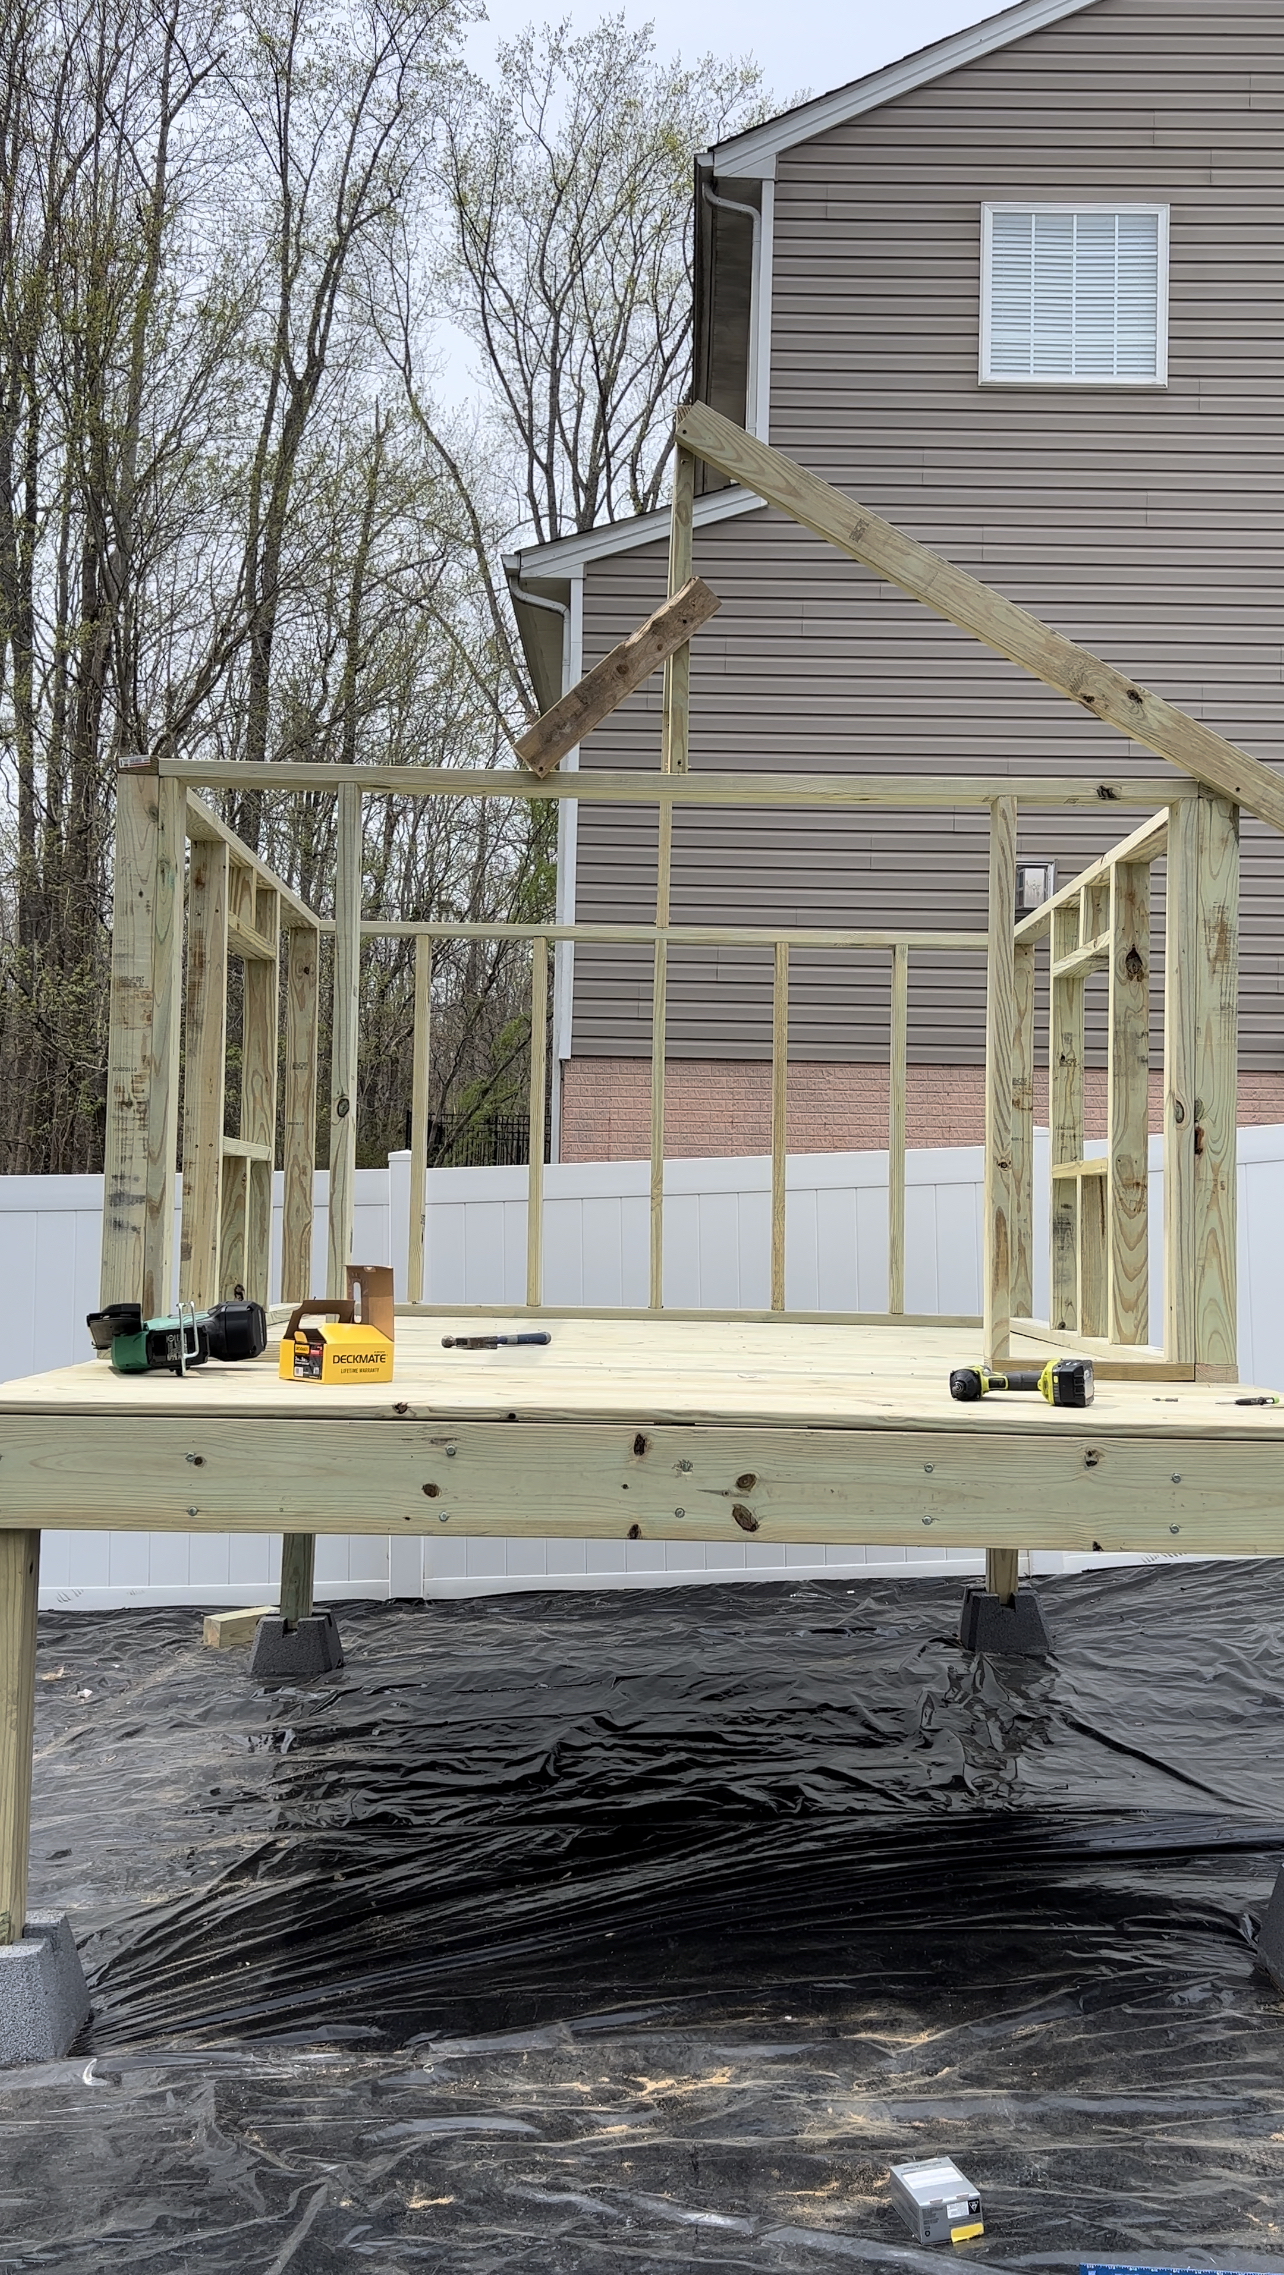
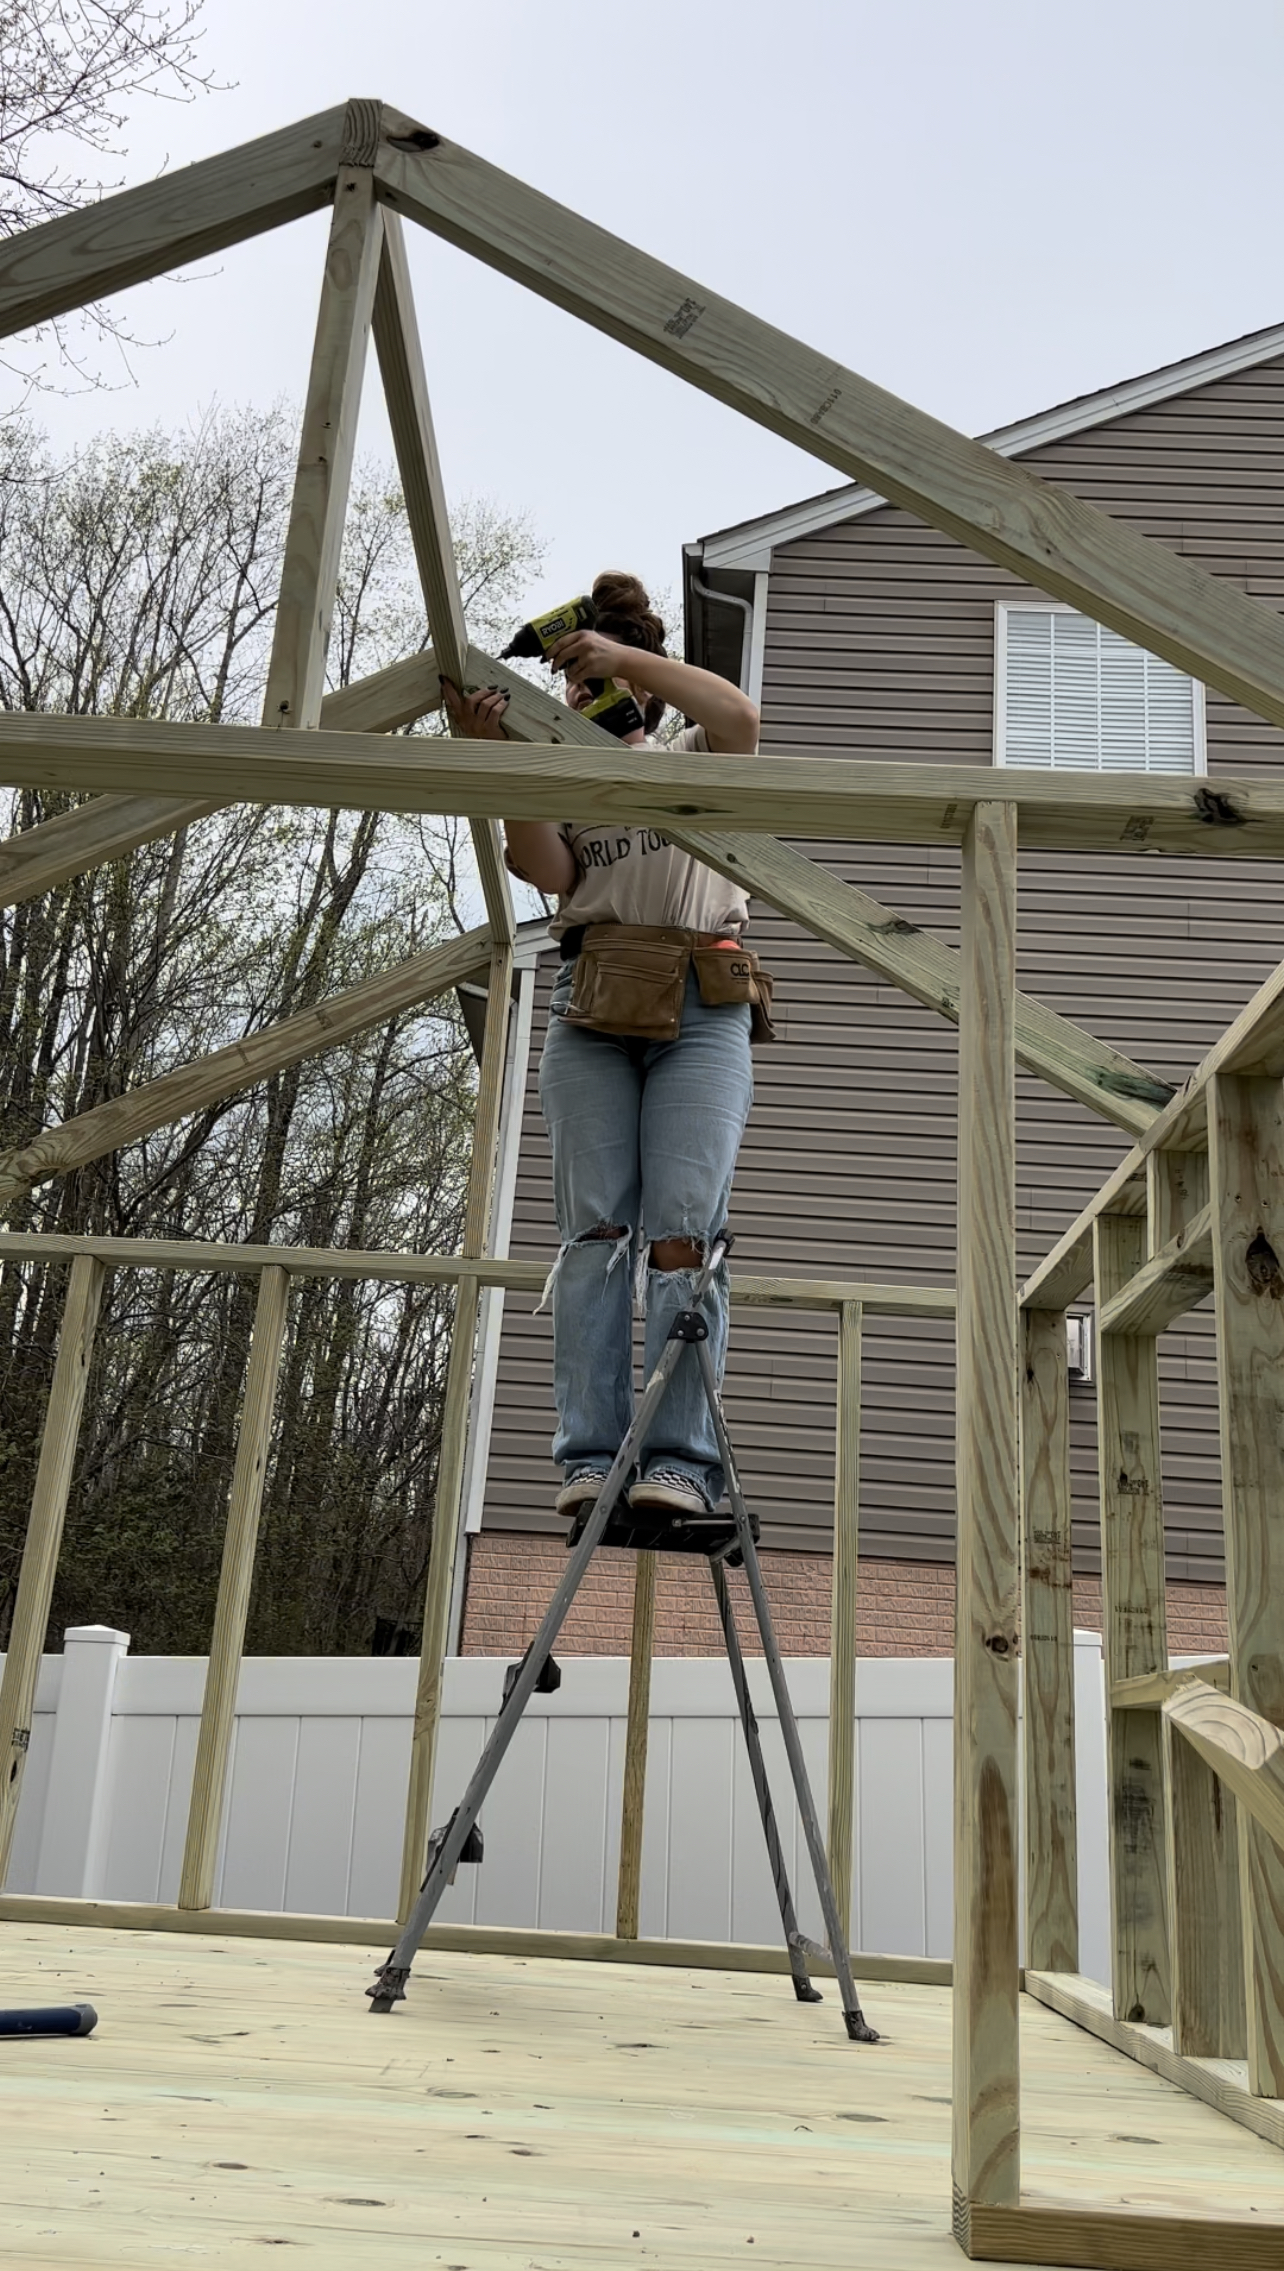
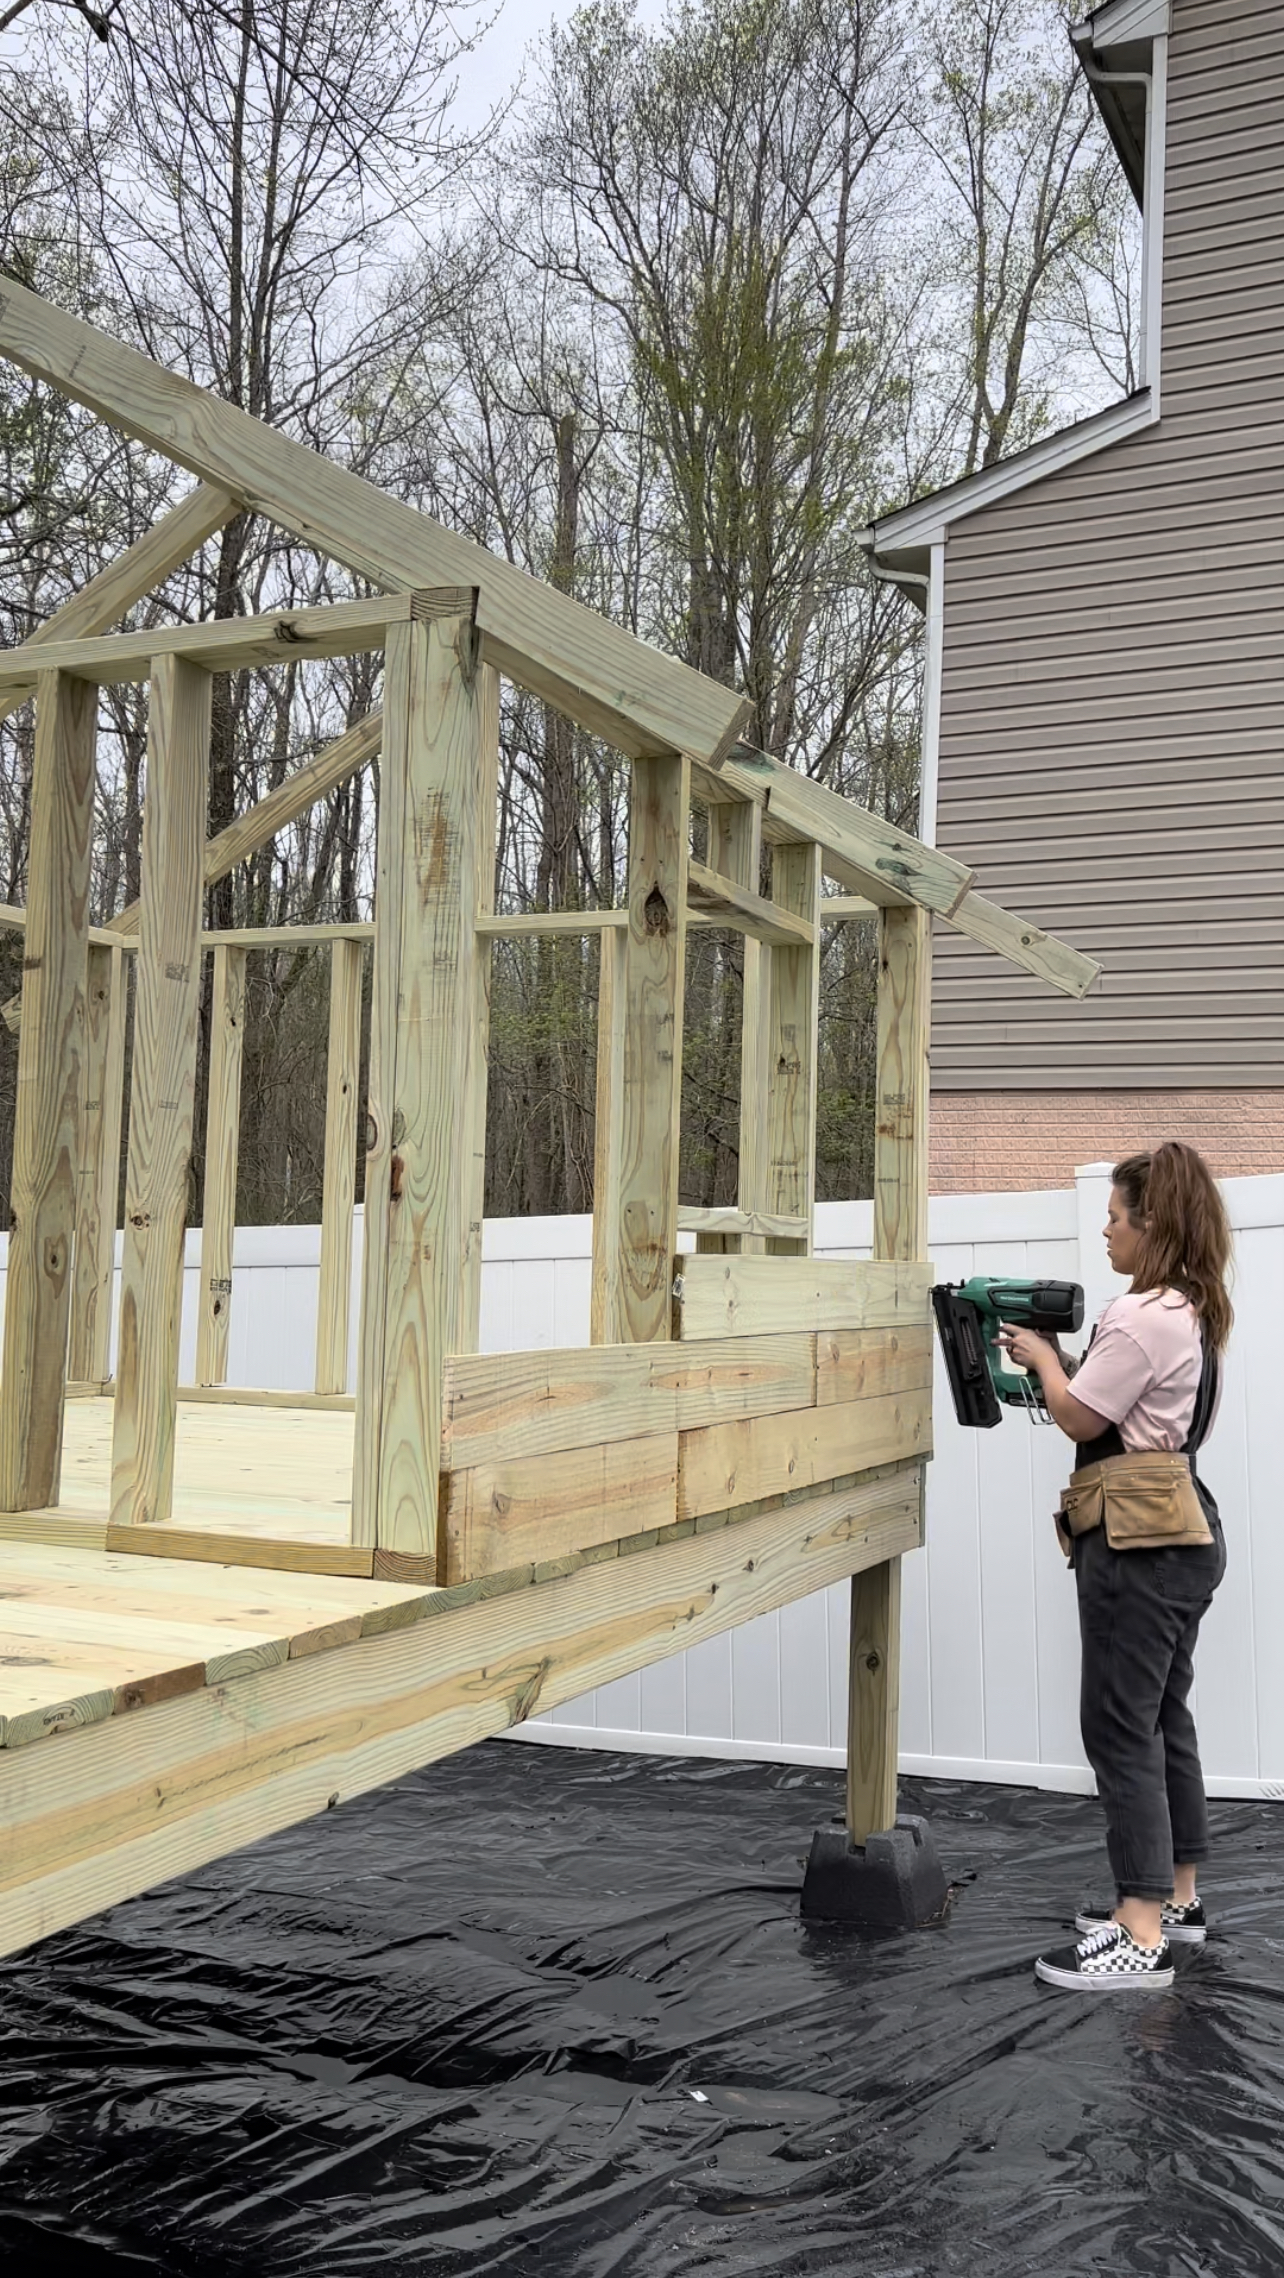
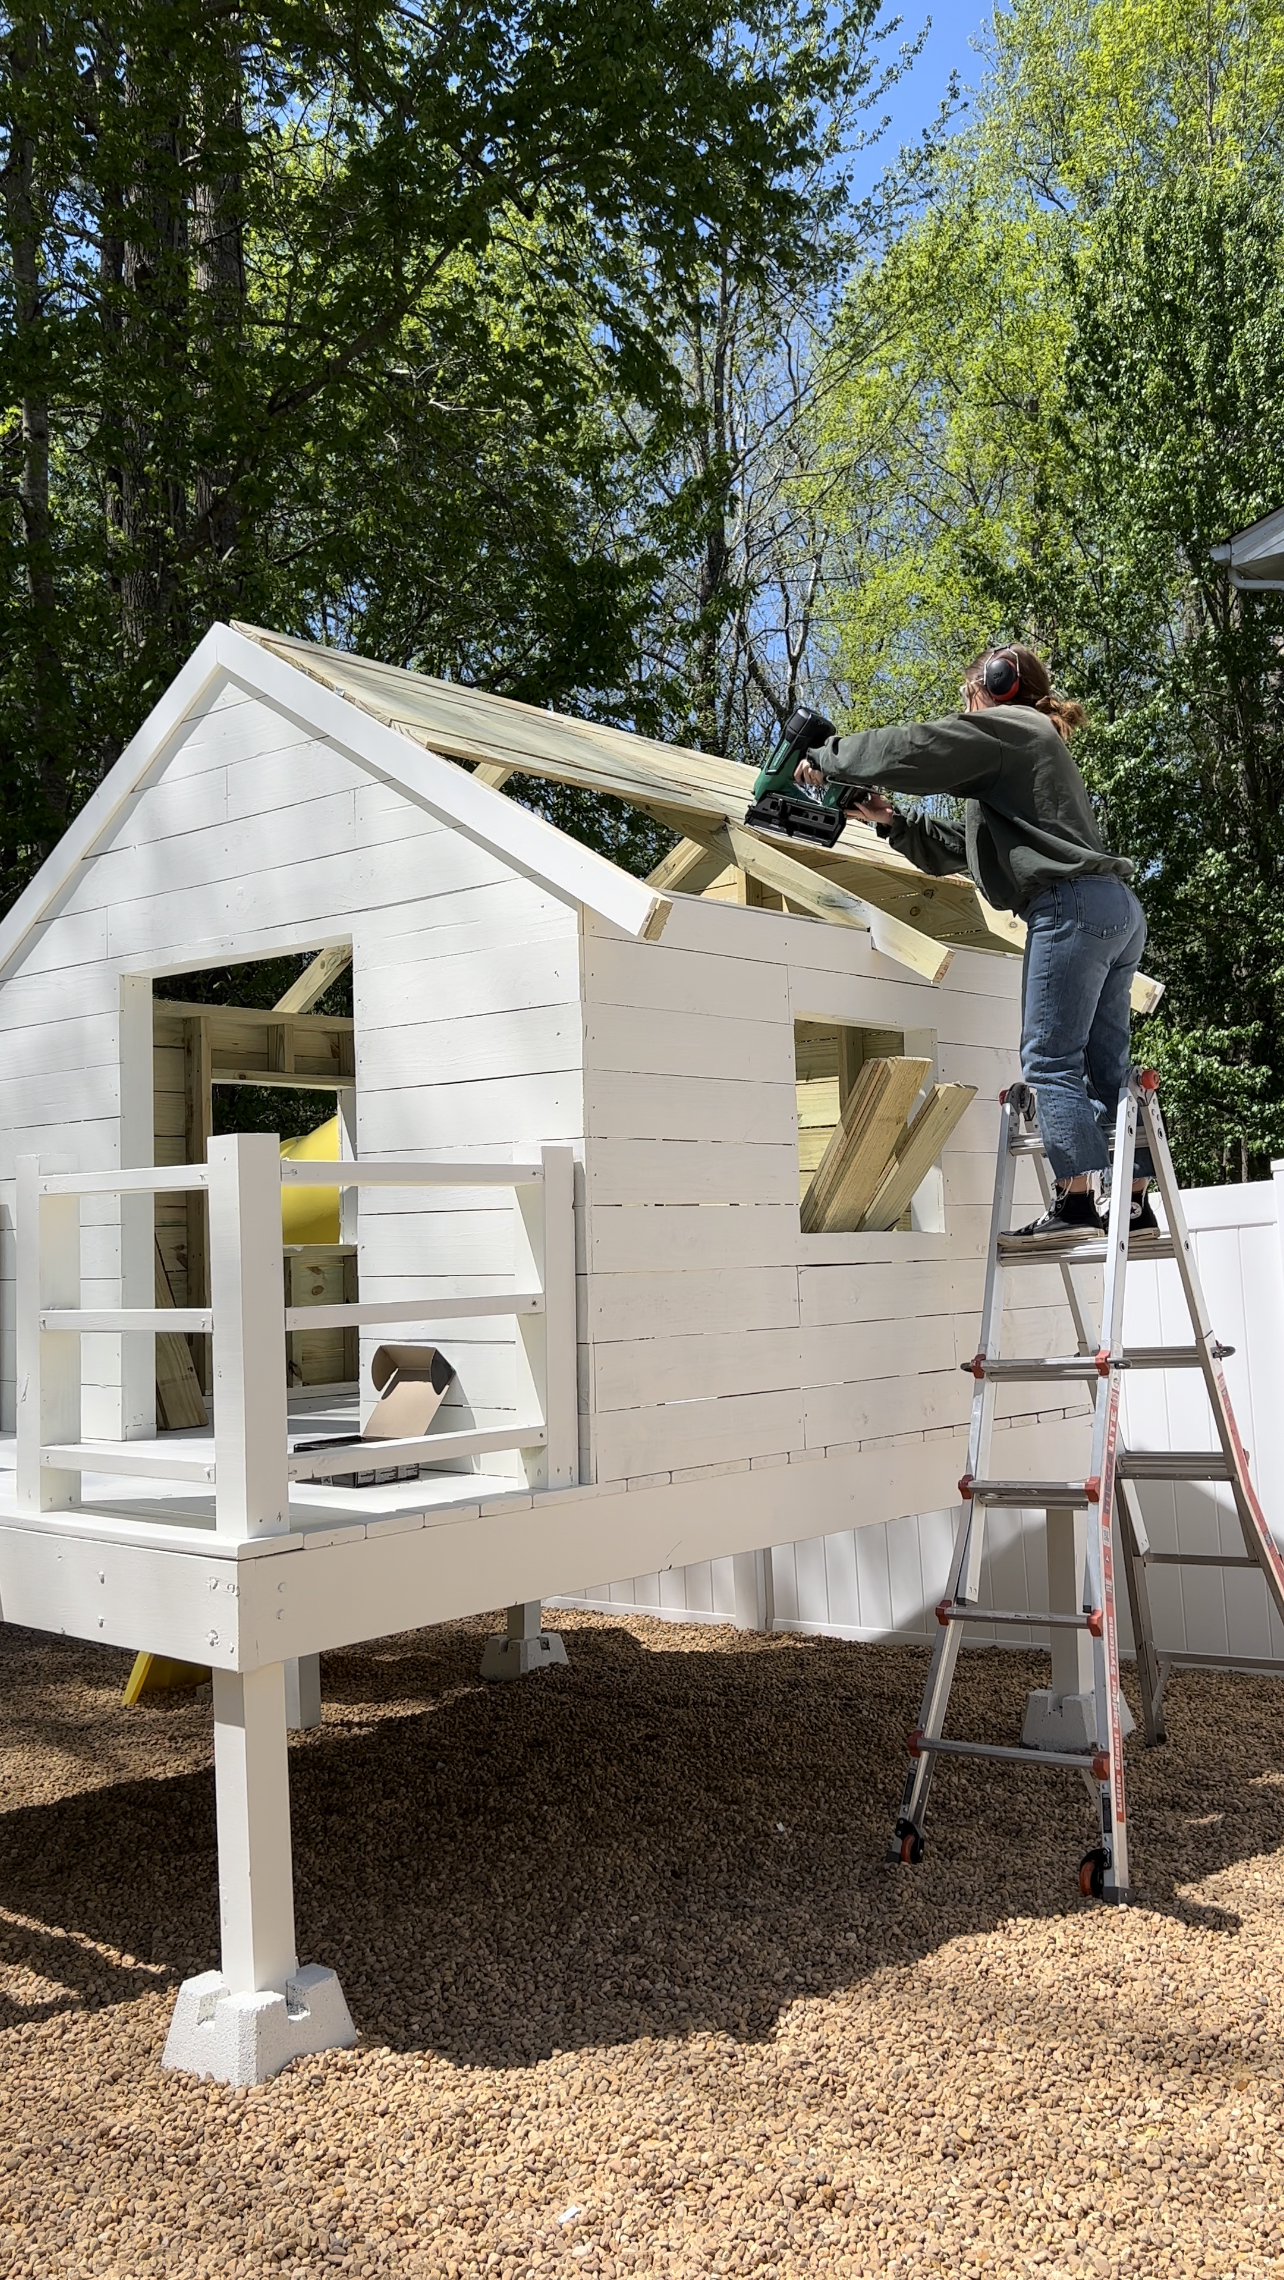
Roof Frame
To frame the roof I cut two 28 in boards and screwed them in centered on the front and back walls. Then, I cut another 2×4 down to and screwed it between each of the 28 in boards to create the roof line.

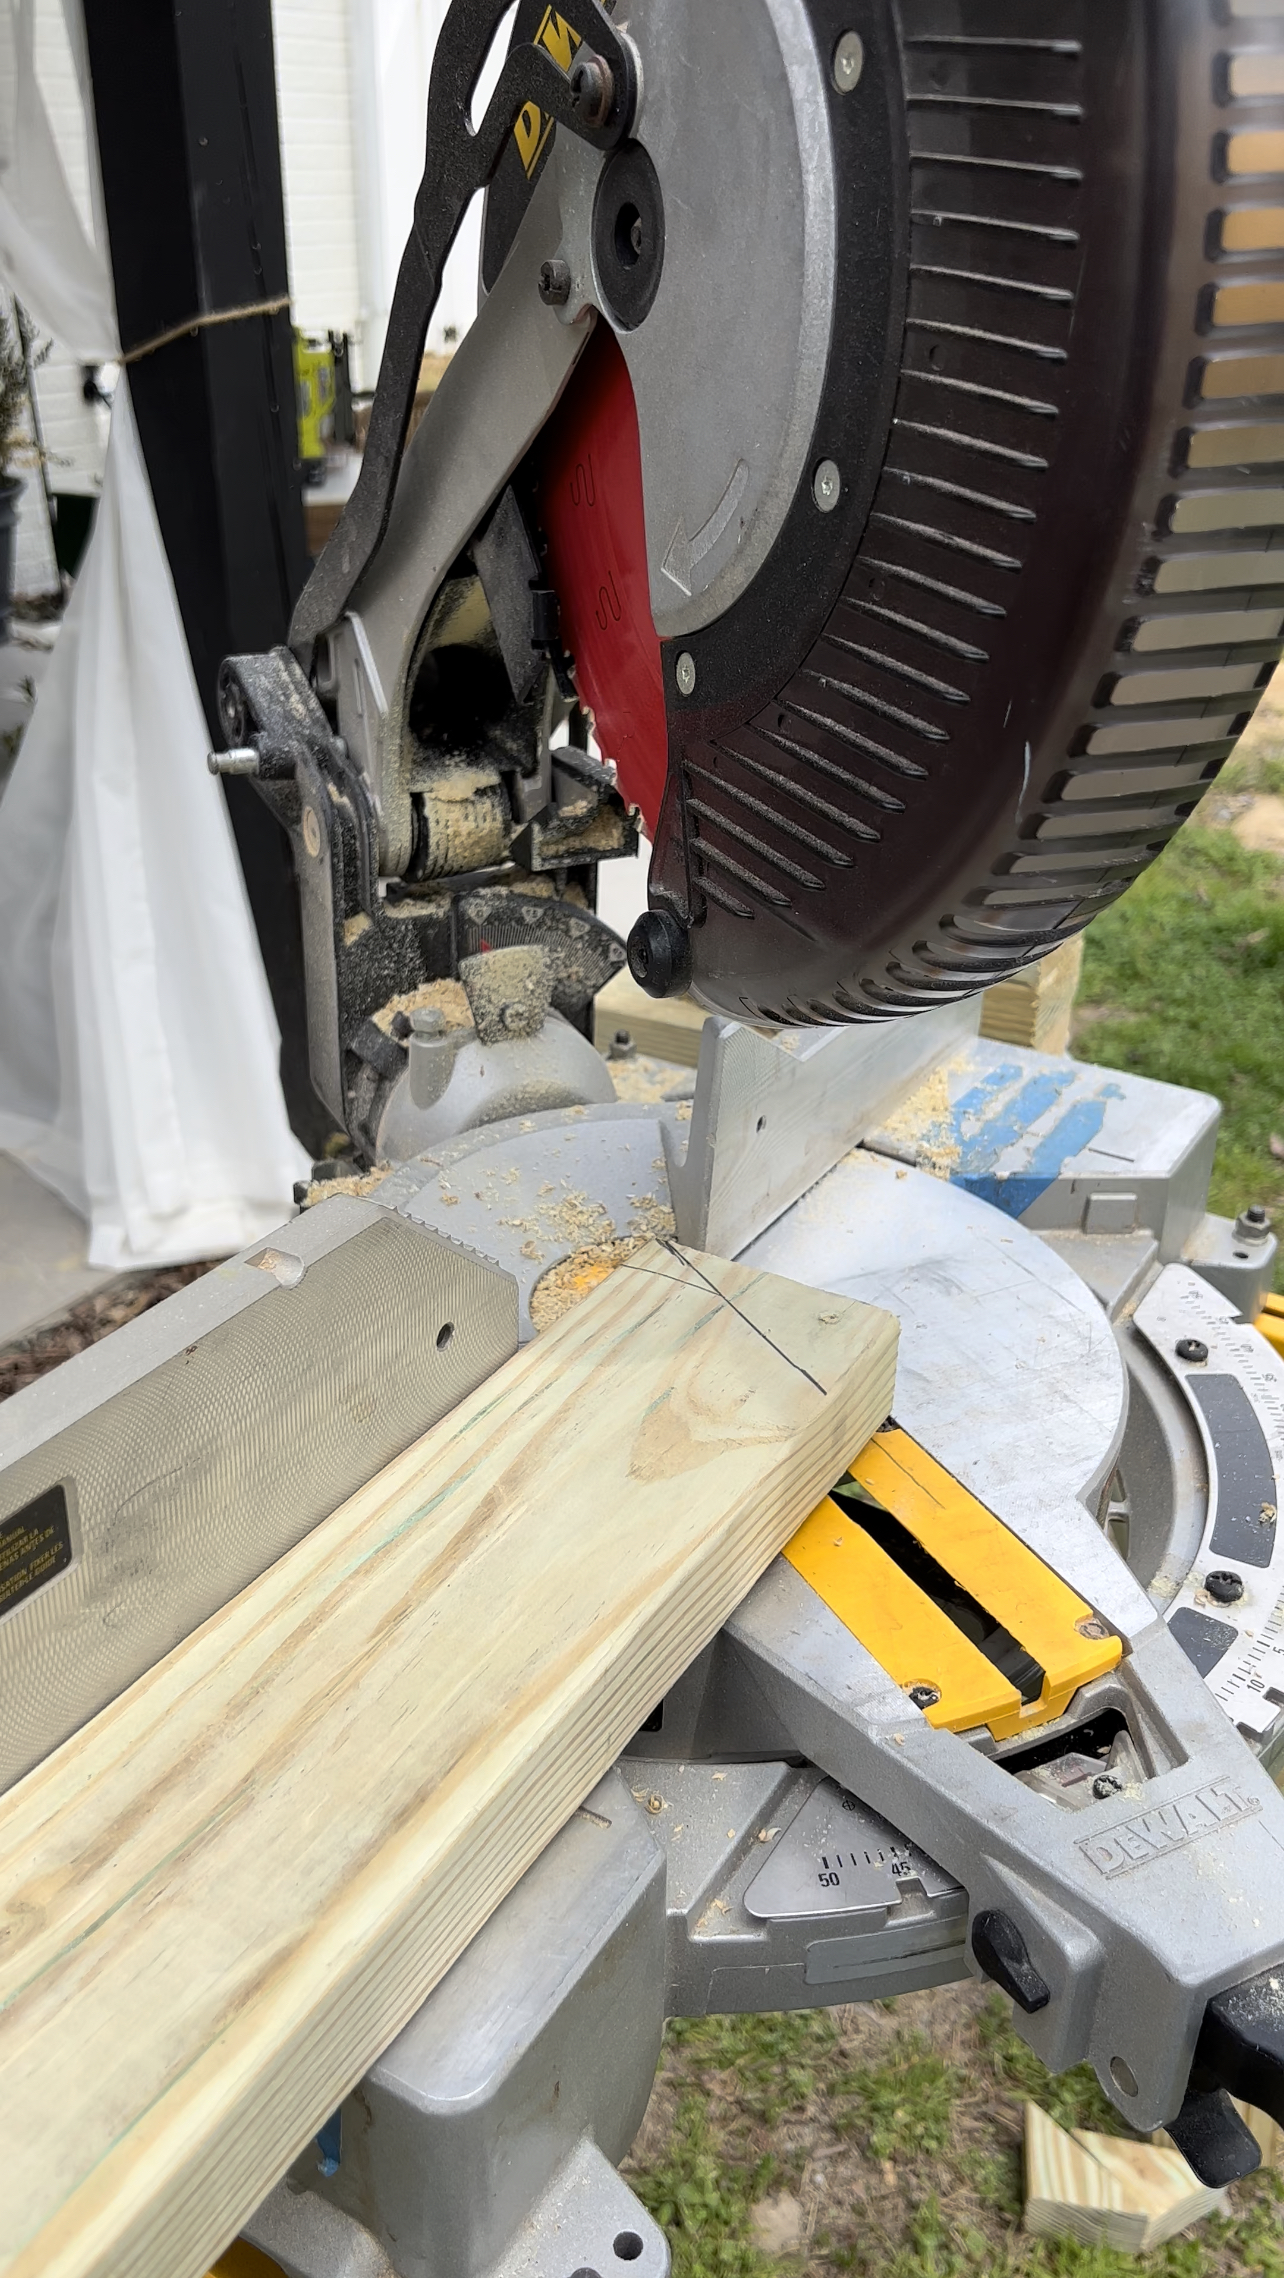
Next, I placed a 2×4 against the front of the playhouse lining the top corner up with the outside each of the 24 inch board. Then I placed two brad nails in to hold it in place while I traced the the cut angle for the roof line and the bird’s mouth cut for the bottom roof edge. I removed the board and cut. Then I used this board as a template to cut 5 more. I would recommend cutting these at an angle on the ends to be vertical/parallel with the walls of the playhouse. The length of mine ended up being 63 inches on the bottom side.
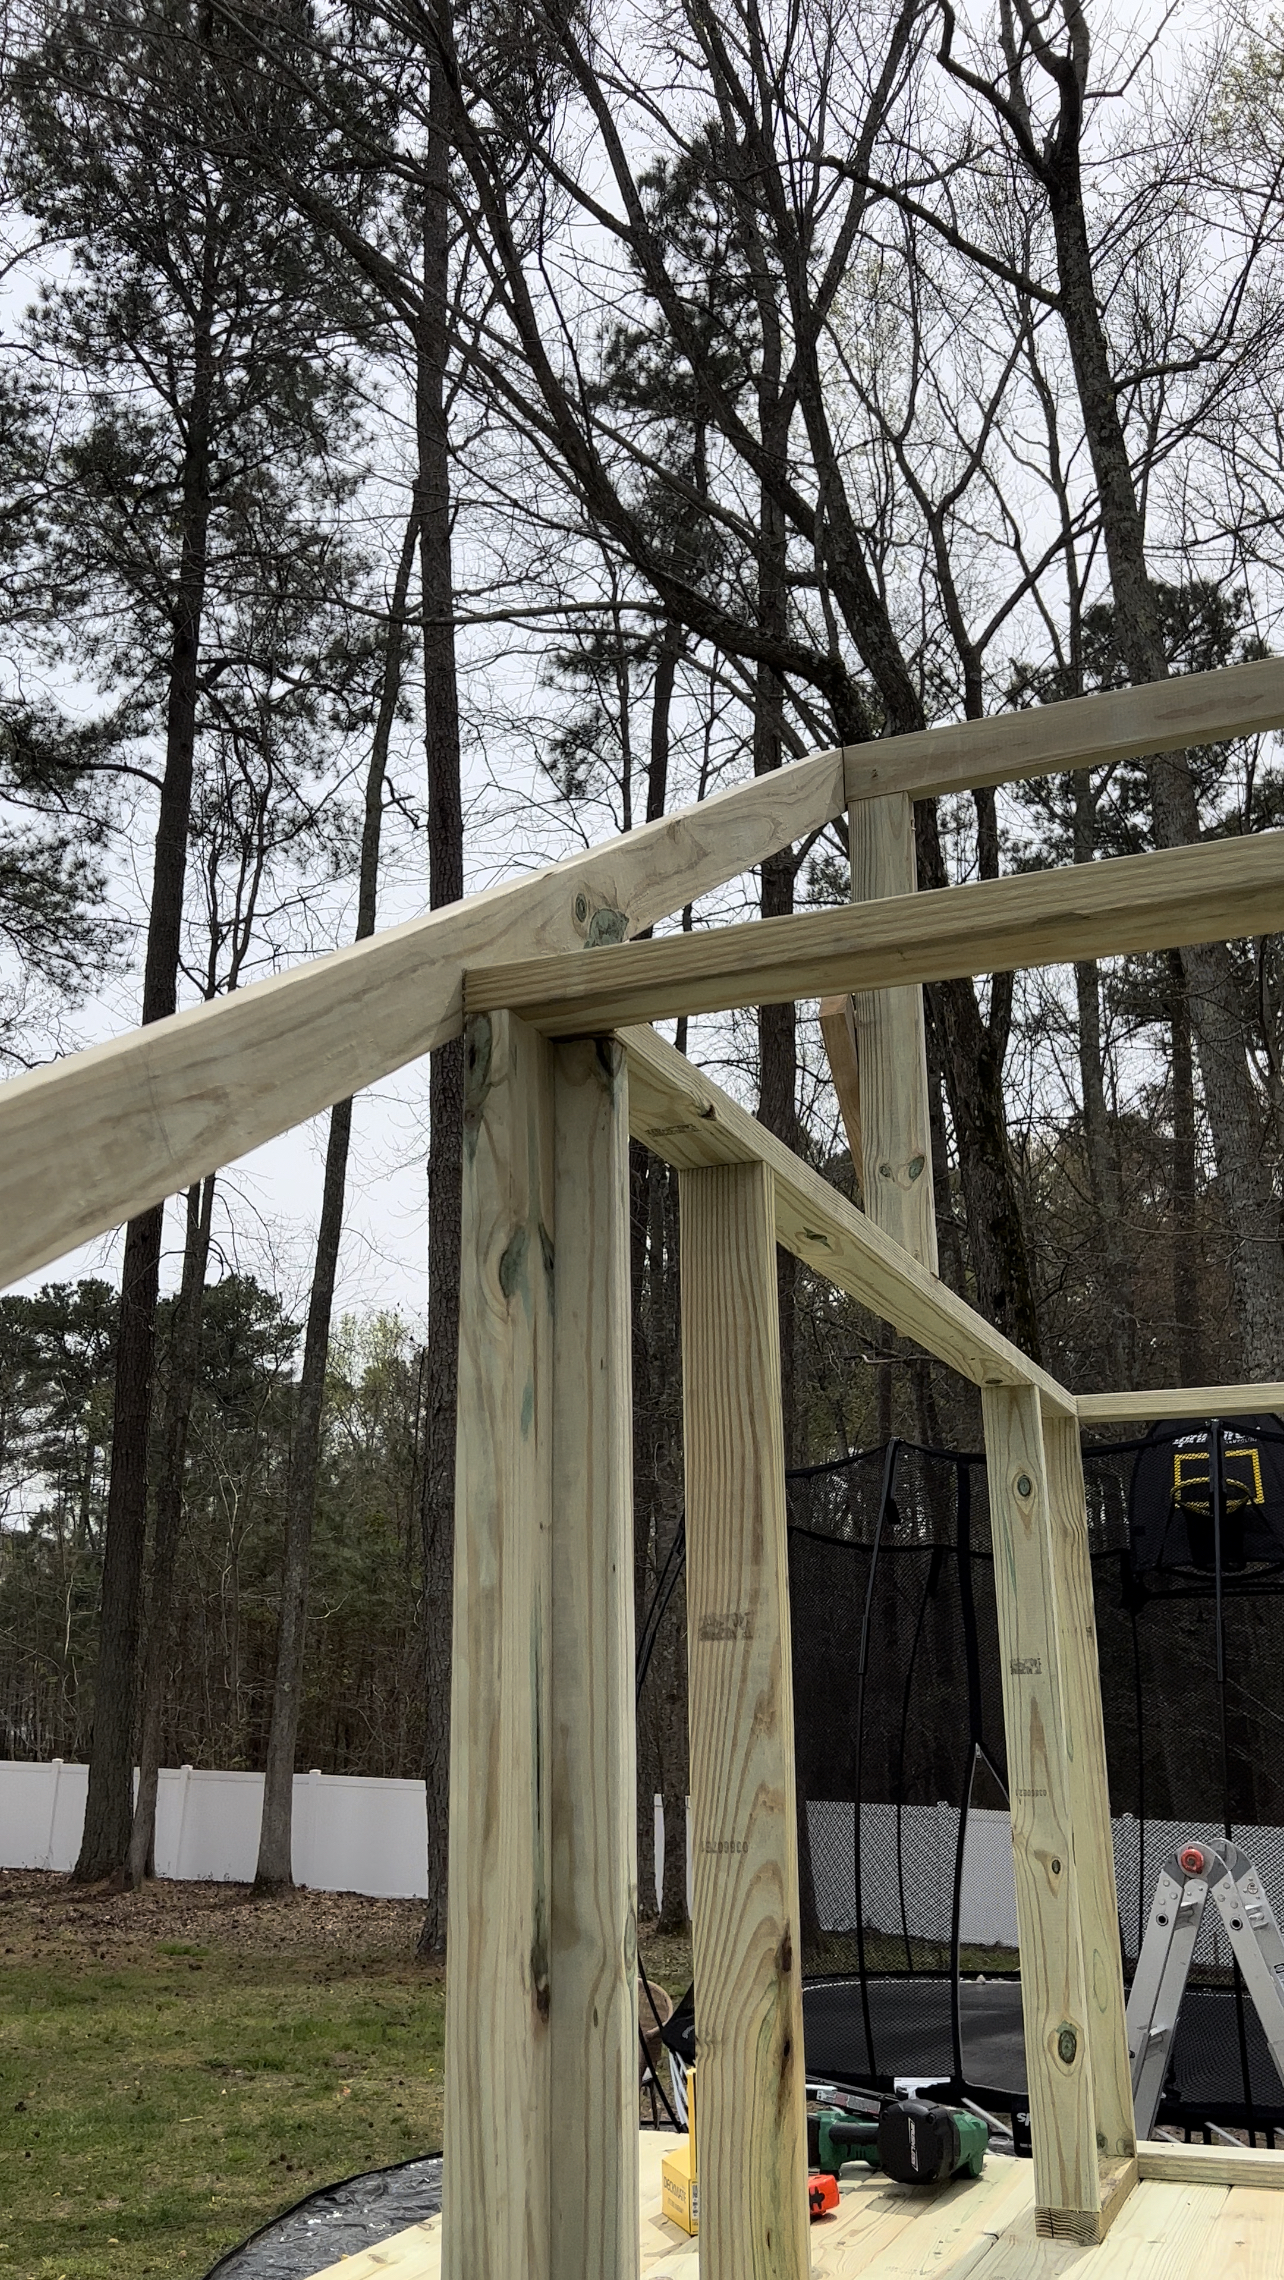

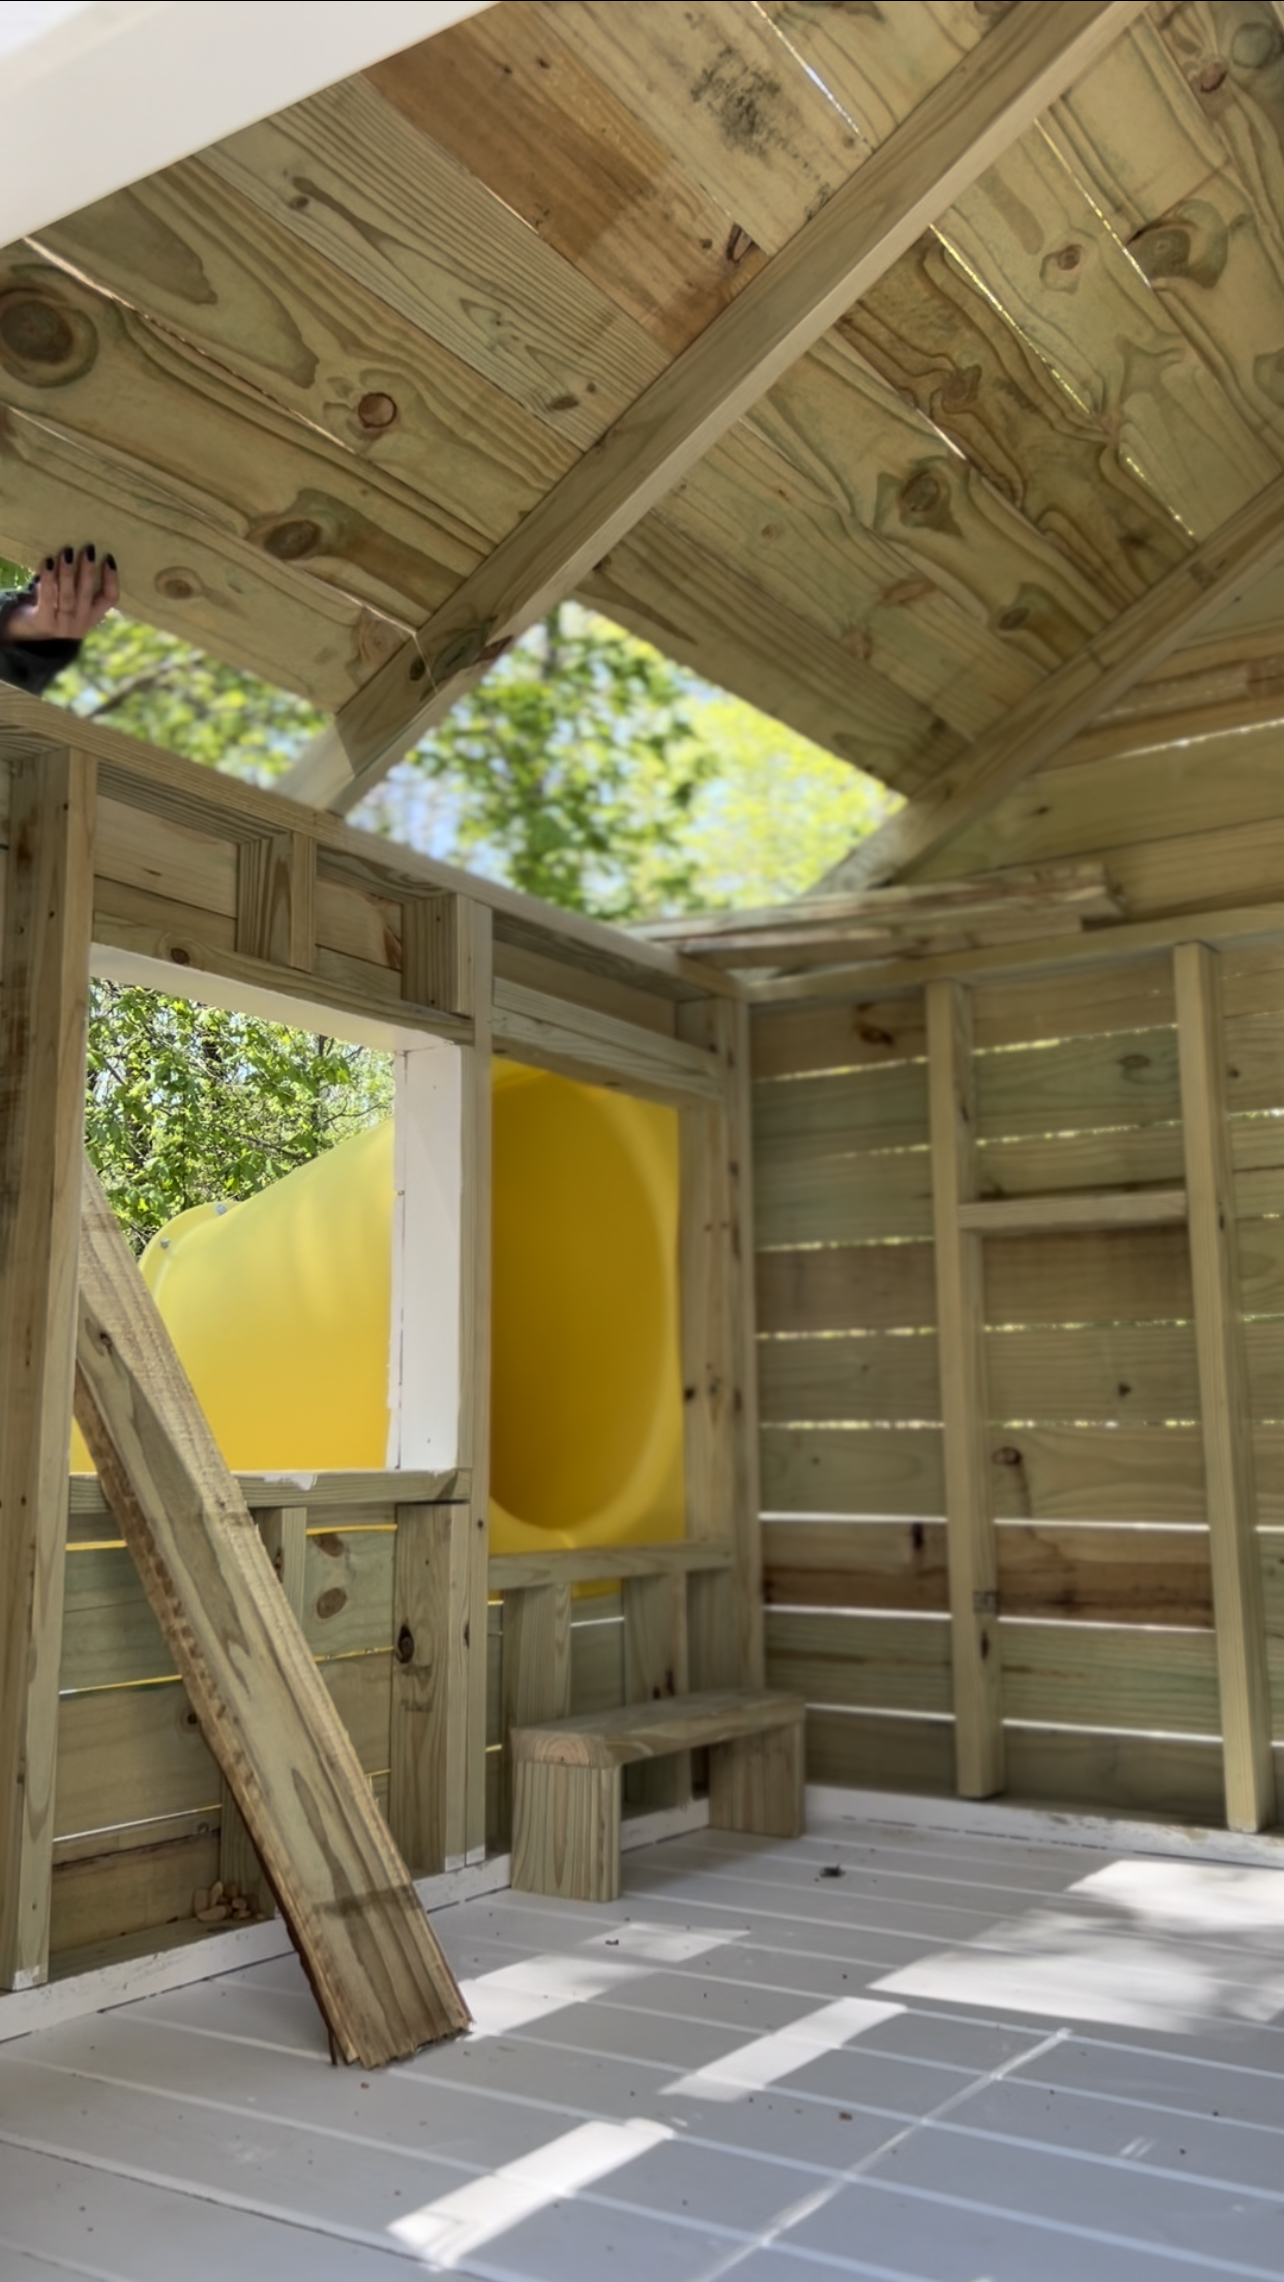
Using 3 in screws, I installed two of these flush with the front and the back sides of the playhouse. I then screwed the remaining two boards center between the front and back walls. For some extra support I cut short pieces to support between the center vertical board and the roof edges (not shown in photos below). I also used up my scraps to add in some shelves between studs on the walls!


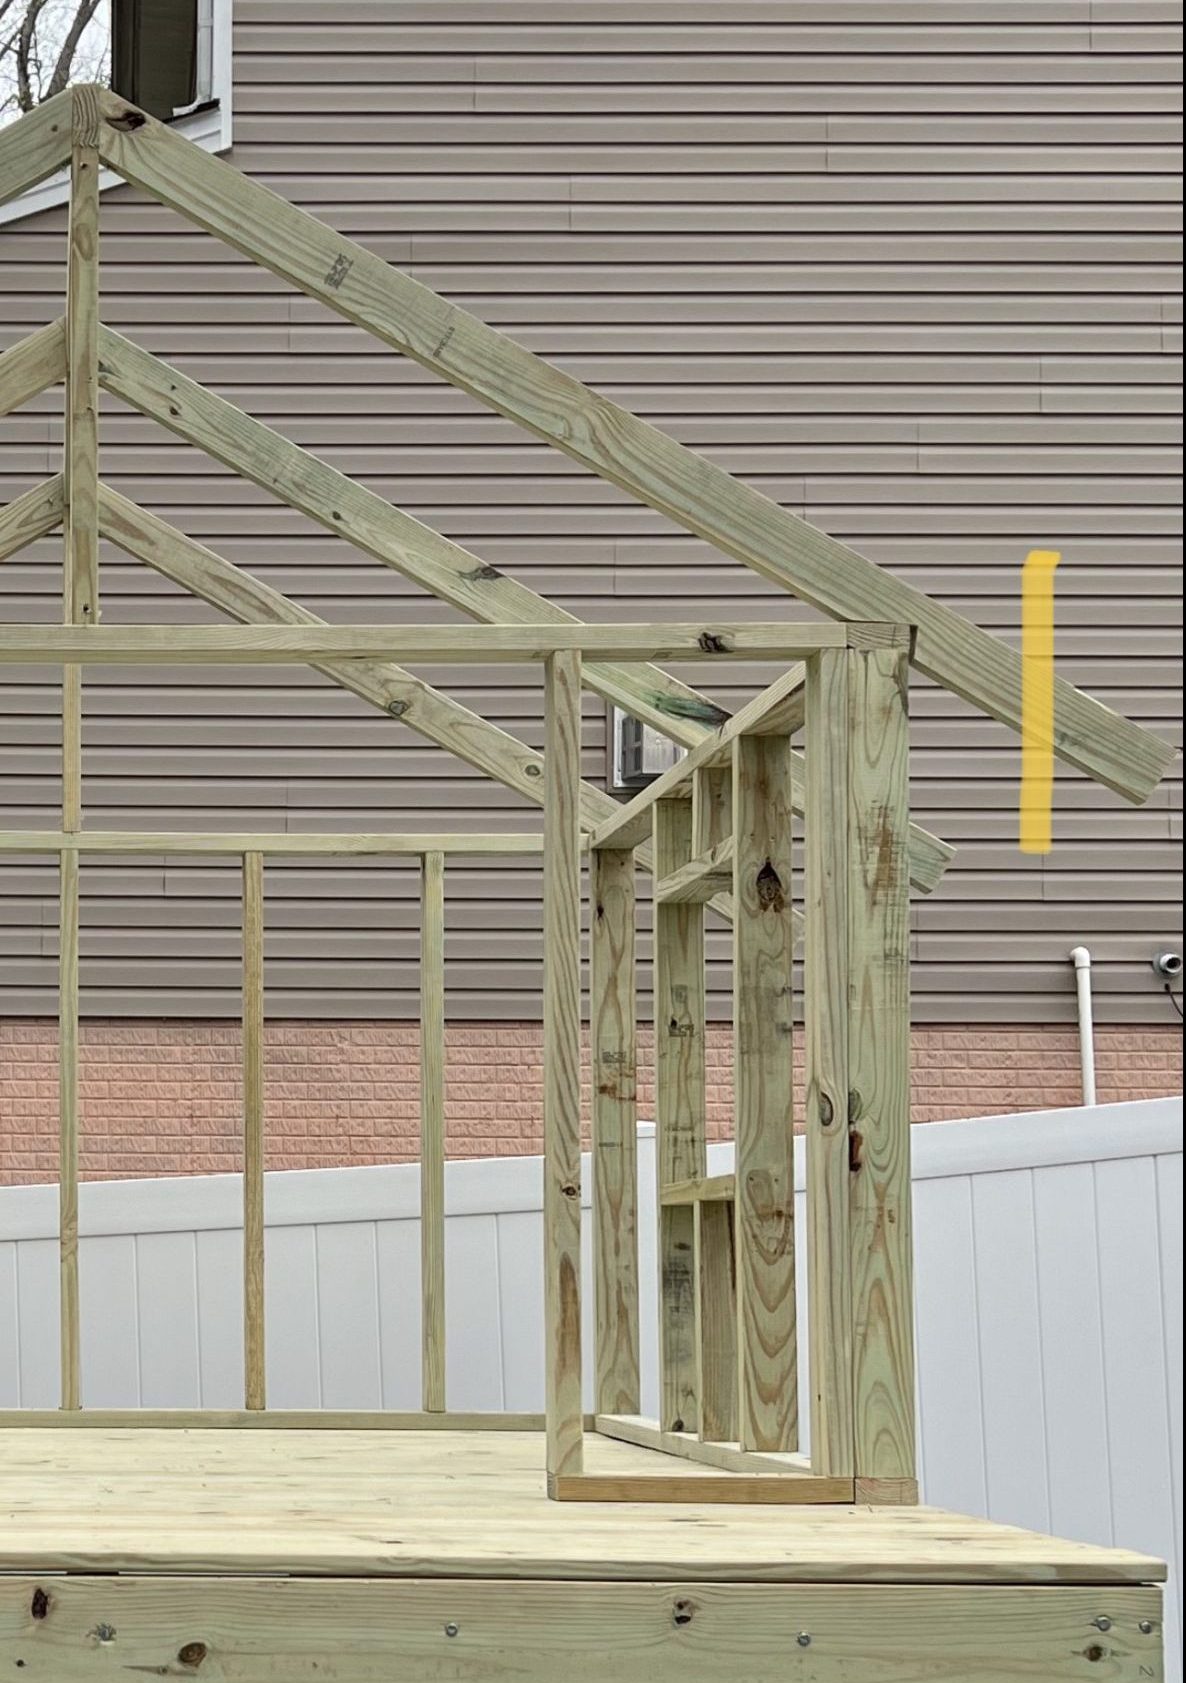
*The yellow line is to show how I eventually cut my rafters
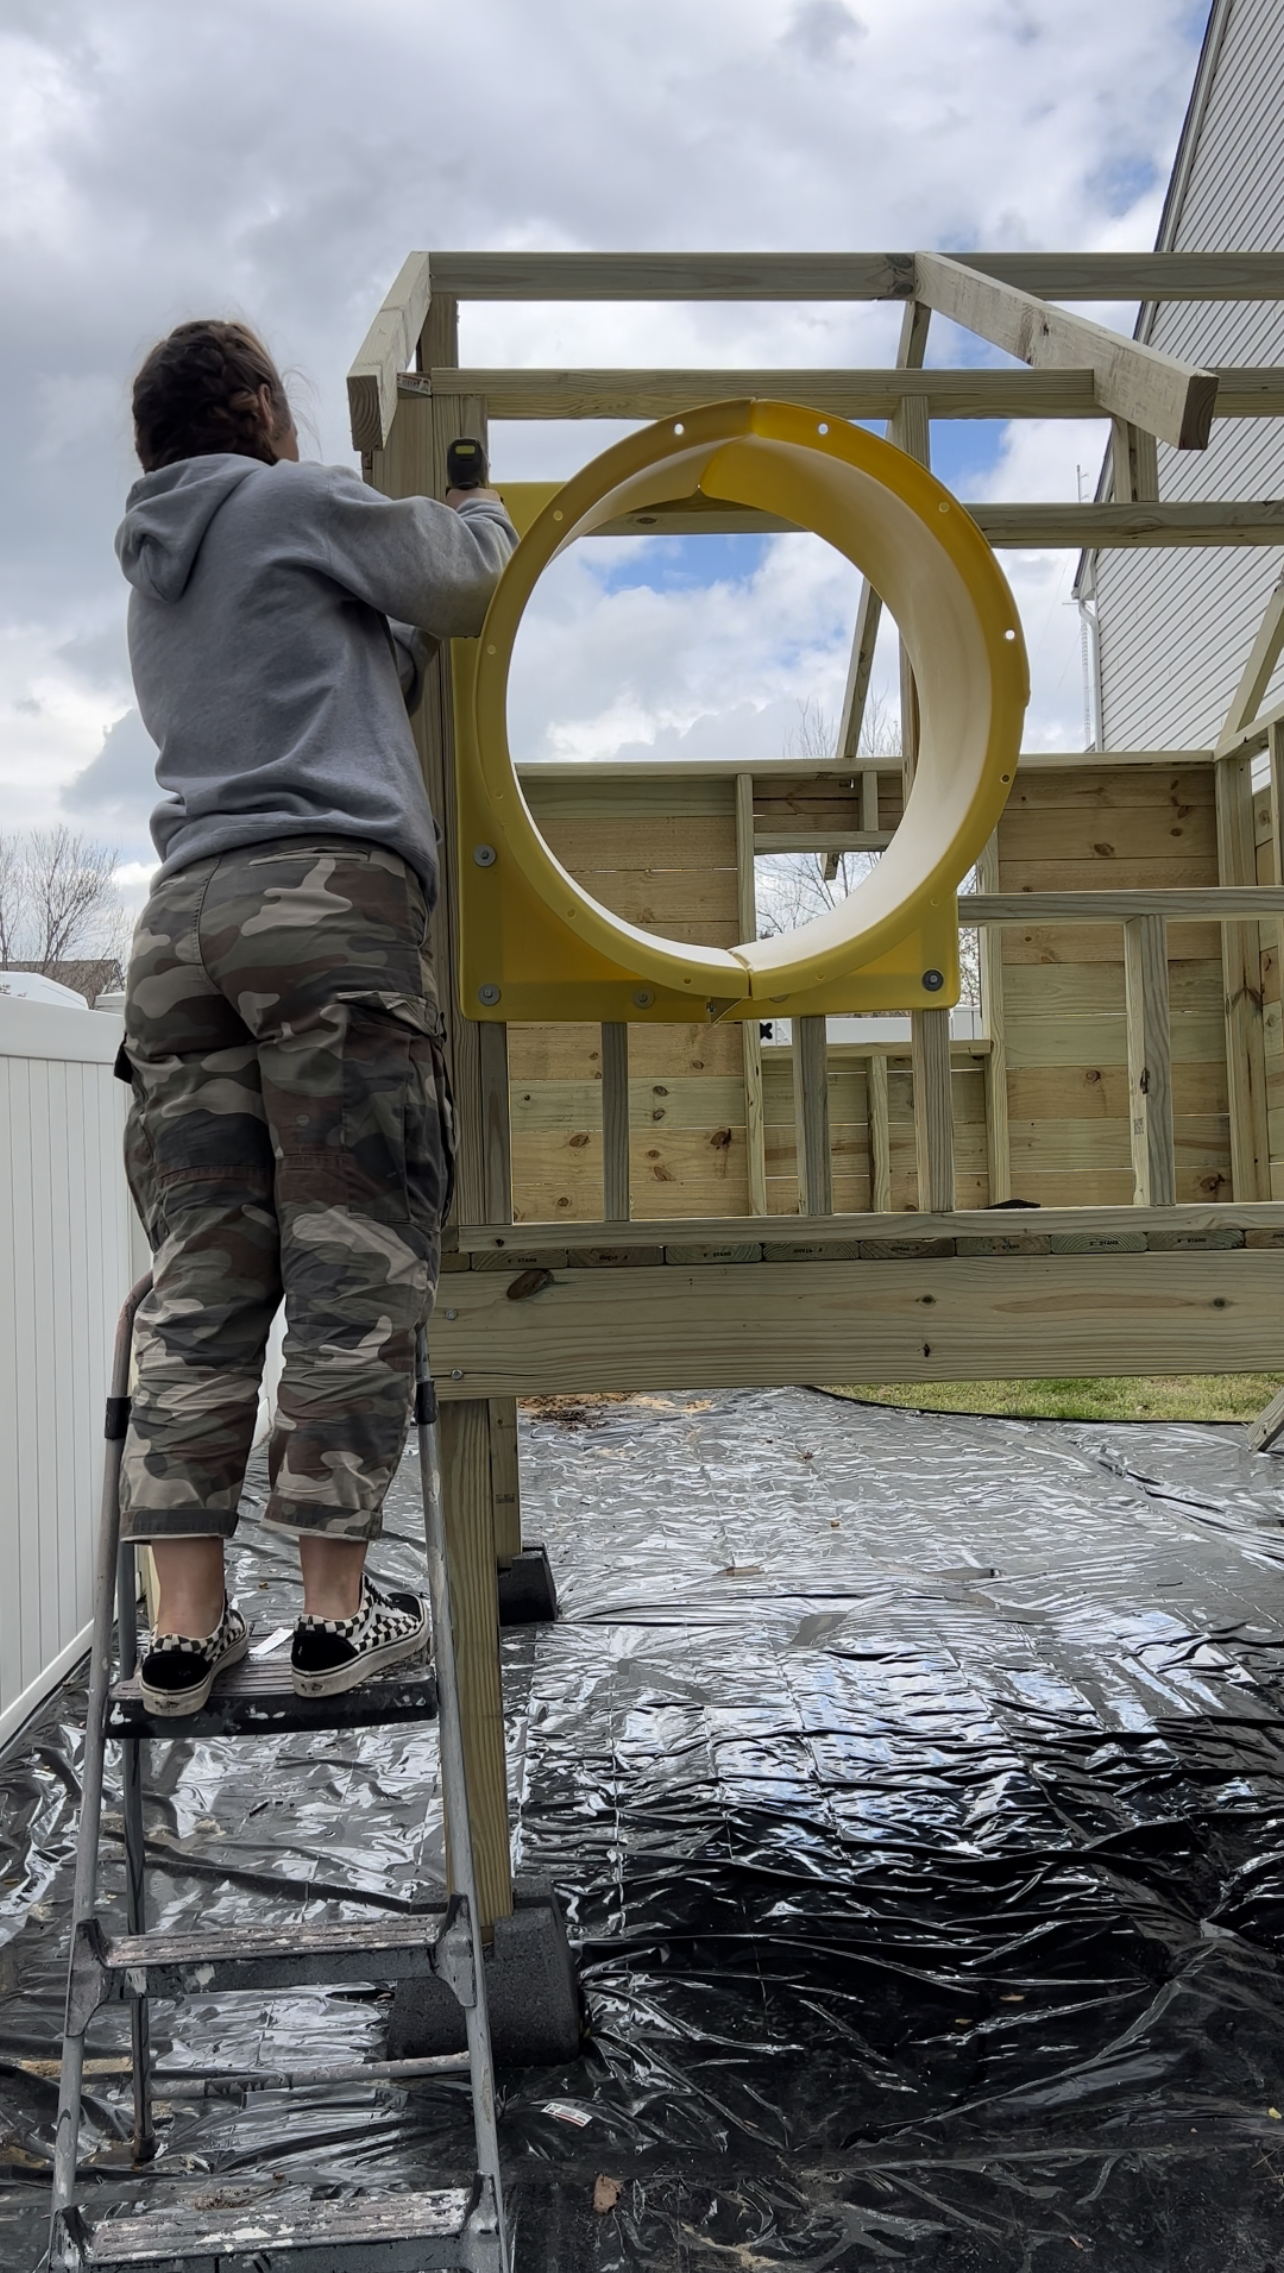
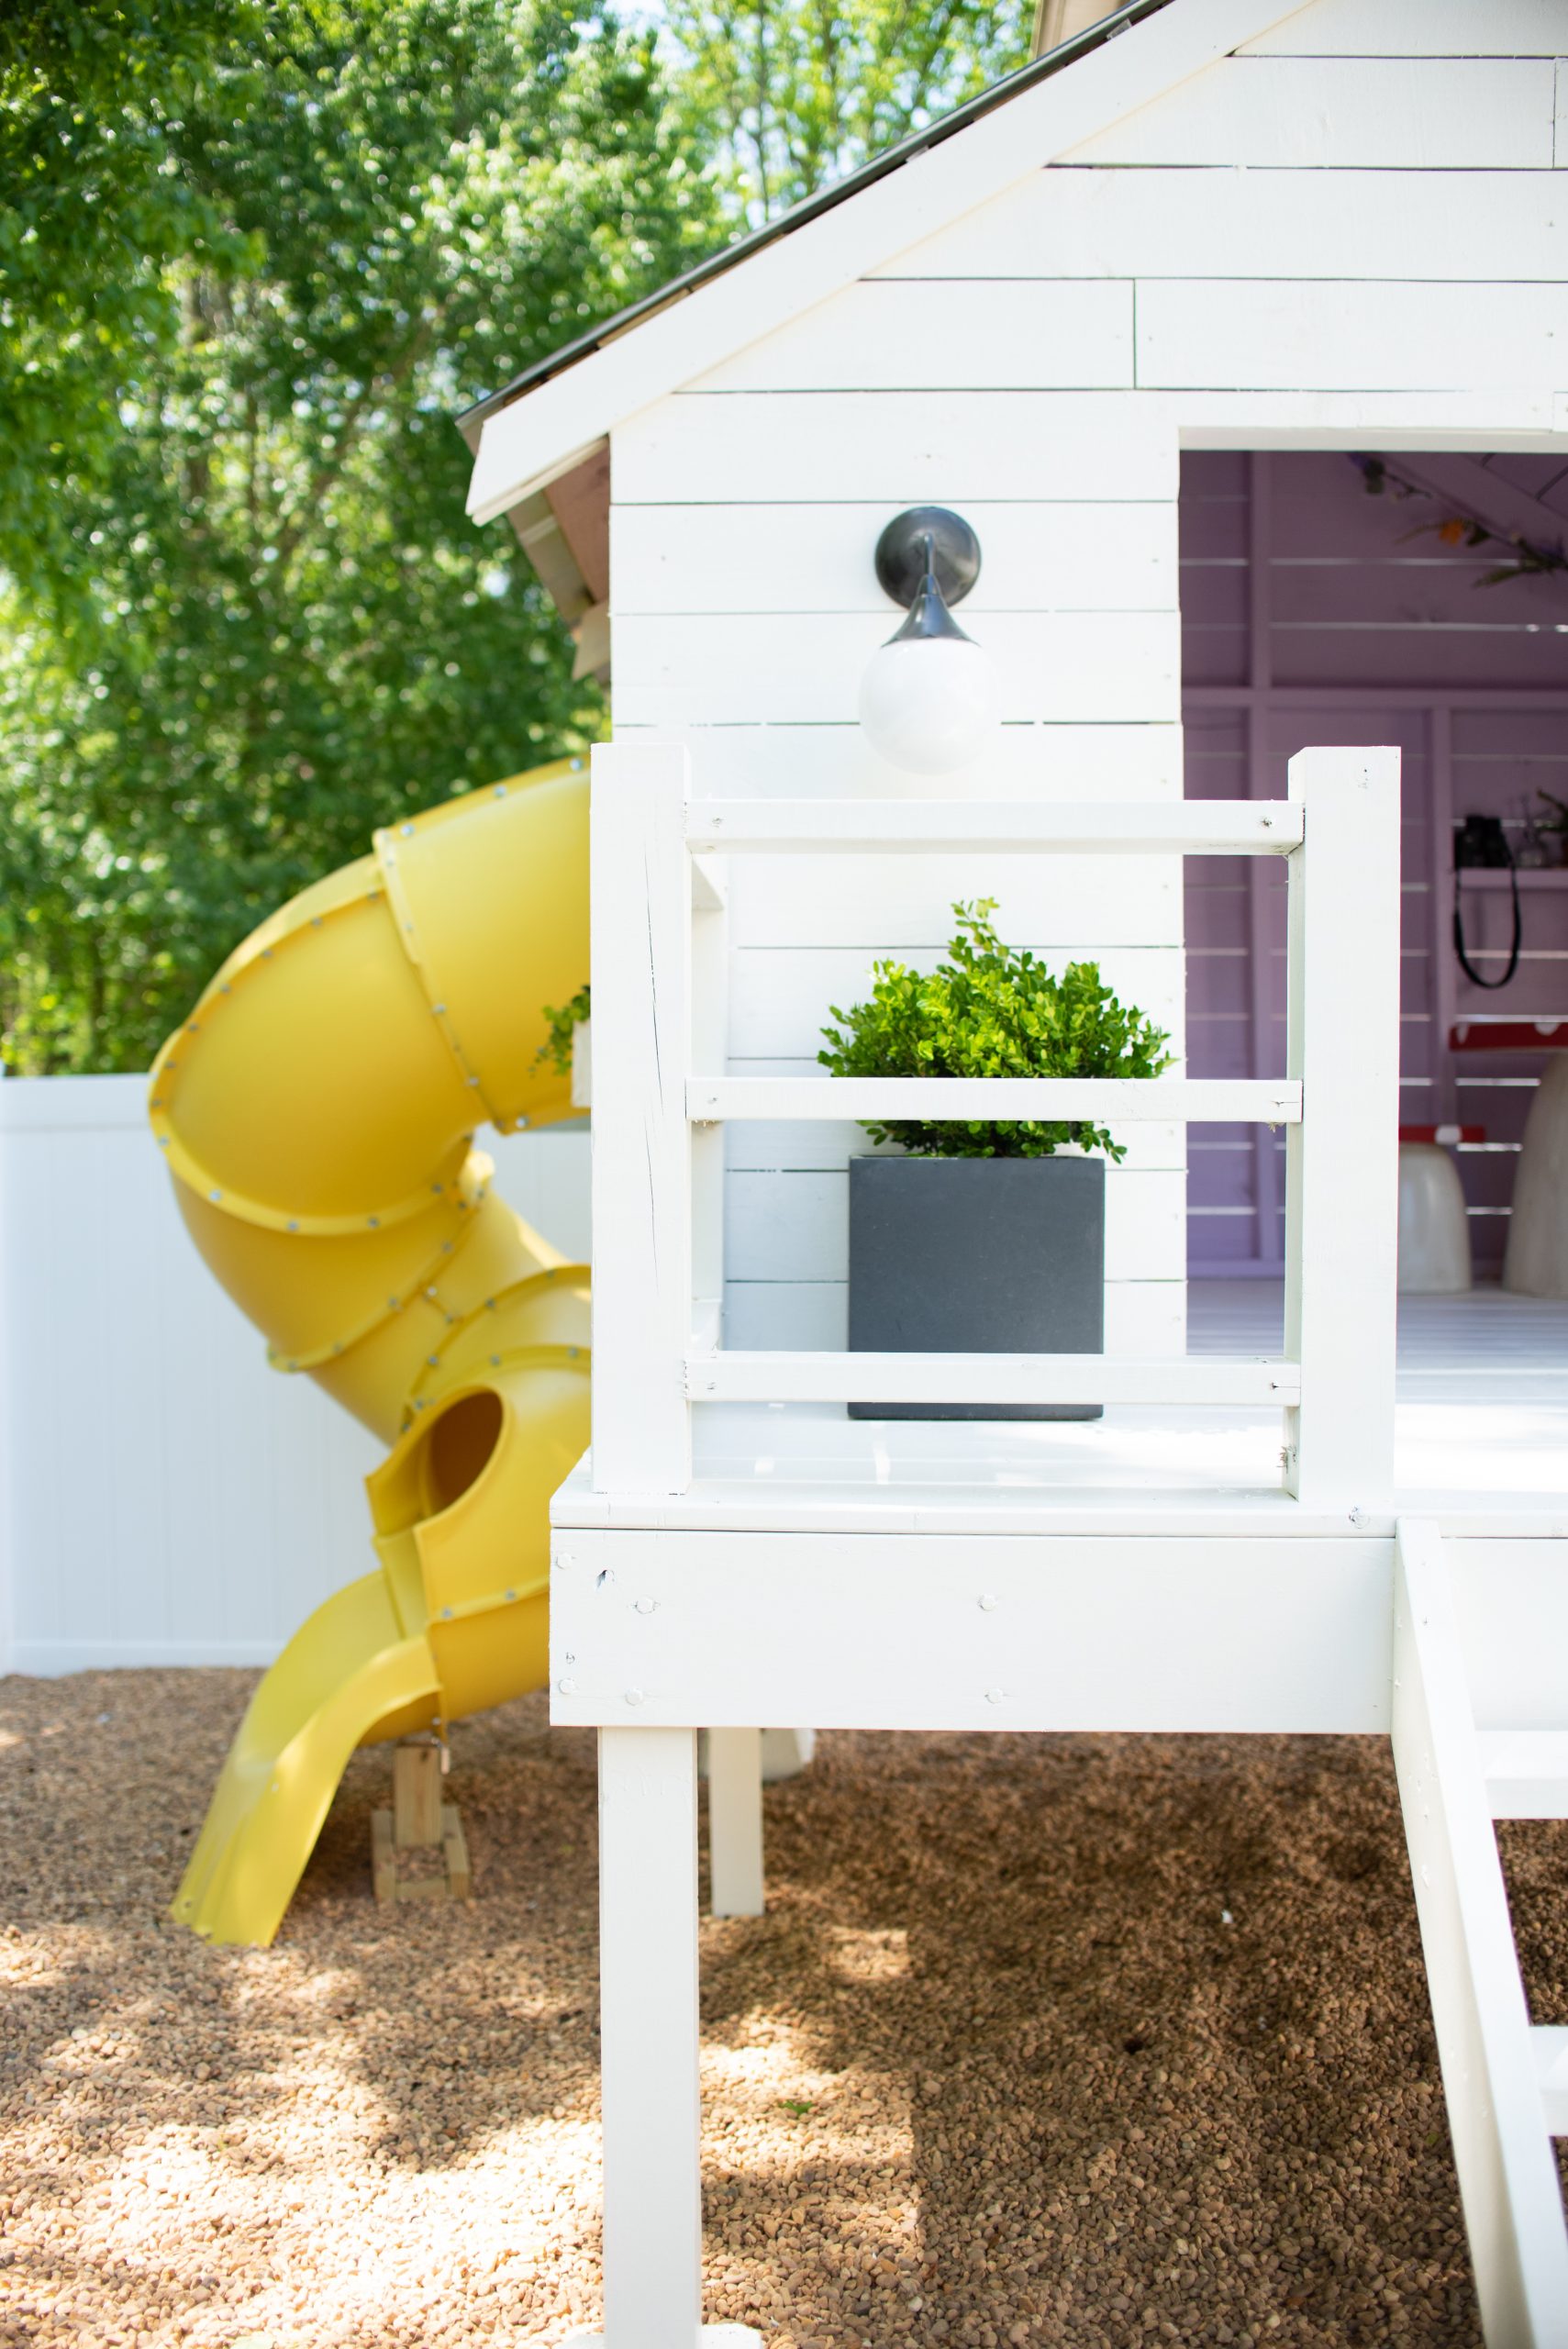
Slide
I purchased this 5 ft turbo tube slide for the playhouse. To prepare to install this, I had to add some additional framing between two of the studs on the side wall. The slide needs the opening for this to be 24.5 inches wide and 27 inches tall, so making sure to frame the walls with this in mind is super helpful. If not, you can add additional framing. I measured 5 ft up from the ground under the area where the slide would be mounted to find the base of the slide framing. After adding this framing based off the slide requirements, I mounted the first piece of the slide to the side of the playhouse using lag bolts included with the slide. I then attached each piece according to the slide instructions.

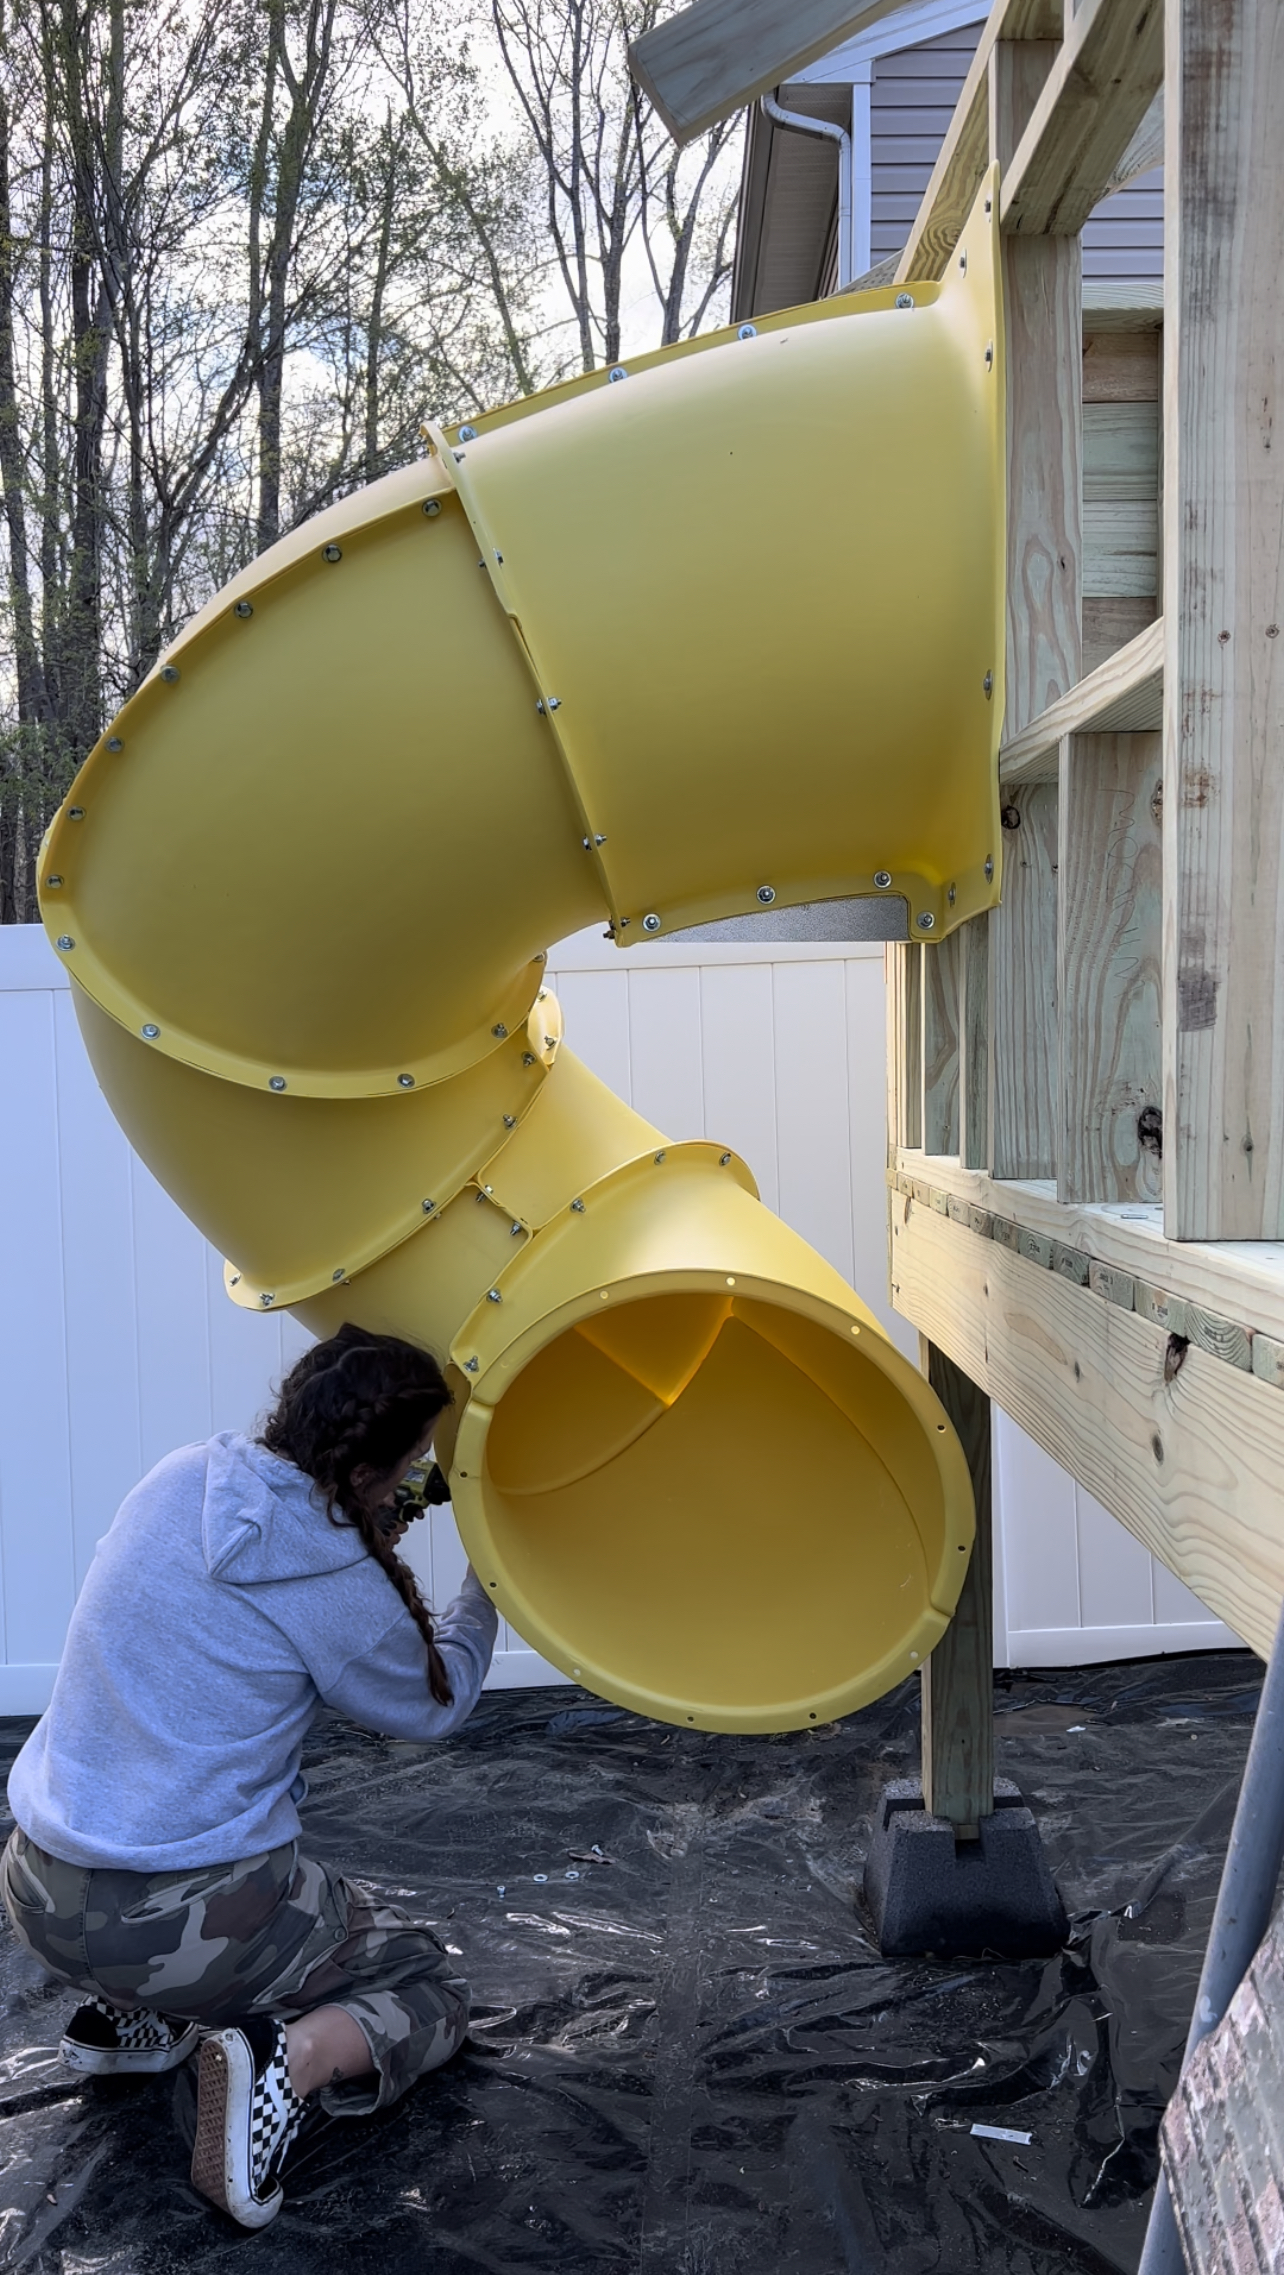
This slide also requires supports. The slide manual gives detailed instructions for these steps!
Siding
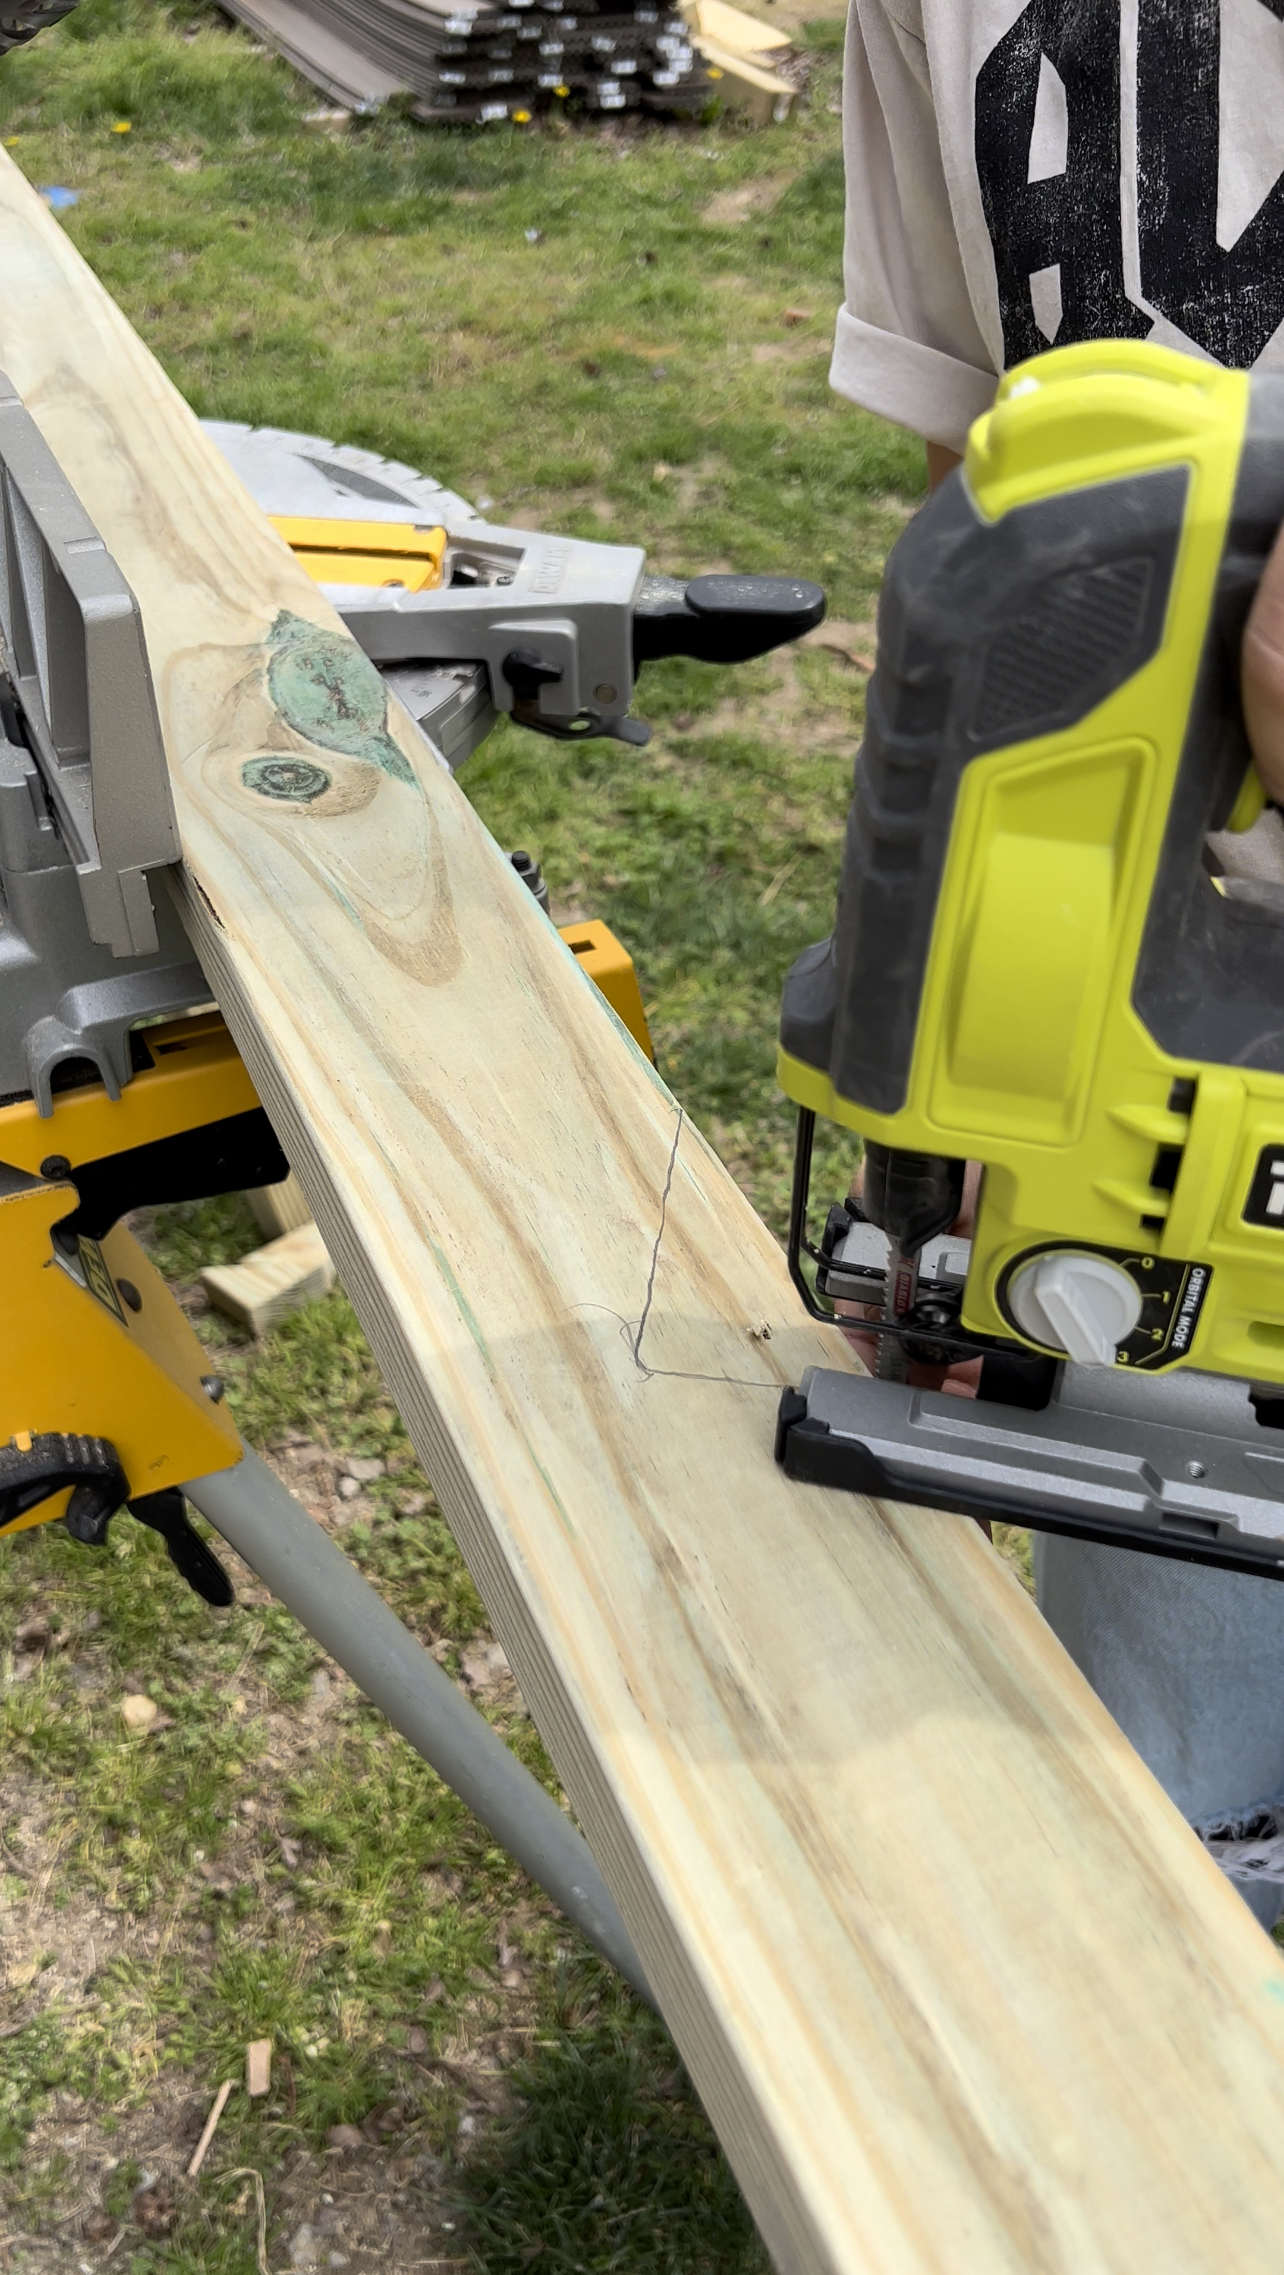
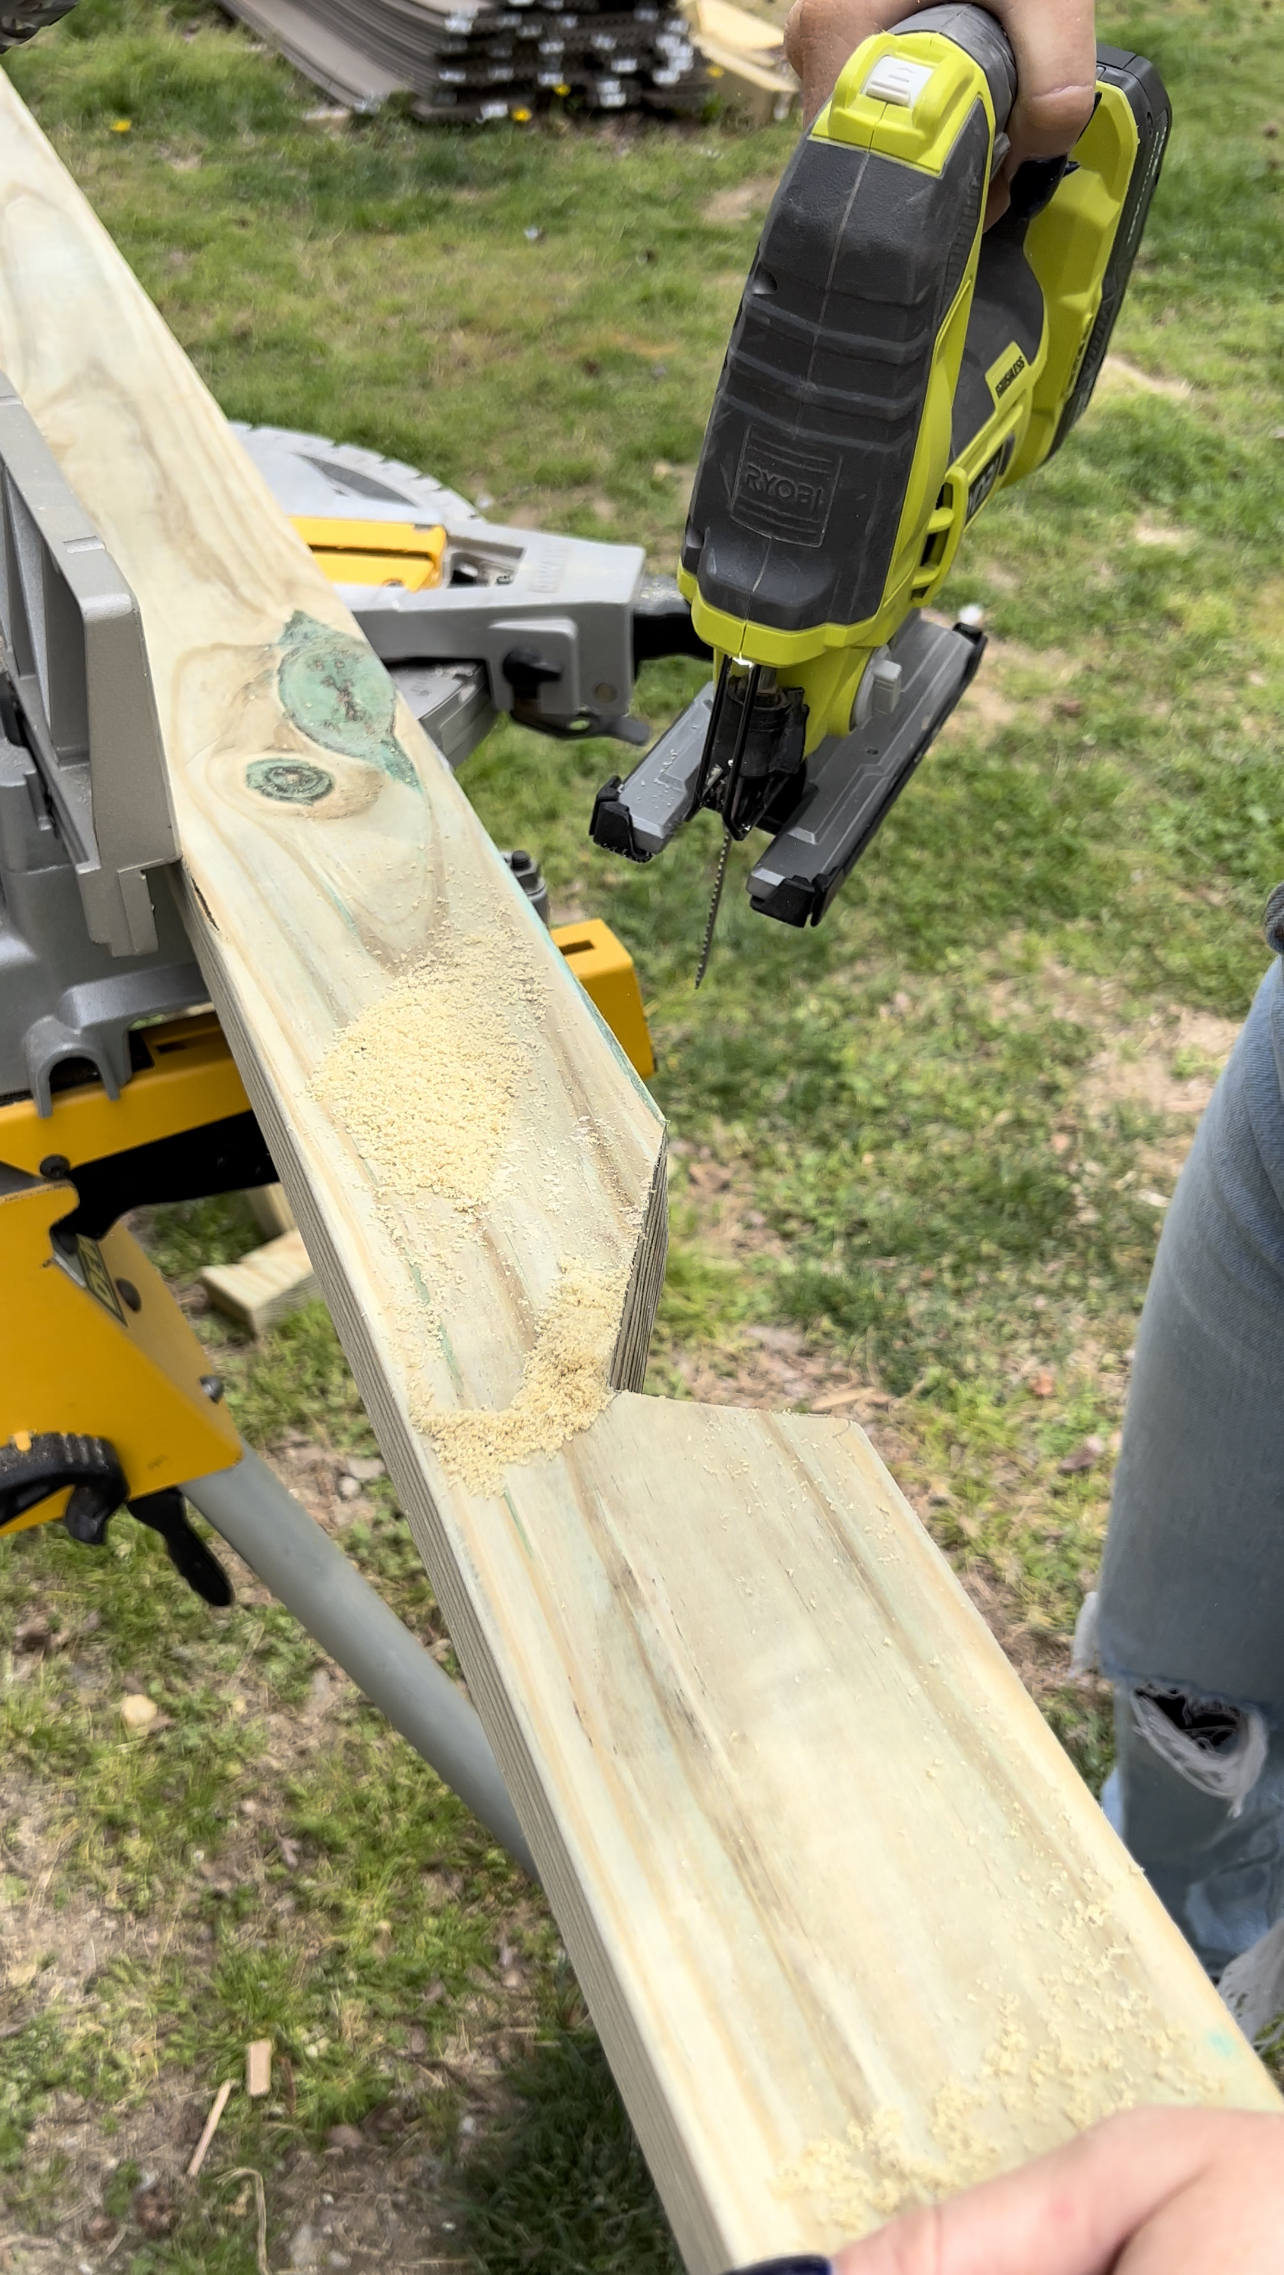
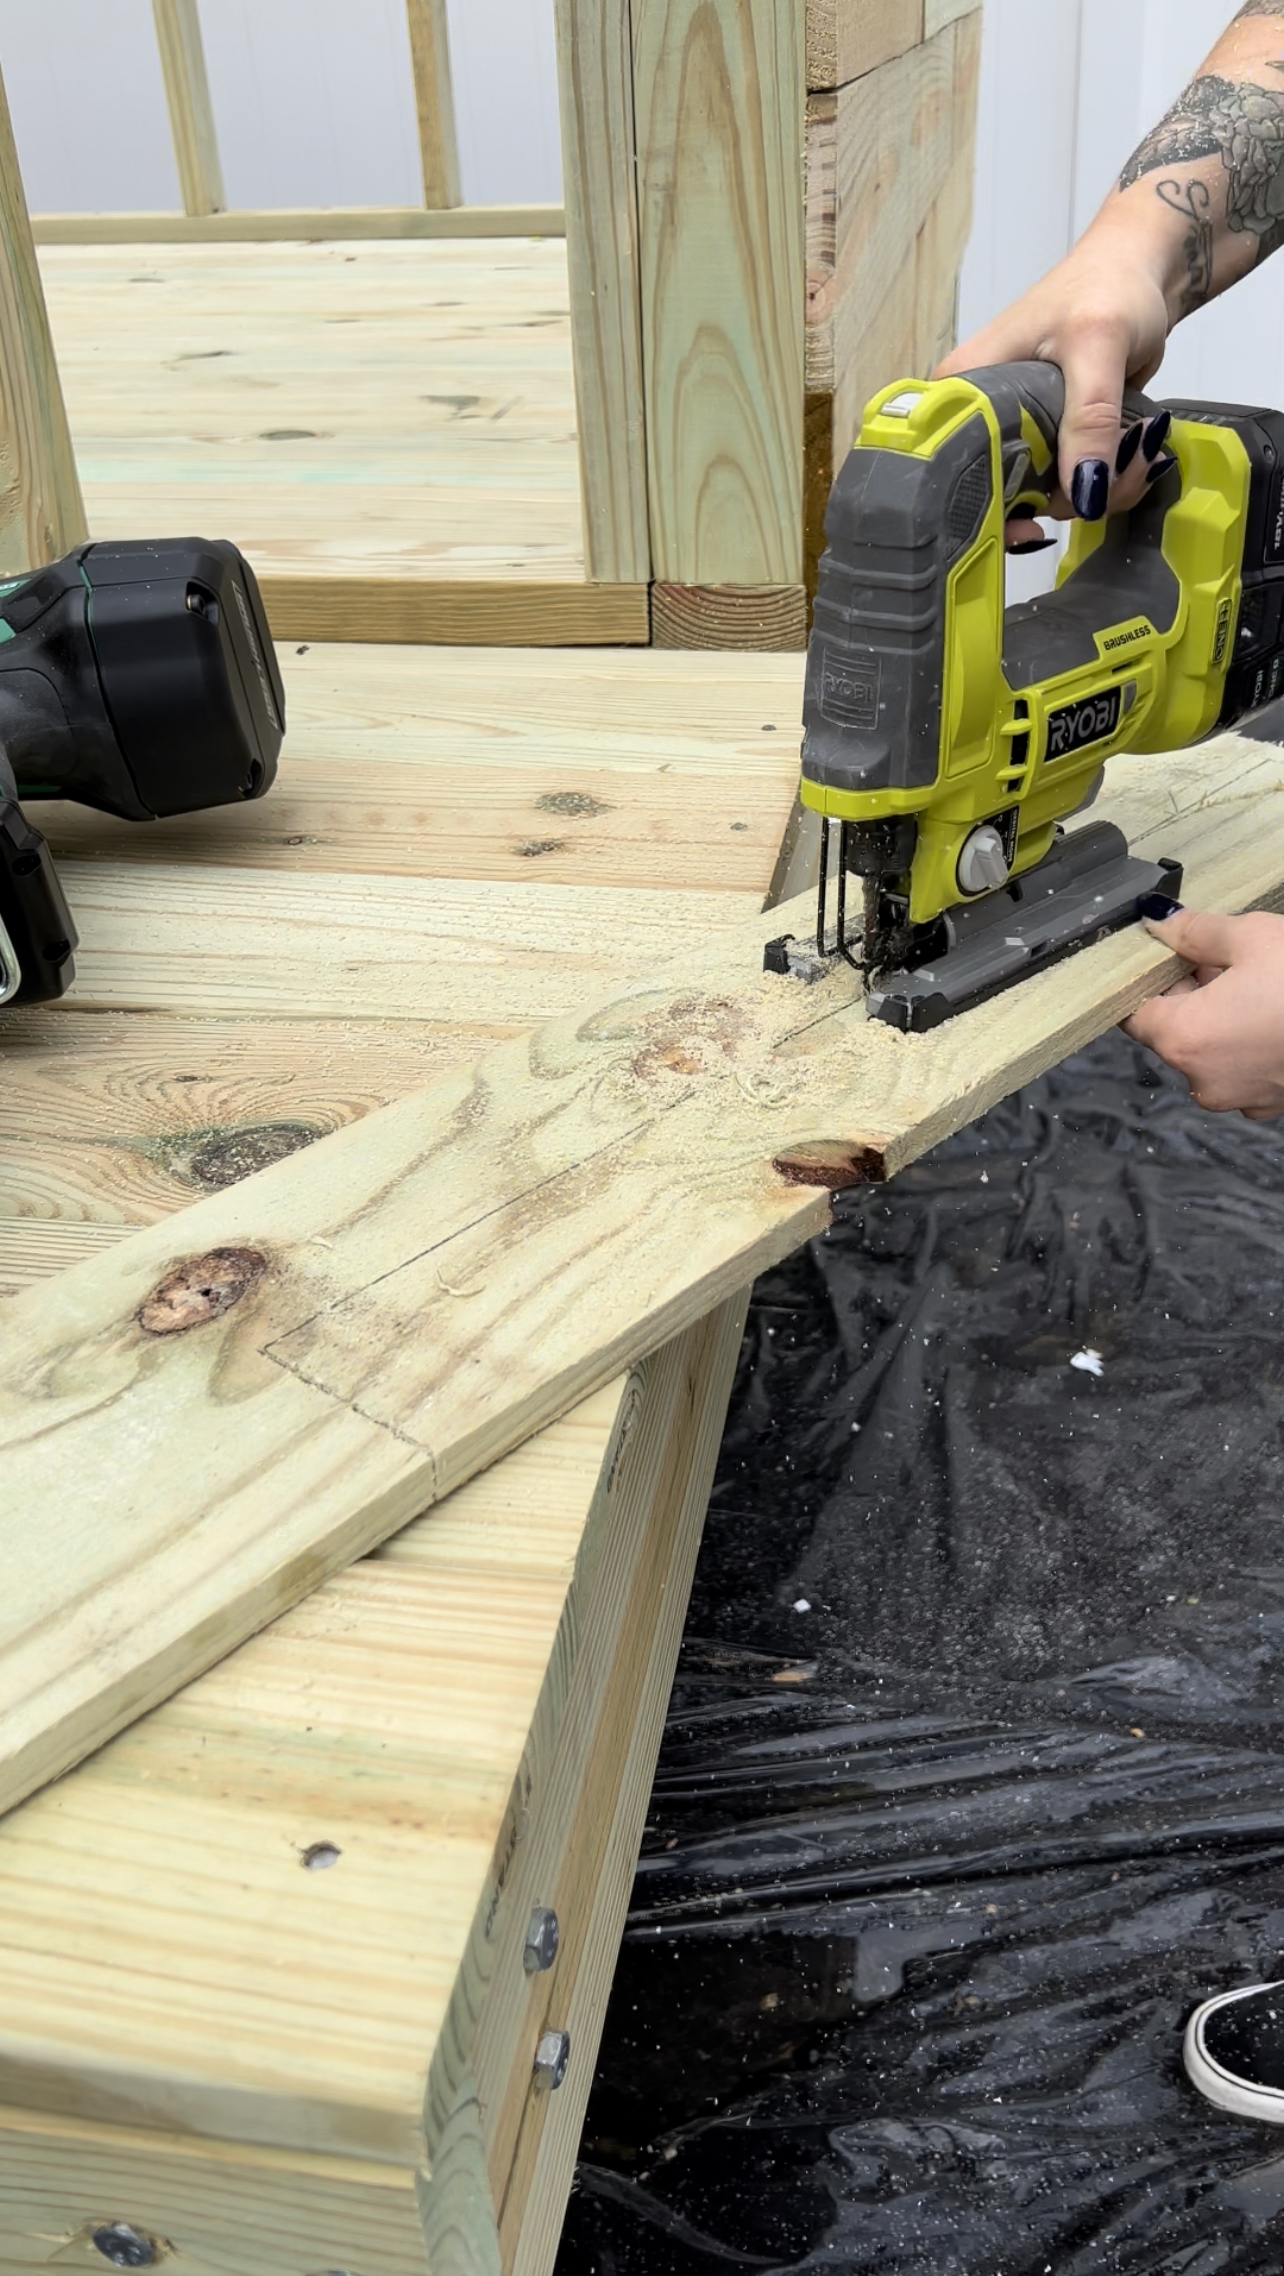
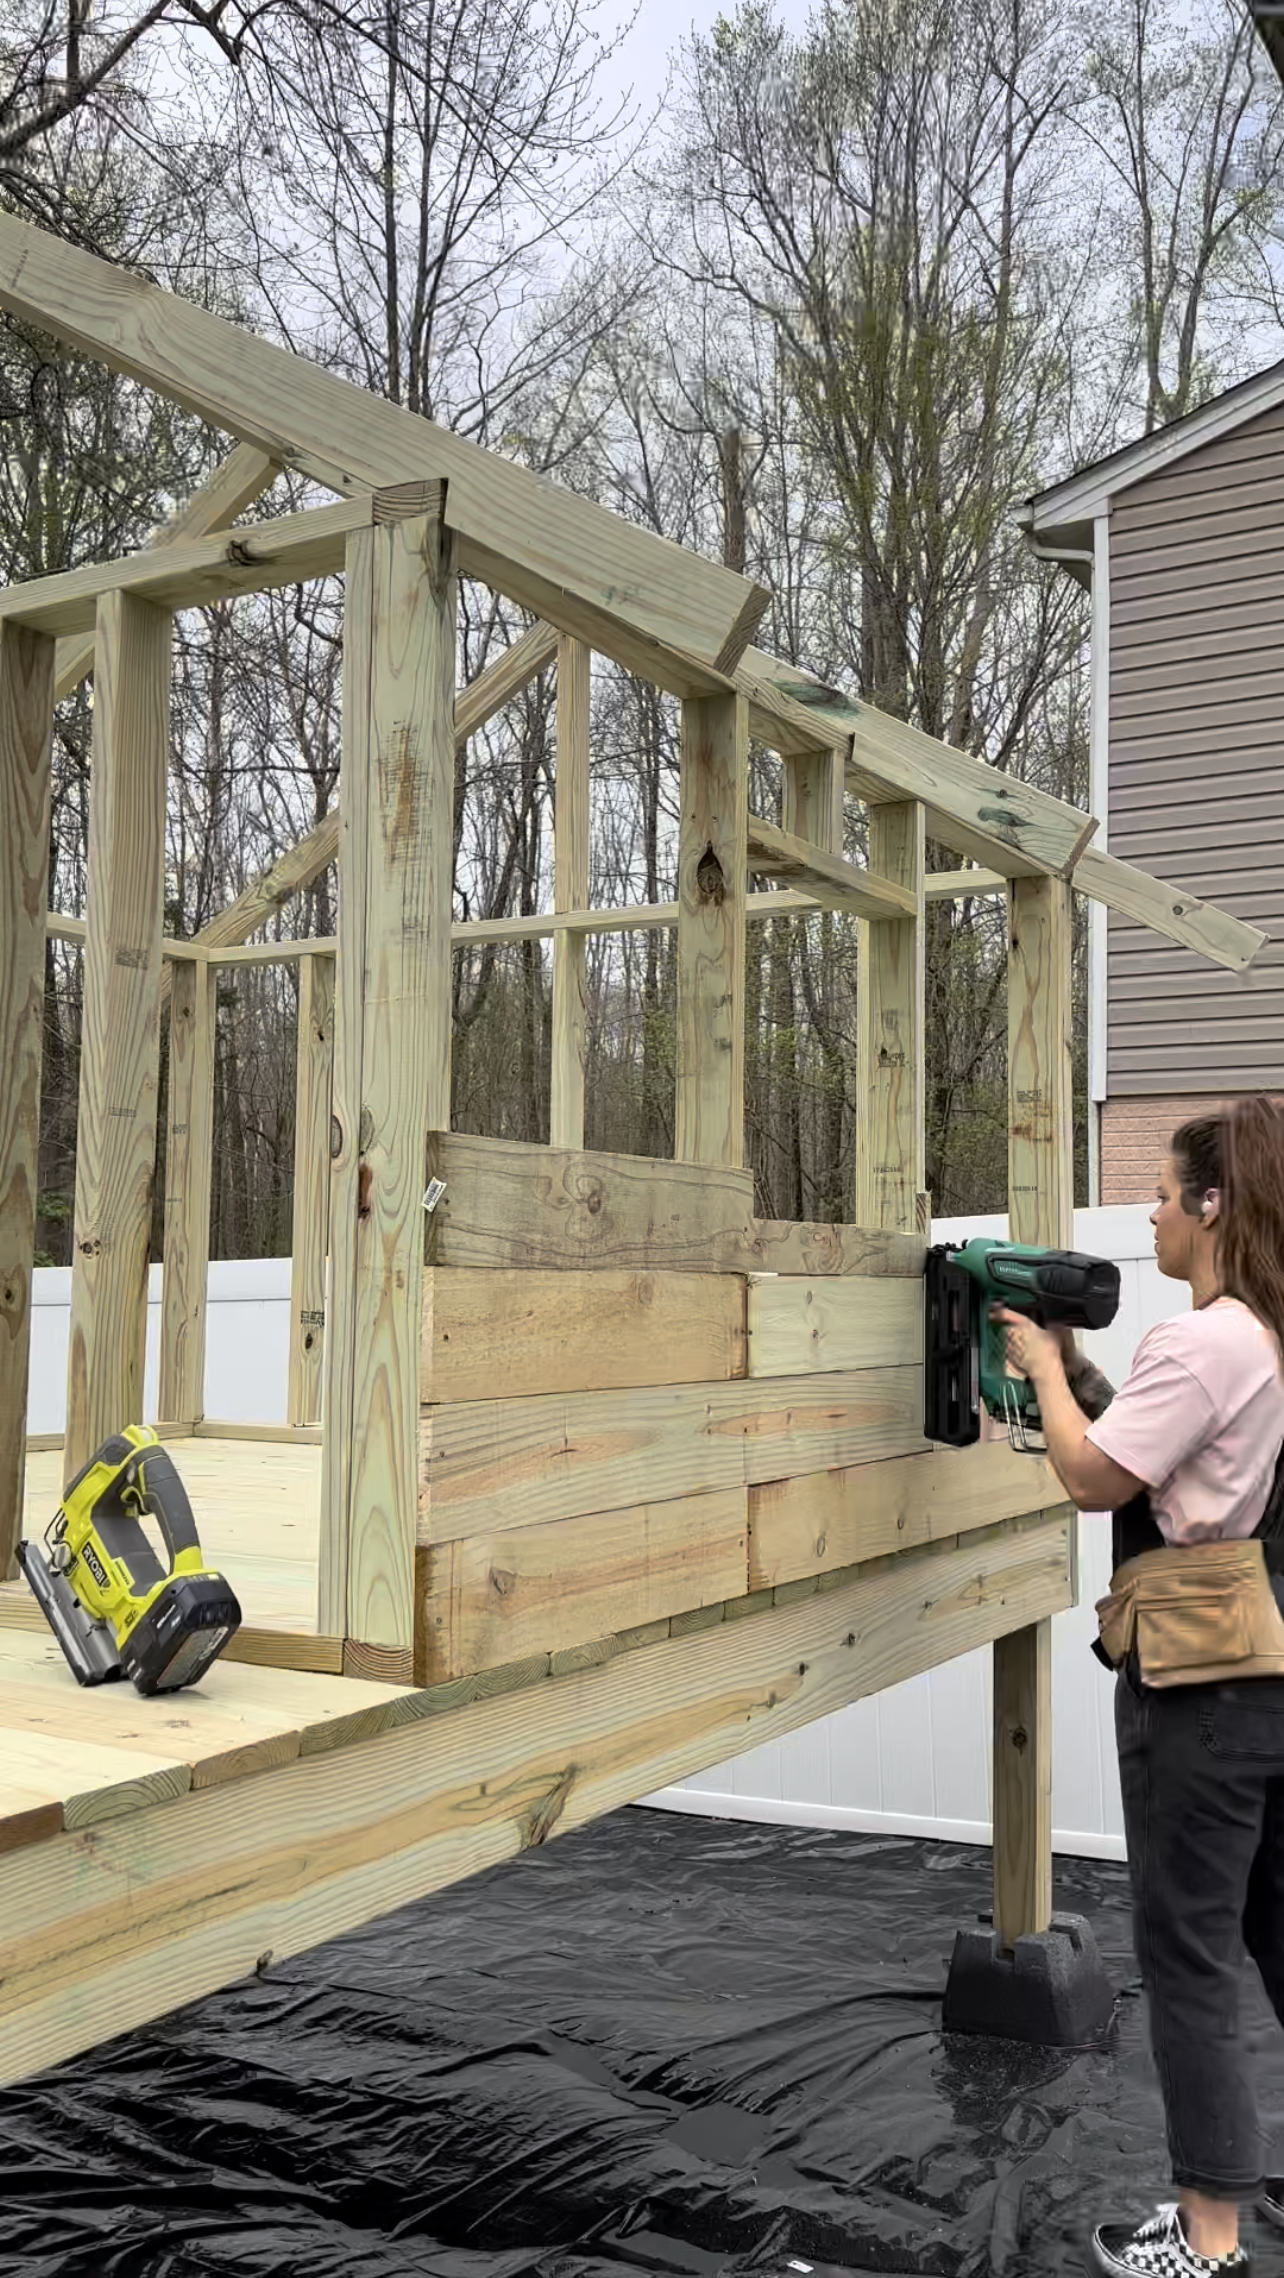
To save myself a whole lot of money, I used some pine fence pickets (pressure treated) for the siding. These come in 6 ft length with a dog ear end. I cut the ends off of them when cutting to length before installing. Then, I nailed them to all side of the playhouse in a staggered pattern with the joints meeting centered on a stud. Next, I used my framing nailer to secure the boards, but screw would also work for this. I cut each board to length using my miter saw and cut out the window, slide, and rafter notches using my jigsaw.
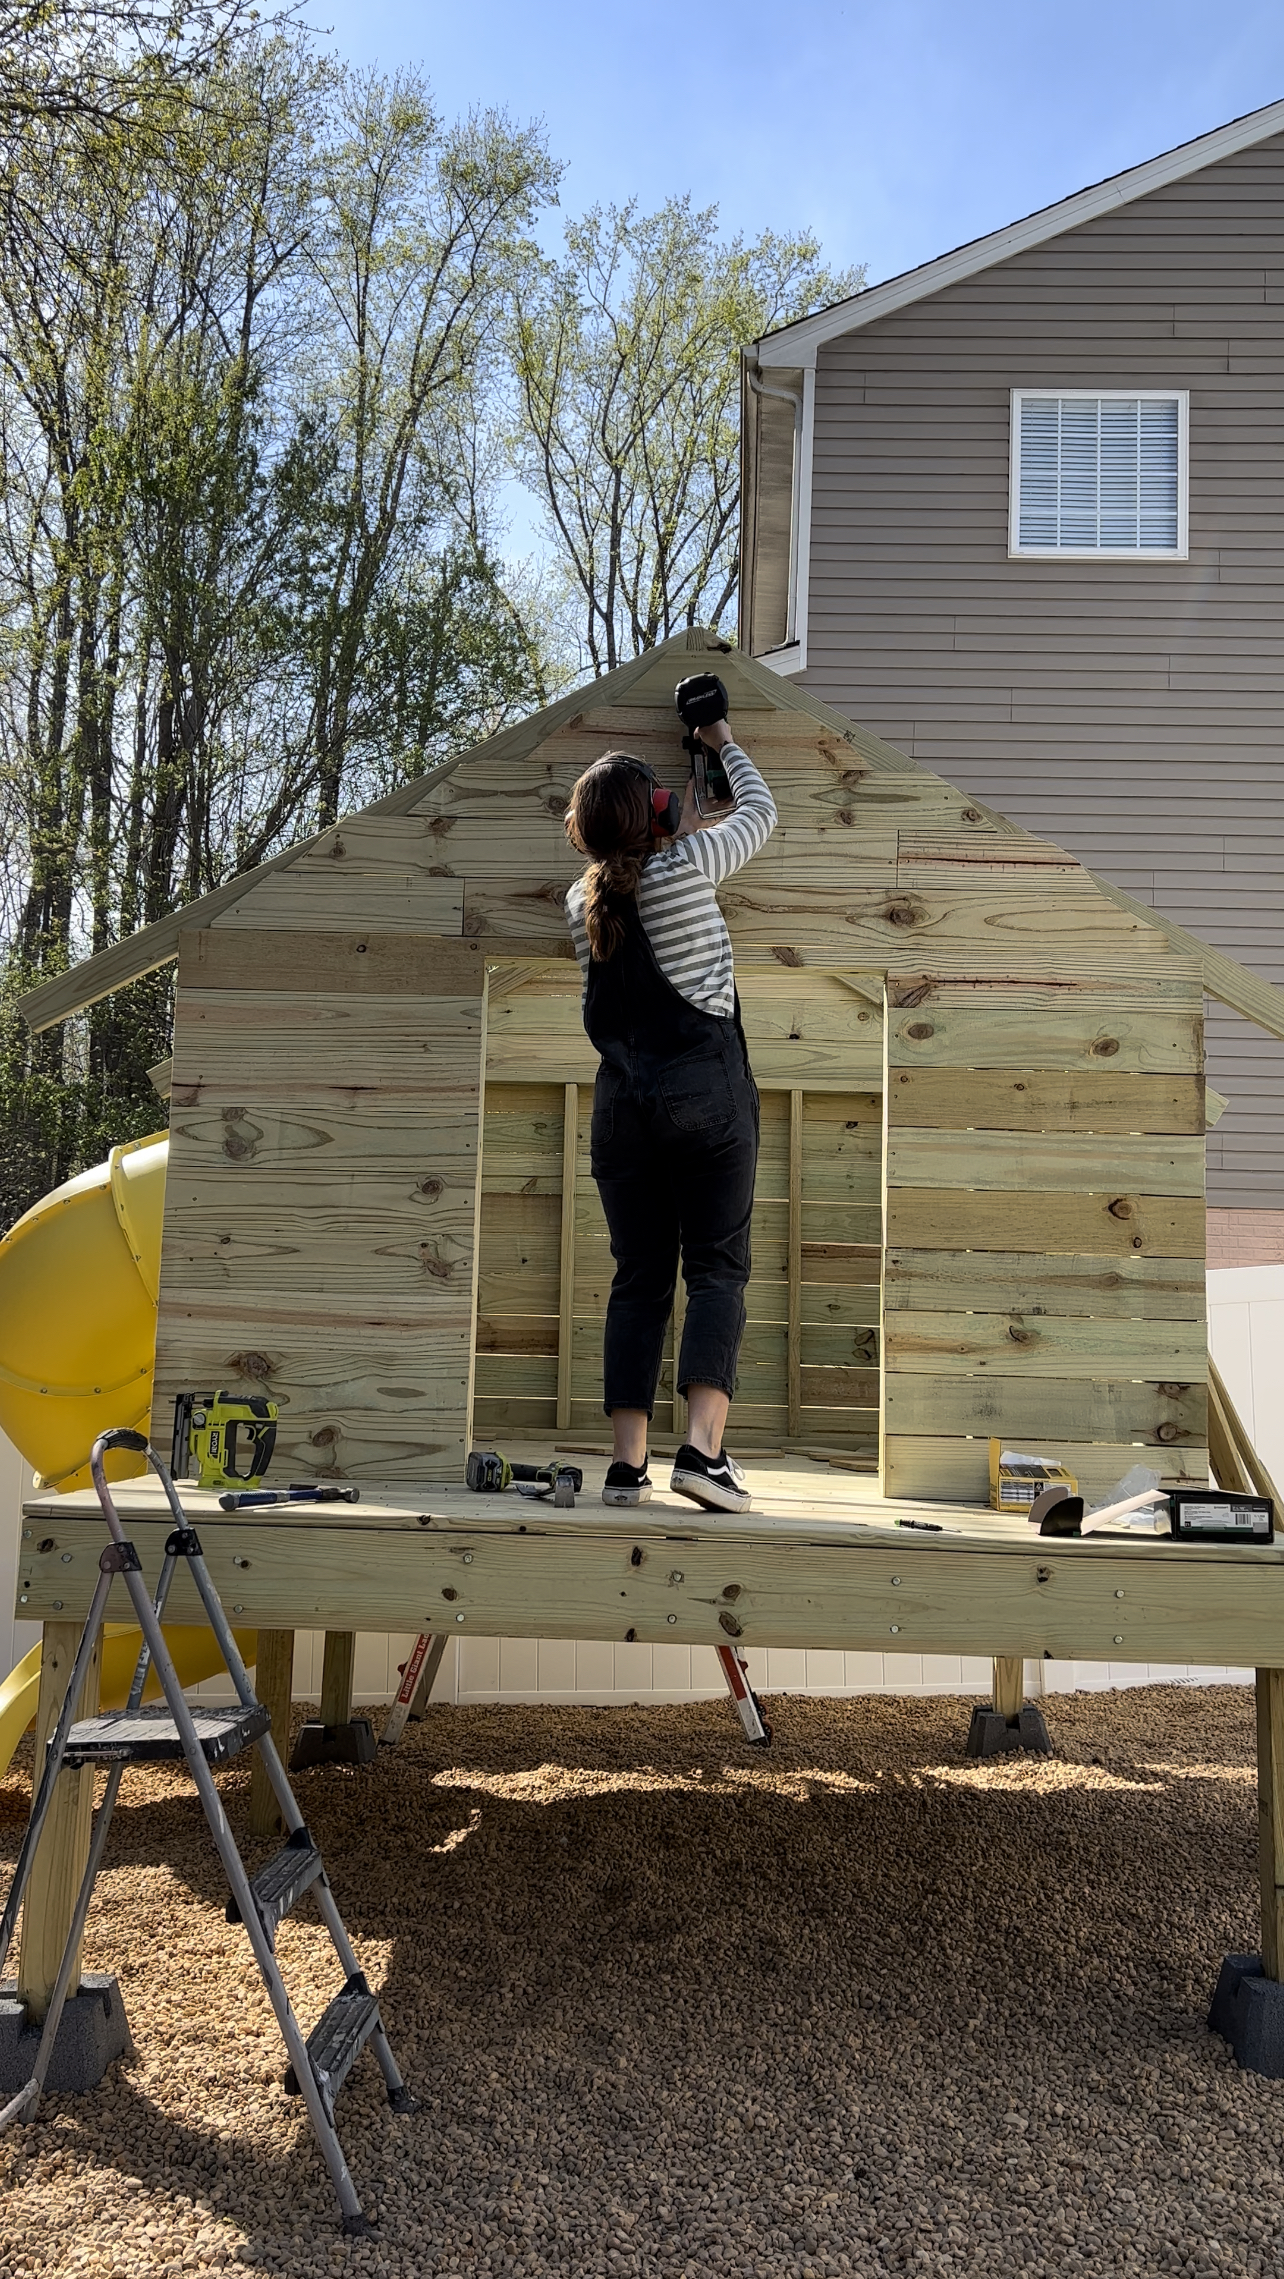
For the boards on the top of the front and rear walls, I would recommend placing the board up and tracing the angles cut line from behind the roof rafters for a clean cut. This was another thing I wish I would have done differently. I cut mine quickly at different angles knowing that I would cover it with trim, but my trim almost ended up not covering some areas so it would have definitely been worth it to trace and cut a clean line.
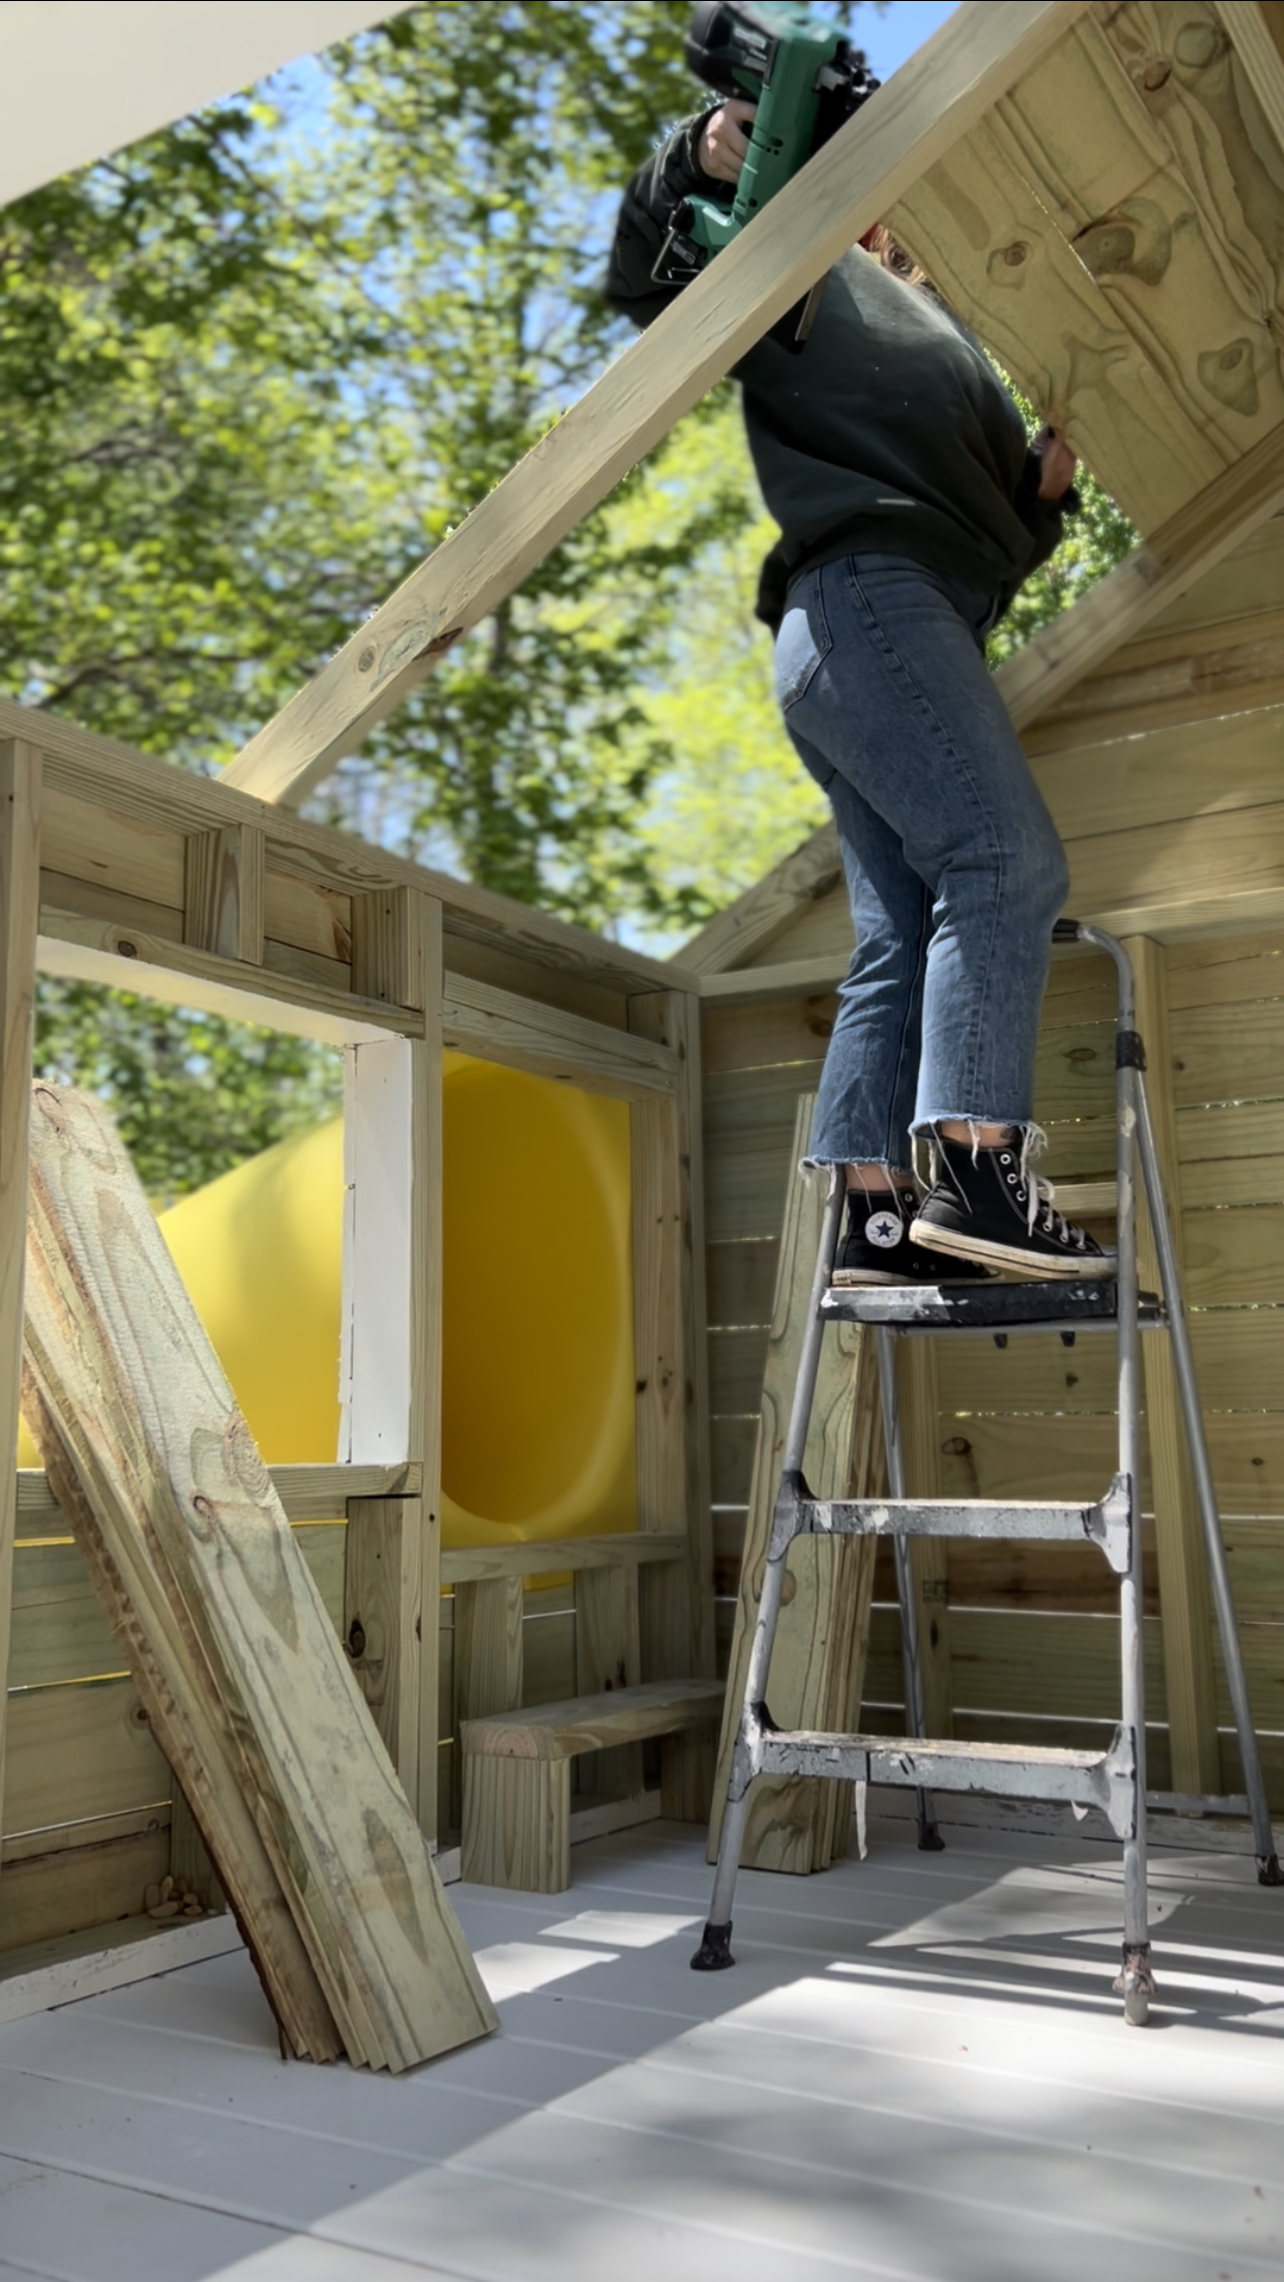
I also added these fencing boards to the roof before installing the roofing. This is totally optional. I like the way that it looks inside and it also keeps the heat down and keeps hot metal away from children’s hands. If you decide to do this, installing these first will give you lots of extras to use up for siding and save even more $$$.
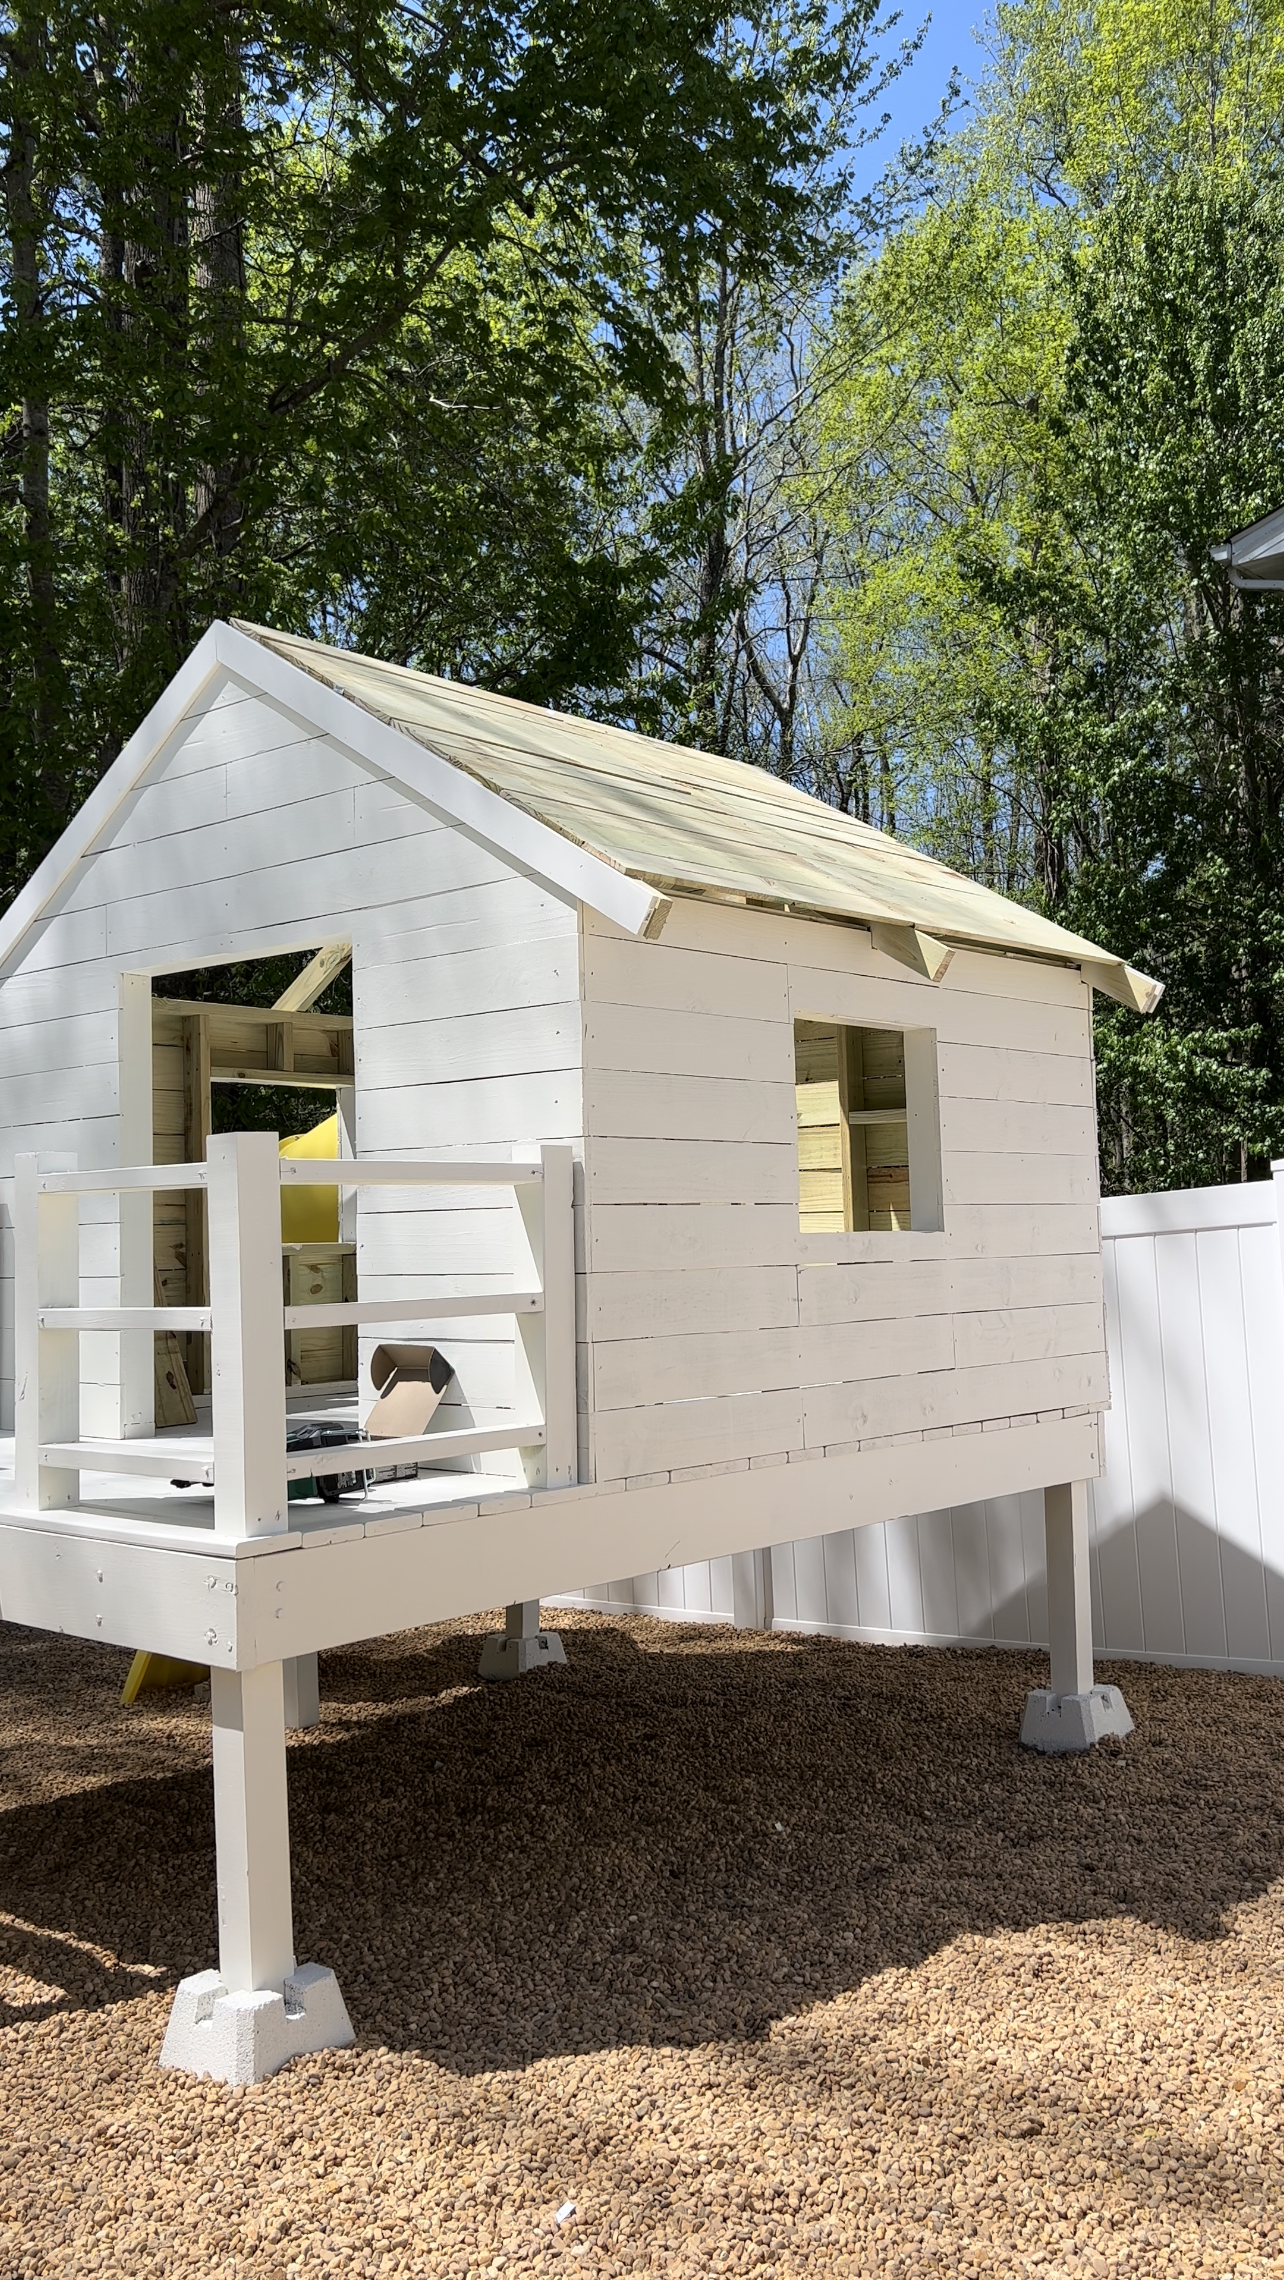
For a clean and finished look, I cut two pieces of trim boards to cover the edging on the front and rear wall against the roof edge line (pictured above).
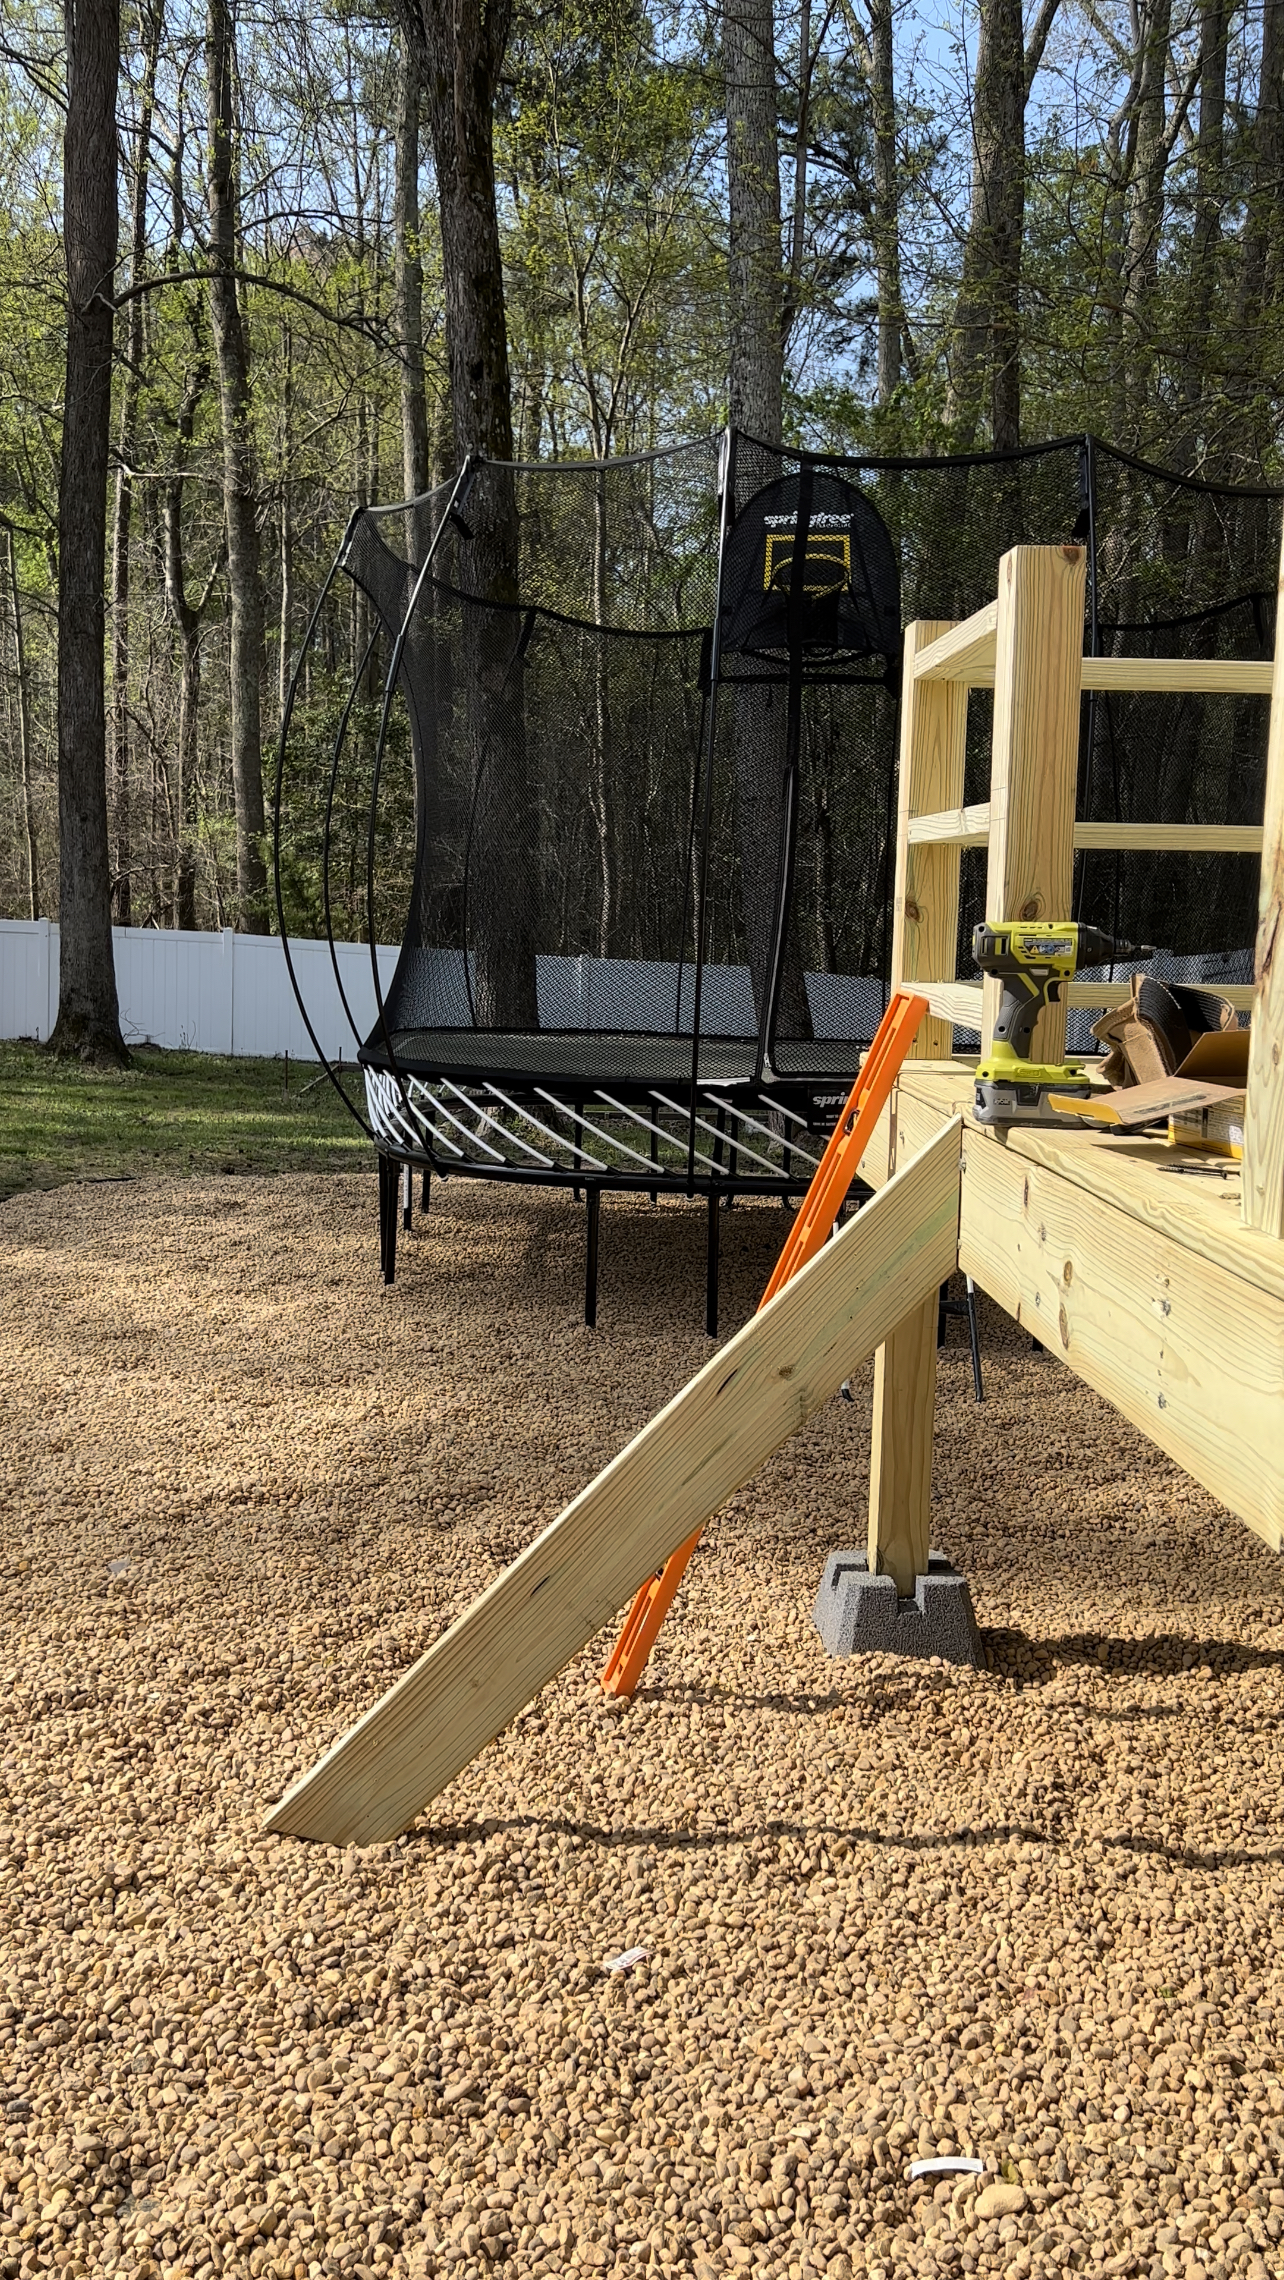
Porch/Steps
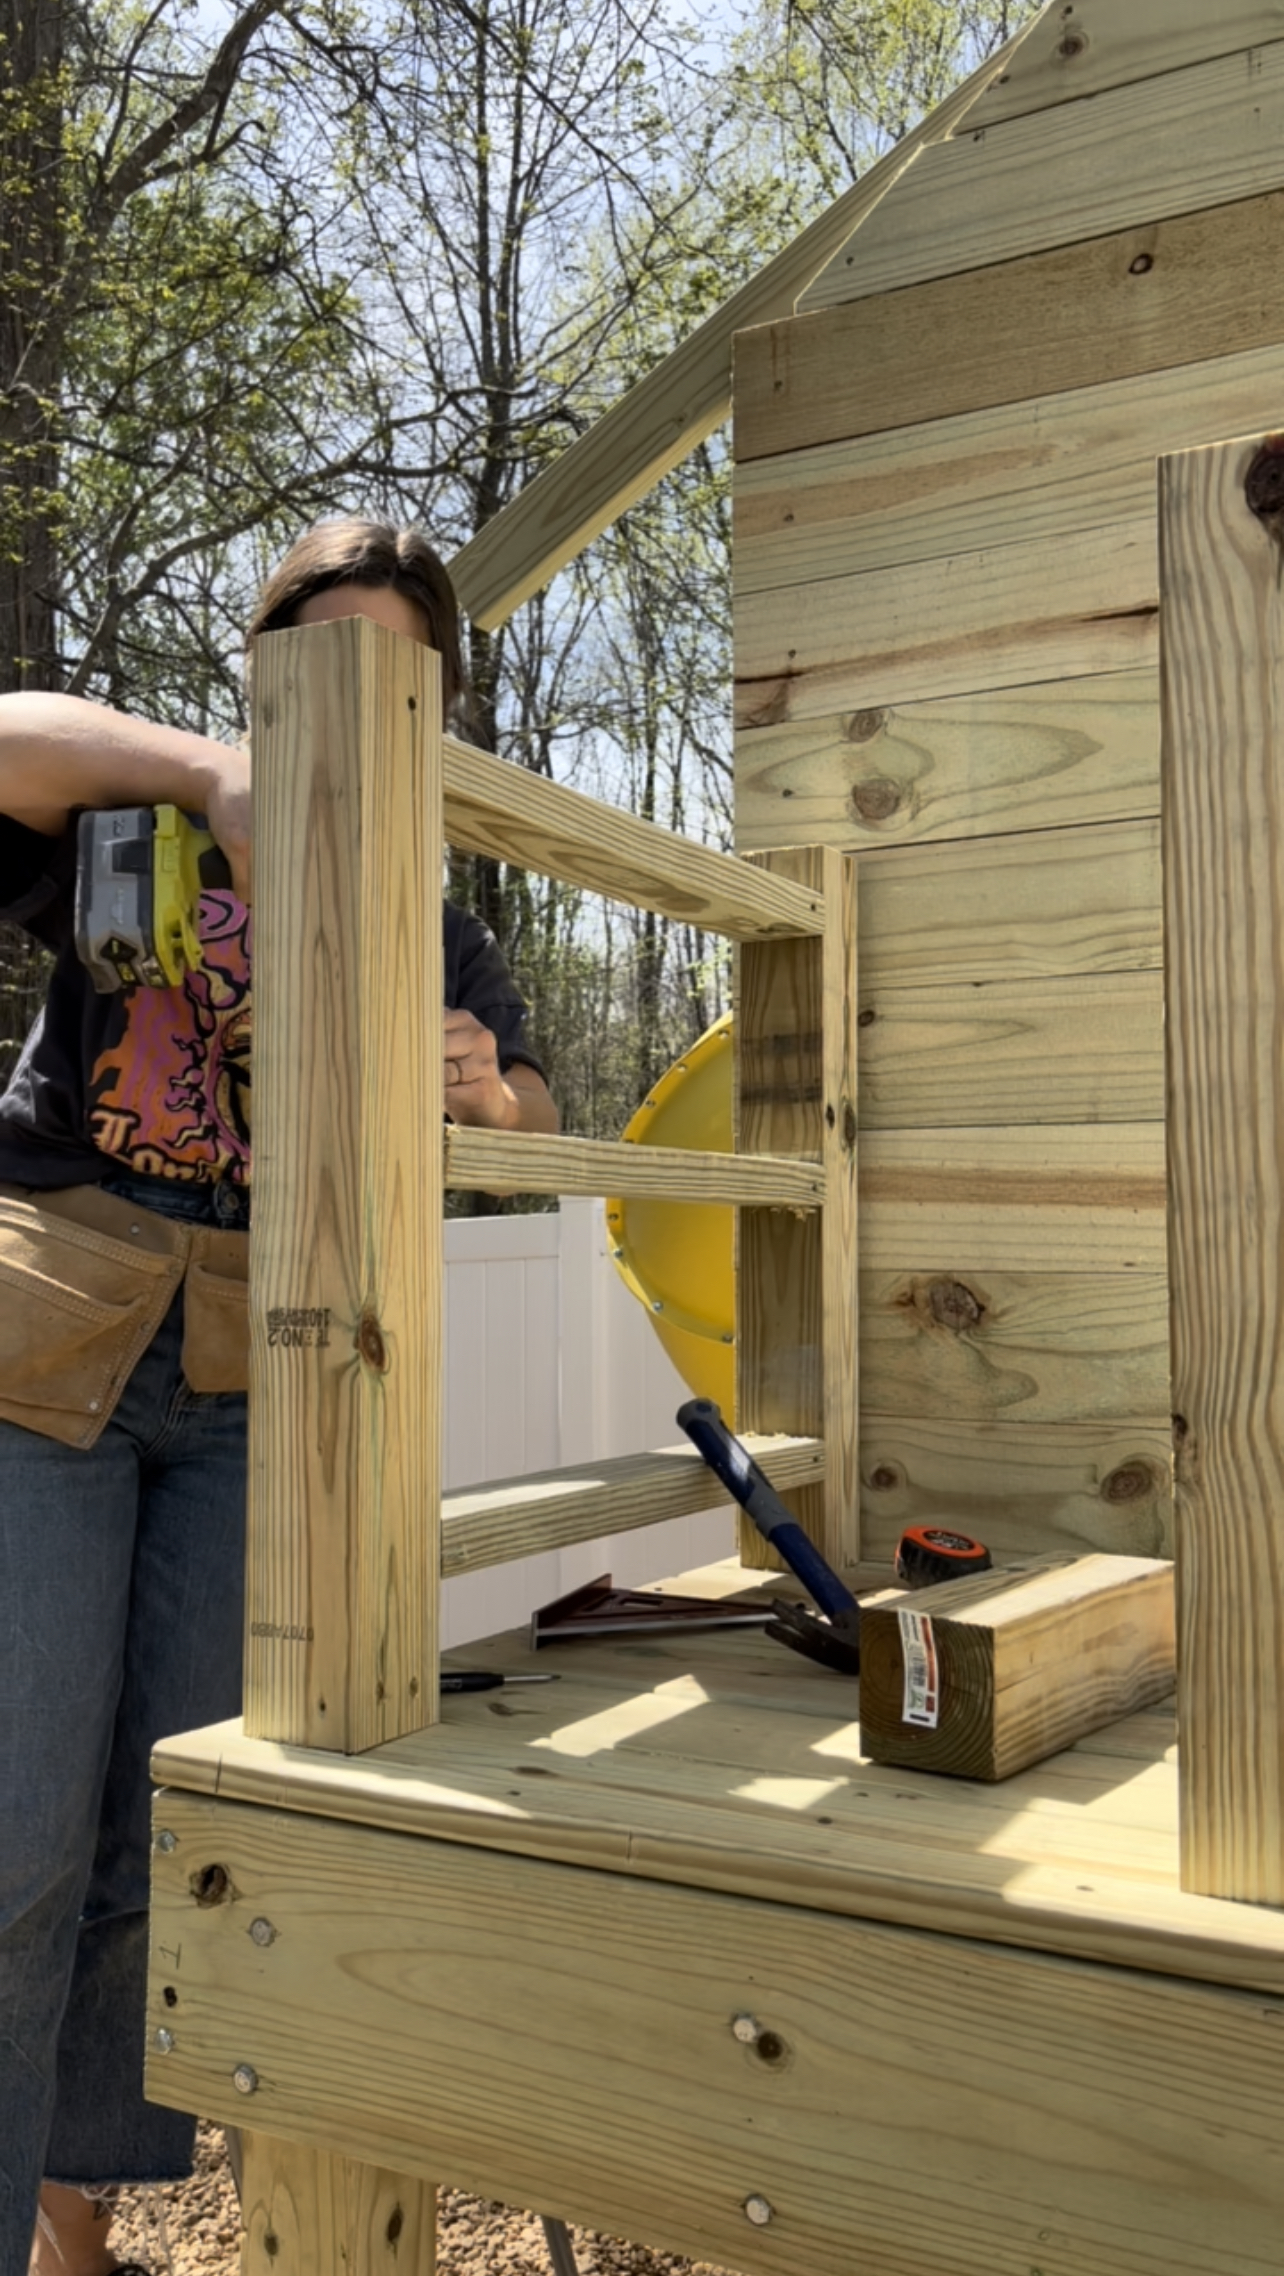
Using 4×4 posts, I cut down 6 pieces at 28 inches. I screwed these into the playhouse deck about 1.75 inches from the outside edge each sides. The first posts are .5 in away from the siding. I screwed in using 3 in screws at an angle and a lag bolt for additional security from underneath. Then, I installed the corner posts centered in front of the first posts, and the center posts at 22.75 inches from the corner posts. I then cut down 2×4 boards to fit between each section. I used three boards per section and used some scrap wood blocks to aid in screwing each one in at the same height.

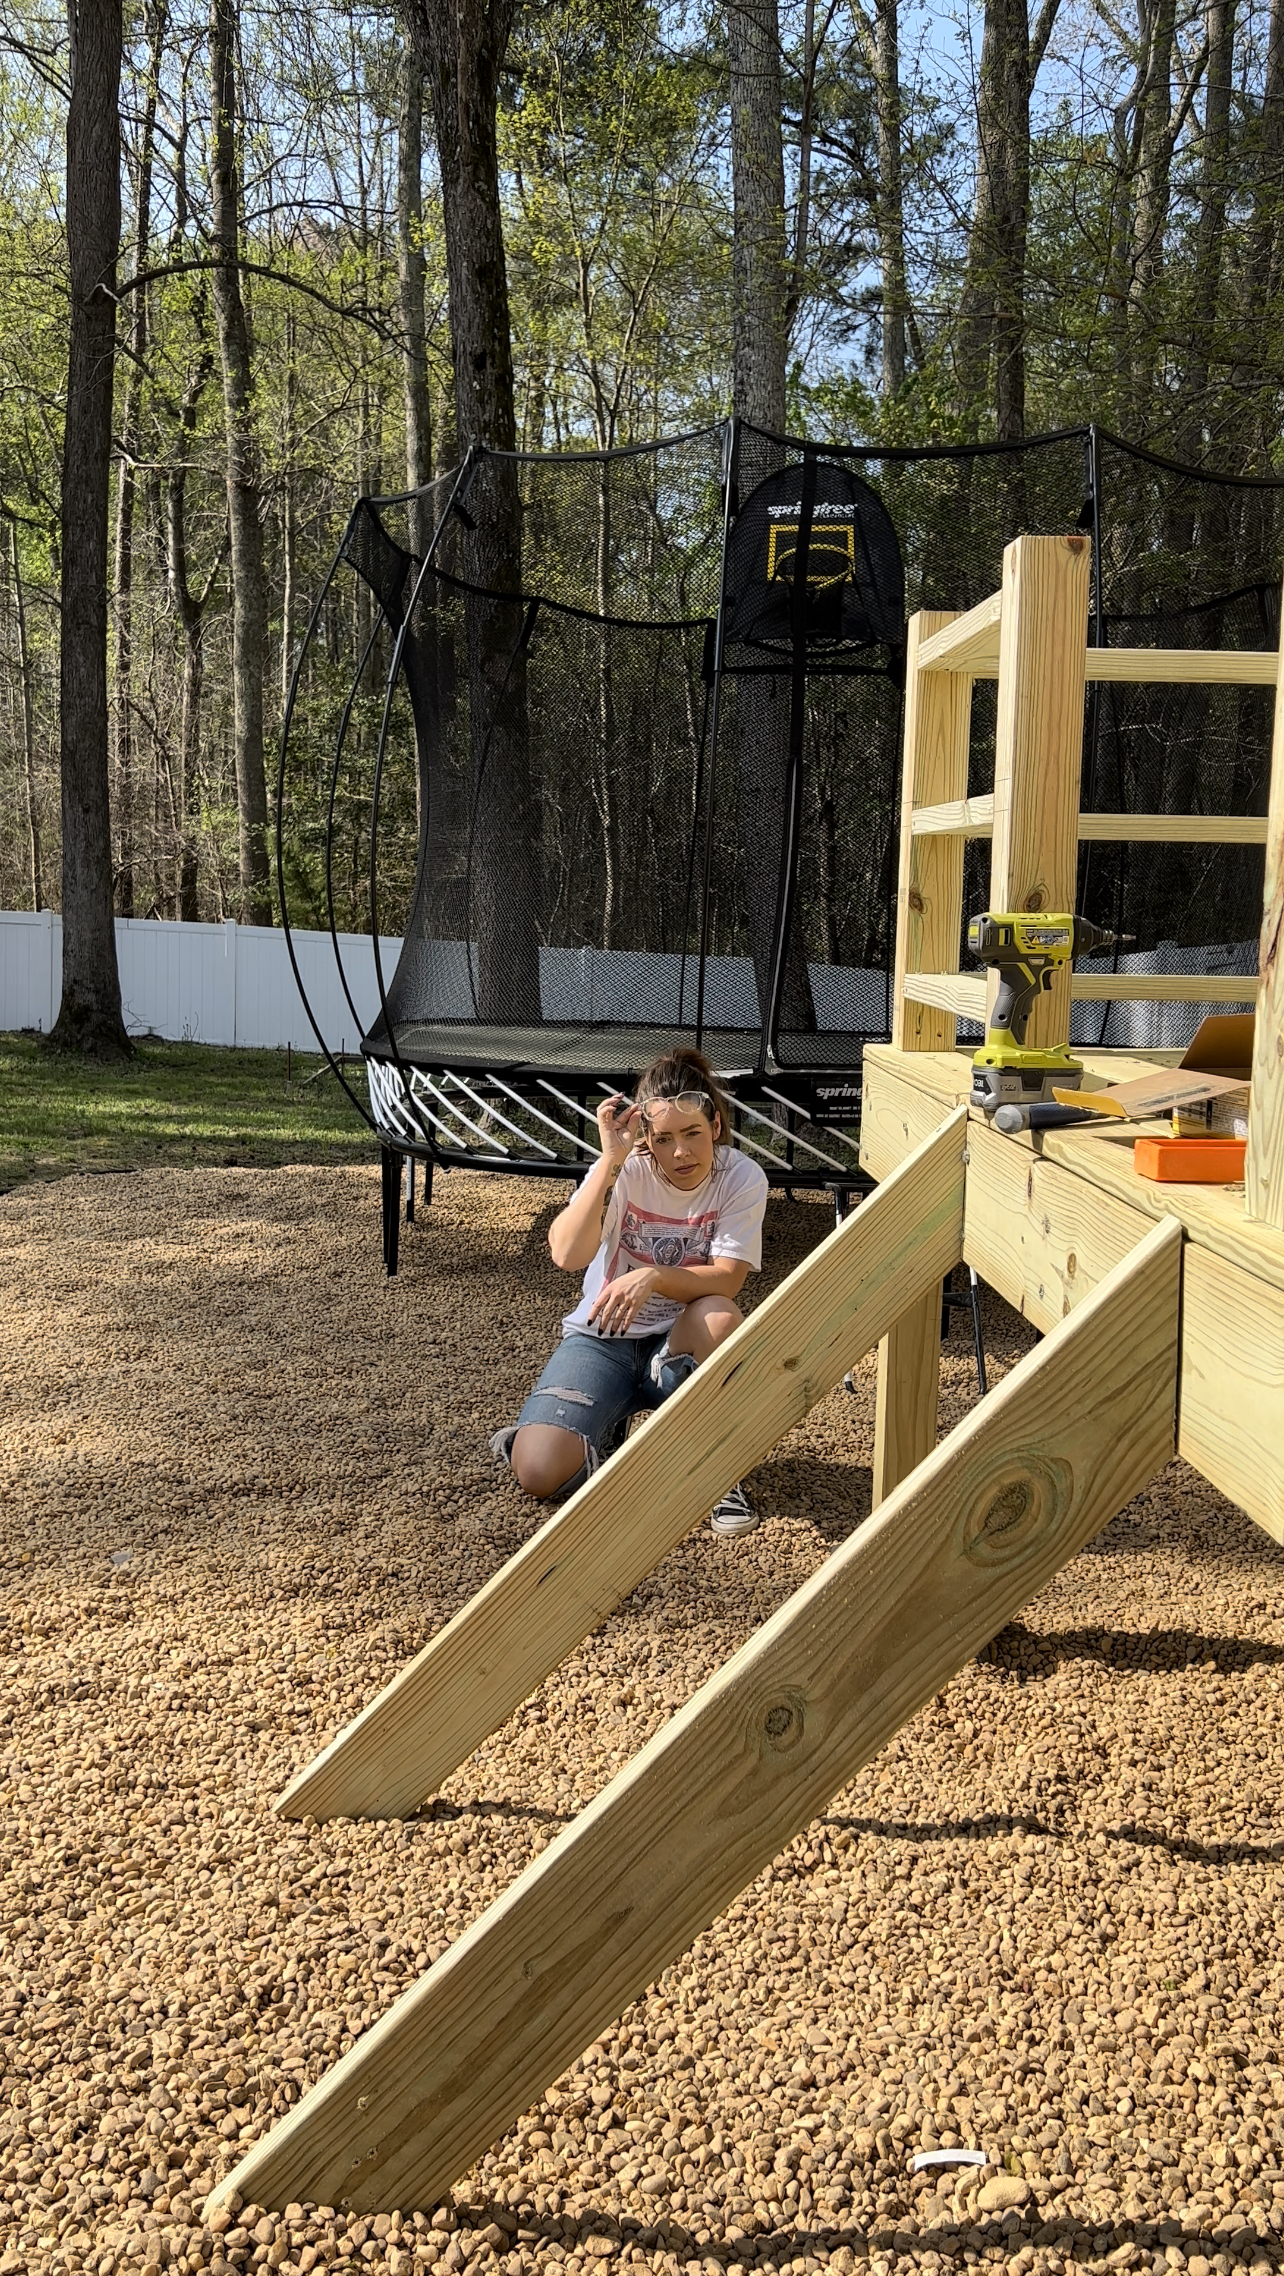
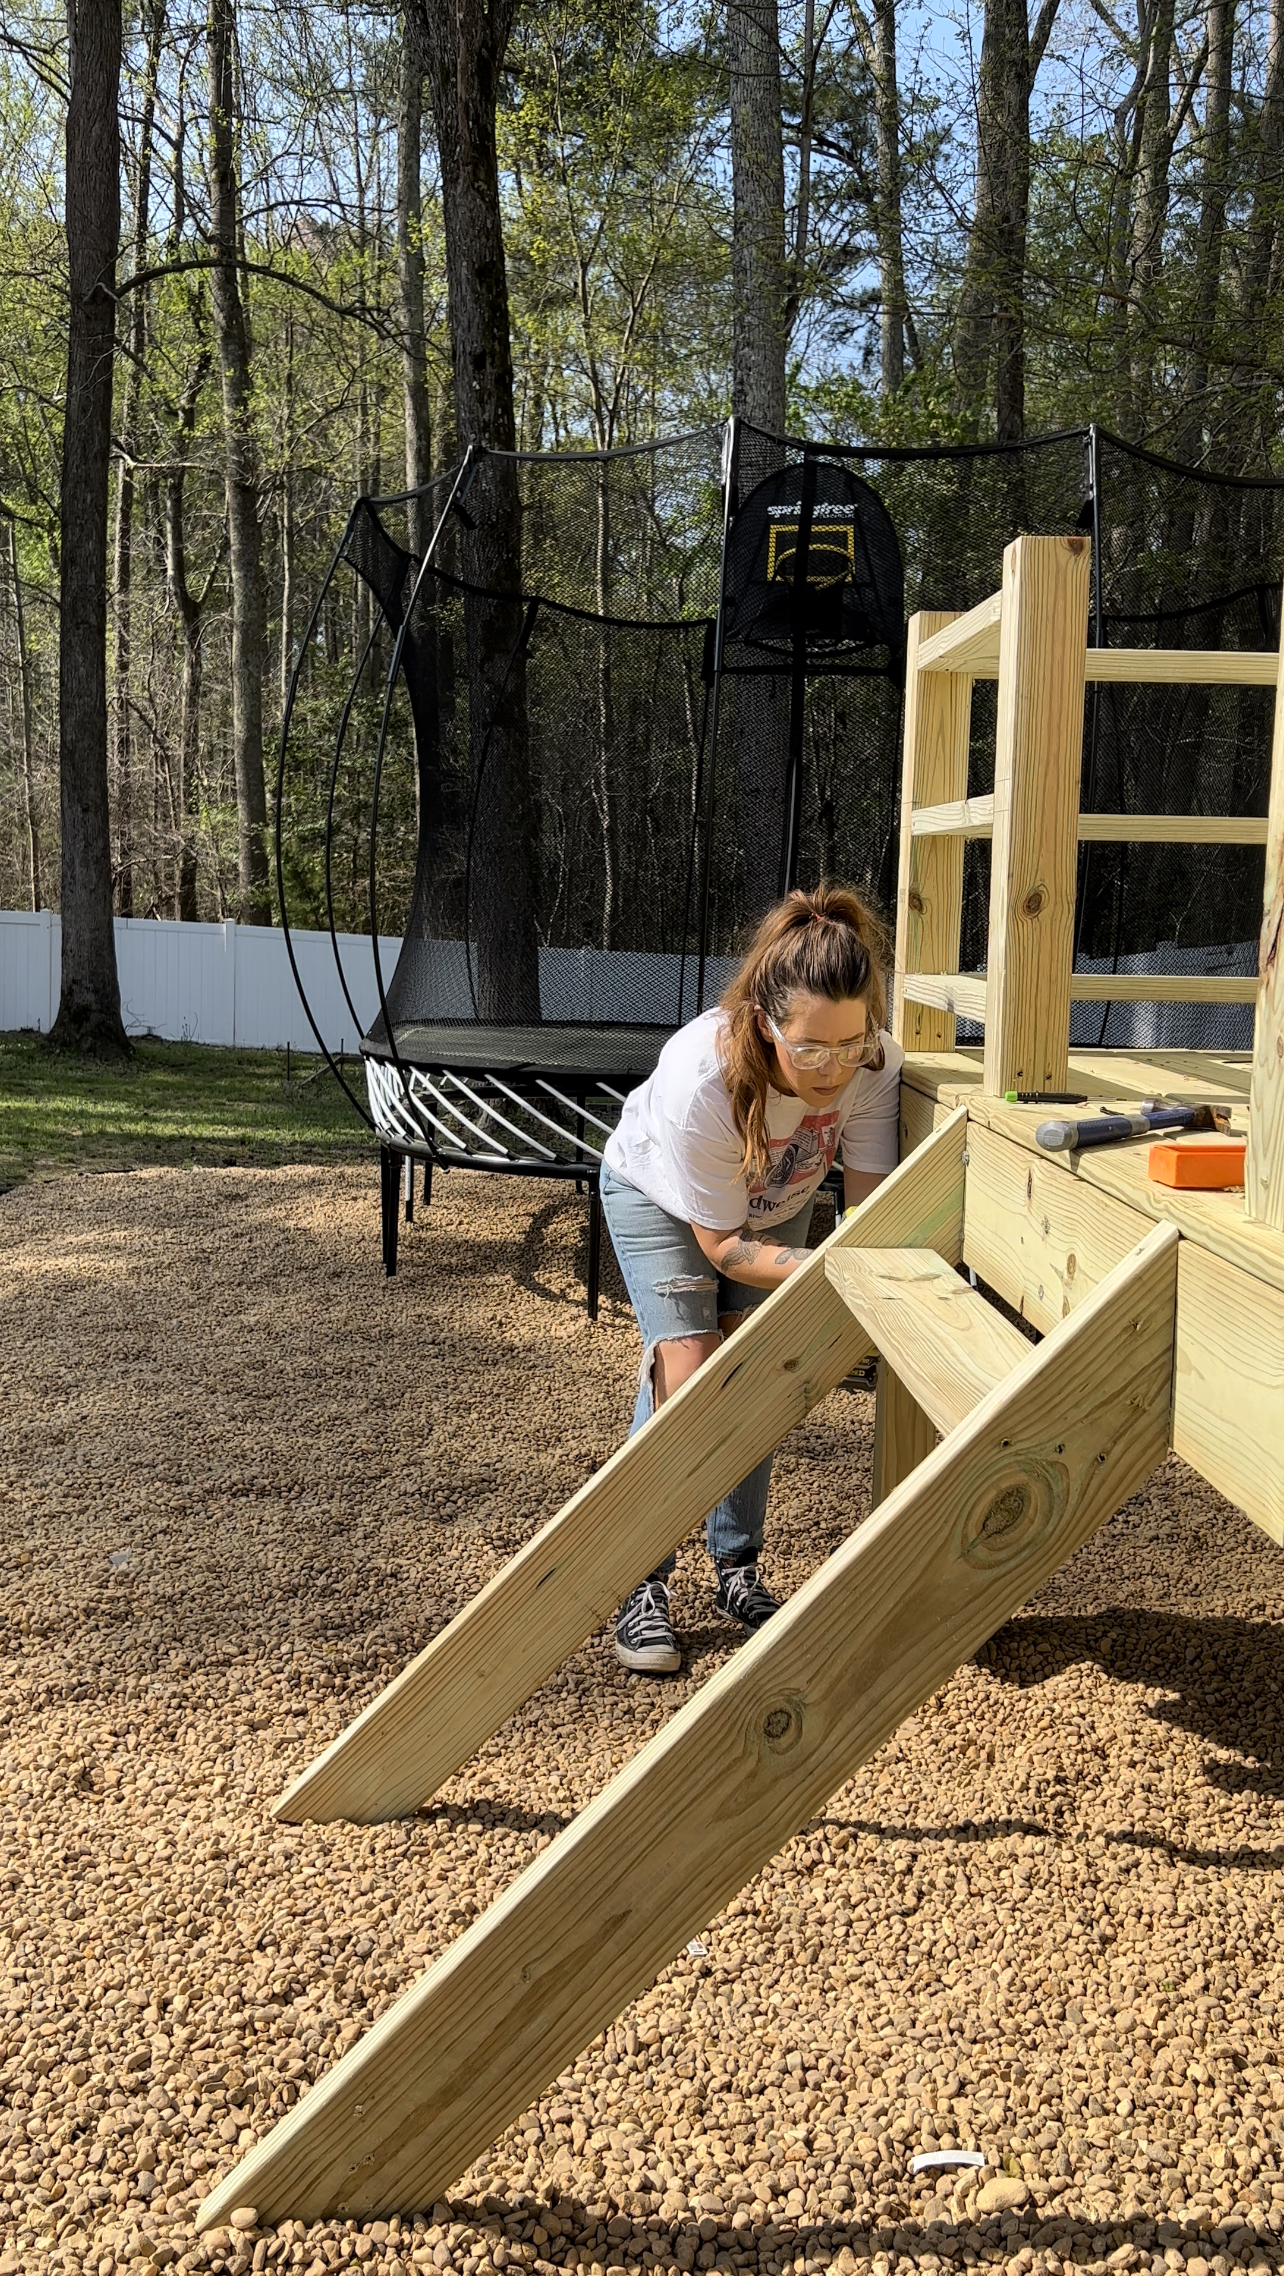
For the steps, I had to navigate around un-level ground. The way I did this was by cutting two 2×6 boards at a 32 degree angle on one end and a 22.5 degree angle in the opposite direction on the other end. Each board measured 42 in from short end to short end. Then, I installed one of these on the side of the playhouse with the lower ground using screws and a lag bolt from behind (first photo below). Next, I placed the other board on the opposite side and viewed from the side to see how uneven they were.
After that, I began cutting small bits off the bottom end of this board until they looked perfectly parallel from the side view. I secured this board to the deck base. I then measured between the two boards at the top and cut 4 pieces at this length and attached them between the stair rails. My steps ended up being 31 in wide.
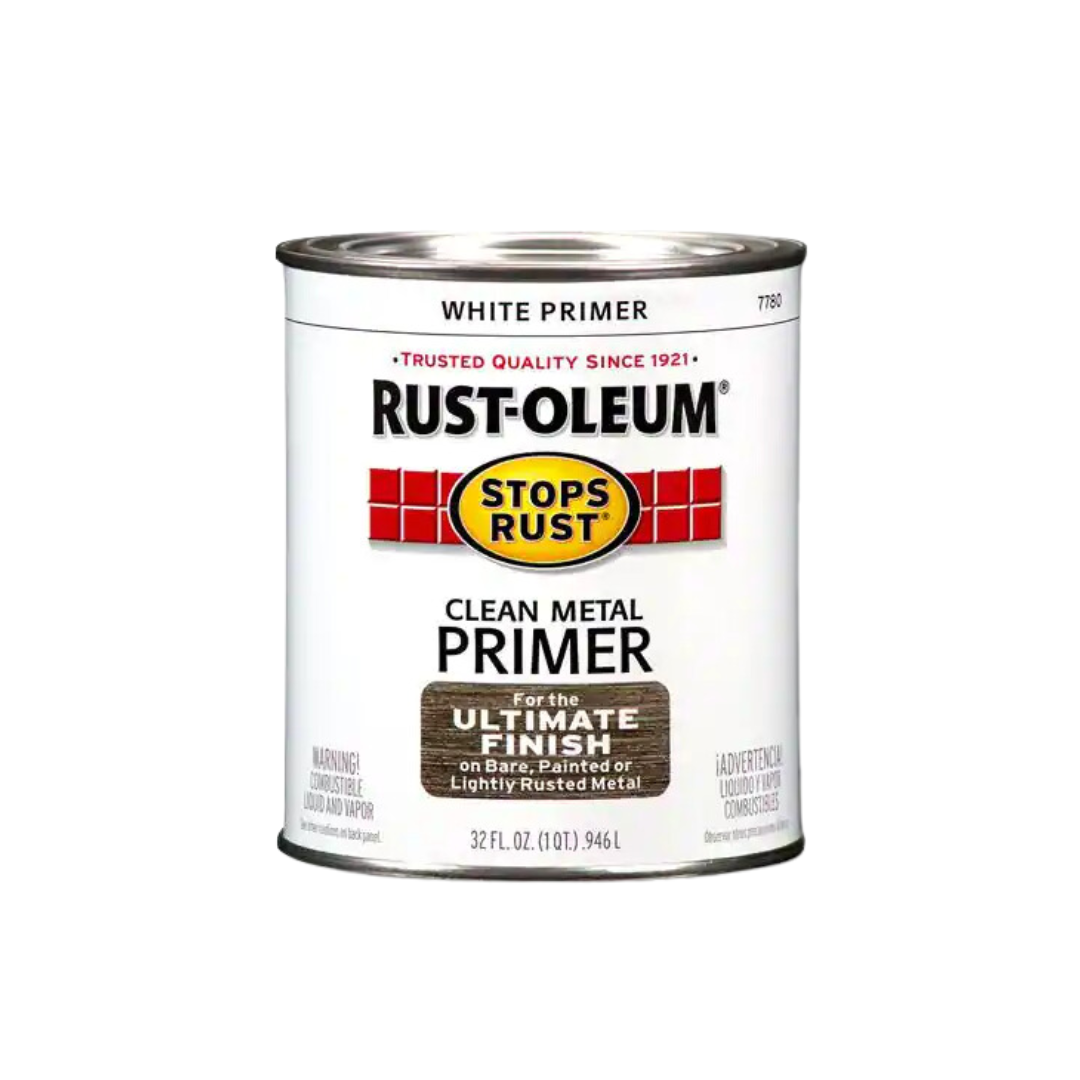
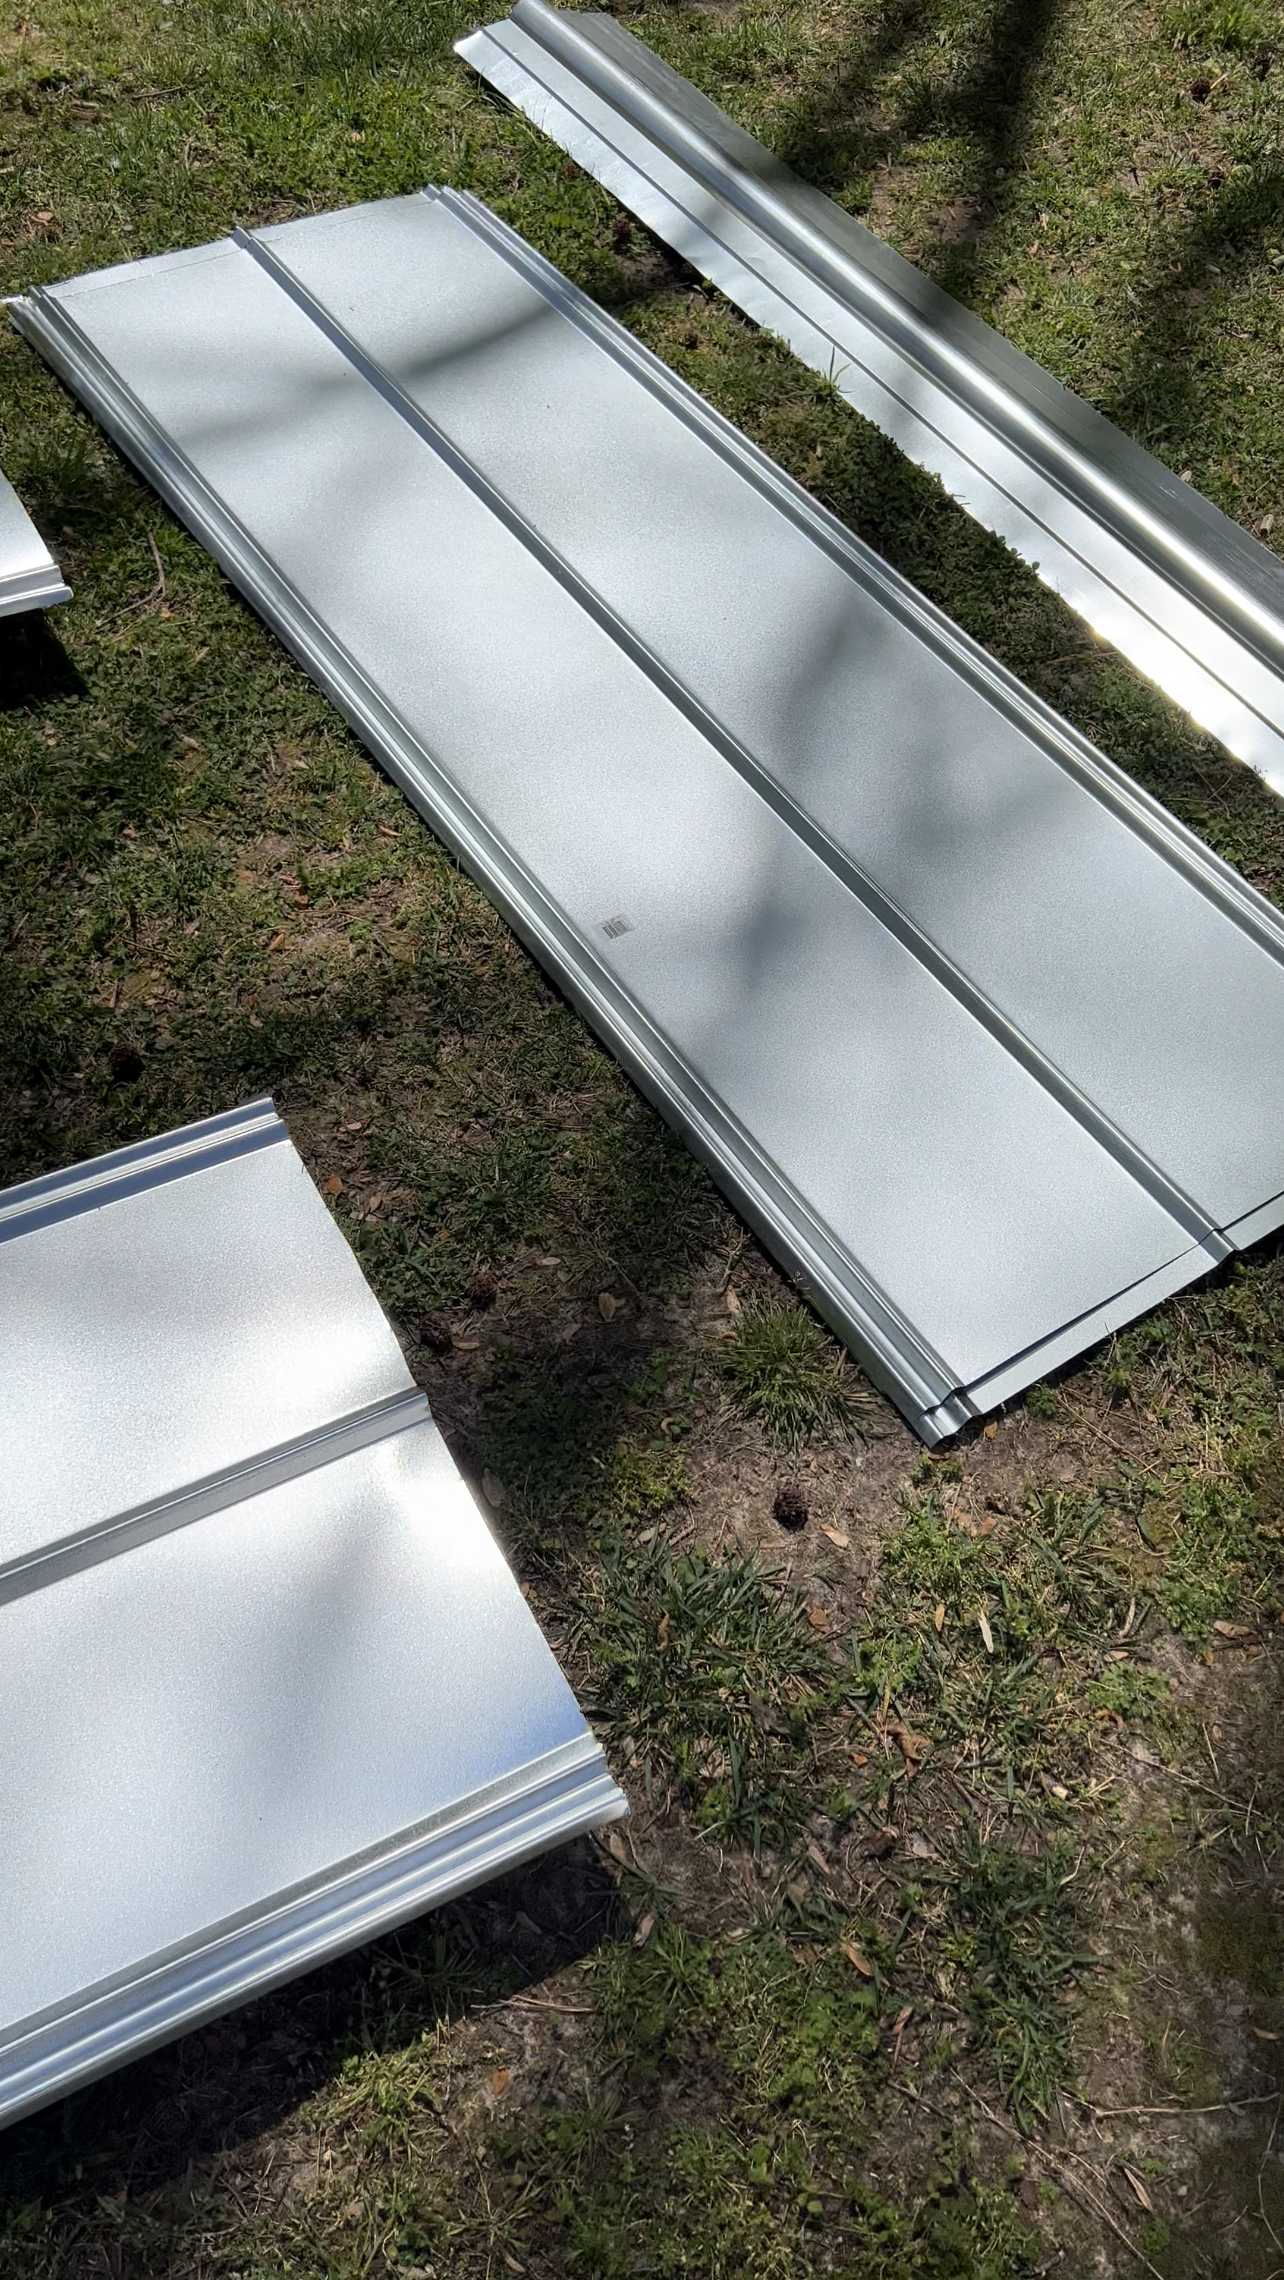
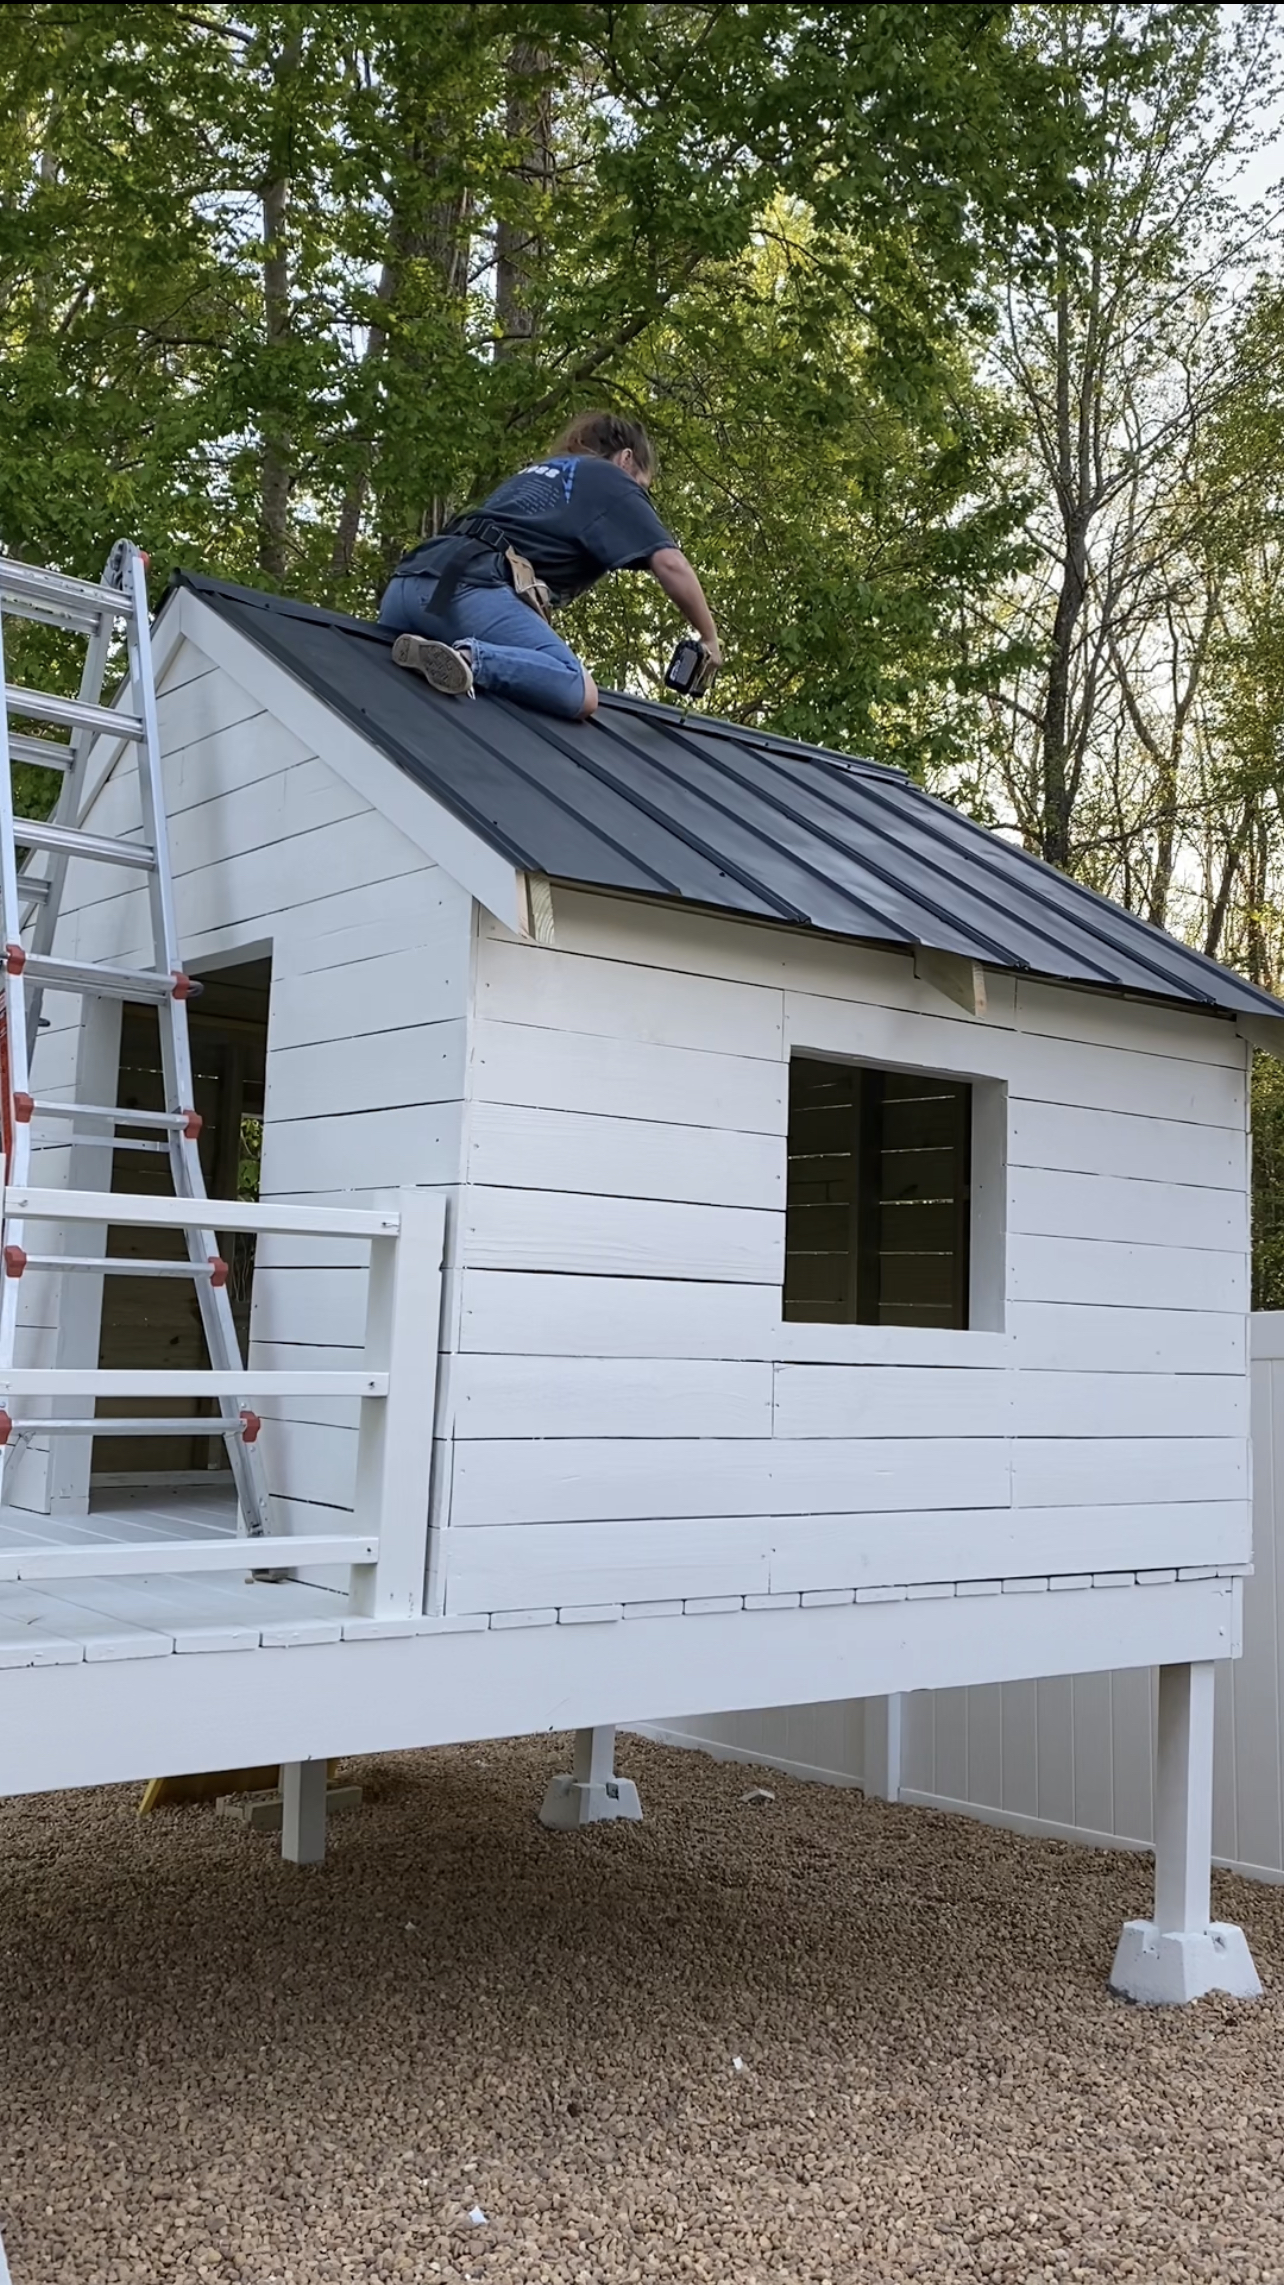
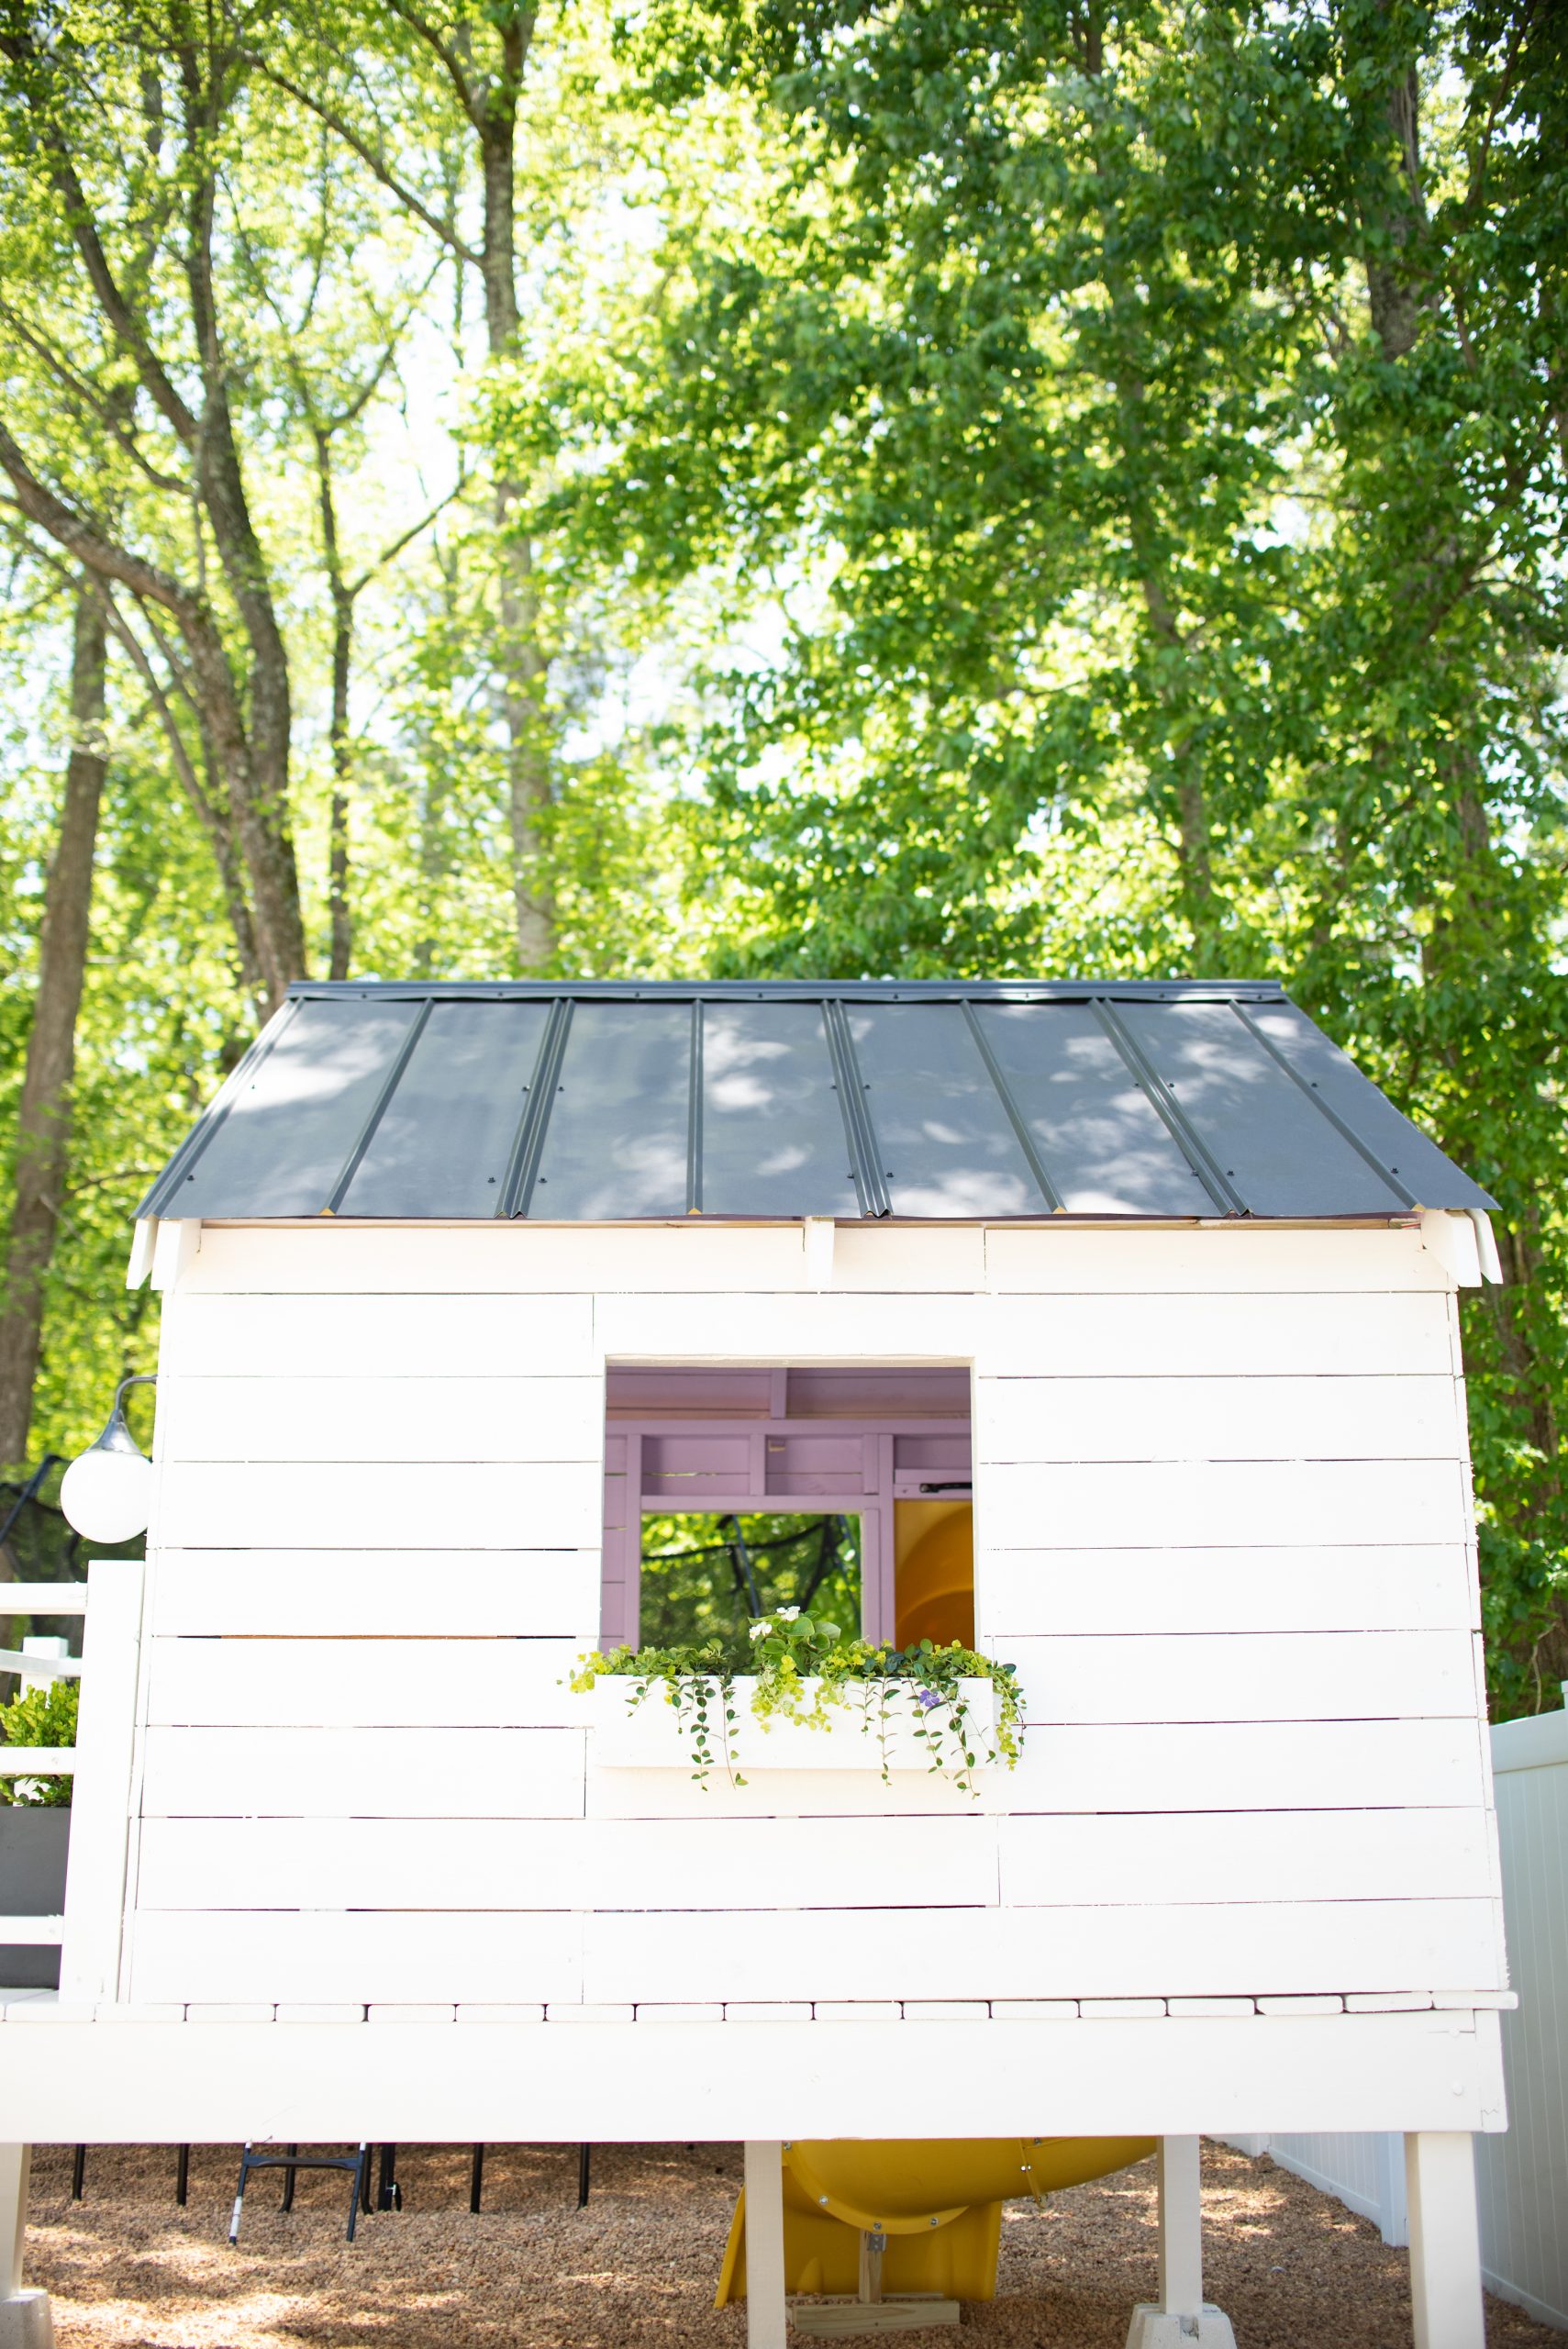
Roof
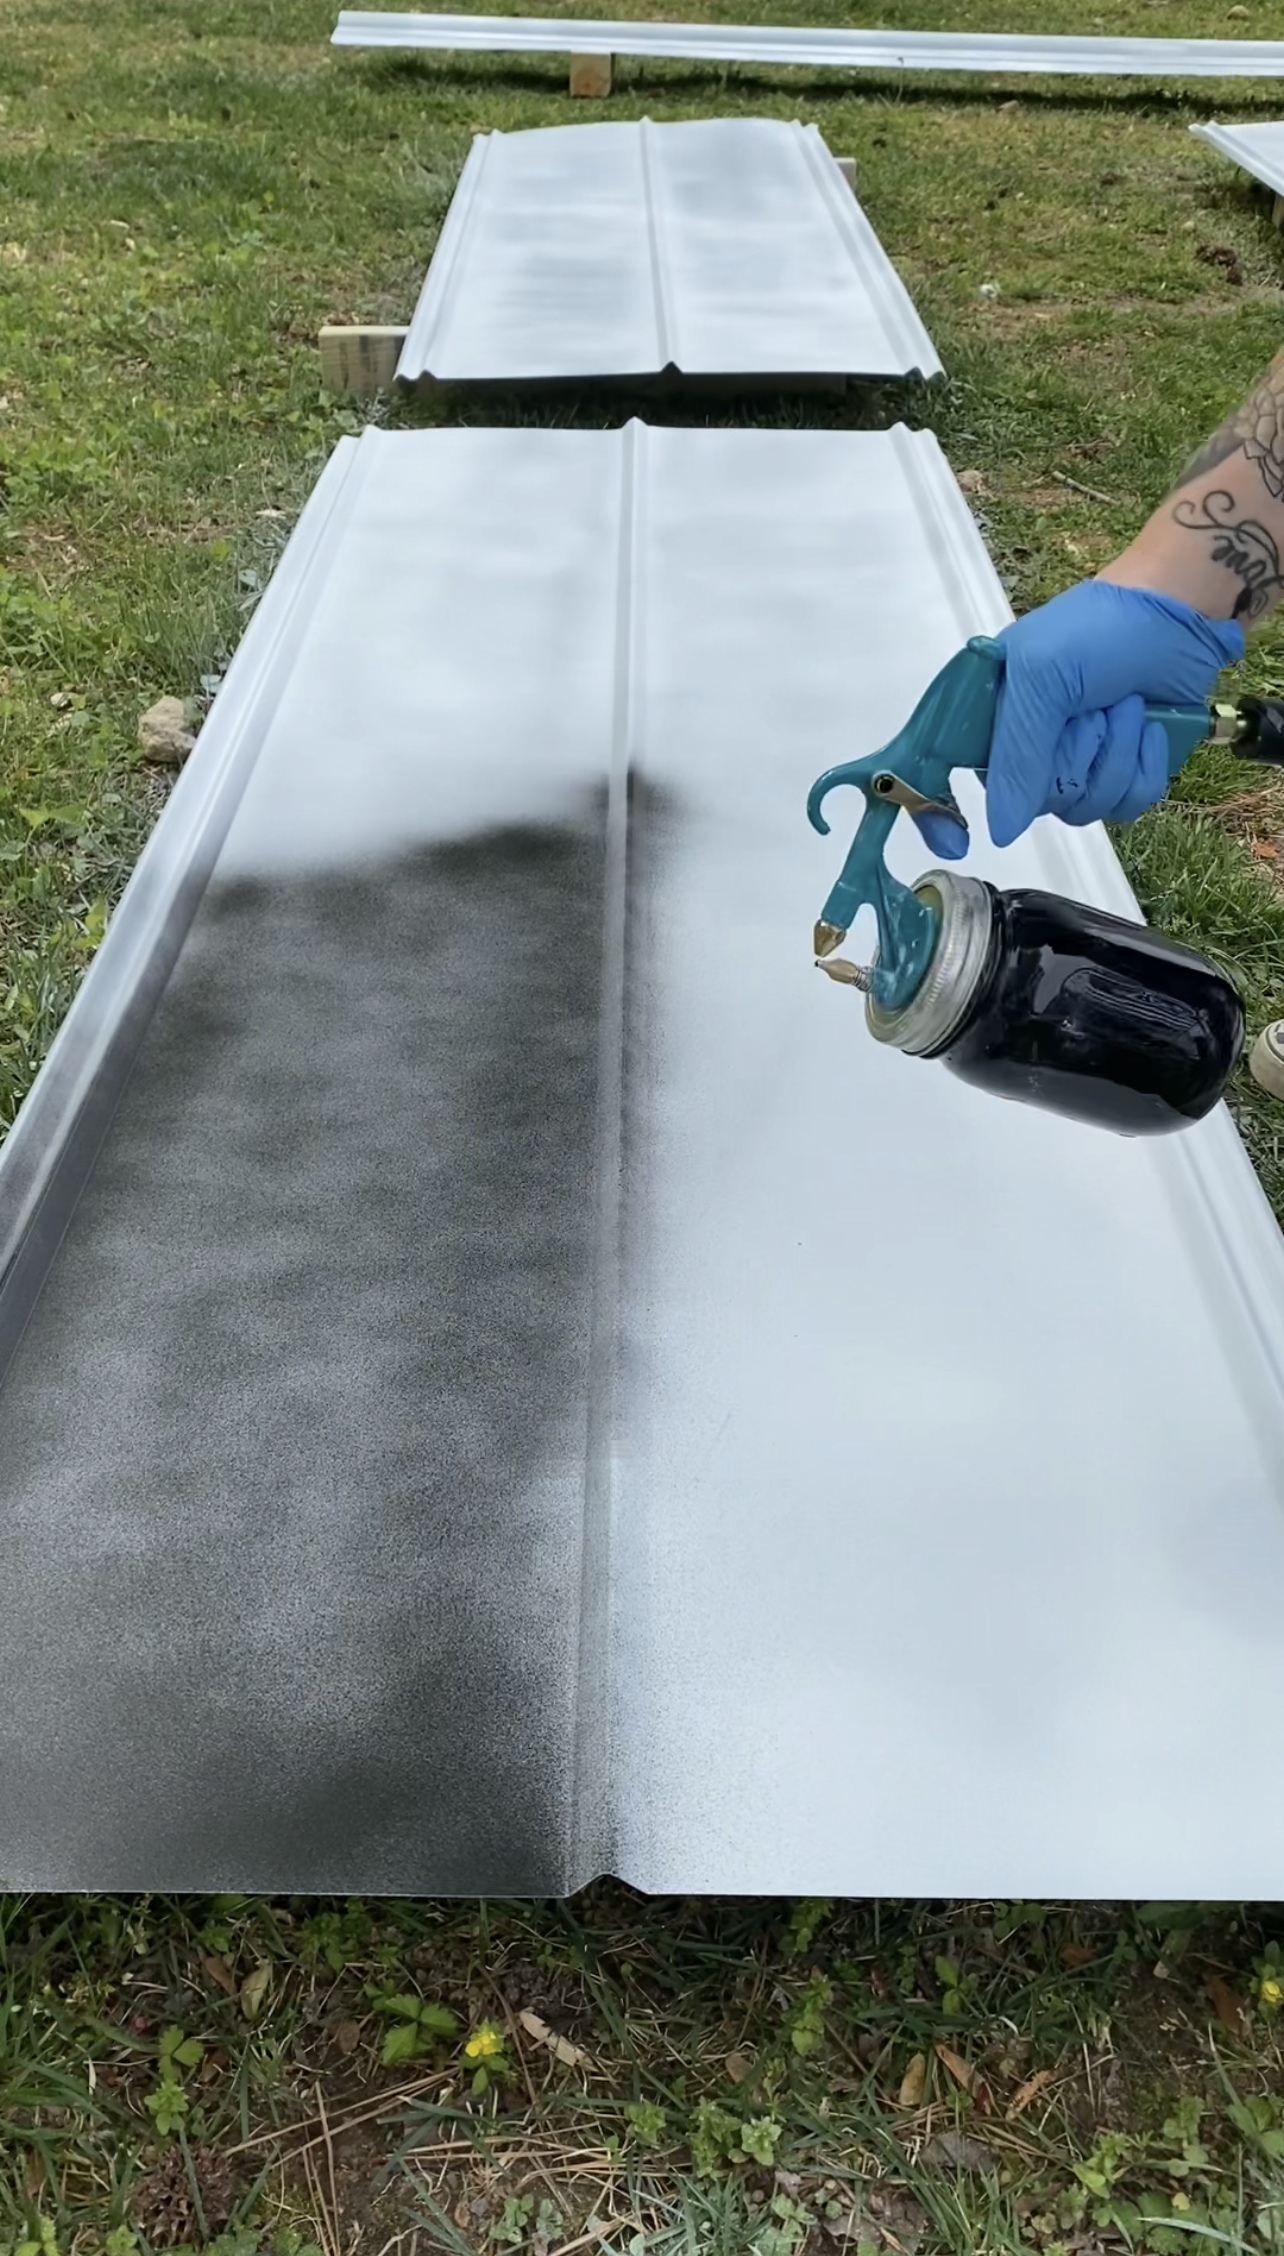
I decided to go with metal roof panels for this. The cheapest option was to purchase these from Lowe’s/Home Depot and cut to length. I bought 4 – 12 ft panels and cut them down to 64.5 inches in length using some siding shears. Because my stores did not carry black panels, I sprayed mine black with Rustoleum Clean Metal Primer & Rustoleum High Performance Enamel in Flat Black.
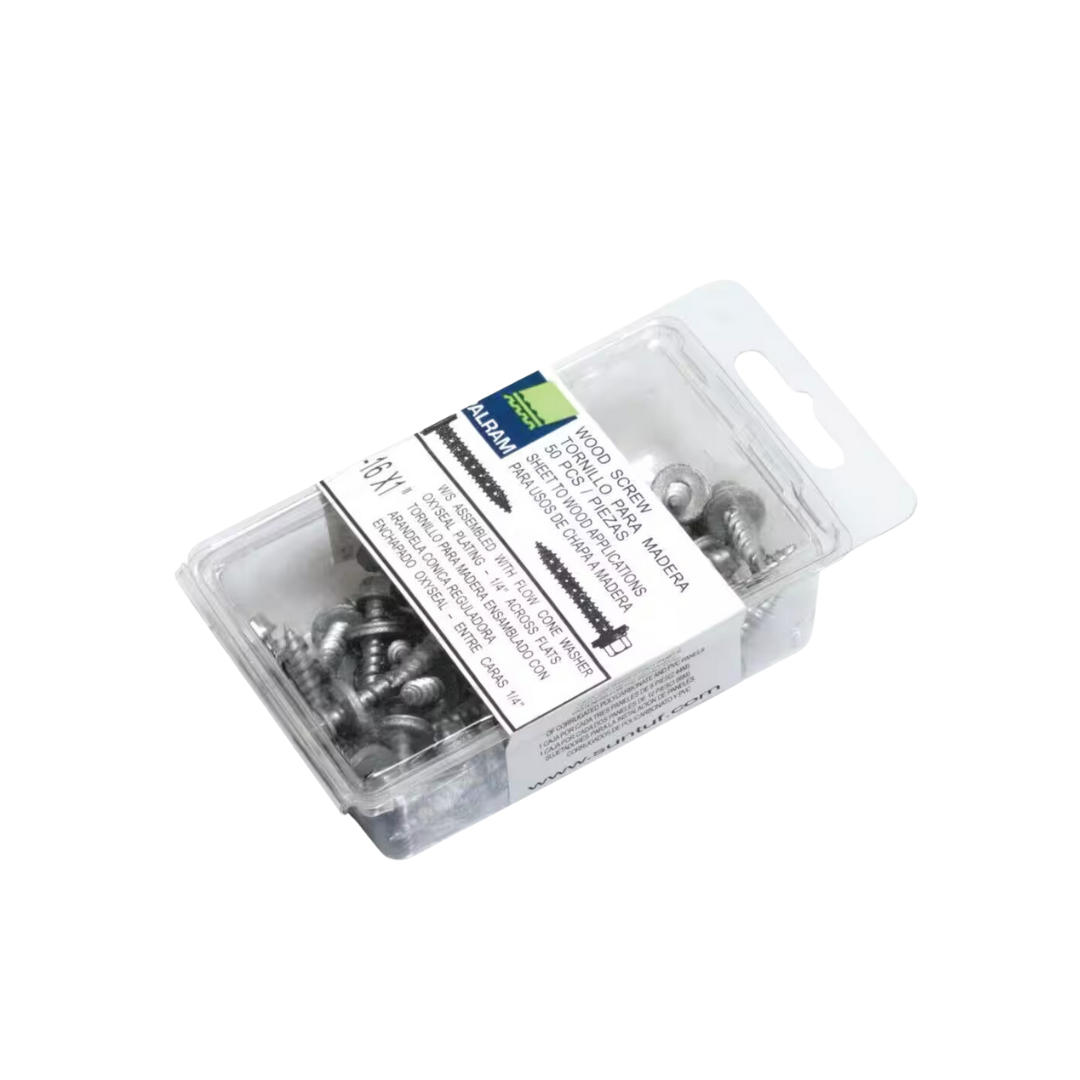
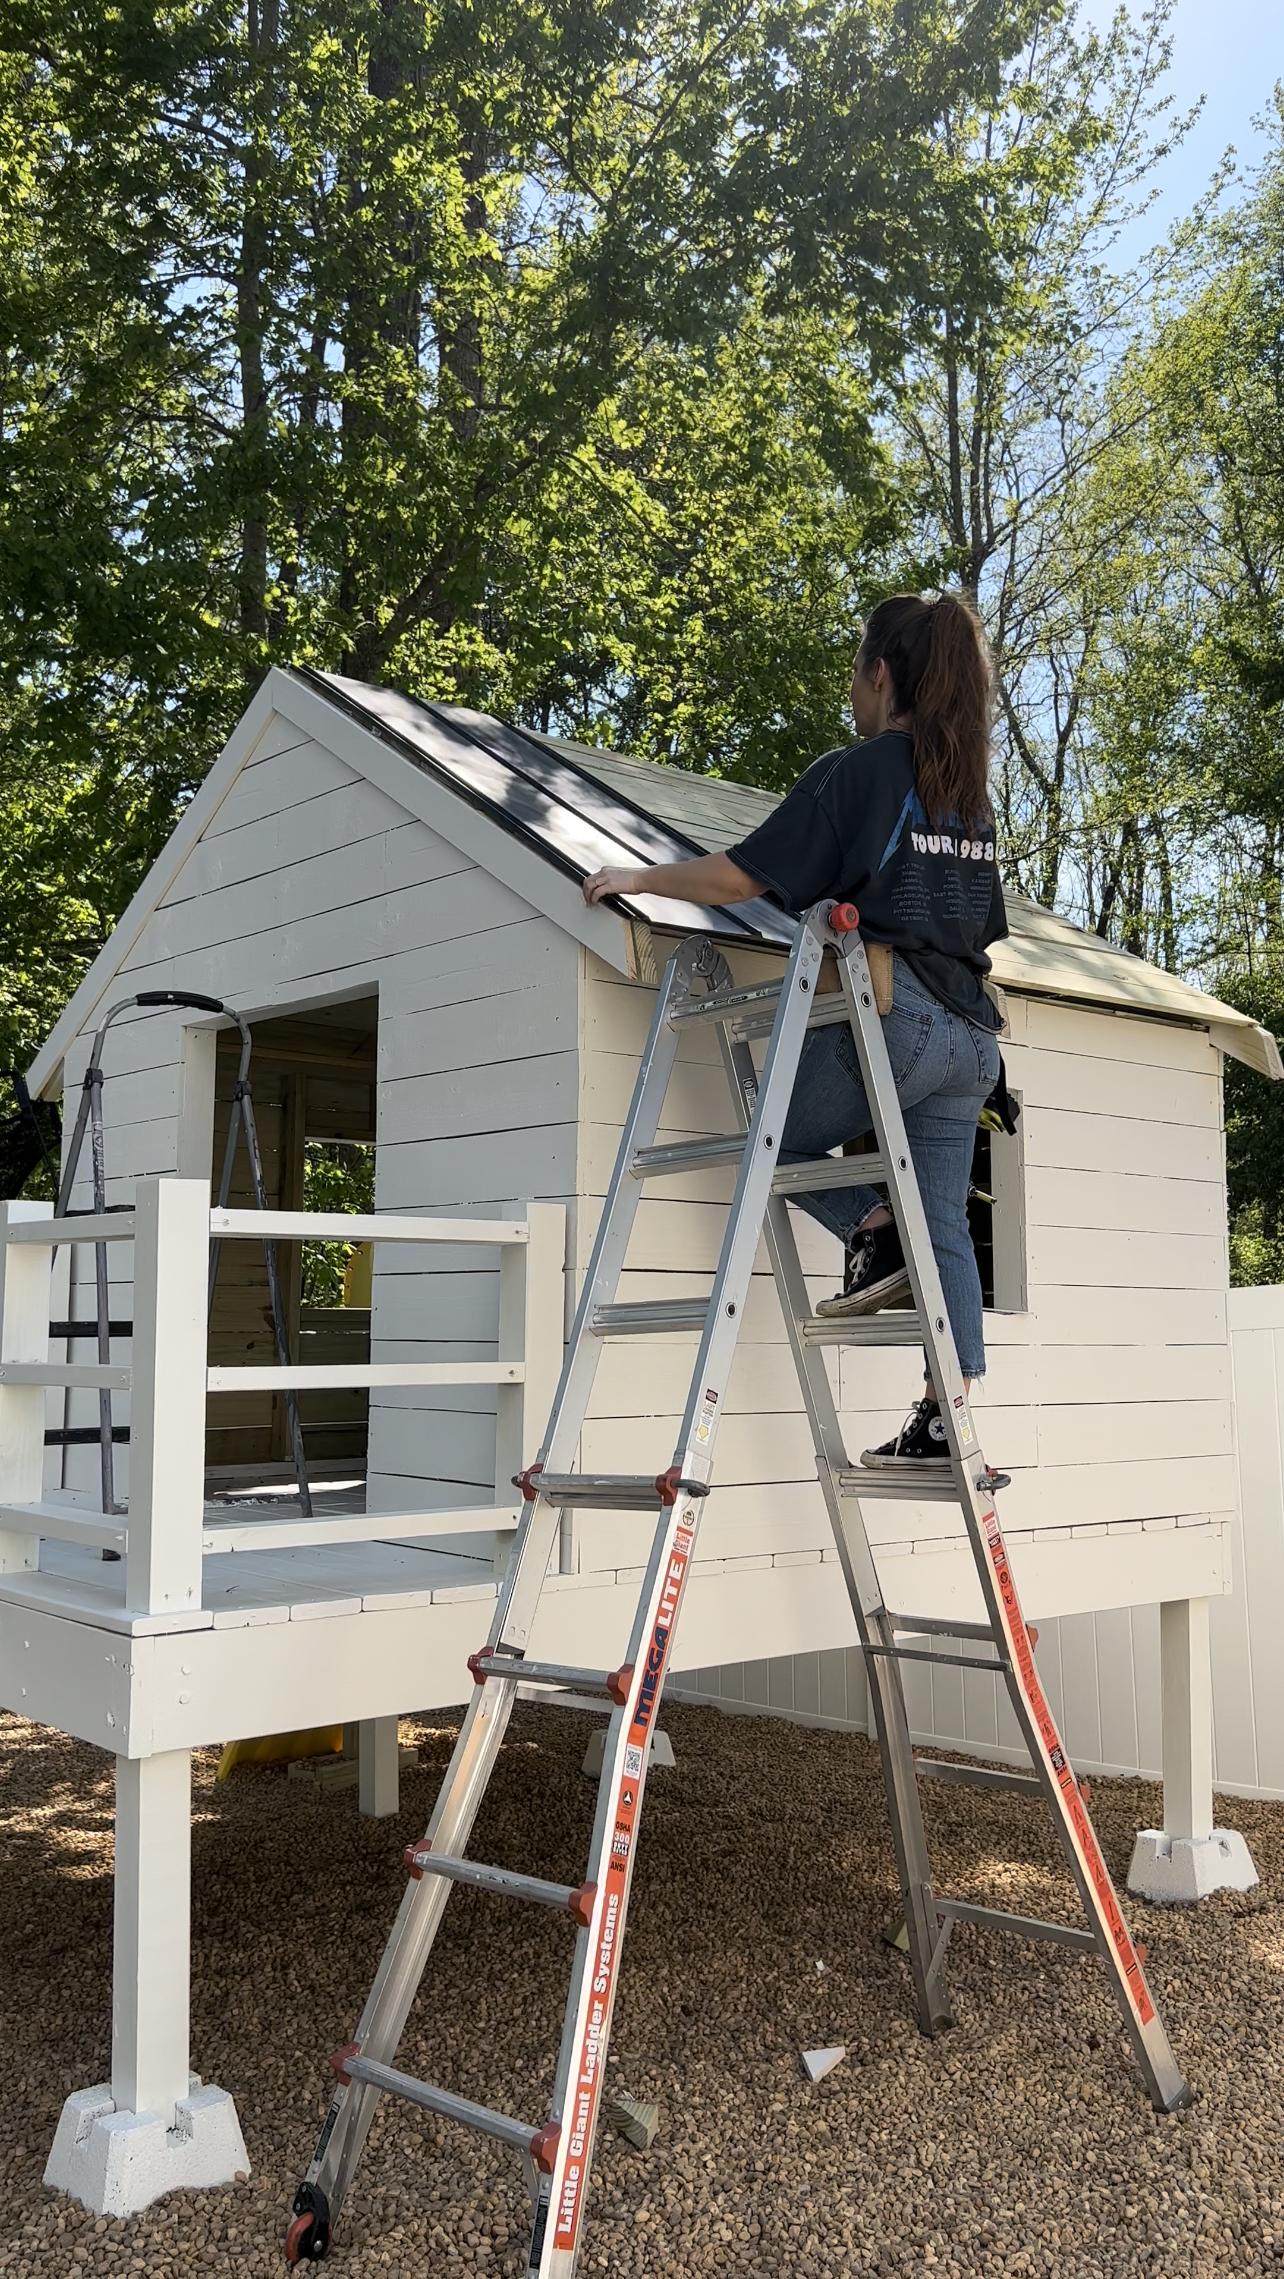
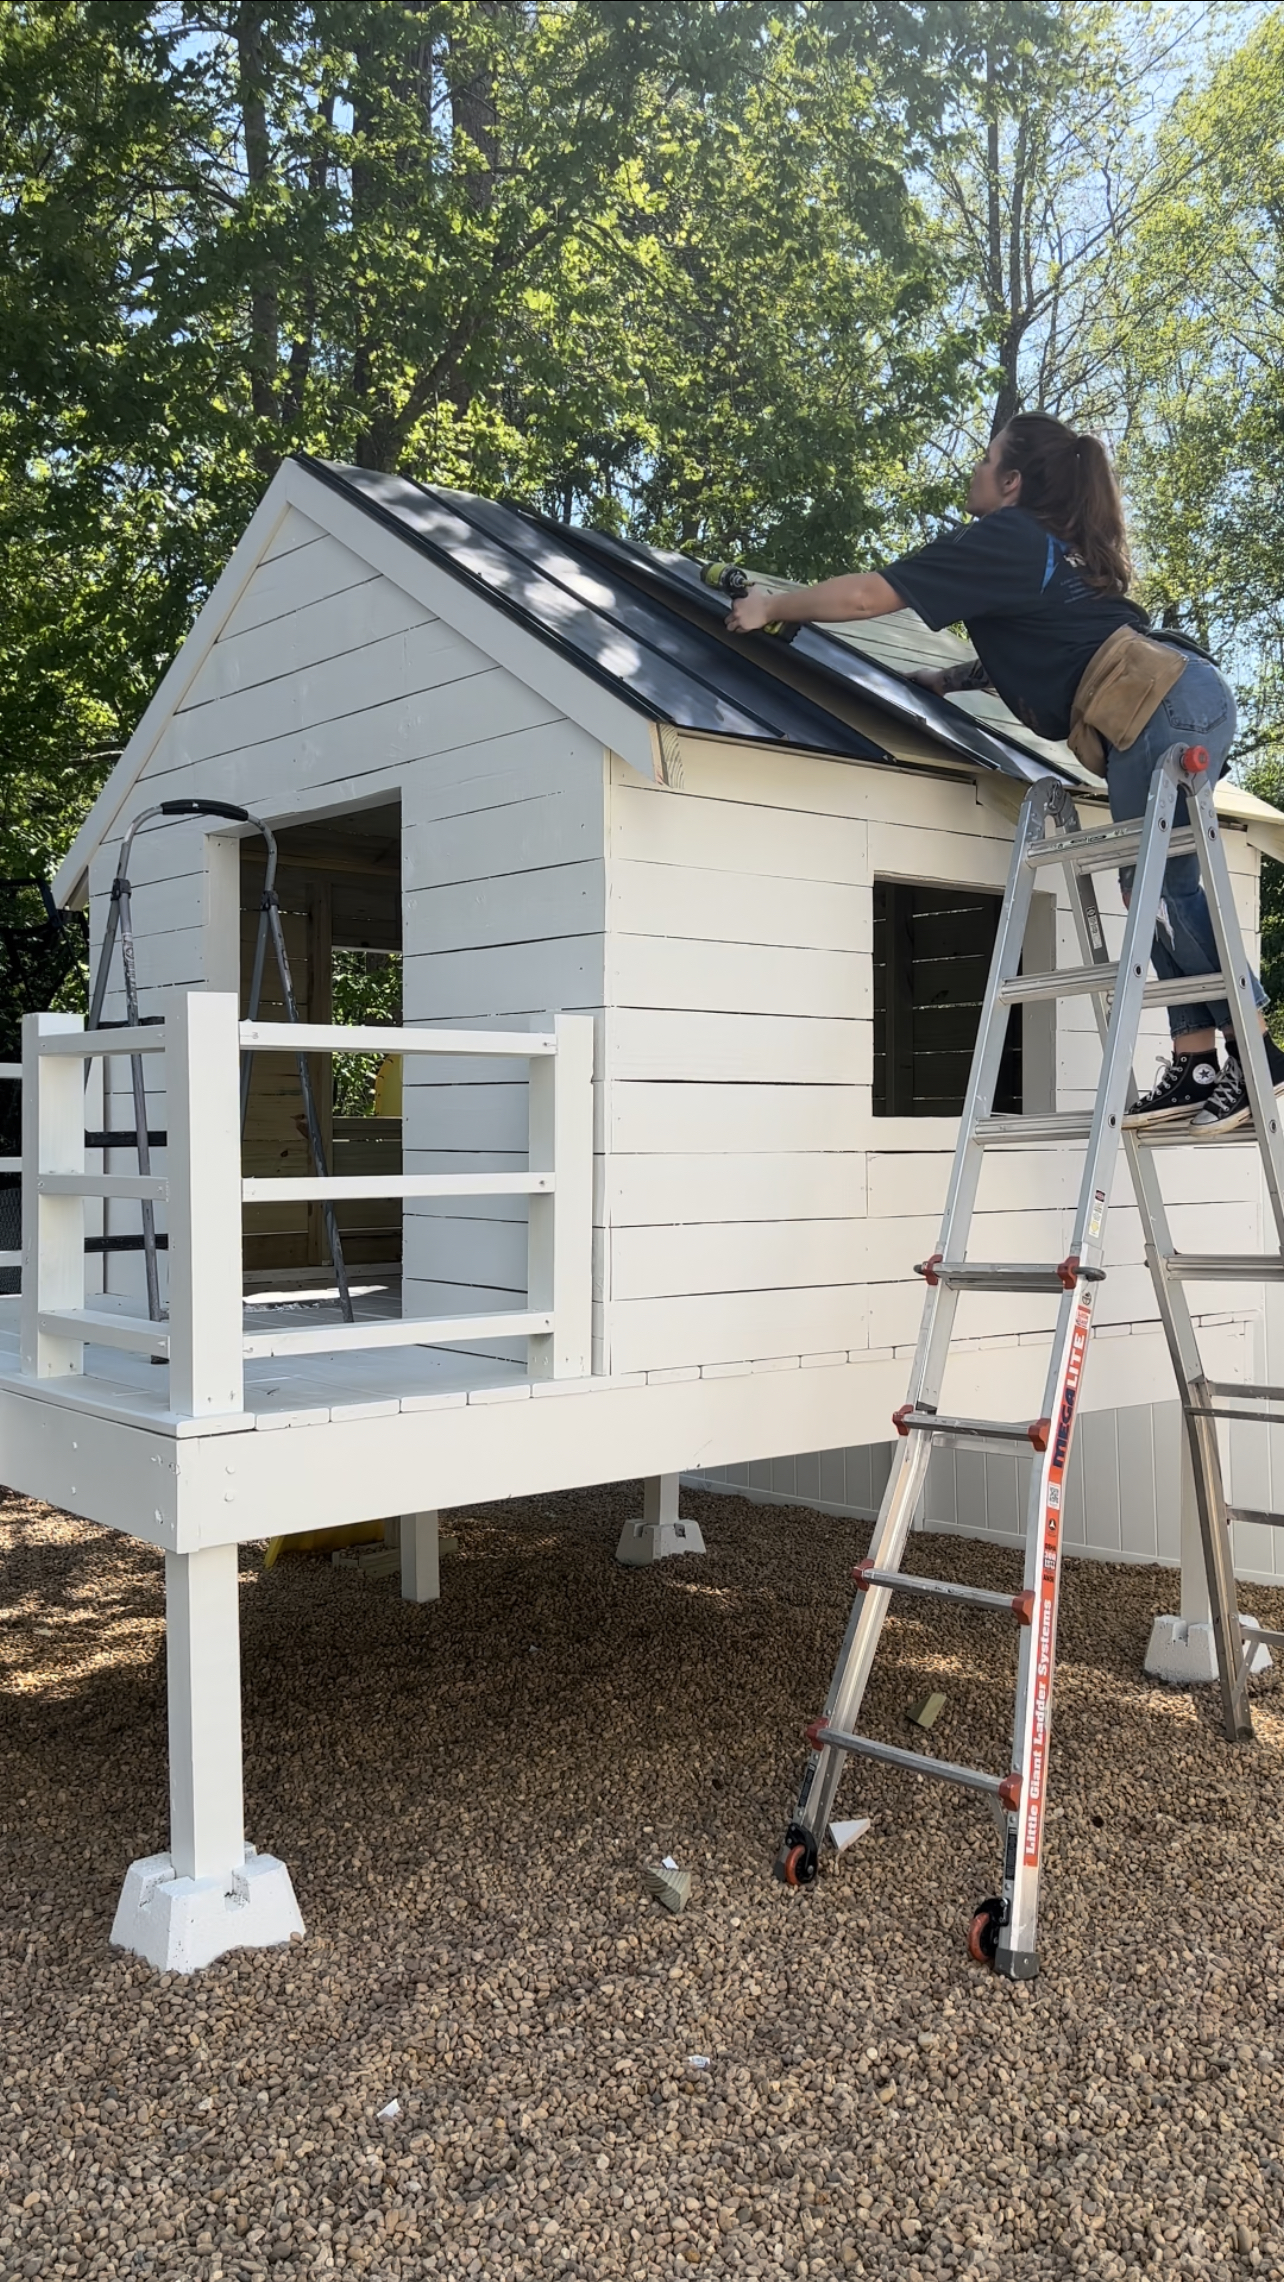
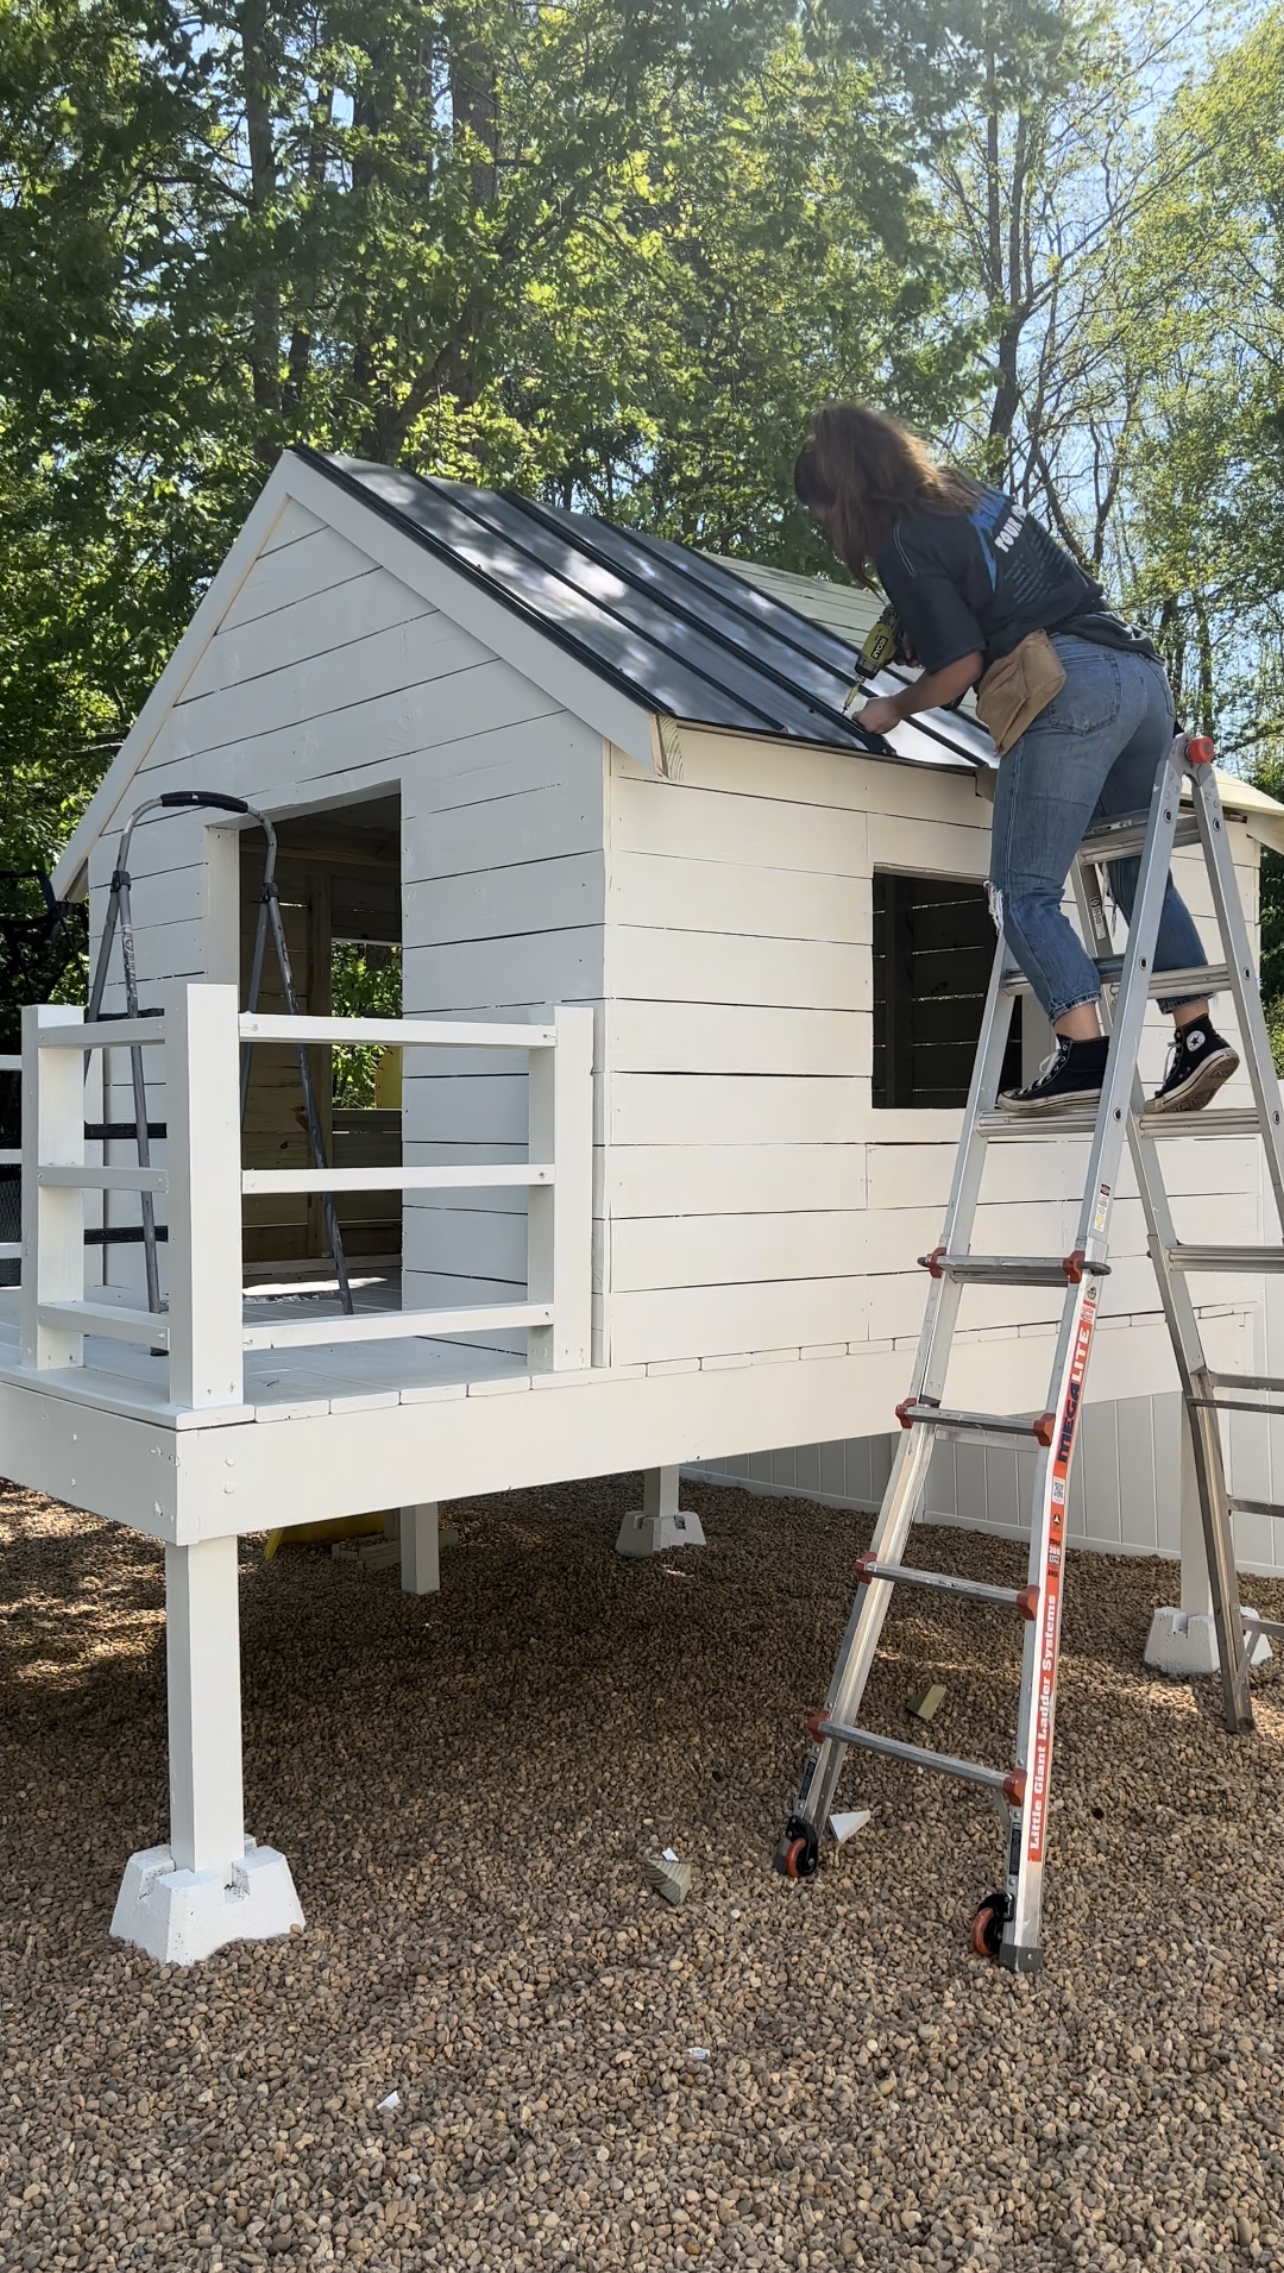
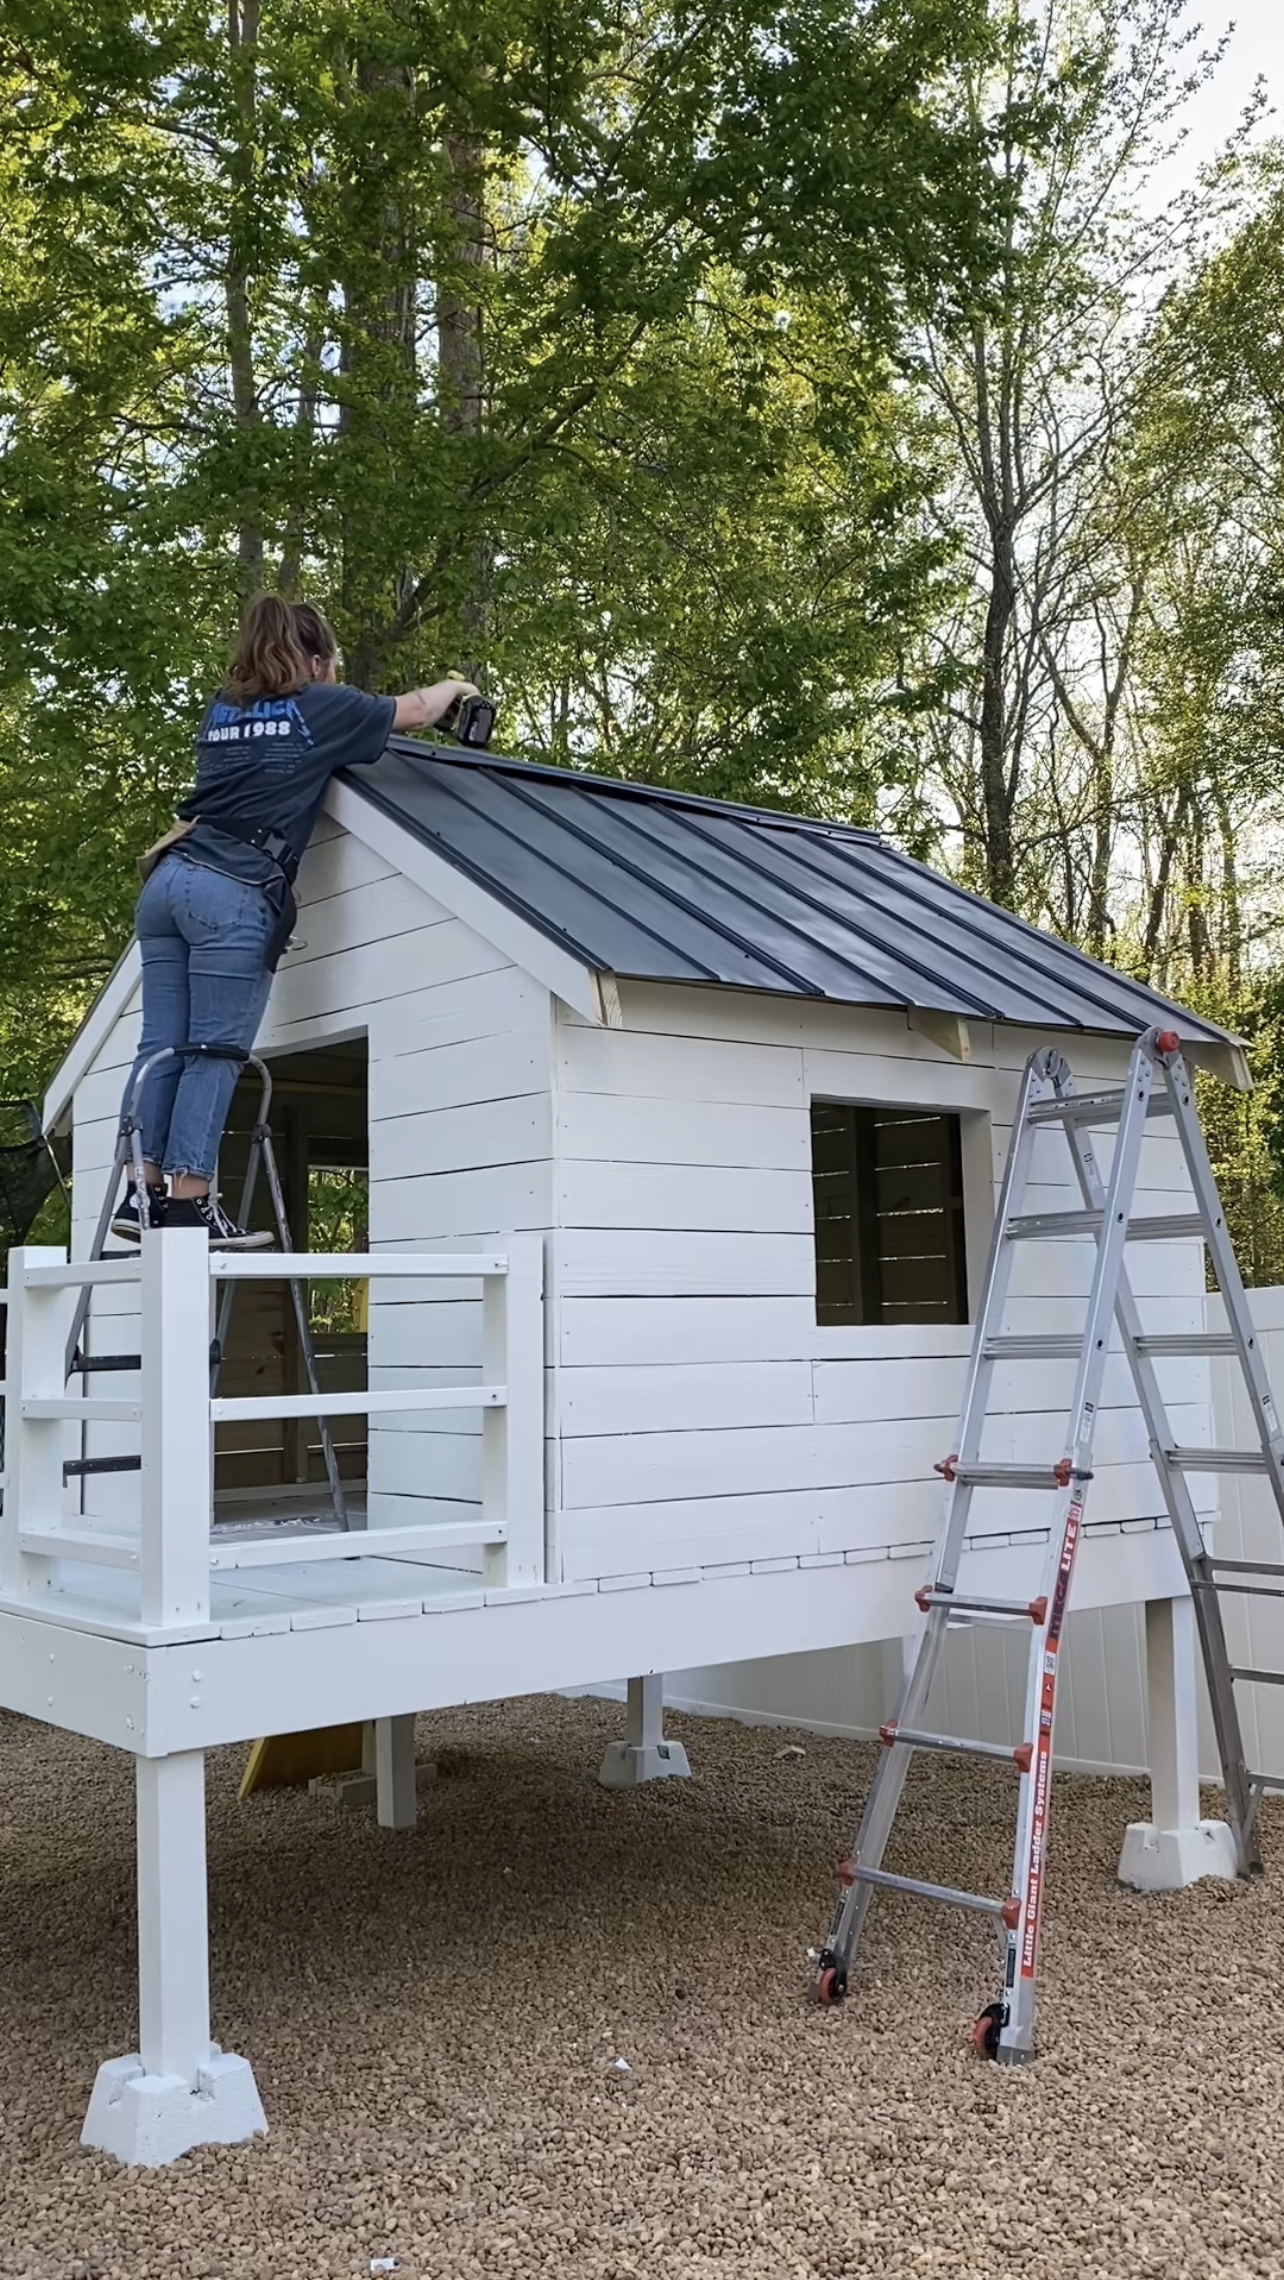
I installed each panel with roofing screws that I also painted black. The ridges on the ends of each panel overlap when installed. I screwed in 3 full panels and cut down the final panel to width on each side. After screwing in all of the roof panels, I cut down the ridge cap to length and screwed in on each side (I had to straddle the roof to do this part).

Finishing Touches
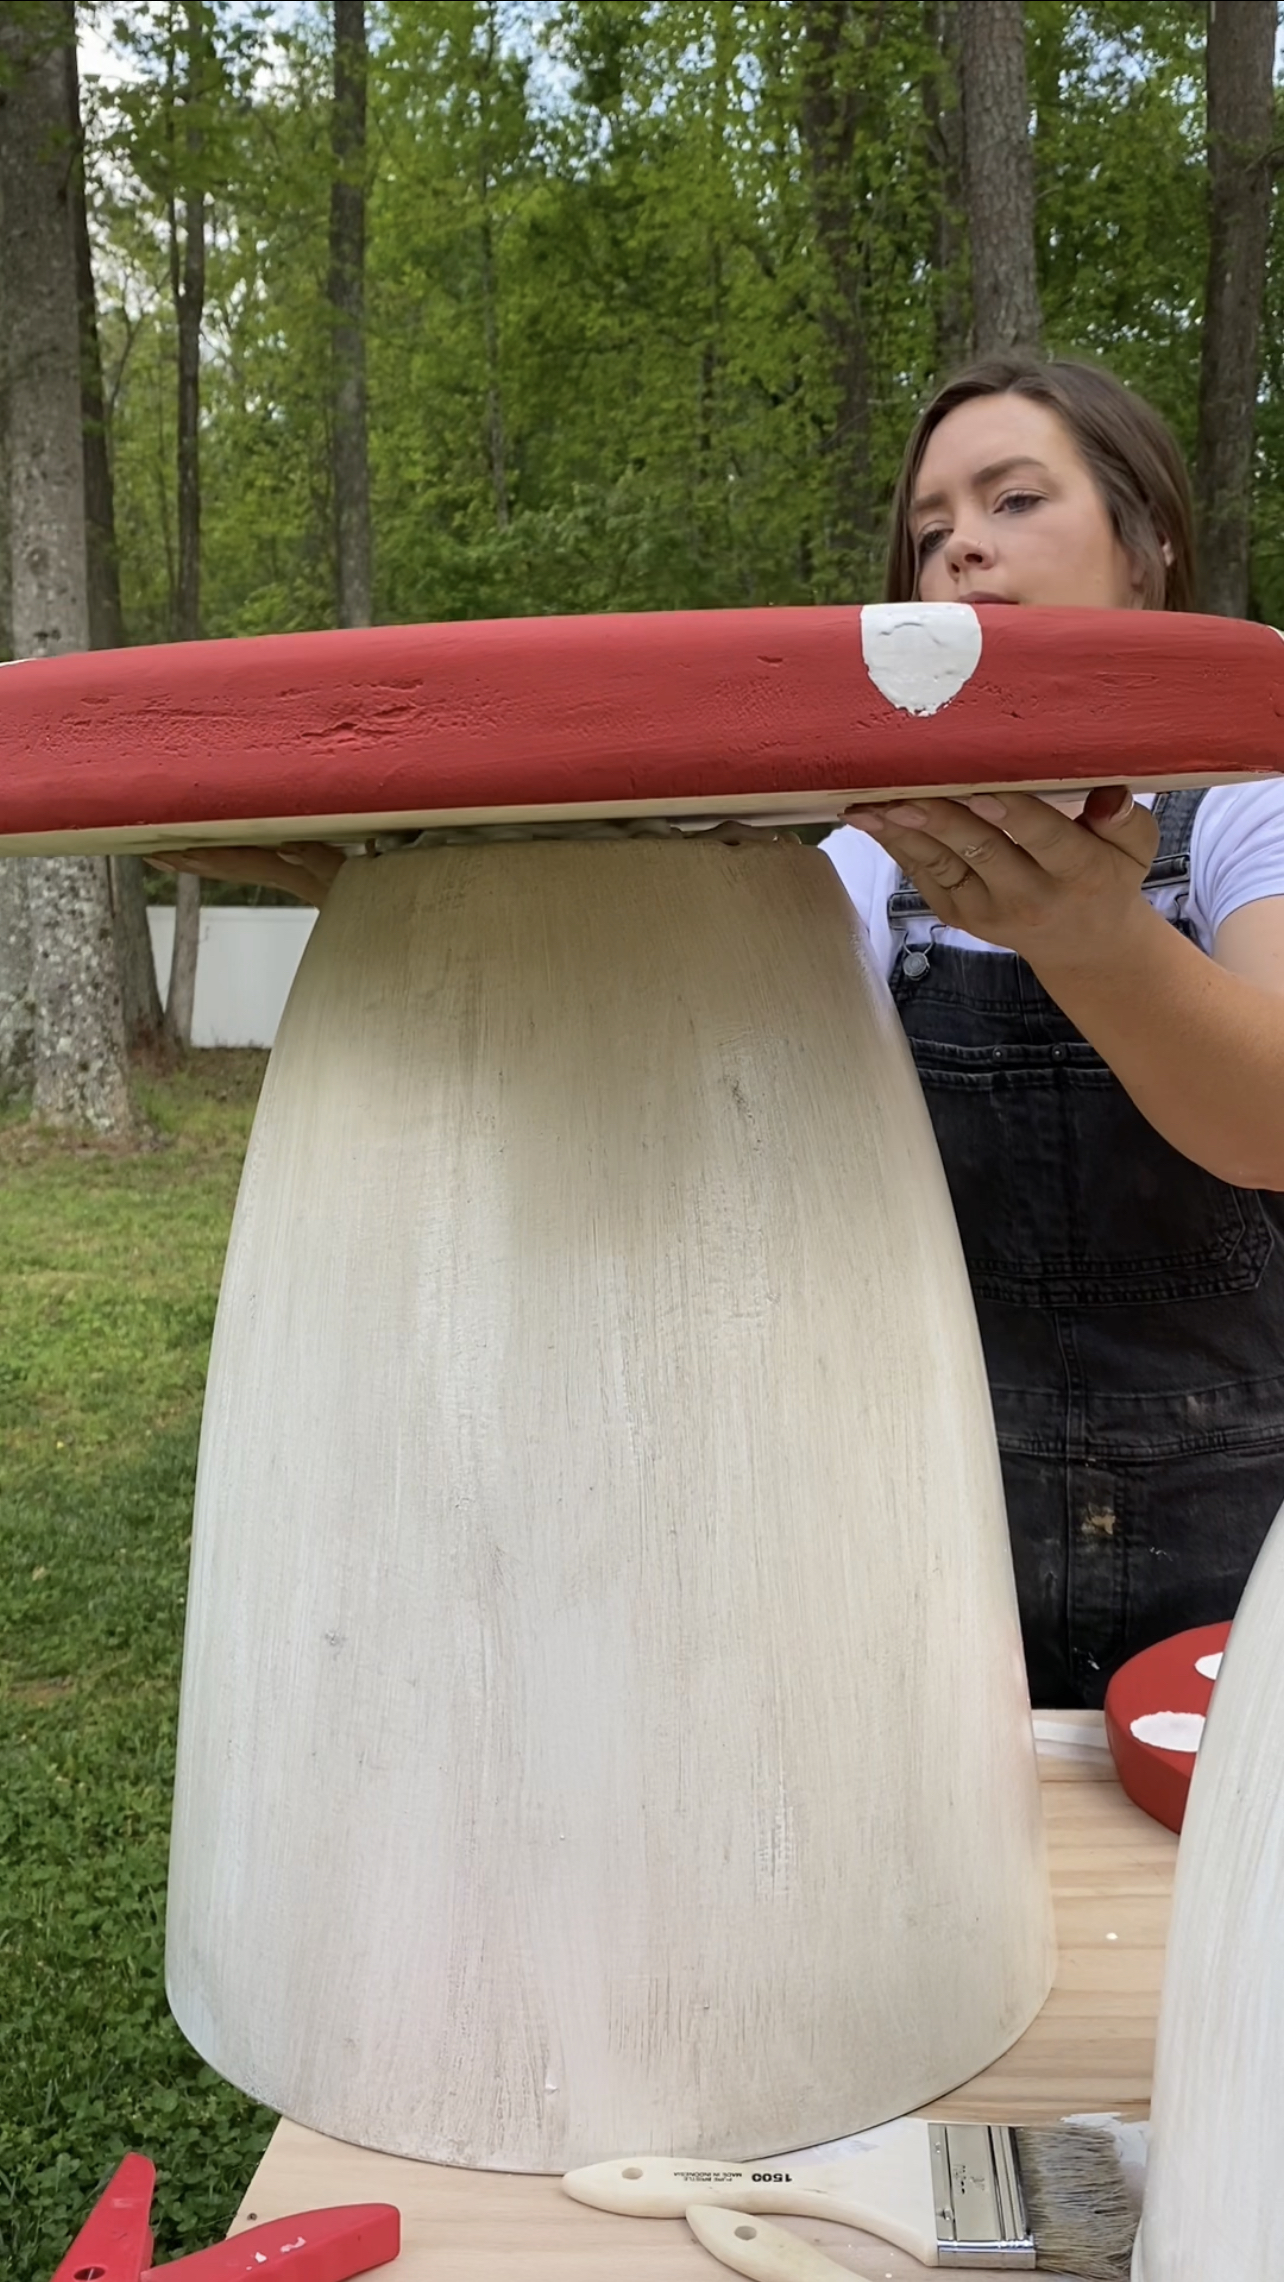
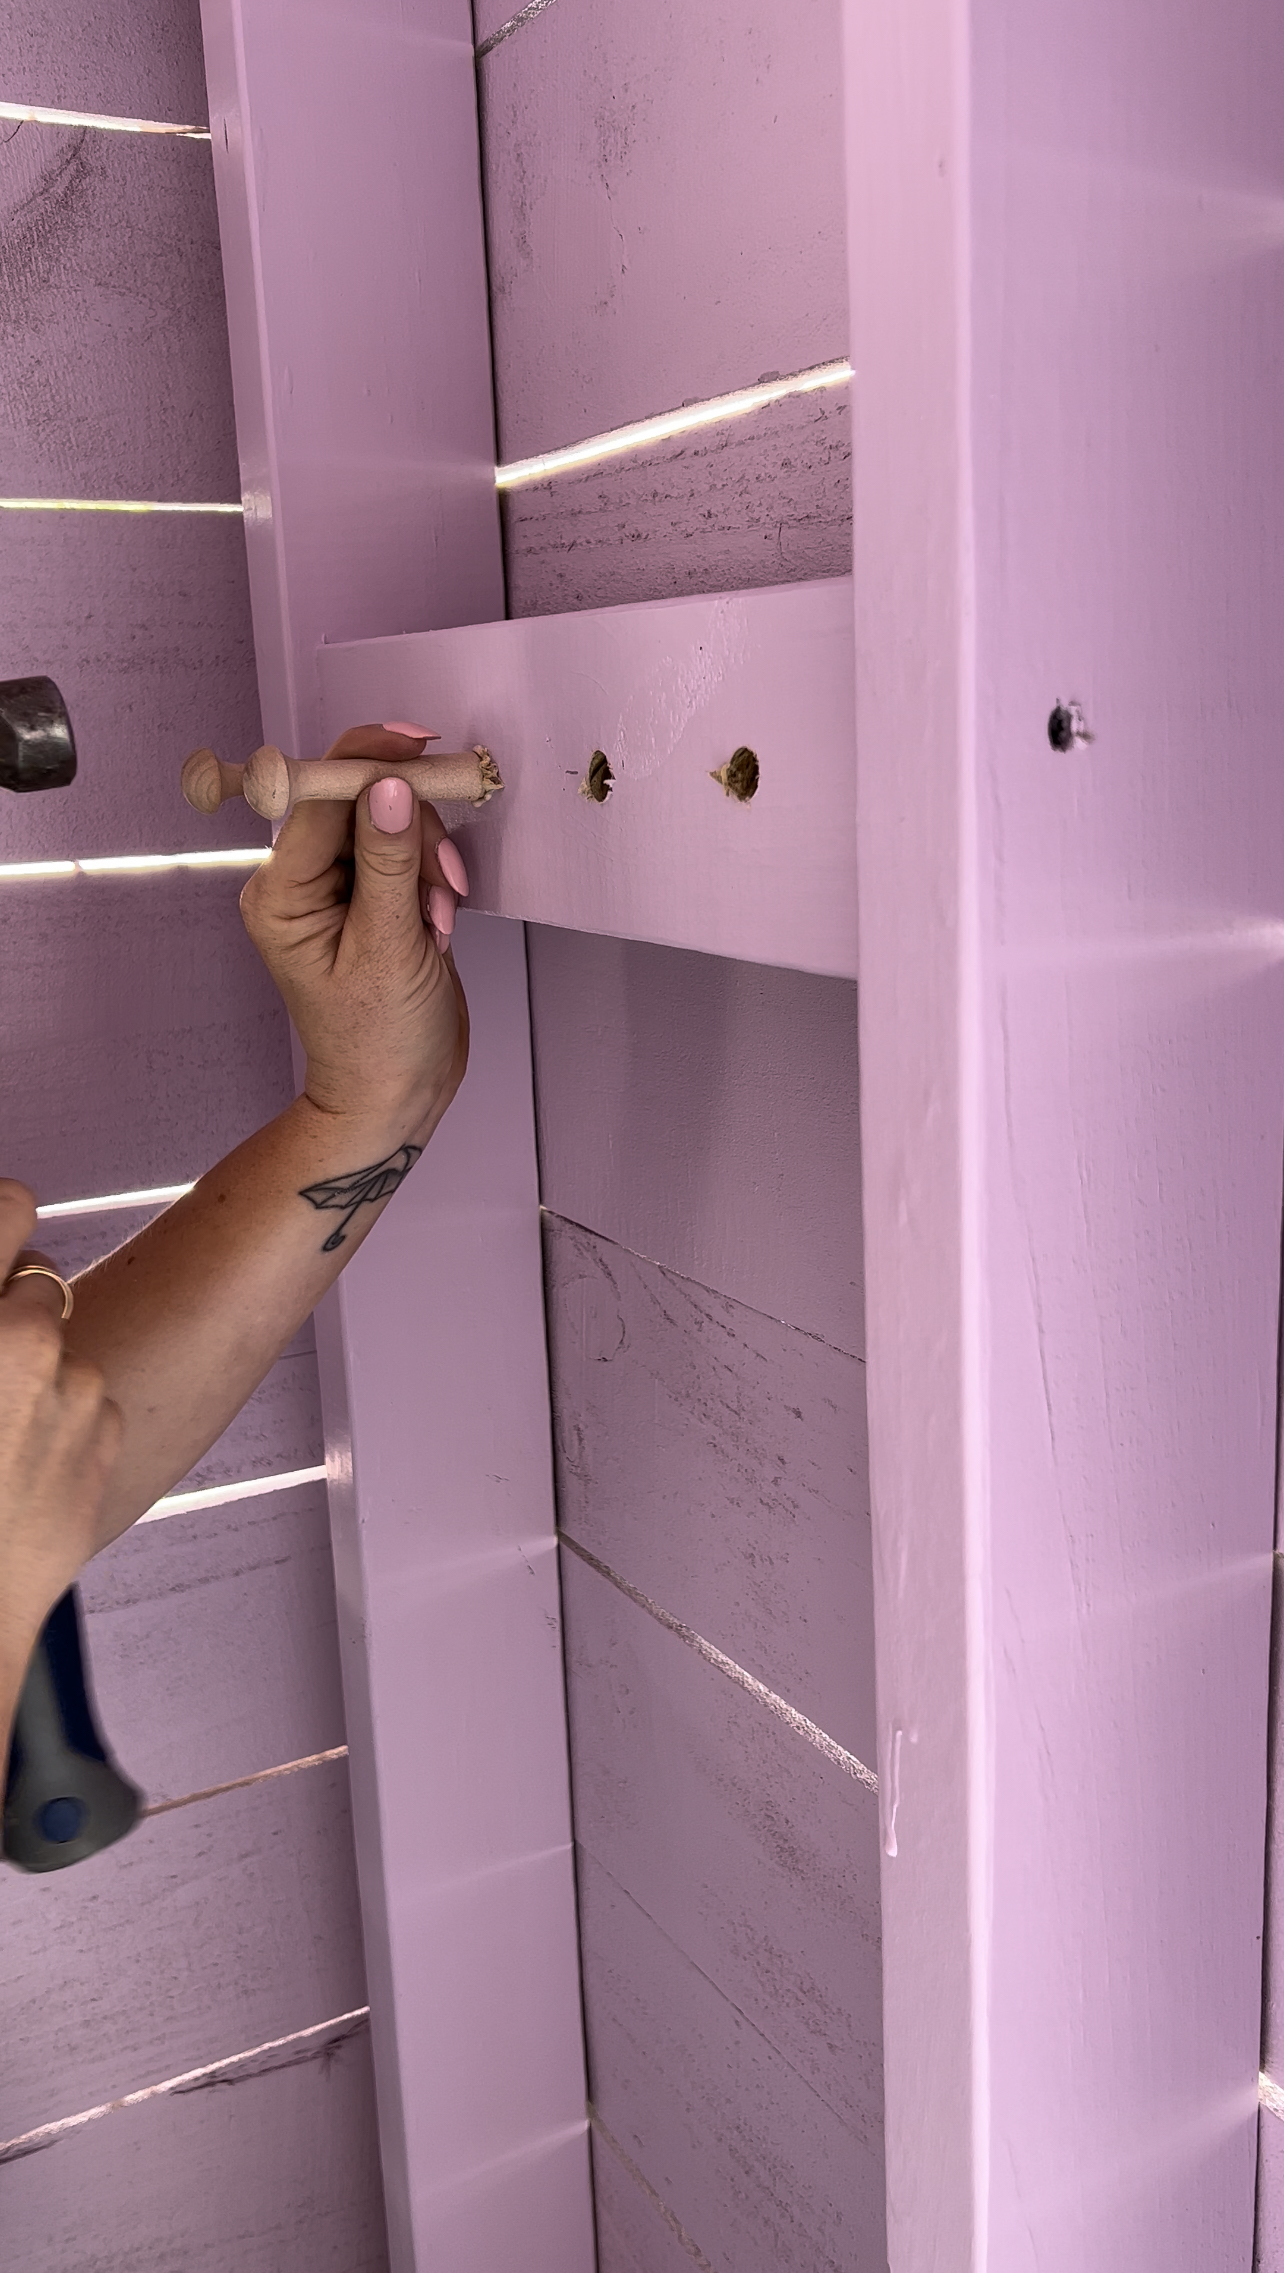
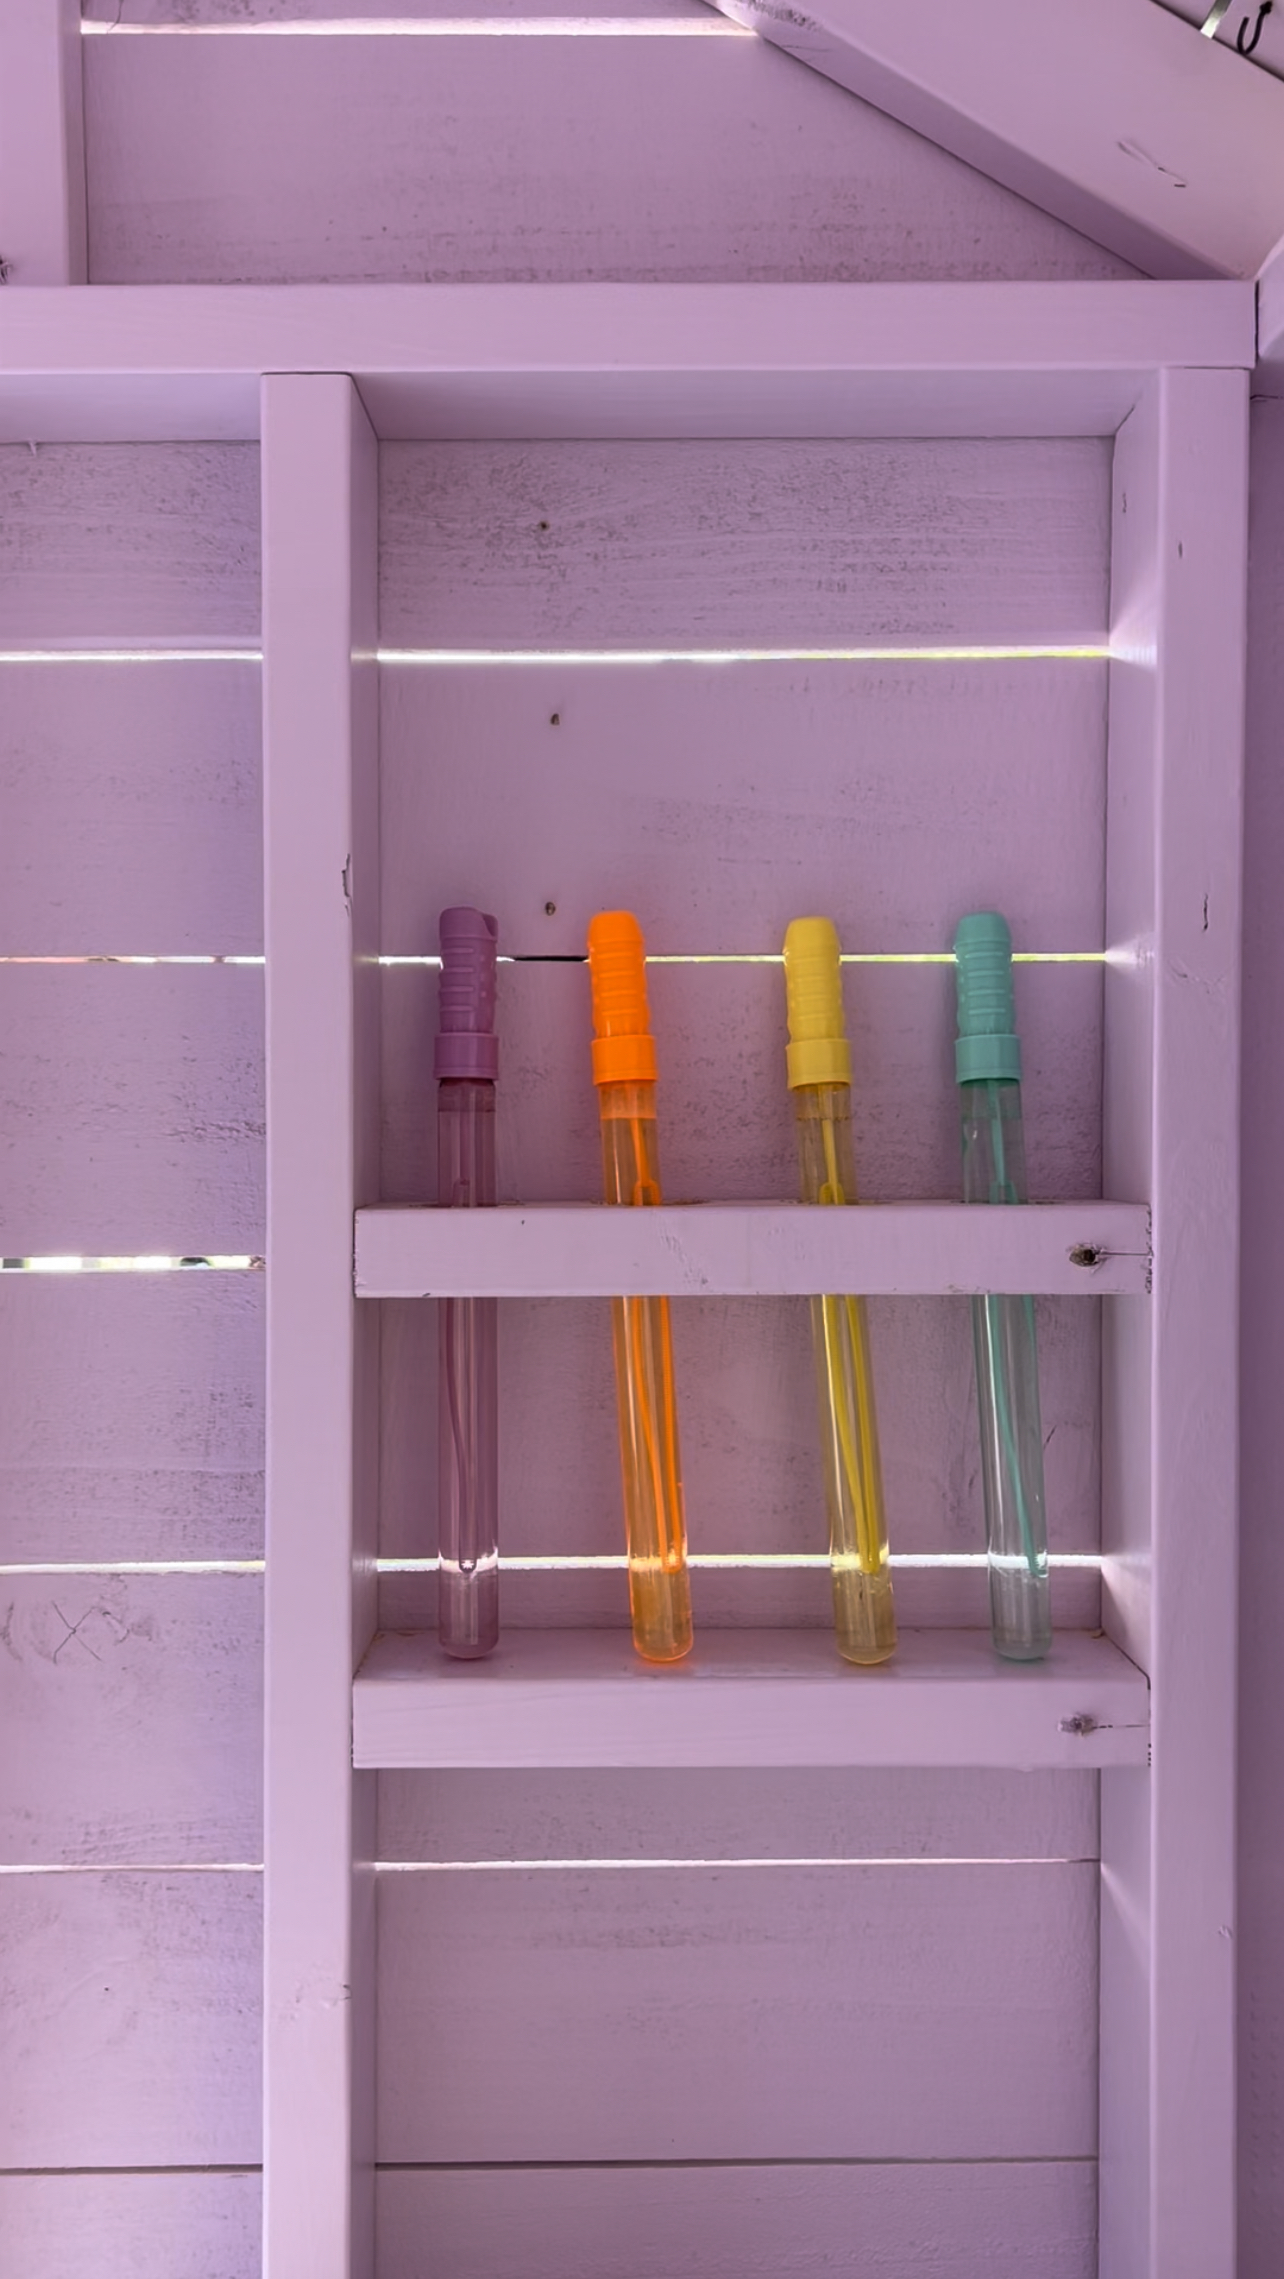
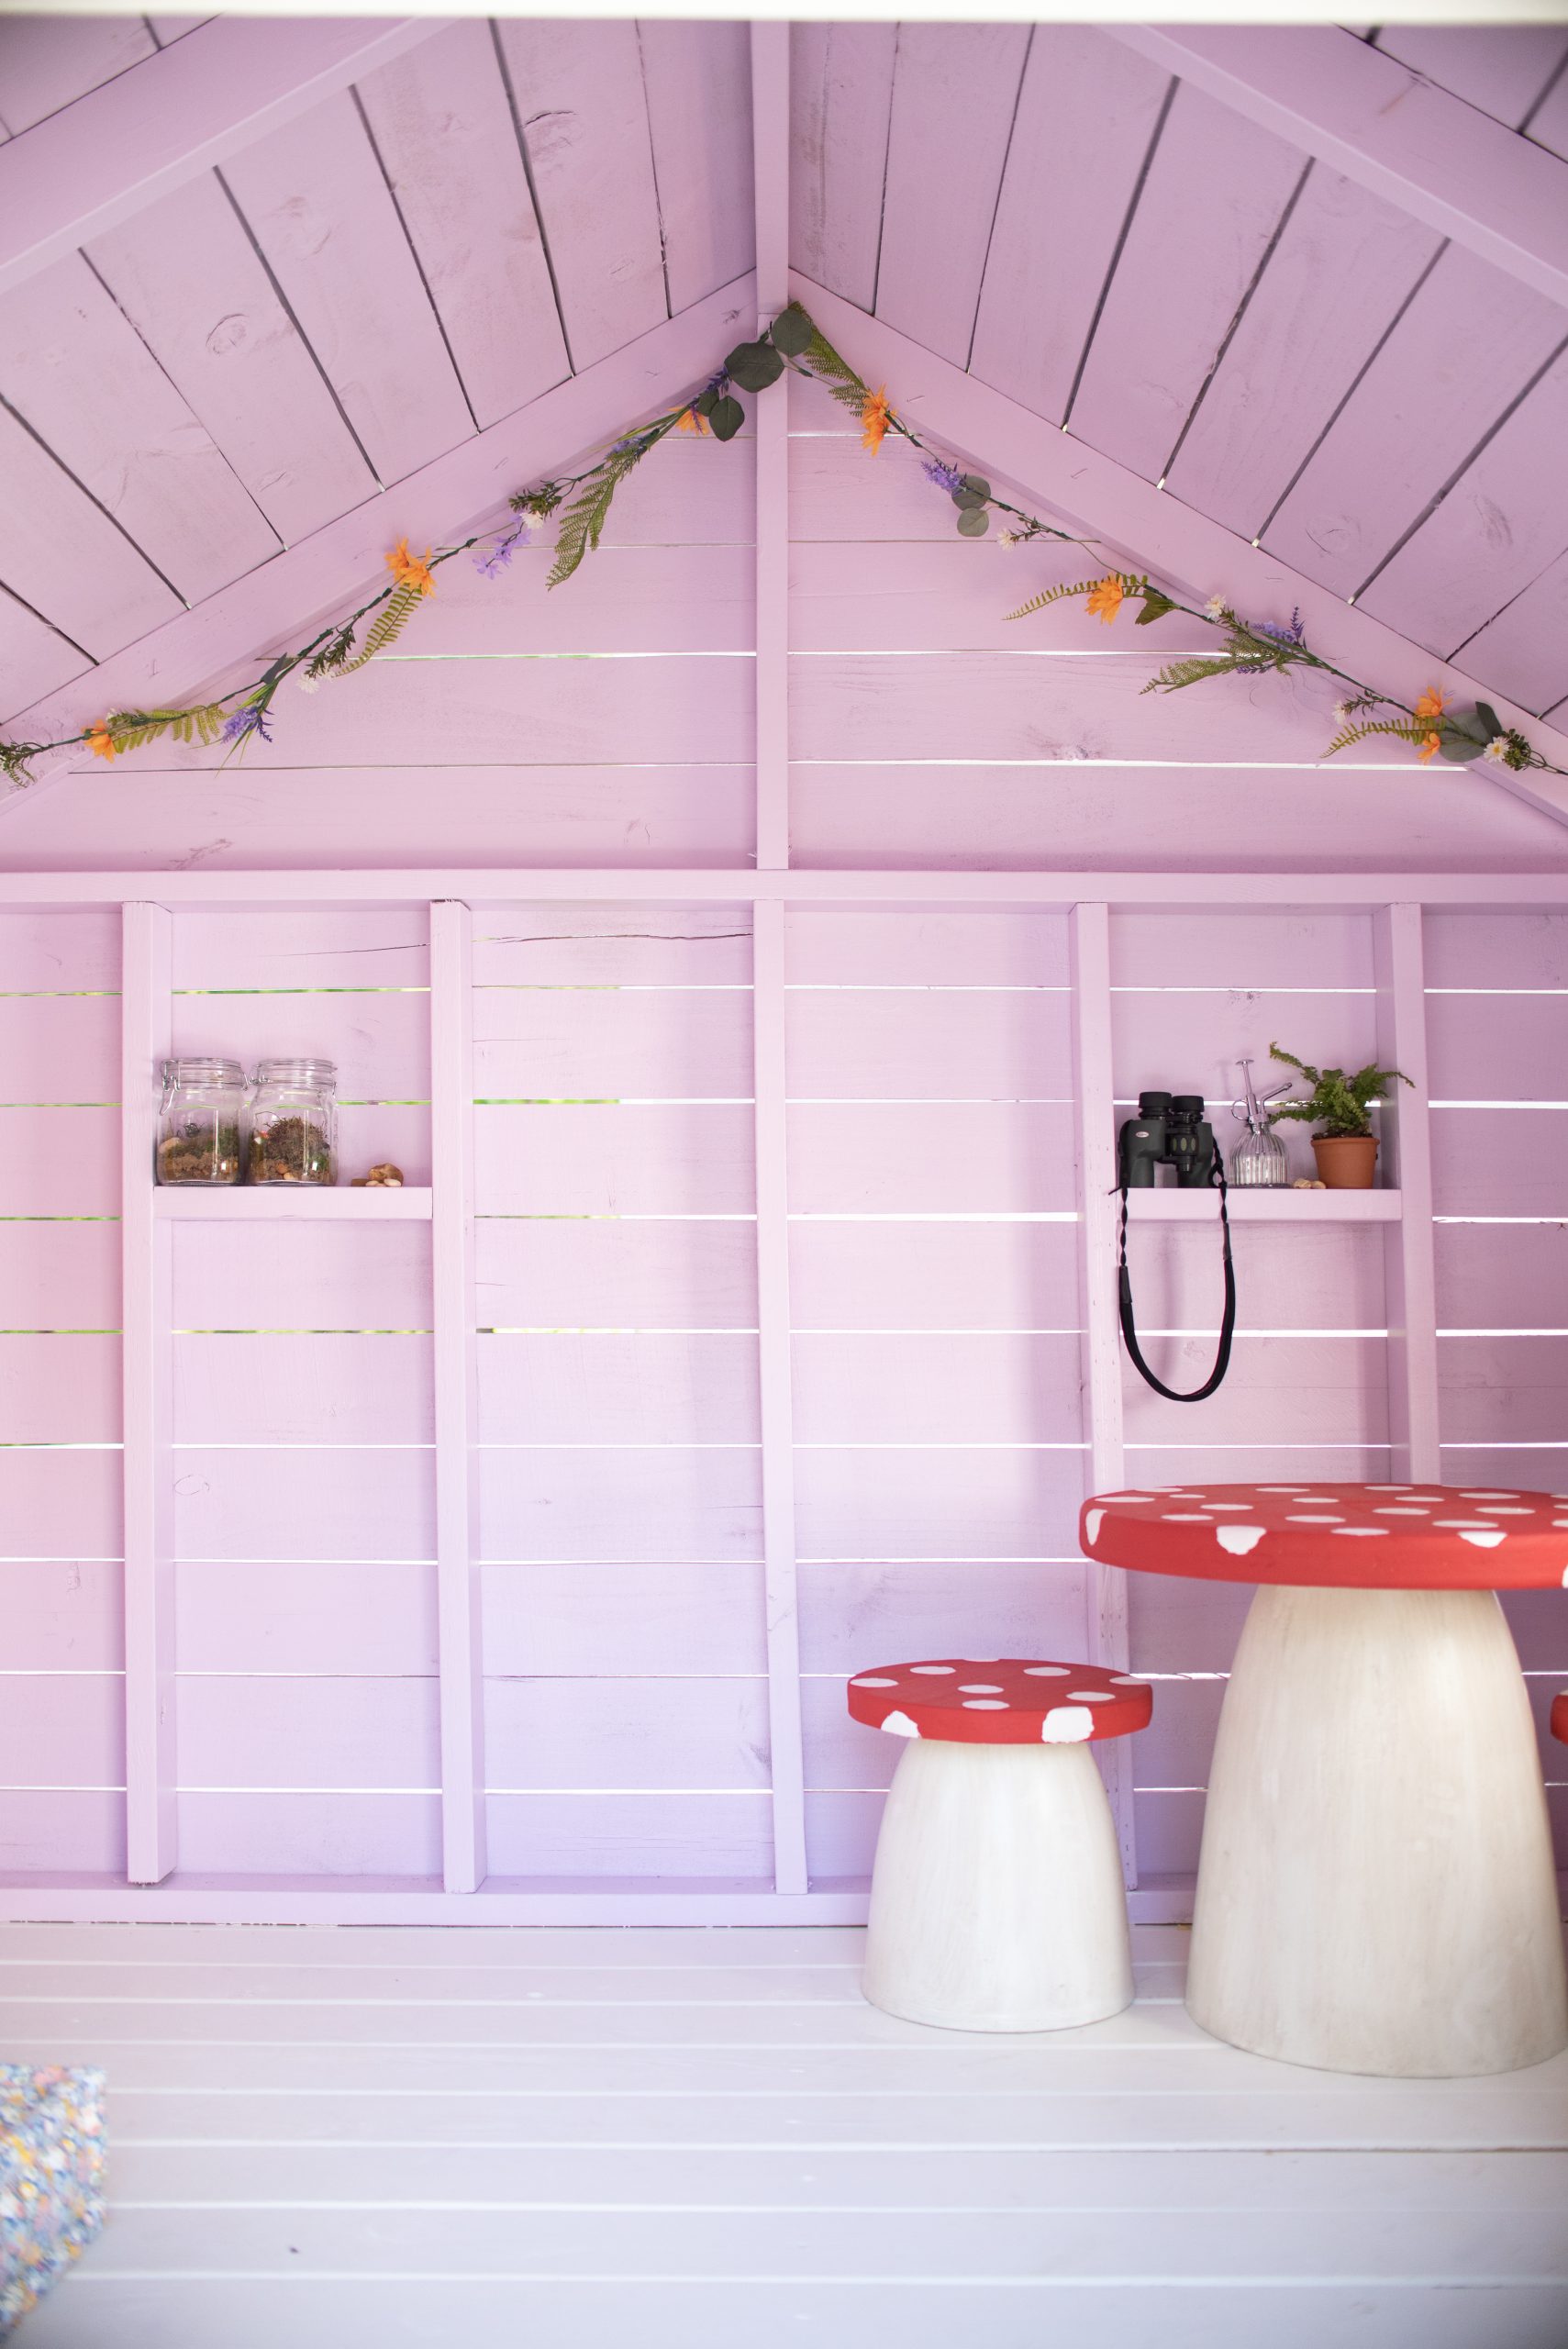
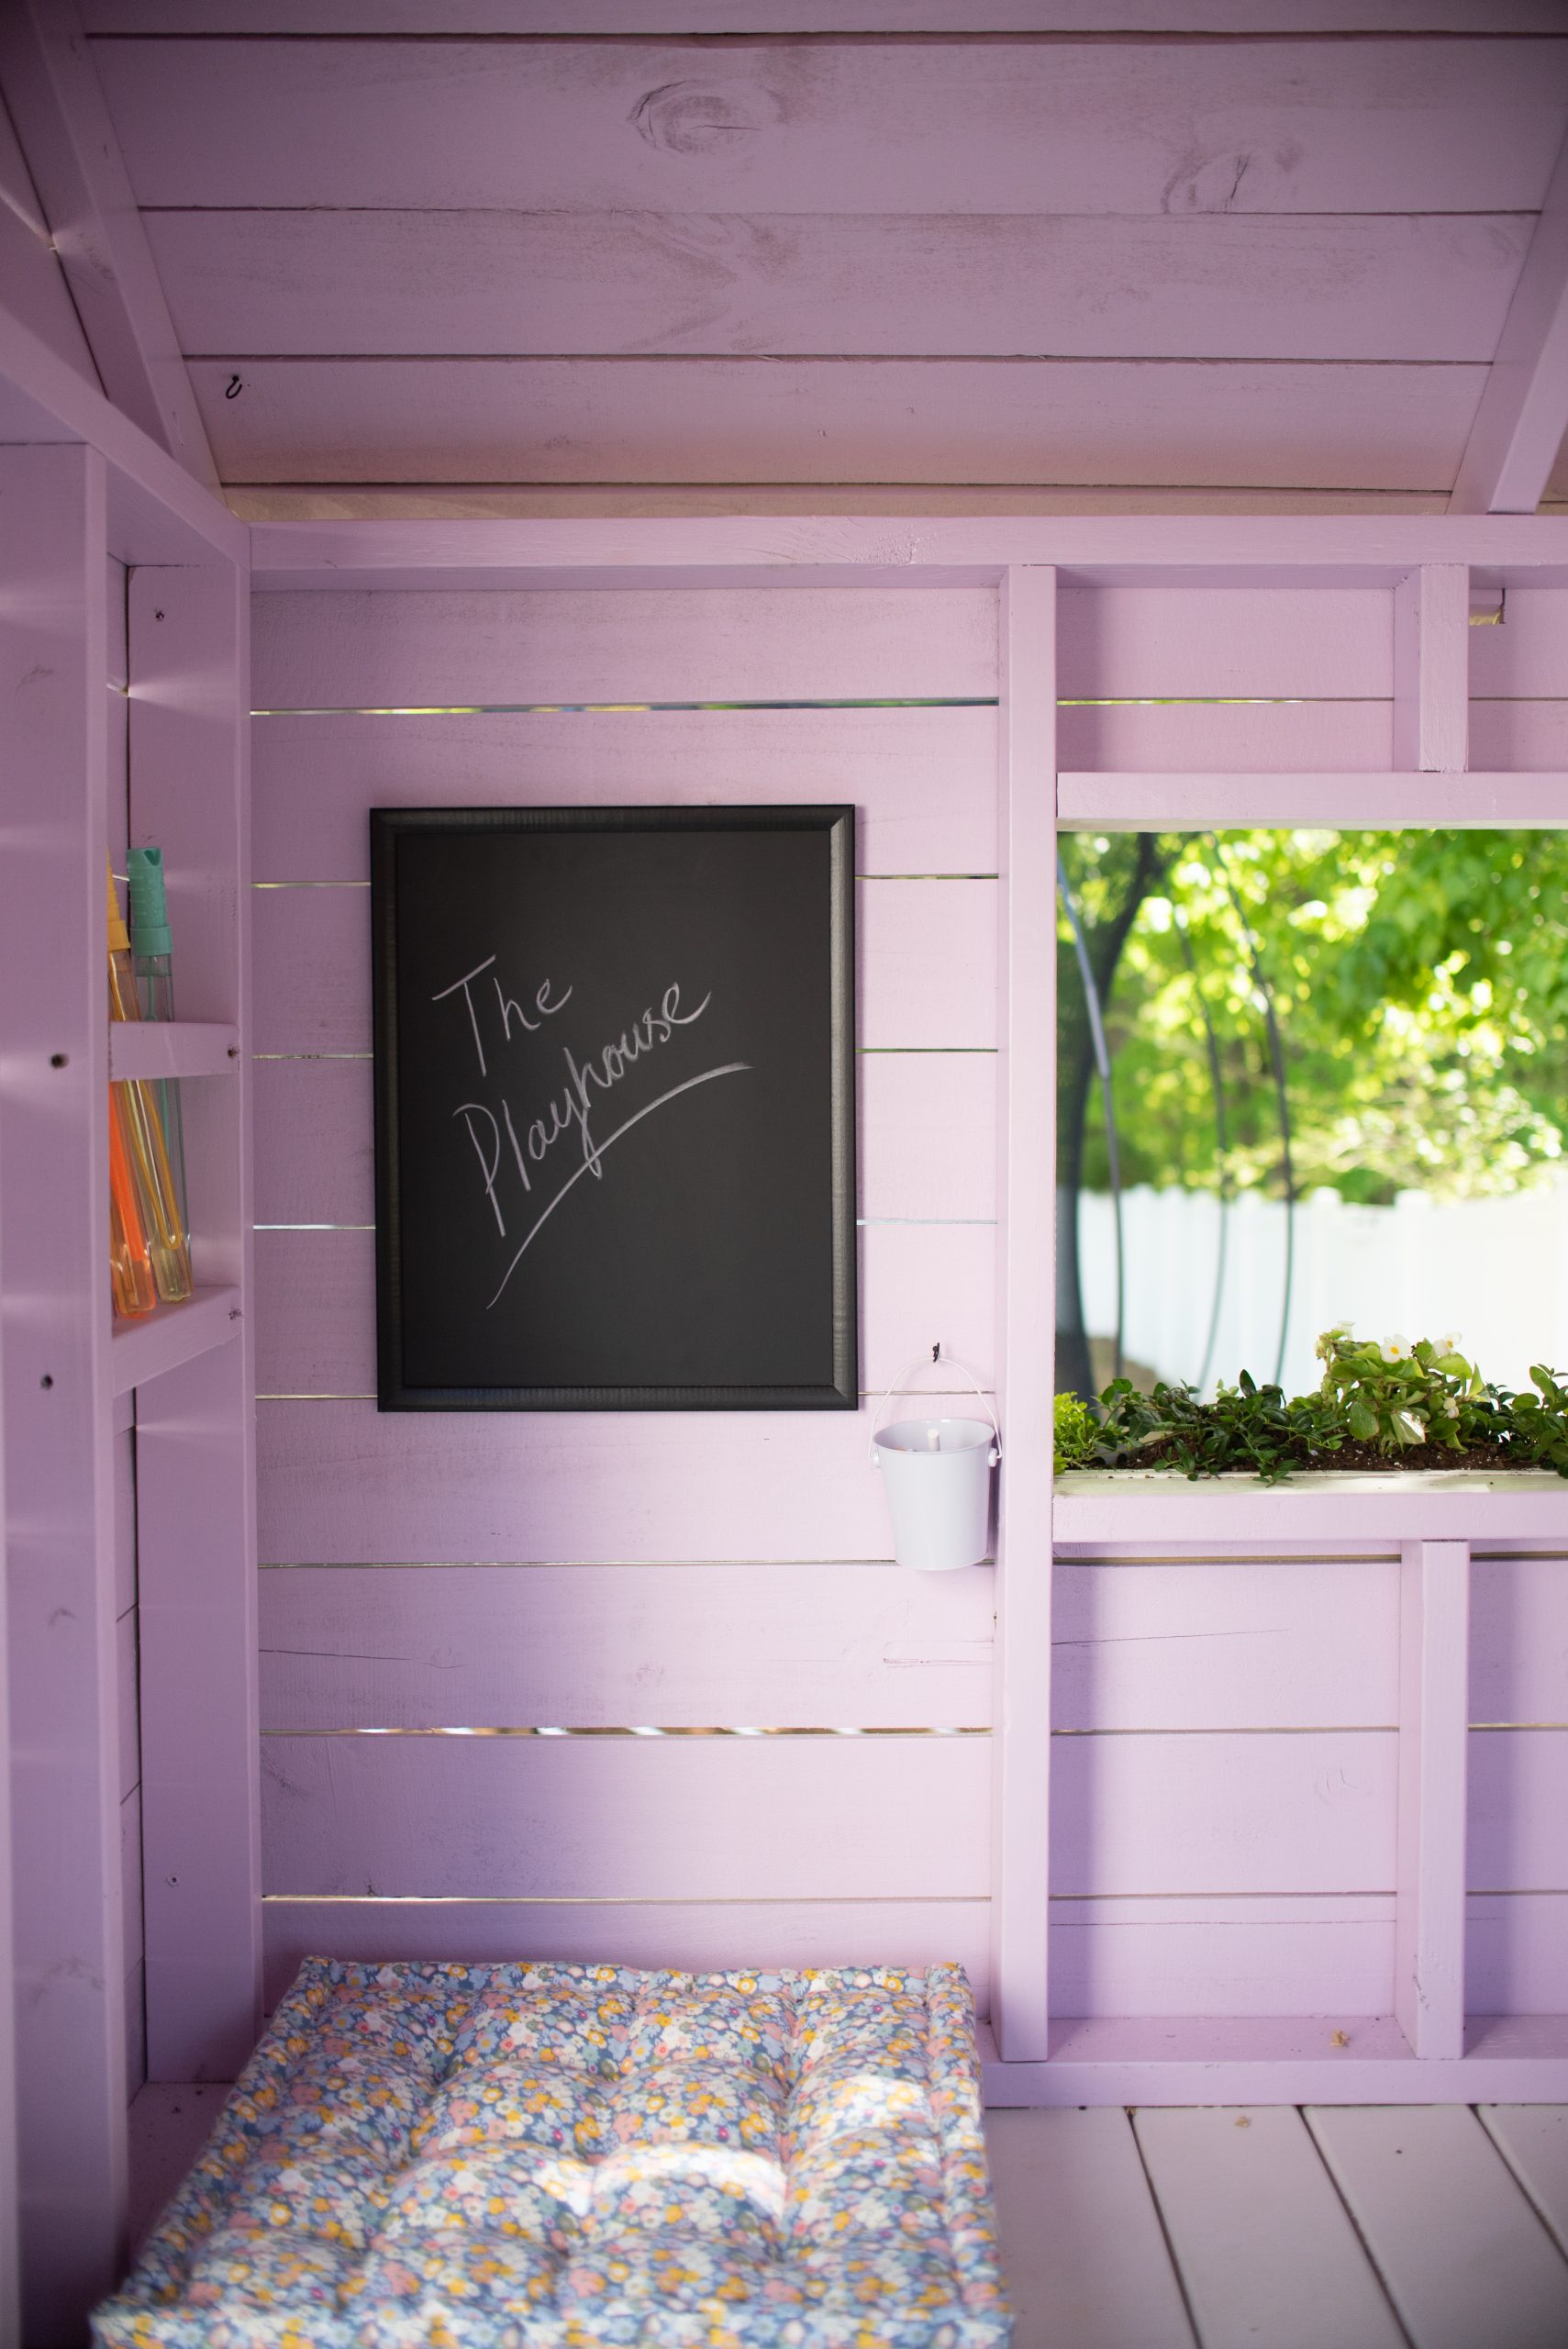
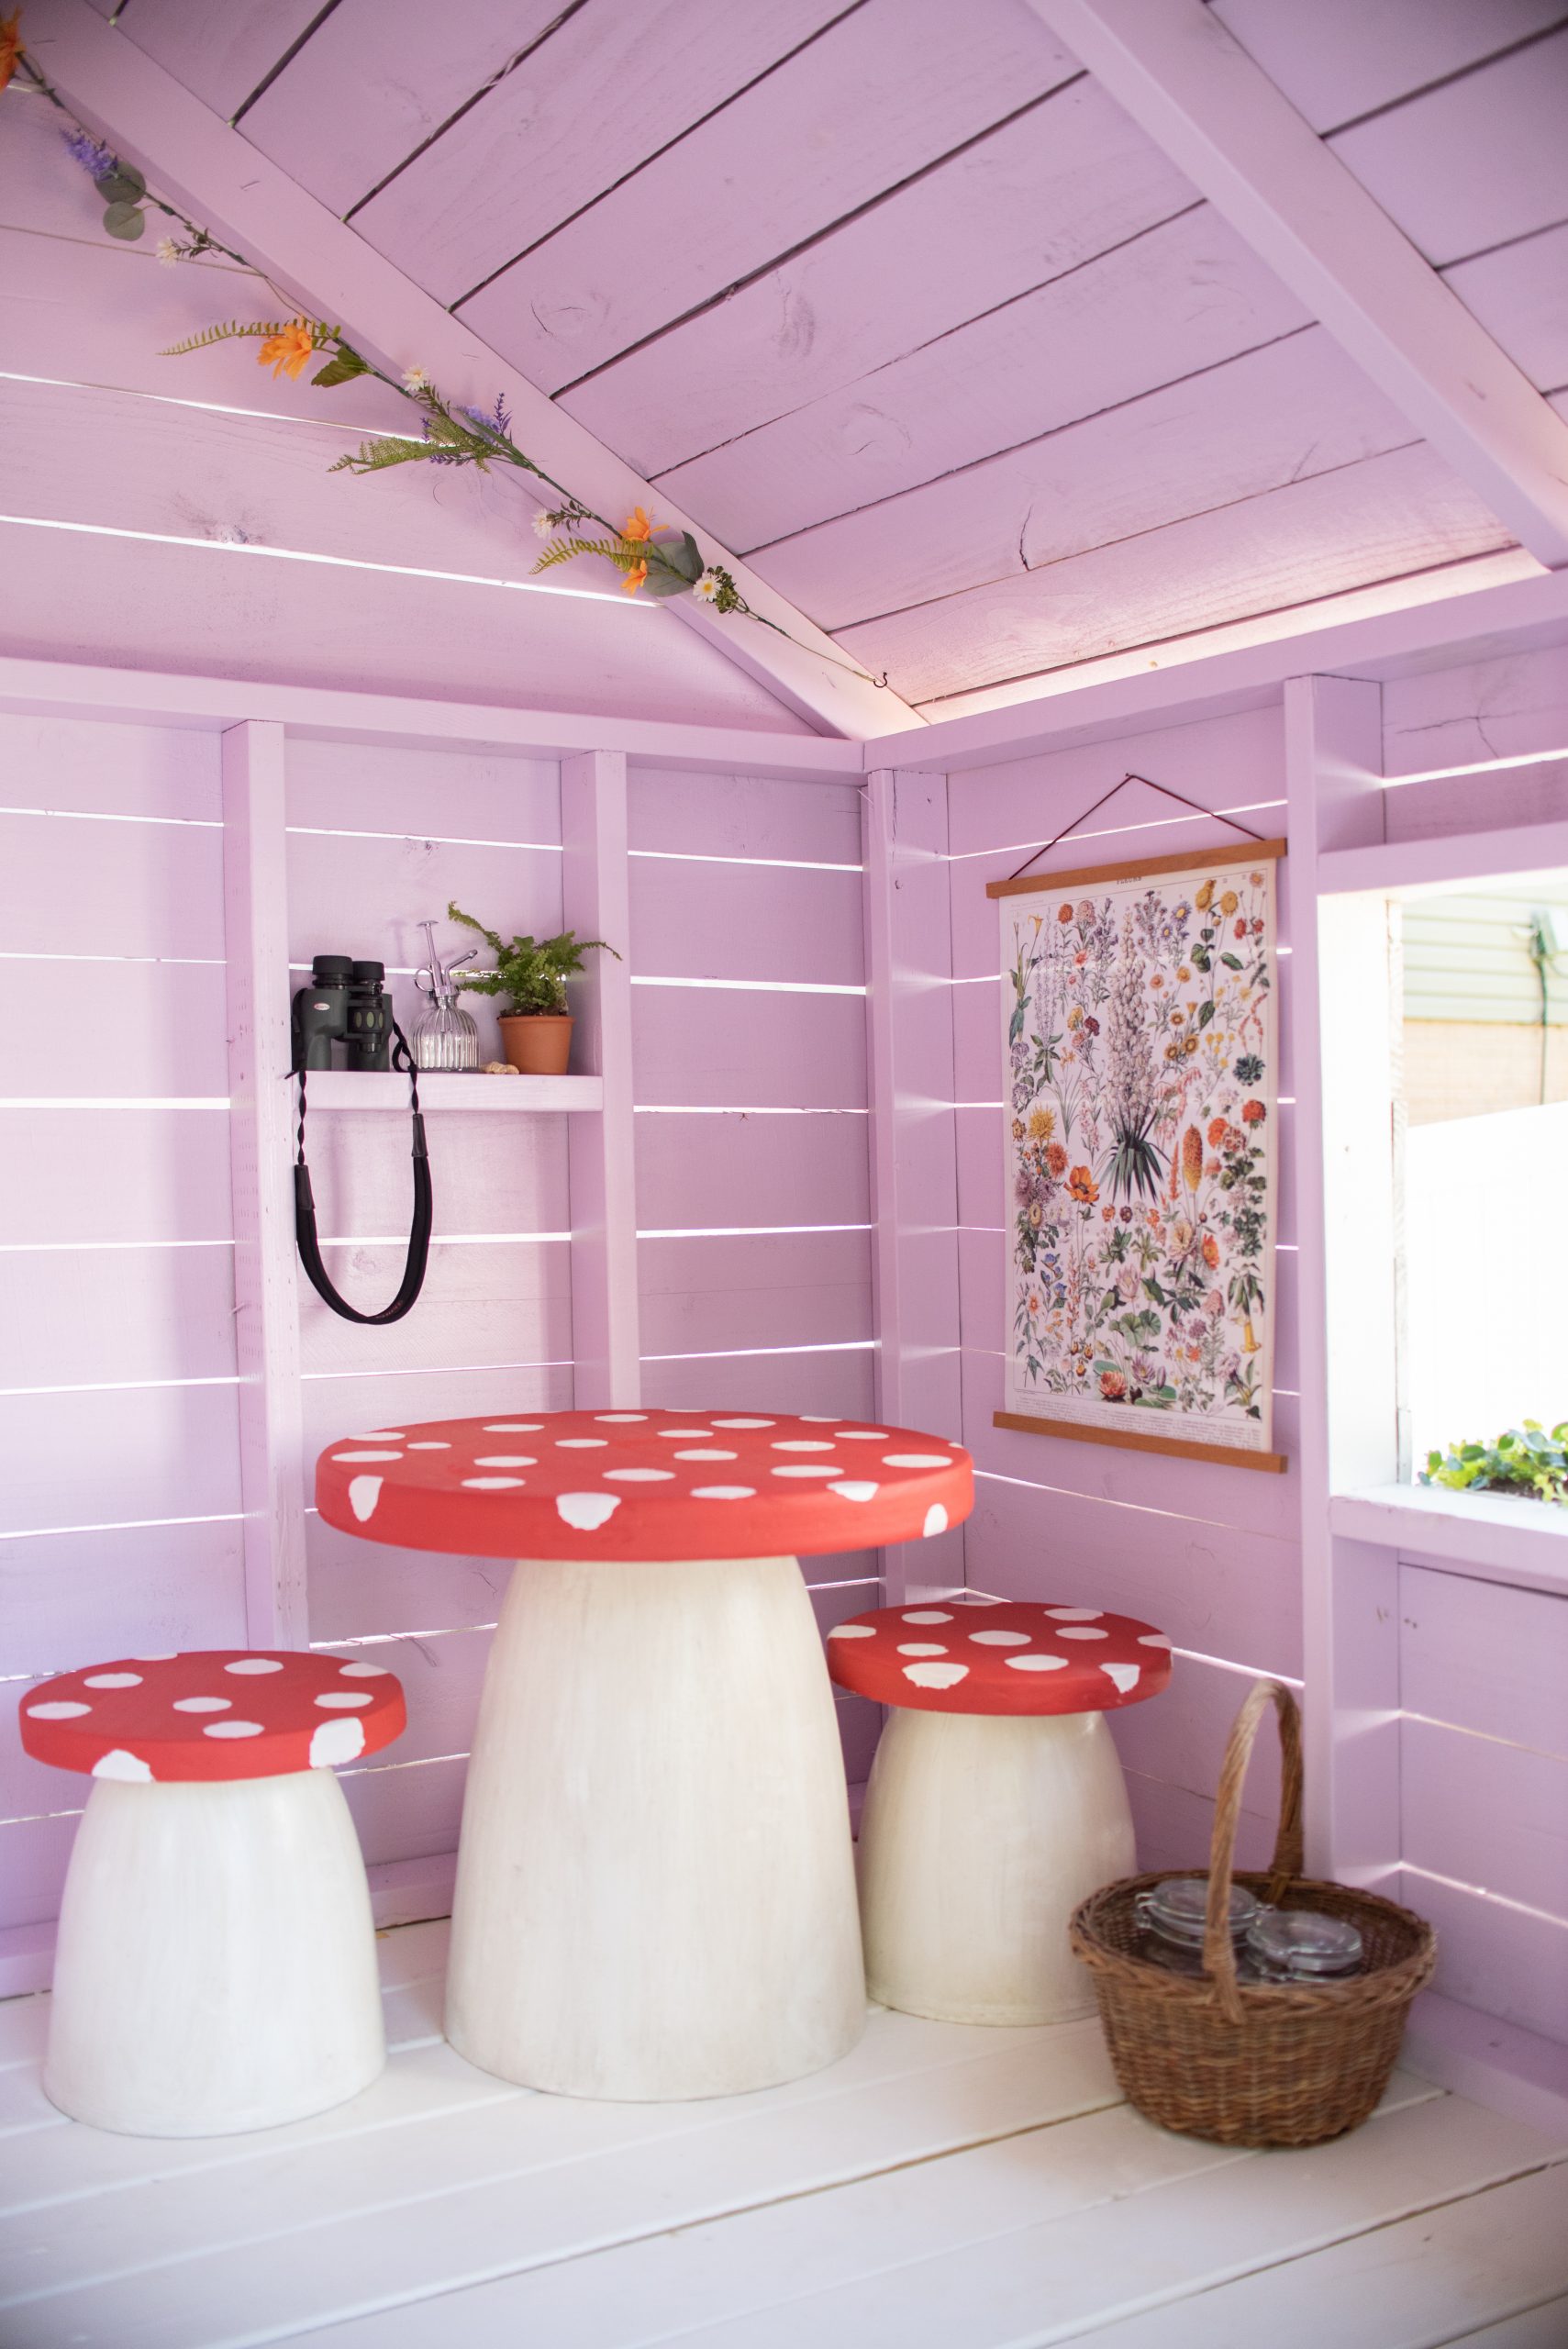
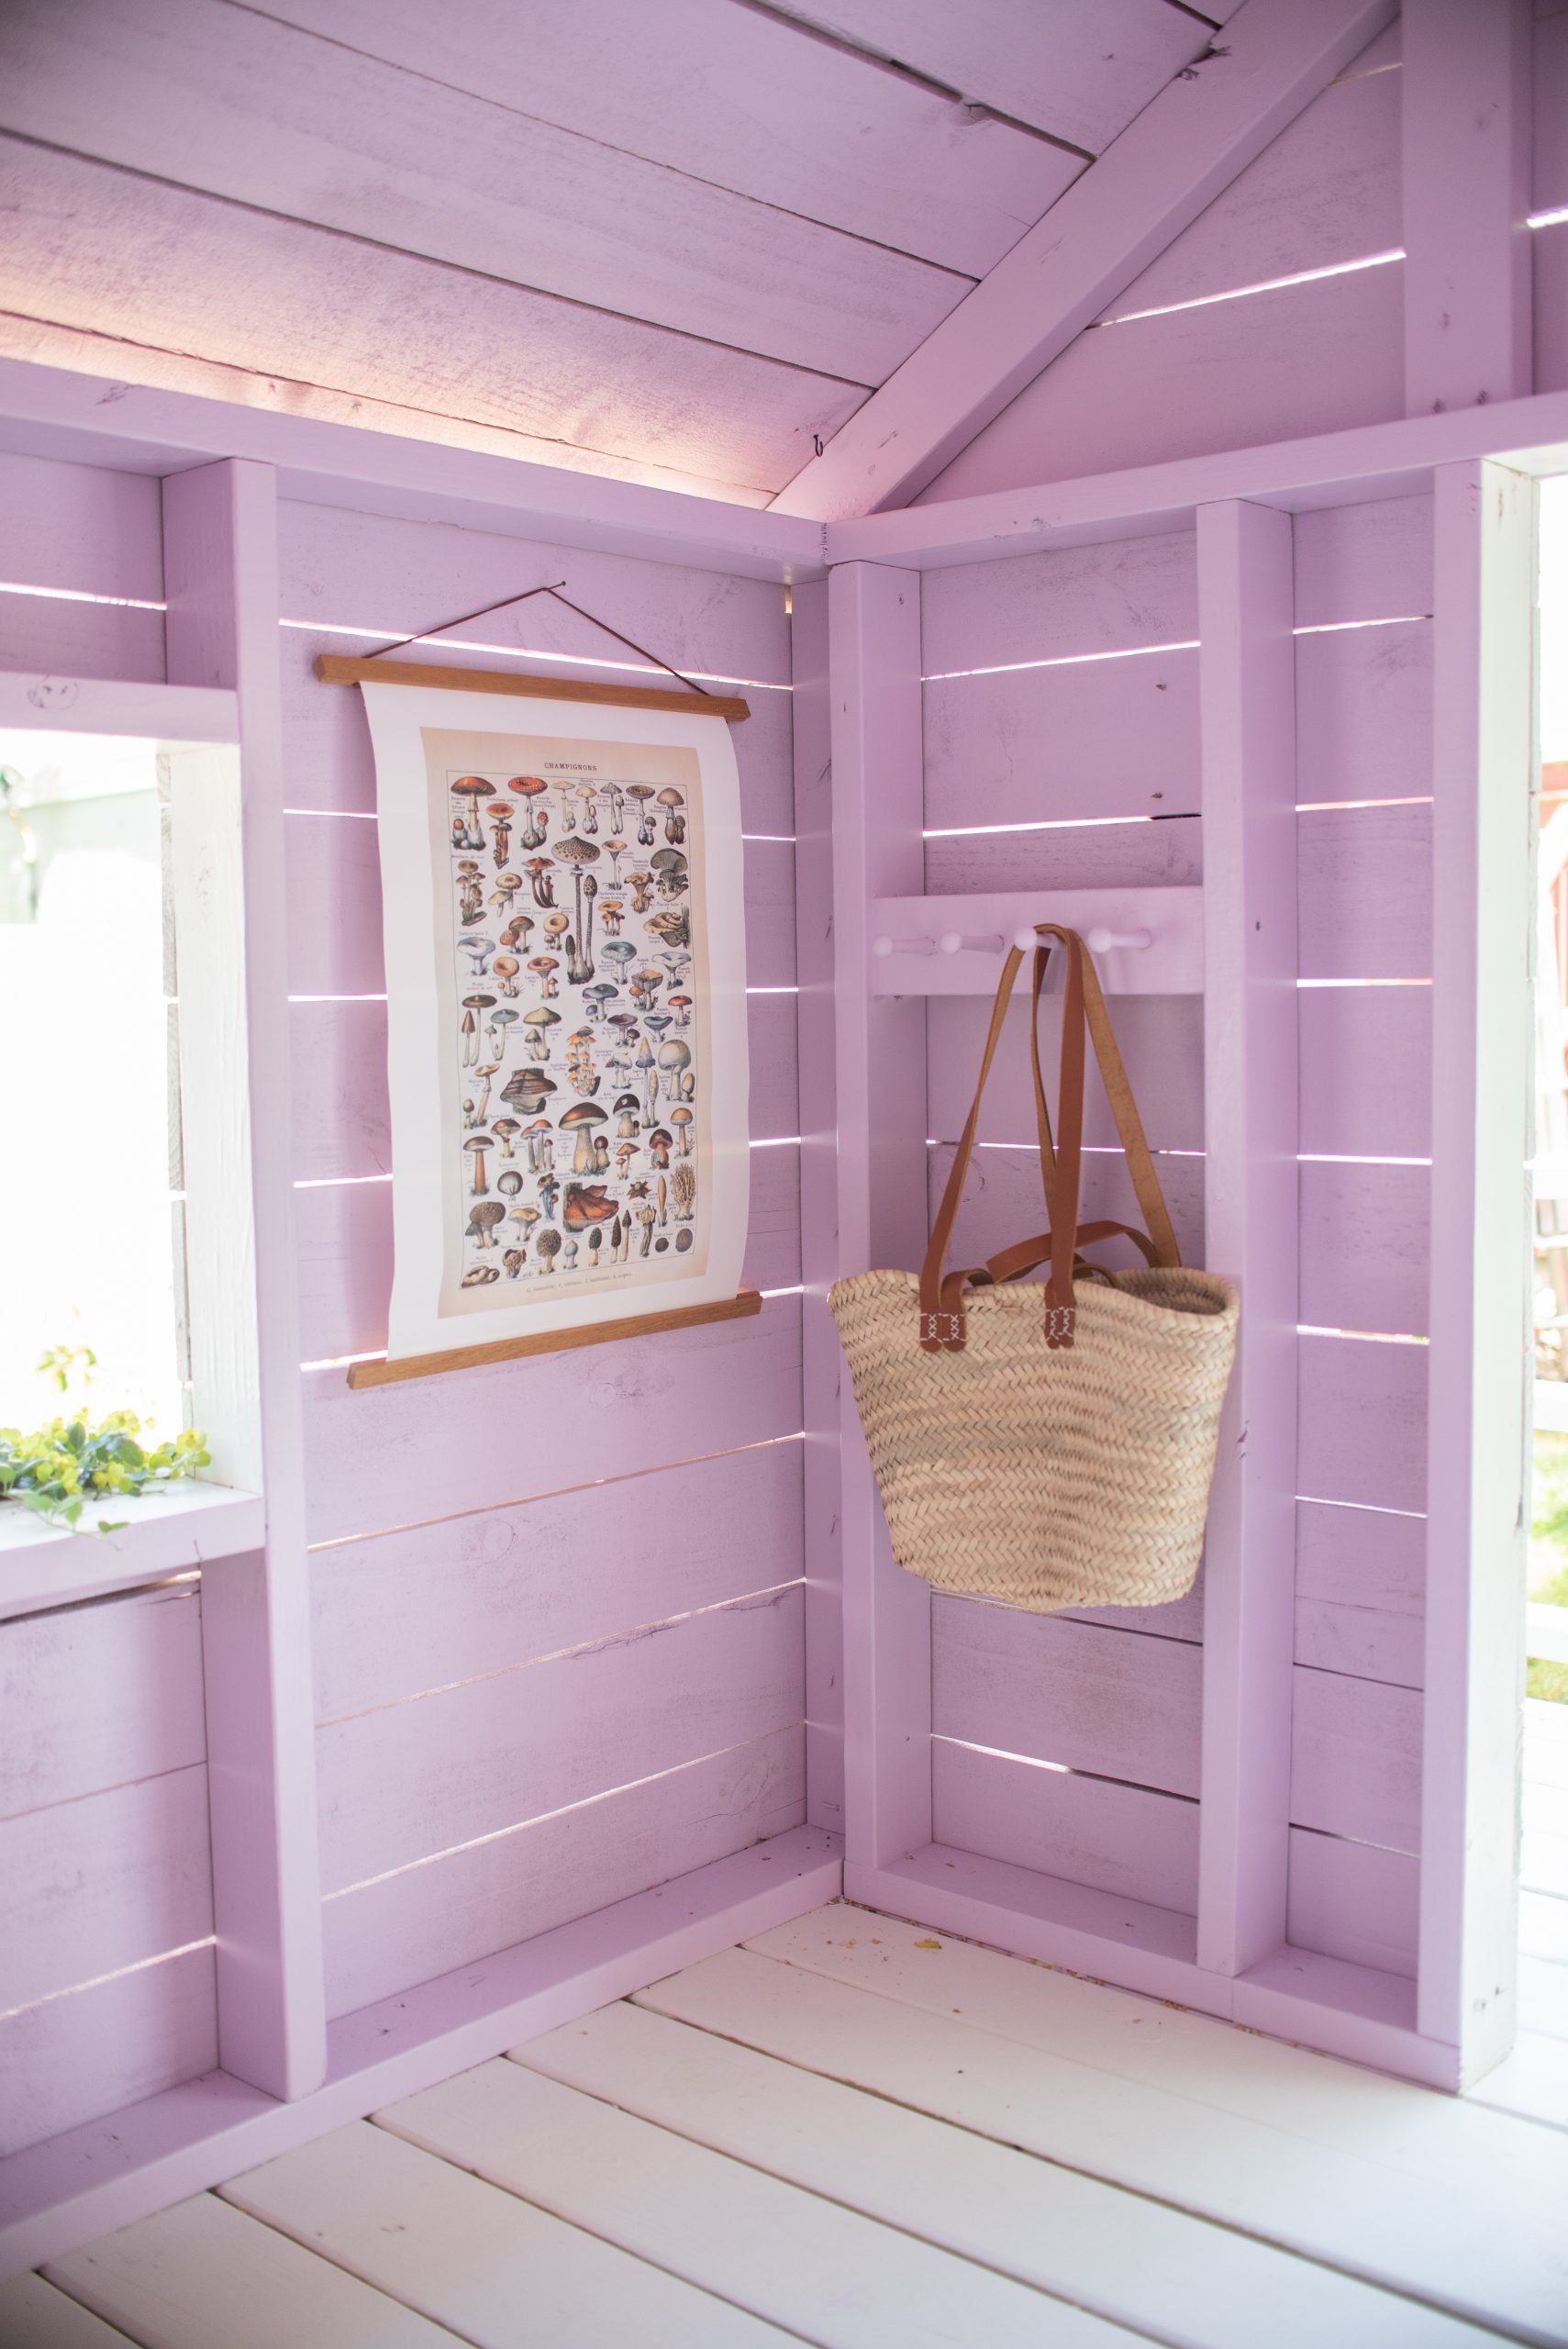
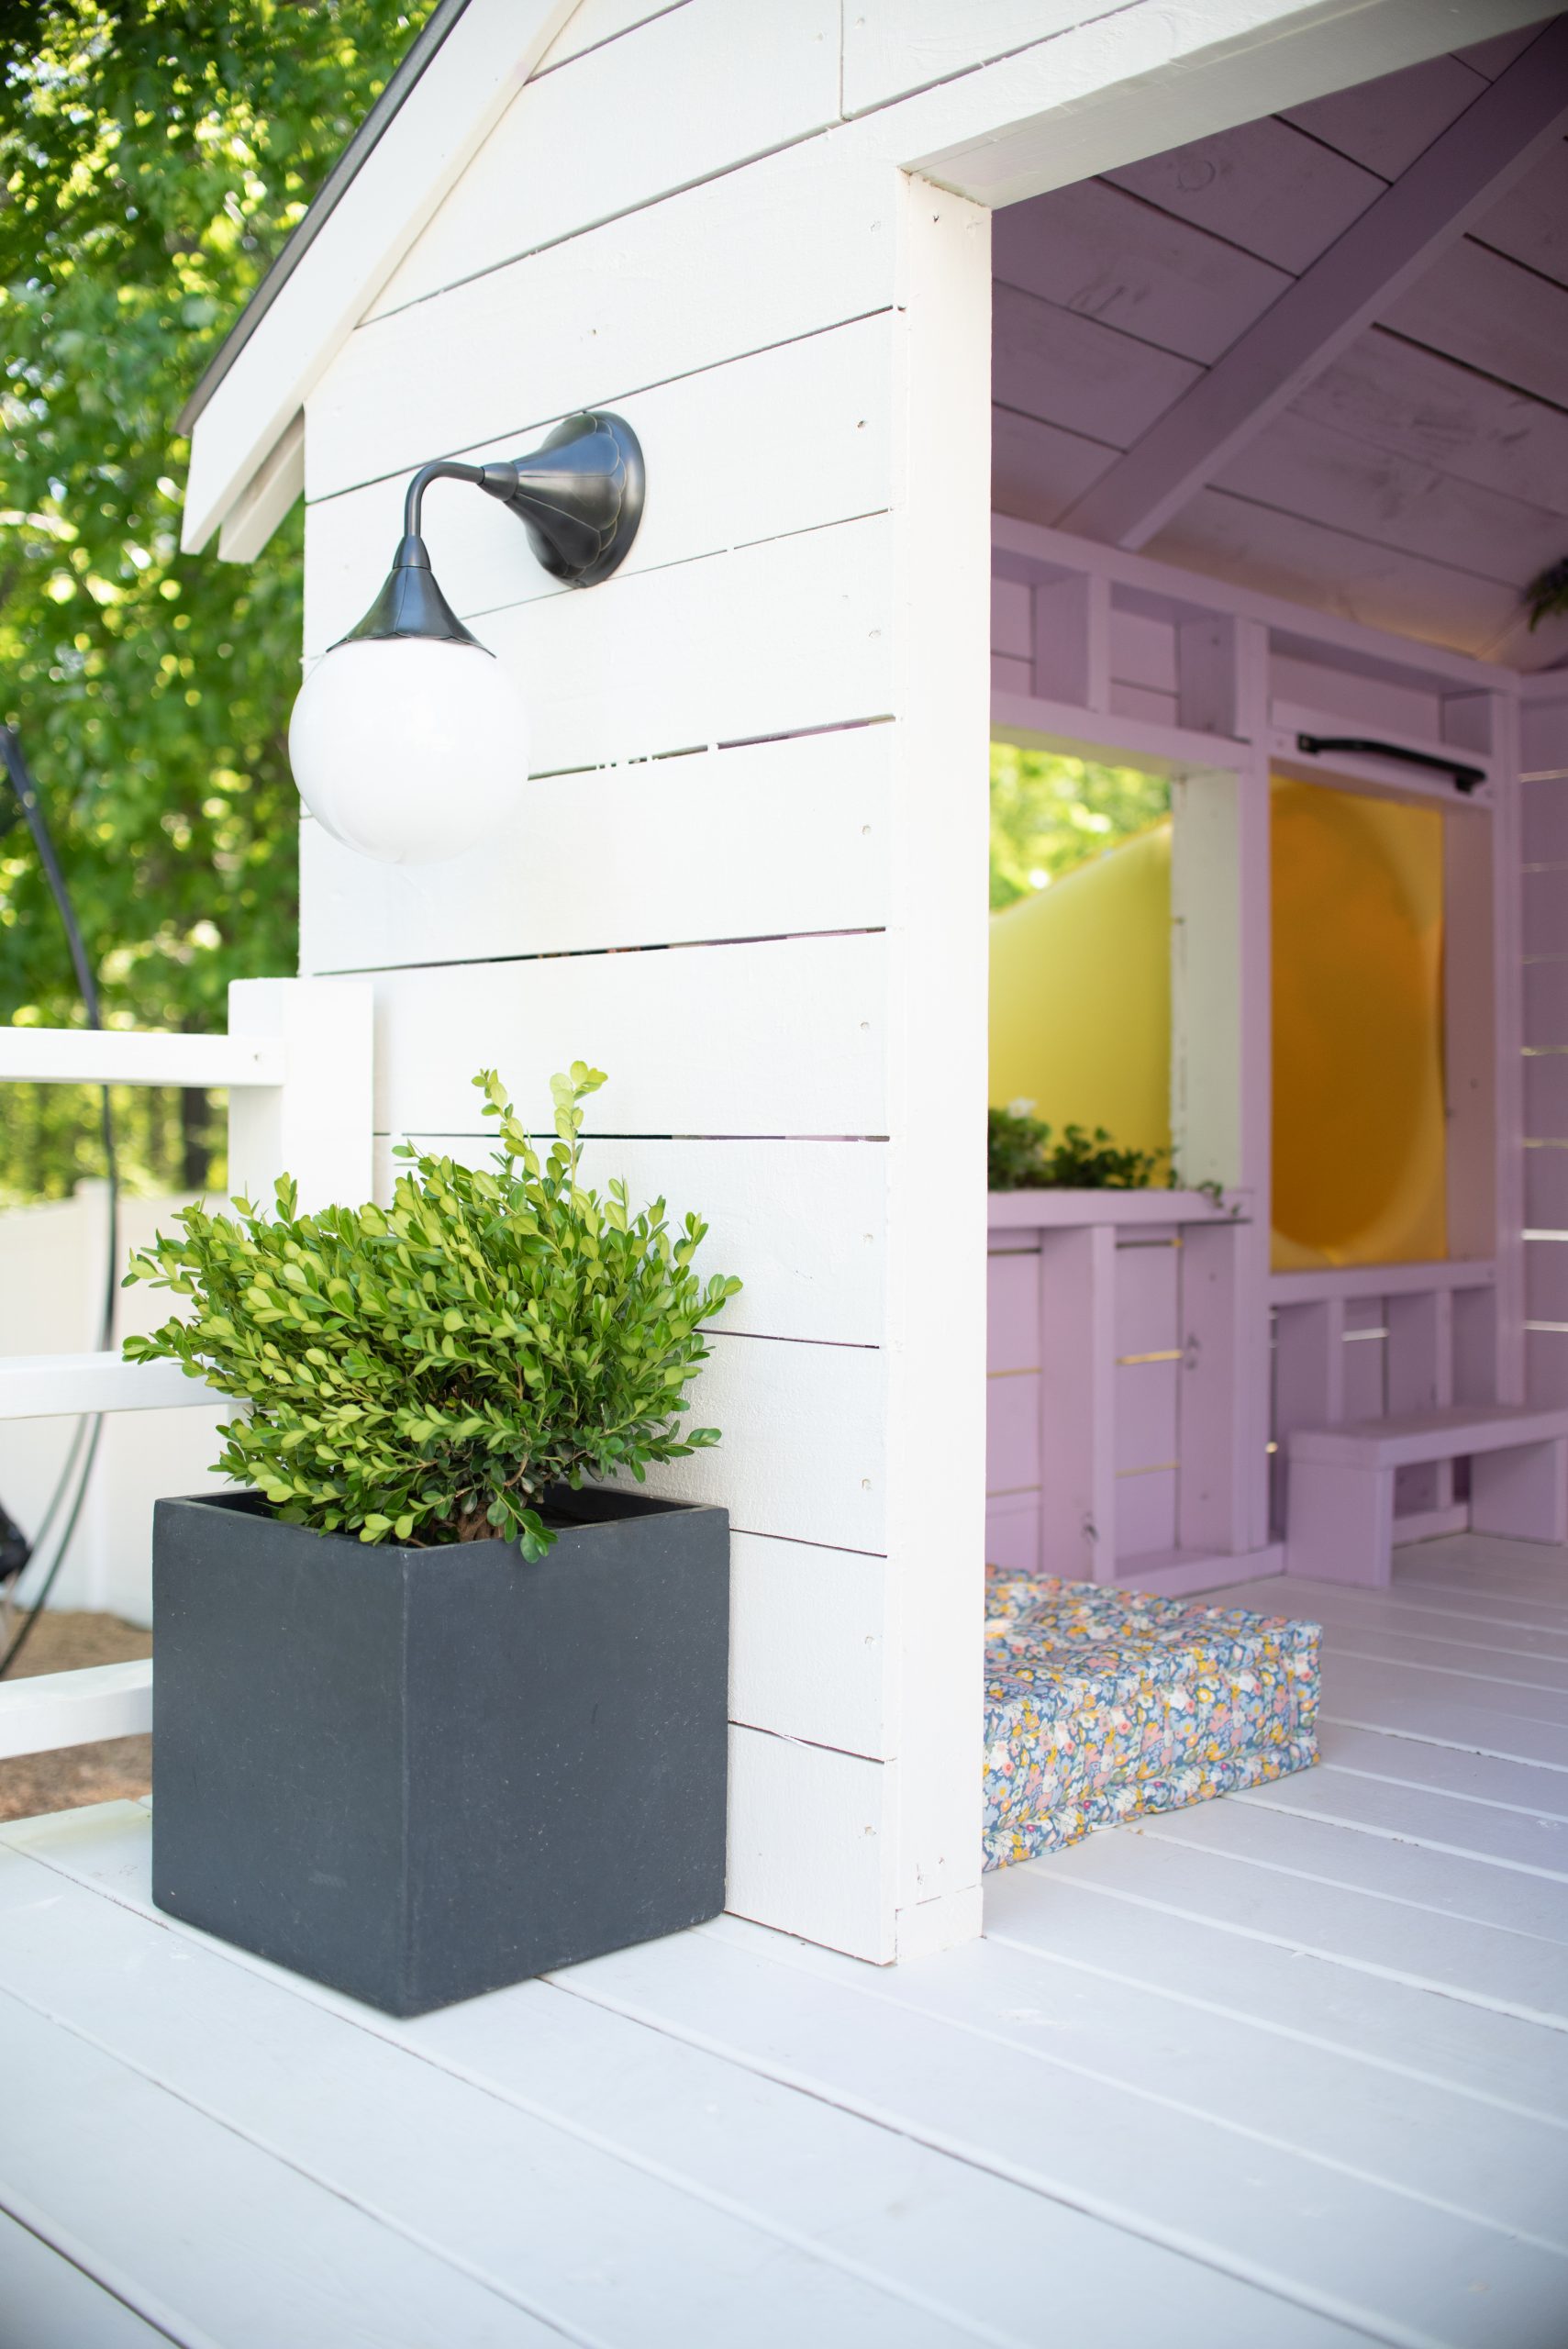
To finish it up, I painted the entire exterior with Behr Porch & Patio Paint/Primer in Eggshell in Swiss Coffee. And I painted the interior walls/ceiling with the same paint in Euphoric Lilac by Sherwin Williams. I also made a mushroom/toadstool table and stools set (blog post coming soon). I hung up some wooden pegs and created a bubble wand shelf by drilling holes through a 2×4 shelf with another 2×4 underneath.
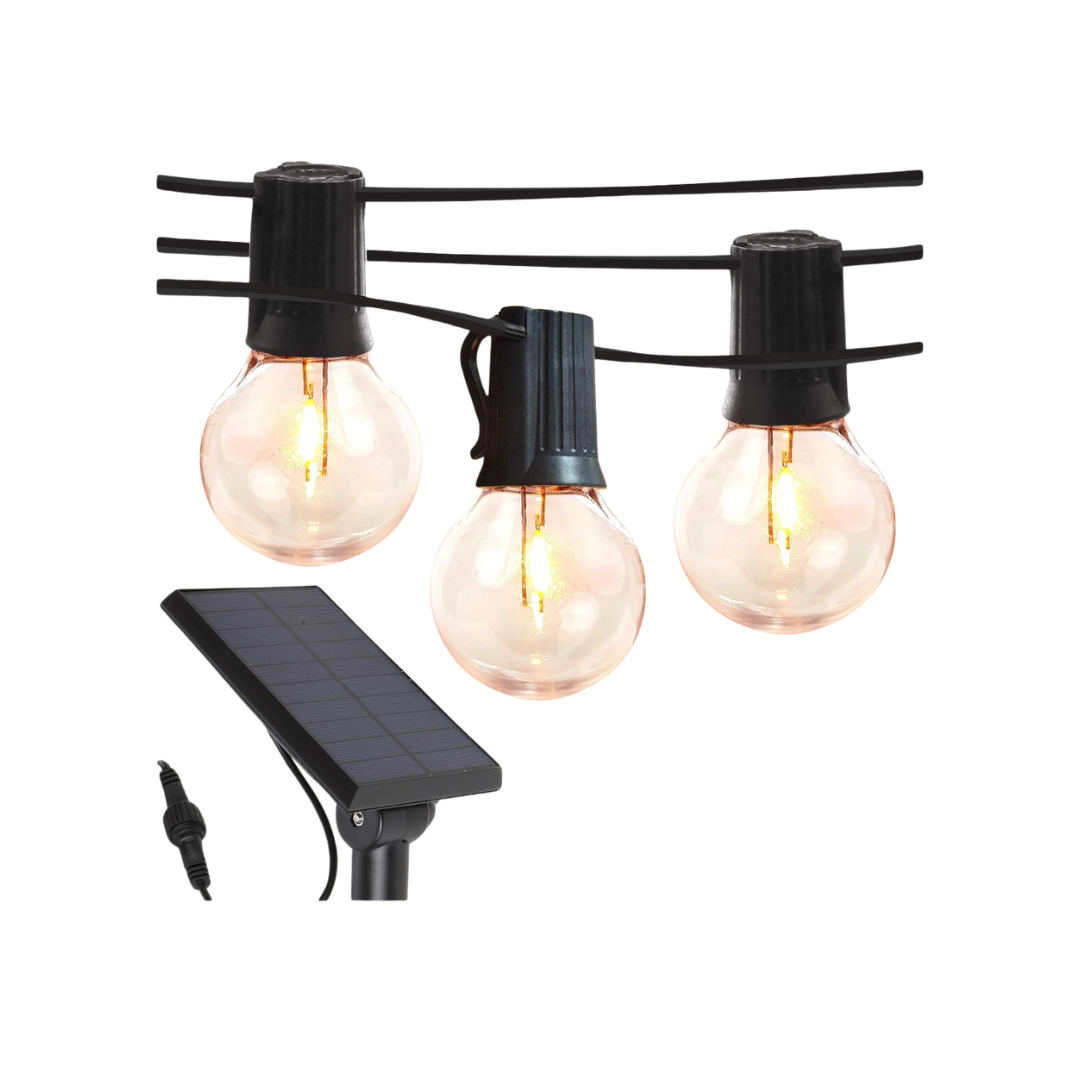
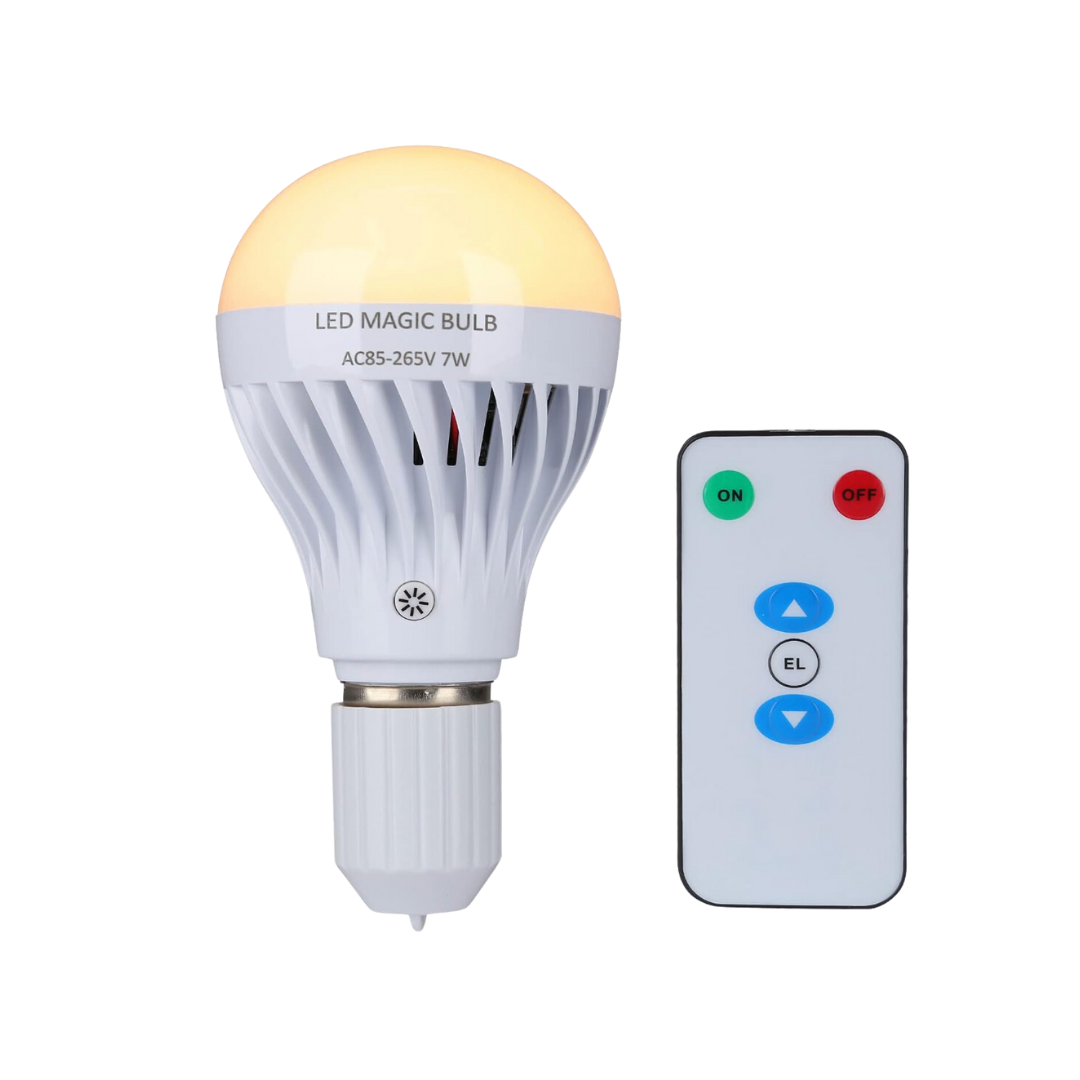
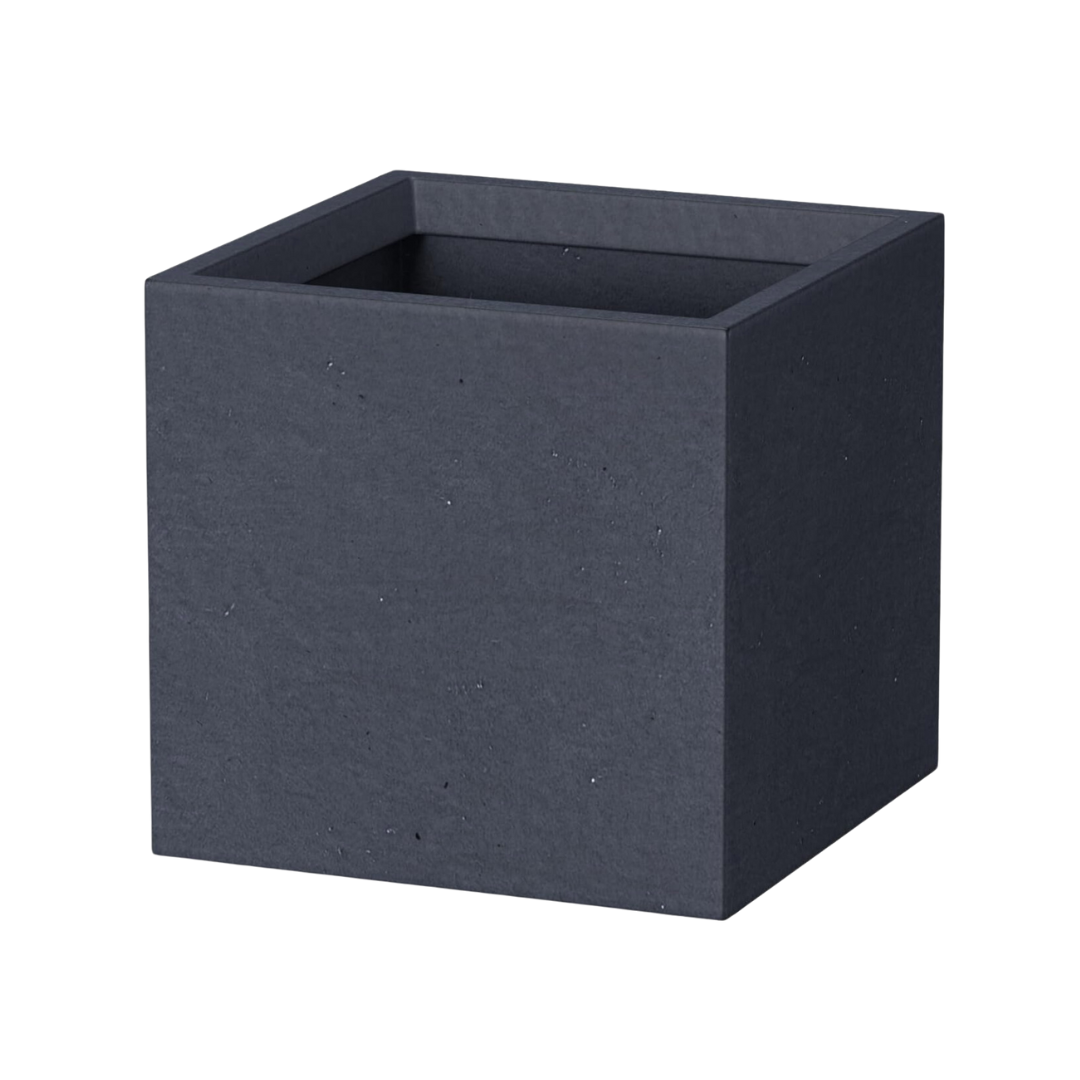
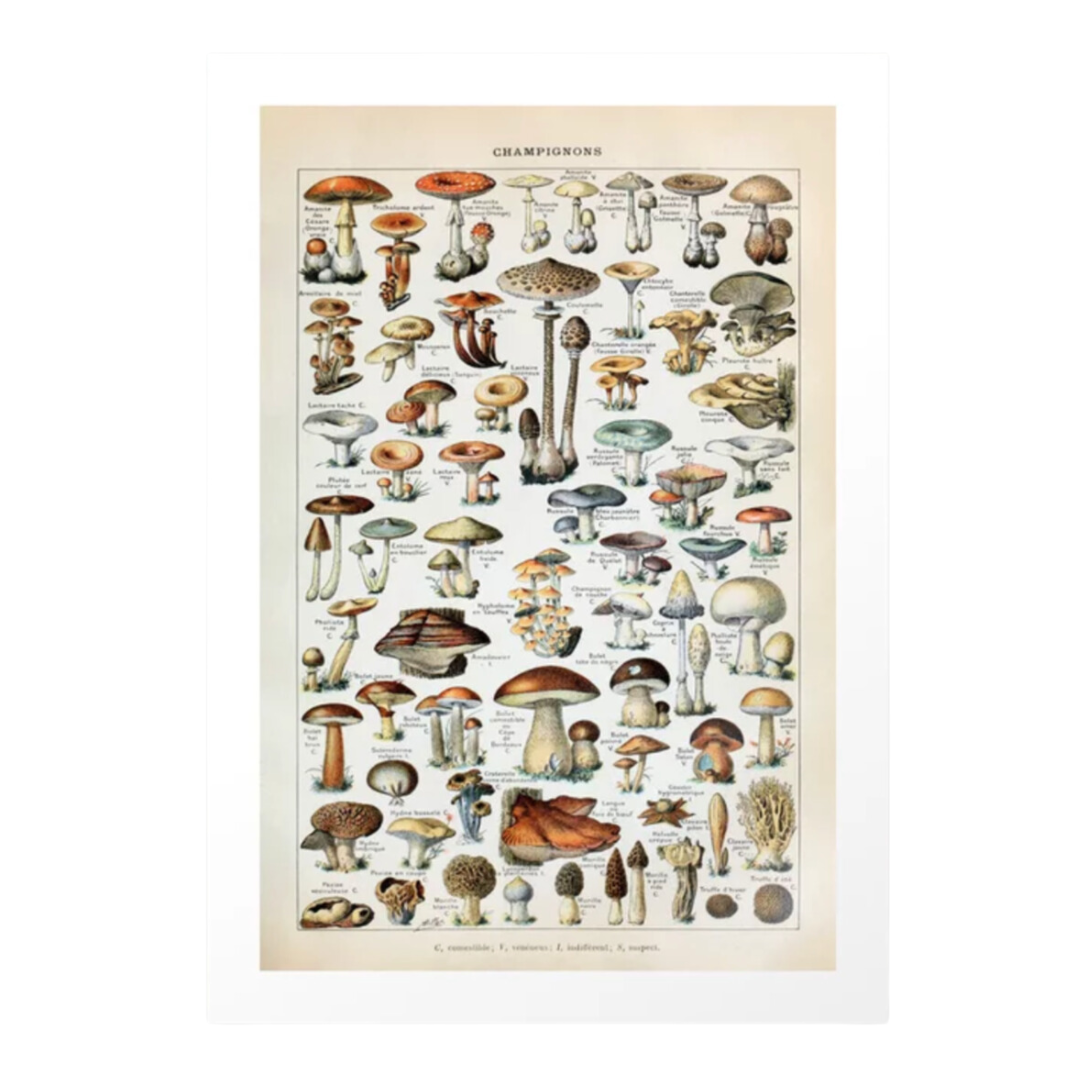
In addition, I made a simple floral garland to hang up inside and hung some solar string lights. I clipped the solar panels for these onto the back side of the roof edge. They turn on automatically at night when they are on and it is so magical! I planted Creeping Myrtle, Creeping Jenny, and Begonias in the flower boxes and hung some vintage style posters along with a chalkboard for them to use.
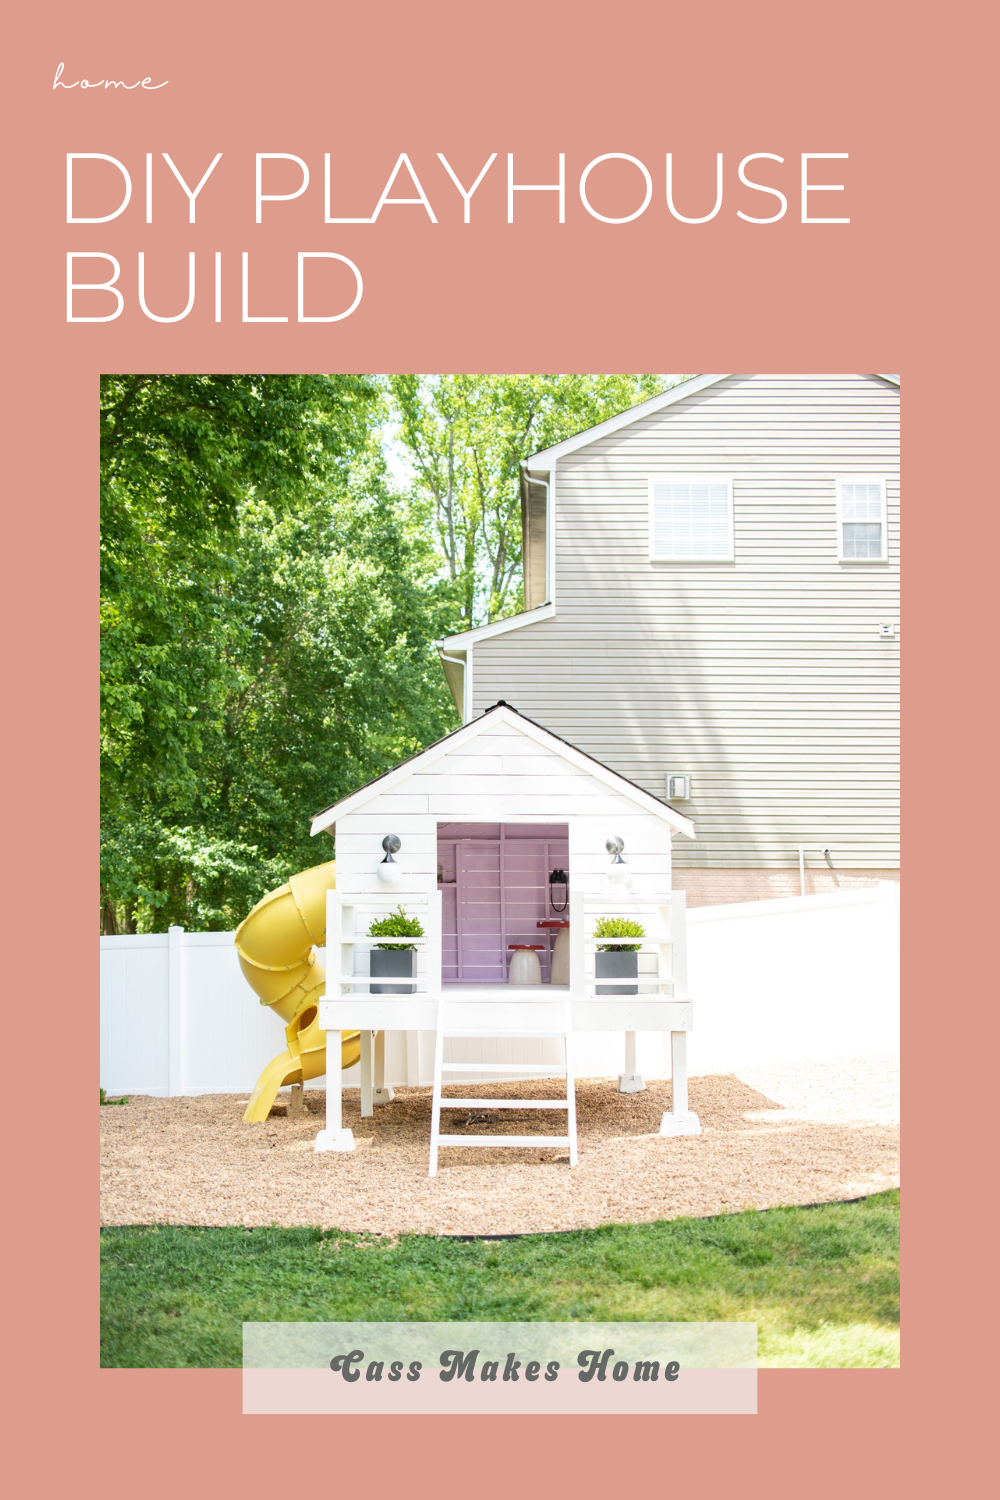
THE FINISHED LOOK
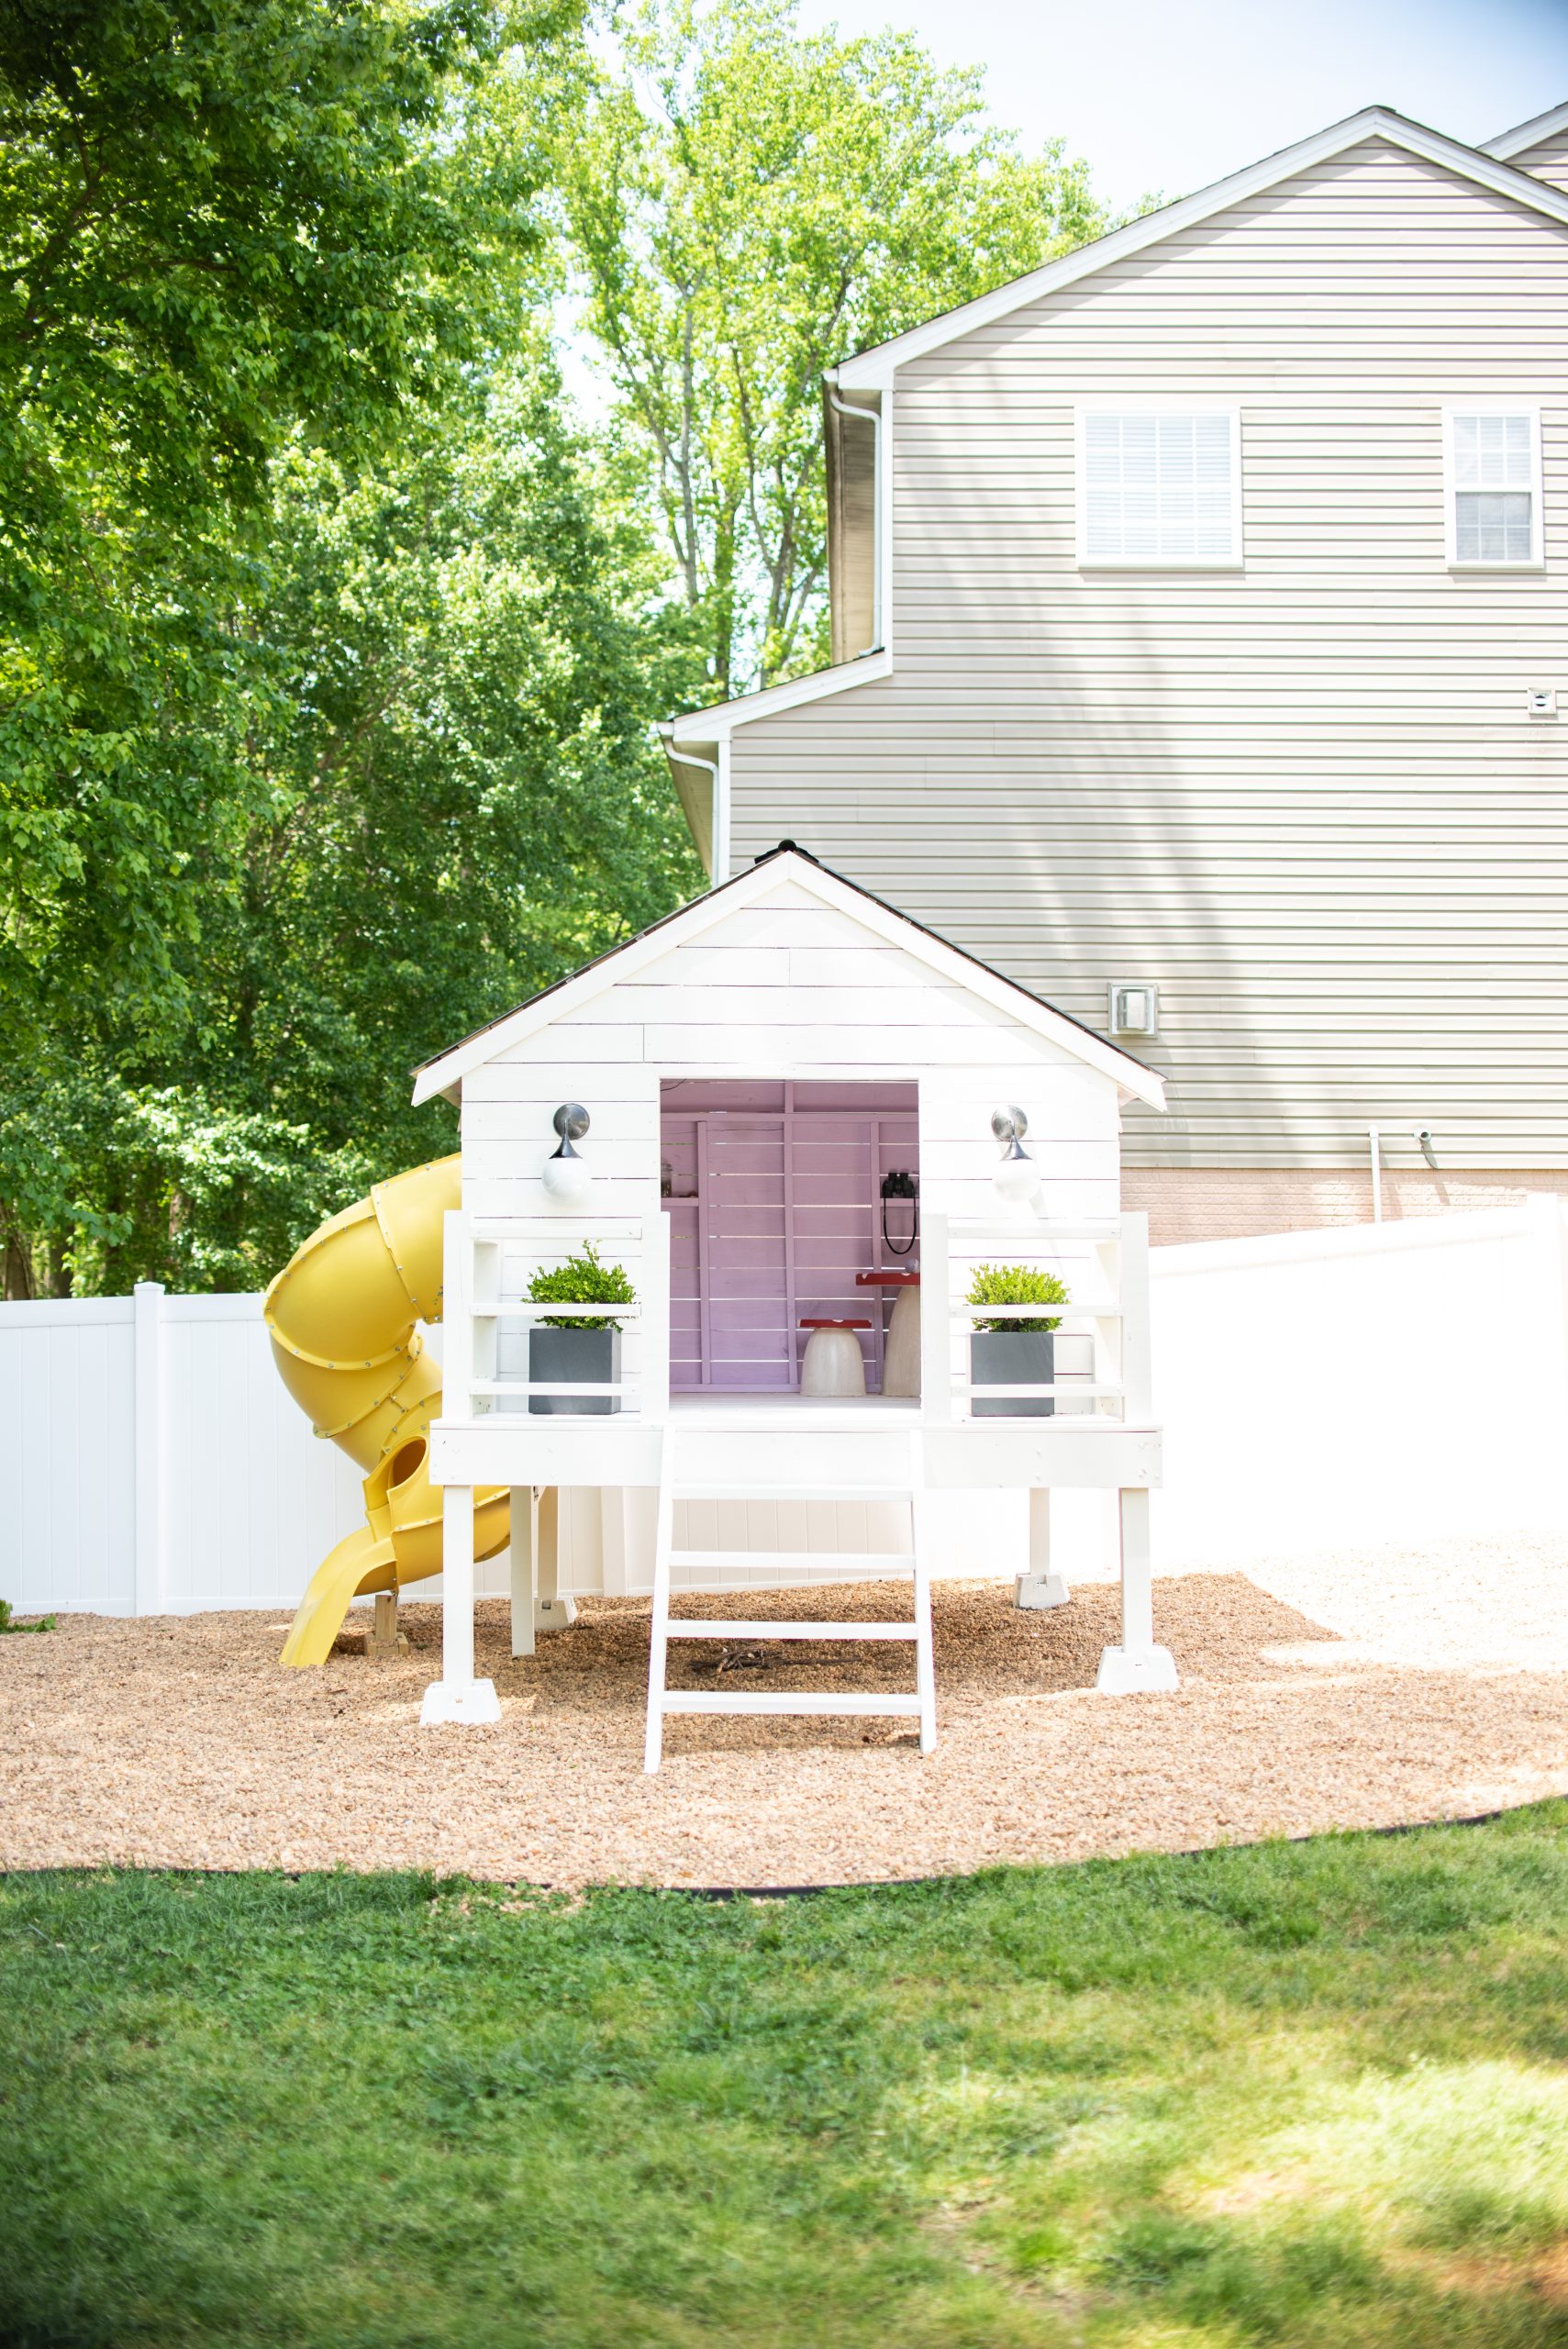
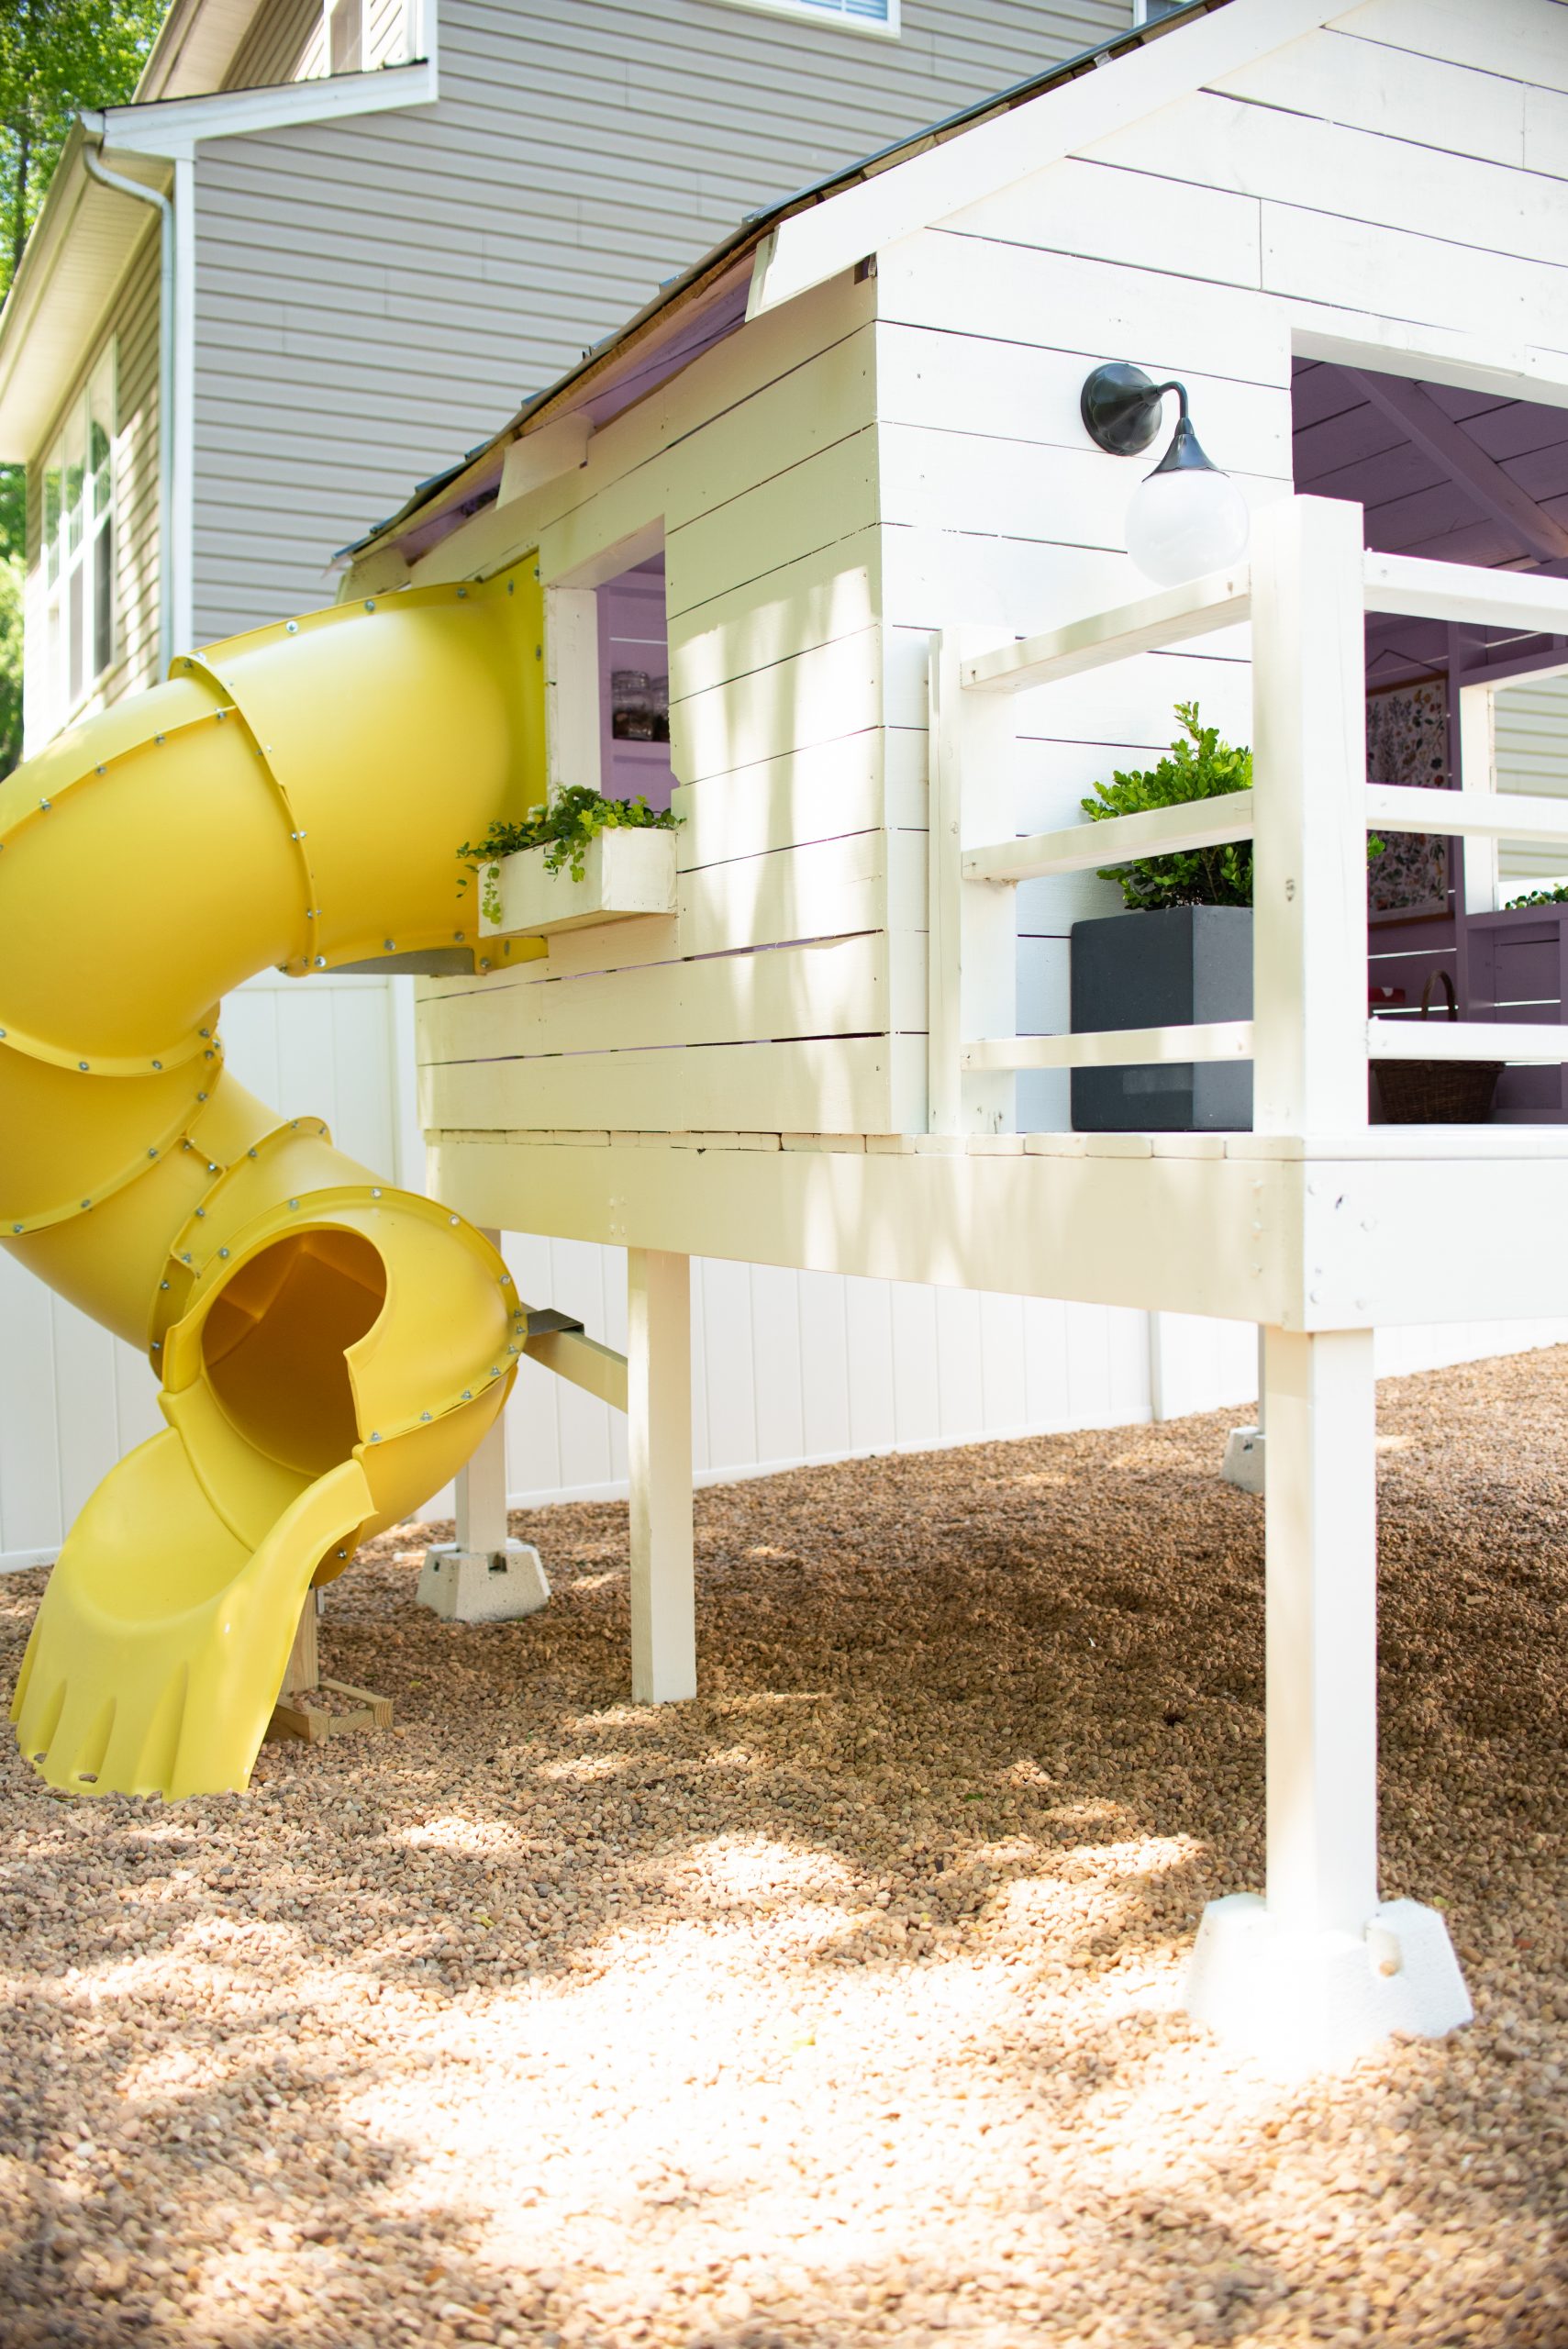
I had pea gravel delivered for this play area. To prep the space, I laid out landscaping fabric and plastic sheeting up to landscaping edging. We had the pea gravel poured right on top!
PAINT COLORS
Swiss Coffee by Behr
Euphoric Lilac by Sherwin Williams


COST
$1,780
SOURCES
*all images are clickable


Tube Slide – 5 ft Turbo Tube Slide
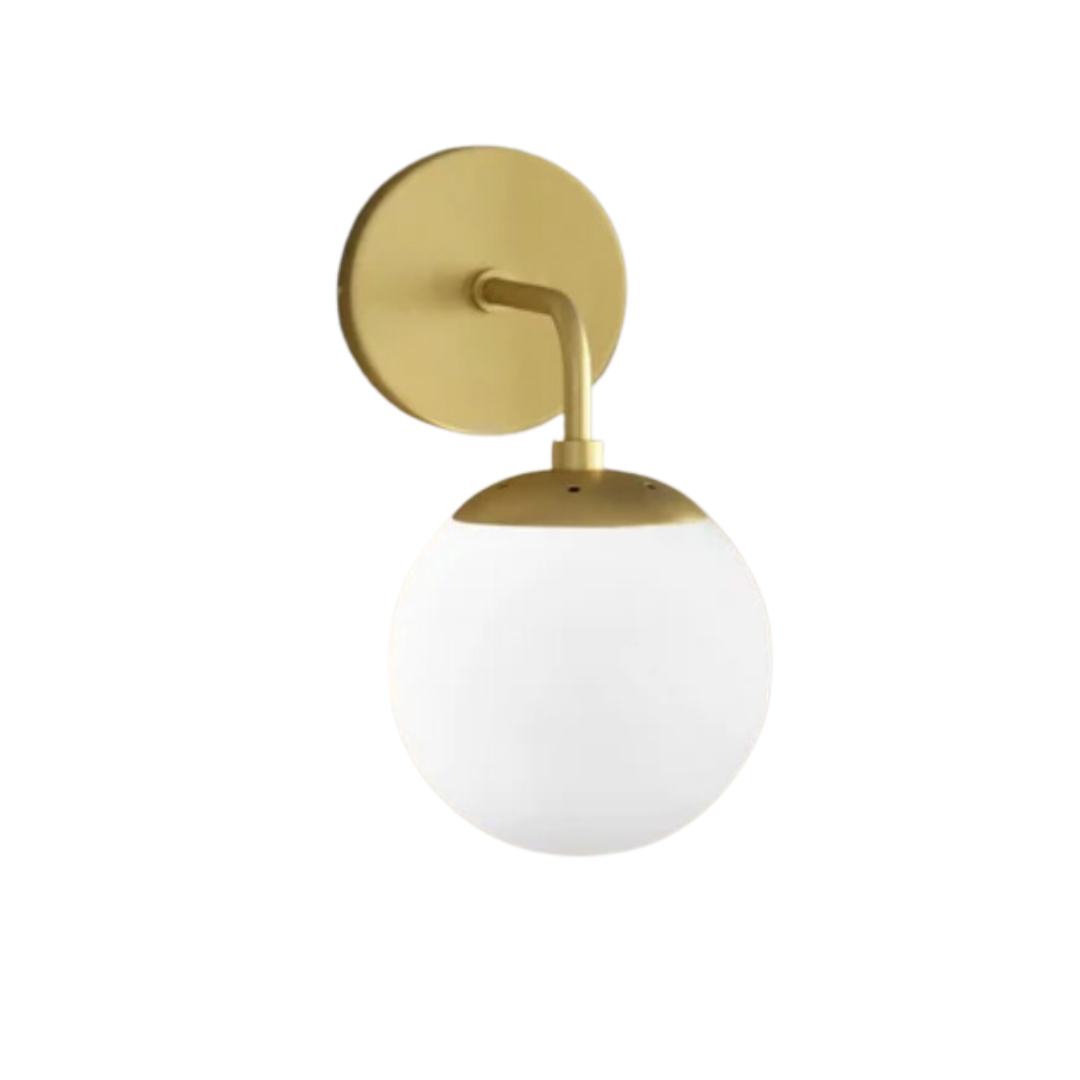
Sconces (the exact ones I used are out of stock but here’s a similar option) – Outdoor Sconces
String Lights – Solar Outdoor String Lights
Magic Bulbs – LED Magic Bulb Rechargable
Planters – Kante Lightweight Outdoor Planter
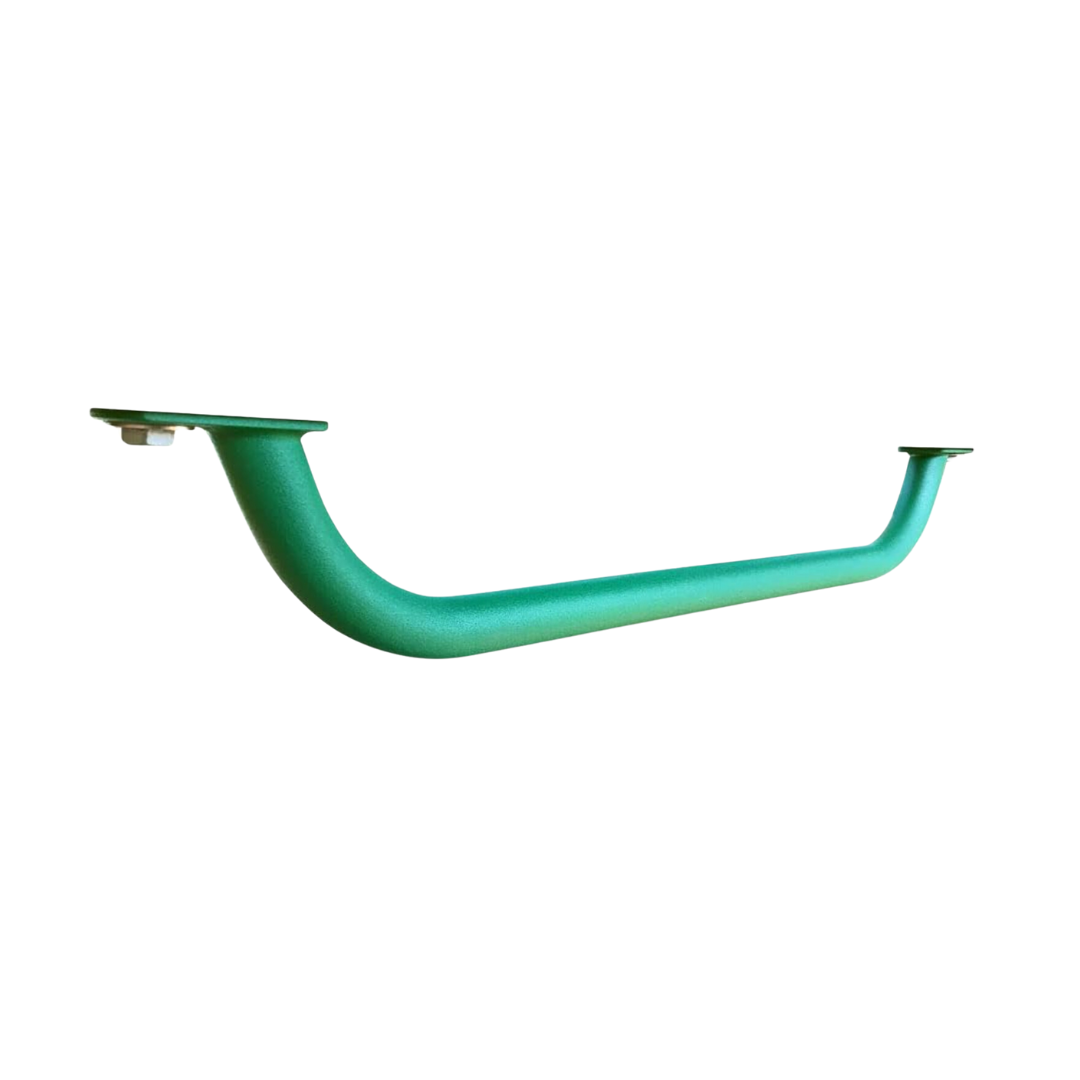
Slide Handle – 24 in Slide Handle
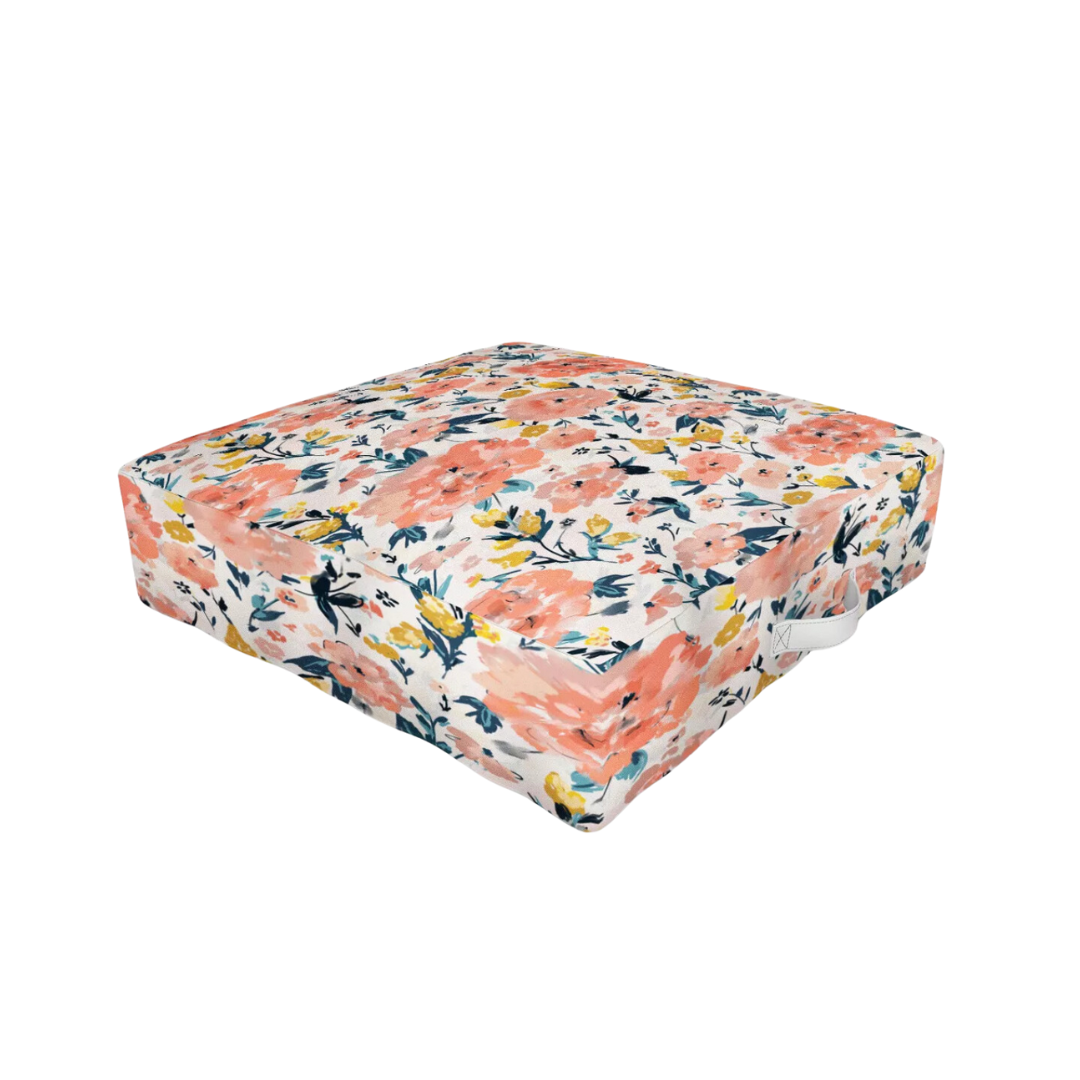
Floor Cushion (the exact ones I used are out of stock but here’s a similar option) – Floral Print Outdoor Floor Cushion
Fleur Poster – Vintage Fleur Poster
Mushroom Poster – Vintage Mushroom Poster
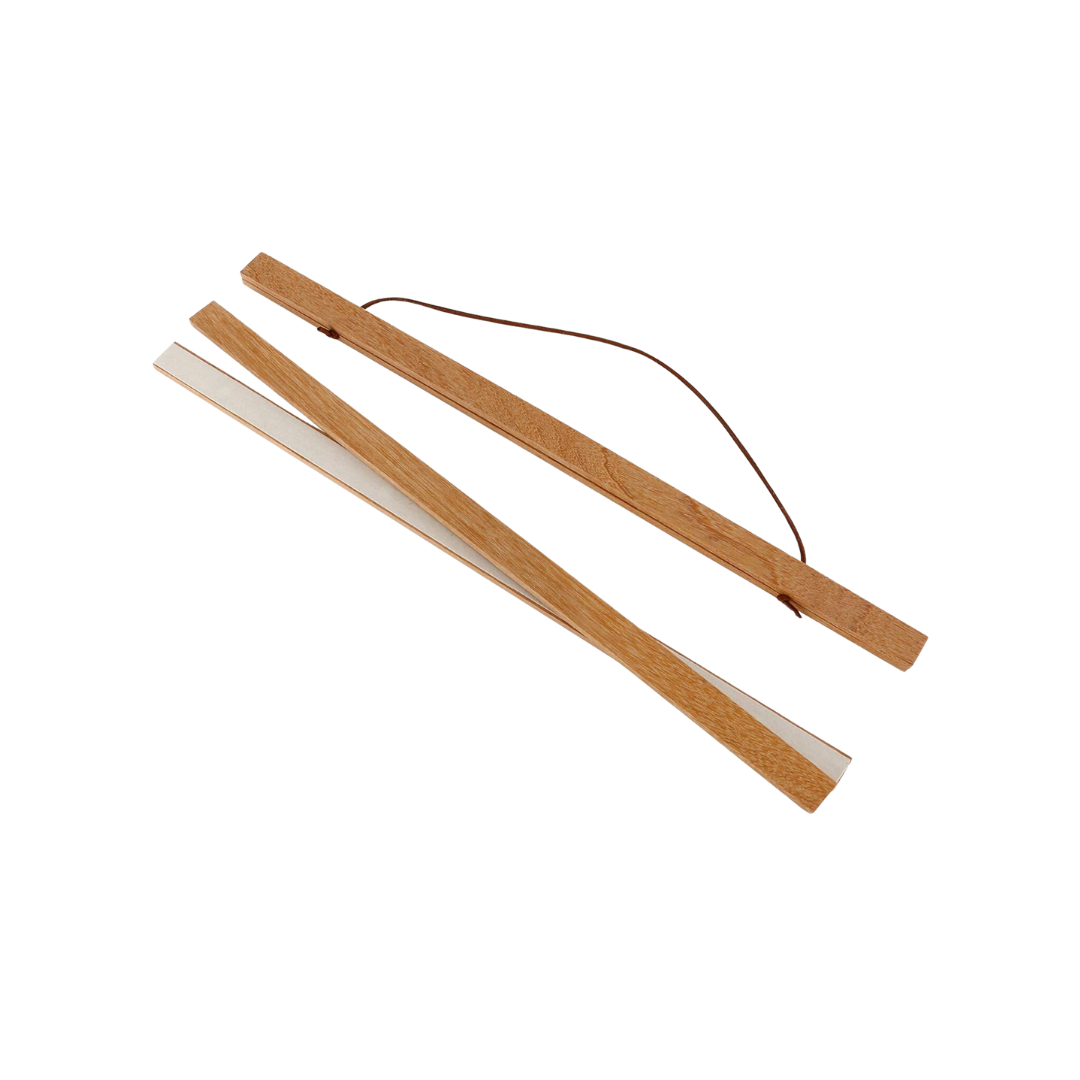
Poster Hangers – Magnetic Poster Hanger Oak
Straw Bag – Handmade Straw Tote Bag
Wooden Pegs – Wooden Shaker Pegs
Chalkboard – Magnetic Chalkboard
Bubble Wands – 4 pack Bubble Wands
Plant Mister – Glass Plant Mister
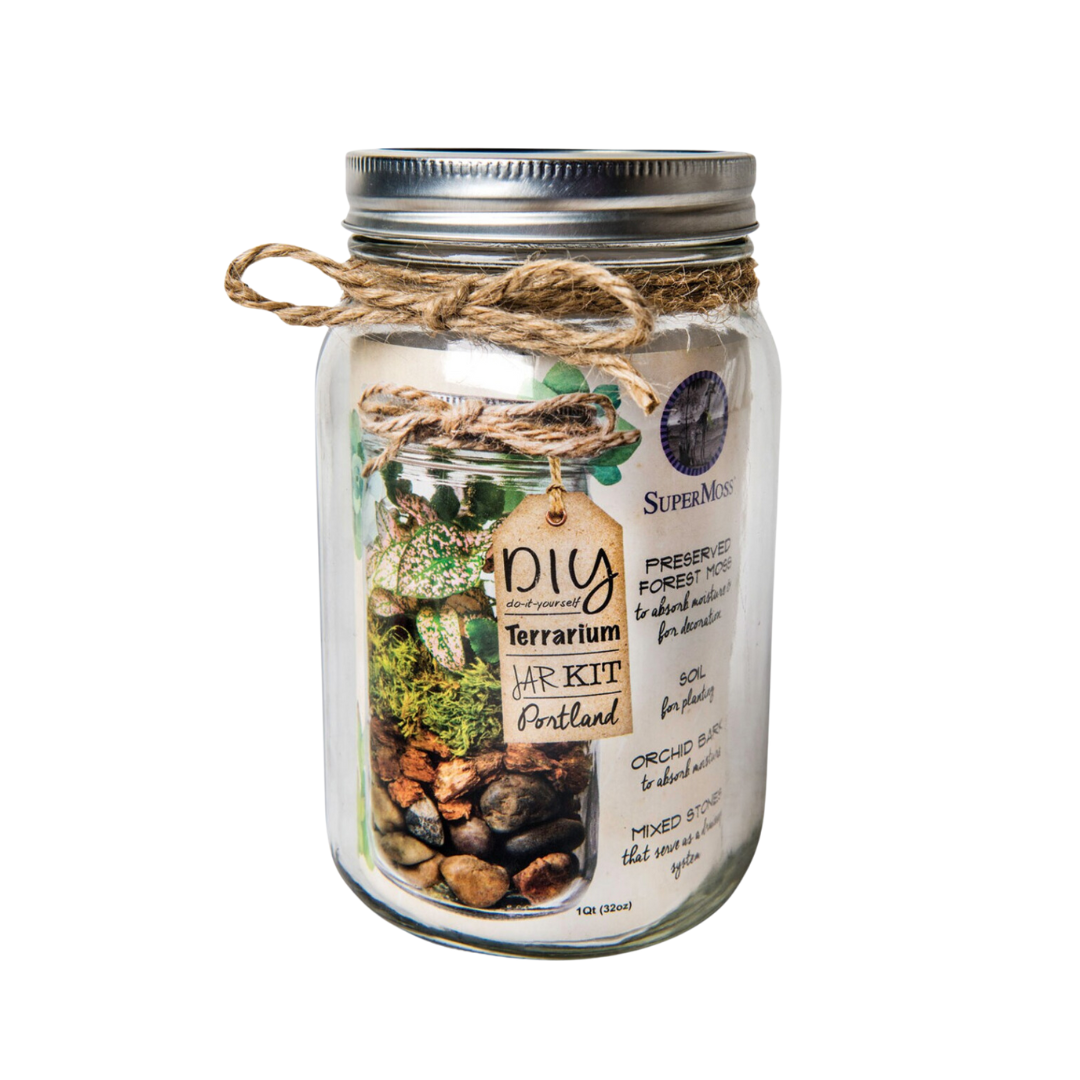
Terrariums – DIY Terrarium Kit
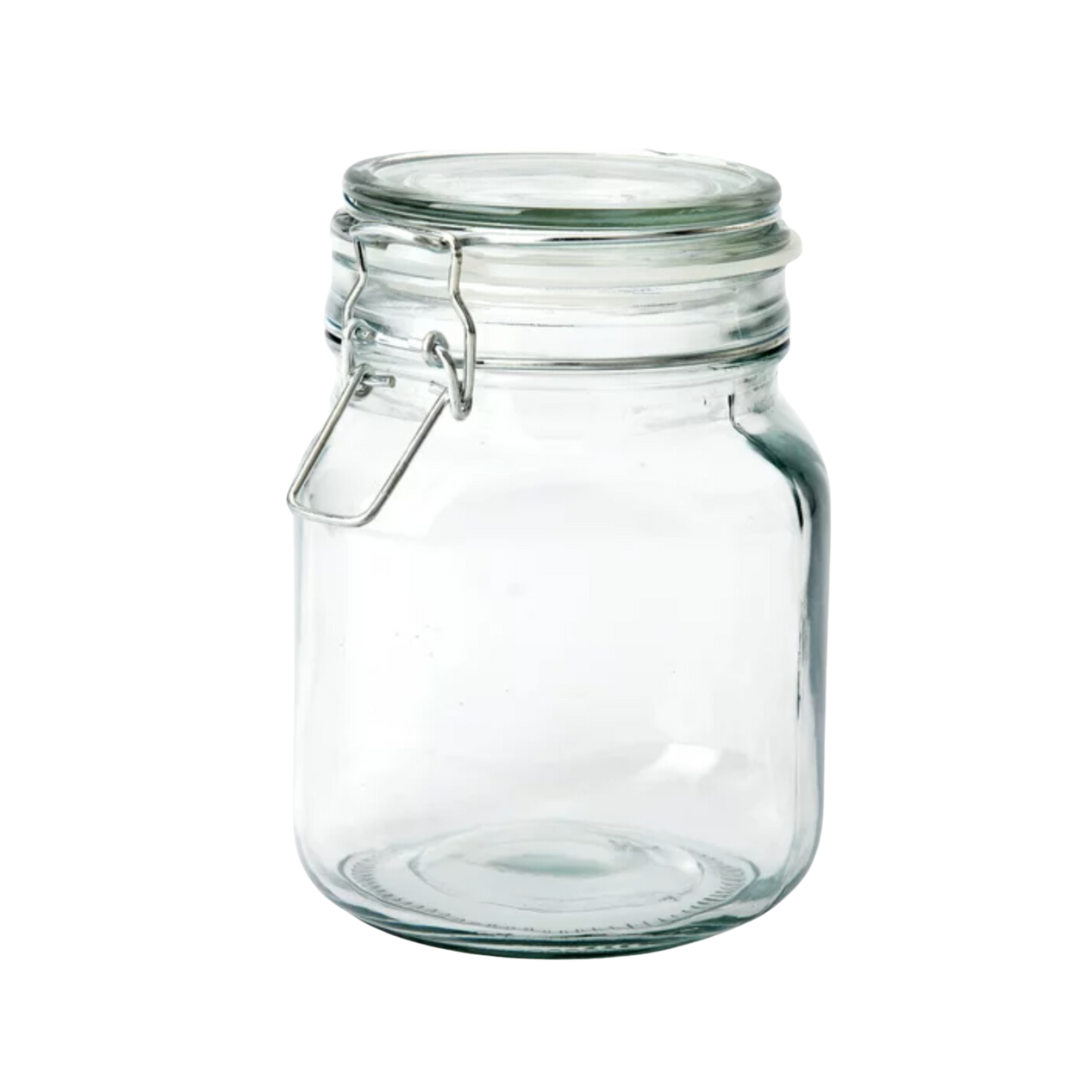
Jars – Lock Lid Glass Jar
SKETCHES & MEASURMENTS

Did you use your good paint sprayer for the roof?
Hi!
Solely based on you doing this playhouse, I am inspired to build one for my kiddos. What size or kind of lag bolts did you use to connect the bass and joists?
Hi Stephanie!
Here are the lag bolts I used.
Hi! I am literally infatuated with this playhouse! You did such a beautiful job & are so inspiring!! May I ask: what size of lag bolts were used? Thank you in advance for your time! 🙂 I REALLY hope I can achieve this project for my 4 yo daughter — so magical!! 😉
Hi Teri!
Here are the lag bolts I used.
https://rstyle.me/+Vf5B7BLqiYgh-cbVT9u8gg
[…] The Playhouse Build (from Cass Makes Home) […]
[…] first big project of 2022 was the Playhouse build. I turned a corner of our yard into a play area with some landscape edging and pea gravel. Instead […]
This playhouse build is absolutely incredible! 😍 I’m blown away by the attention to detail and the creativity that went into making this space so magical for kids. The color choices and the overall design really bring out a whimsical charm that any child would adore. I wish I had a playhouse like this when I was young! 🏠💫 Kudos to the talented builder for bringing such joy to little ones. 🙌✨ #PlayhouseGoals #ChildhoodDreams #CreativeDesign
Was the $1,780 cost including the paint, slide and details you added inside? Or was it just for the wood and screws?
I would like to know this as well!
If you build this today, it will be a lot cheaper than 1,780.00 because the wood has come down in price (close to half).
Thank you for such detailed description. I am looking to do something close to yours and looking for ideas. Thank you.
This is adorable!! Now I need to convince my husband to build it ☺️. Did you ever write a post about how you make the toadstool chair and table? It’s such a cute touch!
Hi Cass, I absolutely loved reading about your playhouse build! It reminded me of the wooden fort my dad built for me when I was little—it became the heart of so many childhood adventures. Your attention to detail, like adding the flower boxes, makes it look so magical. What was the most challenging part of the process for you? I’m considering a similar project for my kids, and your guide has given me both inspiration and confidence. Thank you for sharing this beautiful project!
I congratulate, this remarkable idea is necessary just by the way
I think, that you are not right.
Growing up, my siblings and I had a makeshift “fort” made out of old bedsheets and wooden crates, but this playhouse takes it to another level! Seeing how you built this with such attention to detail makes me want to create something special for my niece. The part where you mentioned using cedar shingles really stood out to me—it adds such a professional touch. Did you find that working with cedar was significantly harder than other materials, or was it worth it for durability?
I am sure thi post has touched alll the internet people,
itss really realoly good post on building up neww blog. https://www.Waste-ndc.pro/community/profile/tressa79906983/
Макс Мара — известный итальянского происхождения модный дом, специализирующийся на создании высококачественной одежды премиум-класса.
Основанный в начале 50-х, он превратился в символ элегантности и безукоризненного кроя.
https://haidenarazhodka.com/viewtopic.php?p=584673#p584673
Фирменные модели пальто покорили сердца модниц по всему миру.
Burberry — это знаменитый британский бренд, представляющий стиль и изысканность.
Основанный в 1856 году, он прославился благодаря знаменитому узору и плащам.
https://aishahadams.com/5-lessons-from-the-thread-app/#comment-6159
Сегодня Burberry — это больше, чем одежда, предлагающая уникальные коллекции и задающая мировые тенденции.
Бренд гармонично интегрирует традиции и инновации, создавая изысканные образы.
На этом сайте вы можете приобрести онлайн телефонные номера разных операторов. Эти номера подходят для подтверждения аккаунтов в различных сервисах и приложениях.
В ассортименте представлены как постоянные, так и временные номера, которые можно использовать для получения сообщений. Это удобное решение для тех, кто не хочет использовать основной номер в интернете.
https://inpenza.ru/dlya-chego-nuzhen-virtualnyj-nomer-telefona/
Оформление заказа максимально простой: выбираете необходимый номер, оплачиваете, и он сразу становится доступен. Оцените услугу уже сегодня!
На этом сайте представлена полезная информация о лечении депрессии, в том числе у пожилых людей.
Здесь можно узнать методы диагностики и советы по улучшению состояния.
http://charlottejobenson.com/__media__/js/netsoltrademark.php?d=empathycenter.ru%2Farticles%2Famitriptilin-pri-bolyah%2F
Отдельный раздел уделяется возрастным изменениям и их влиянию на эмоциональным состоянием.
Также рассматриваются эффективные медикаментозные и немедикаментозные методы поддержки.
Статьи помогут лучше понять, как справляться с депрессией в пожилом возрасте.
It is remarkable, rather amusing idea
На этом сайте вы можете приобрести аудиторию для Telegram. Доступны качественные аккаунты, которые помогут развитию вашего канала. Оперативная доставка и стабильный прирост обеспечат надежный рост подписчиков. Тарифы доступные, а процесс заказа максимально прост. Начните продвижение уже сейчас и нарастите аудиторию своего канала!
Накрутка живых подписчиков в Телеграм канал бесплатно
I don’t think the title of your article matches the content lol. Just kidding, mainly because I had some doubts after reading the article.