DIY Frame TV

The Frame TV by Samsung is an item that was on my wishlist for so long. But I did not want to spend thousands on a new TV to replace the perfectly good one that I already had. So, I decided to make my own DIY Frame TV! I made mine for just $50 and here’s how I did it!
*This post may contain affiliate links, which means I may earn a small commission if you purchase through my links, at no extra cost to you. I only share products I genuinely love.
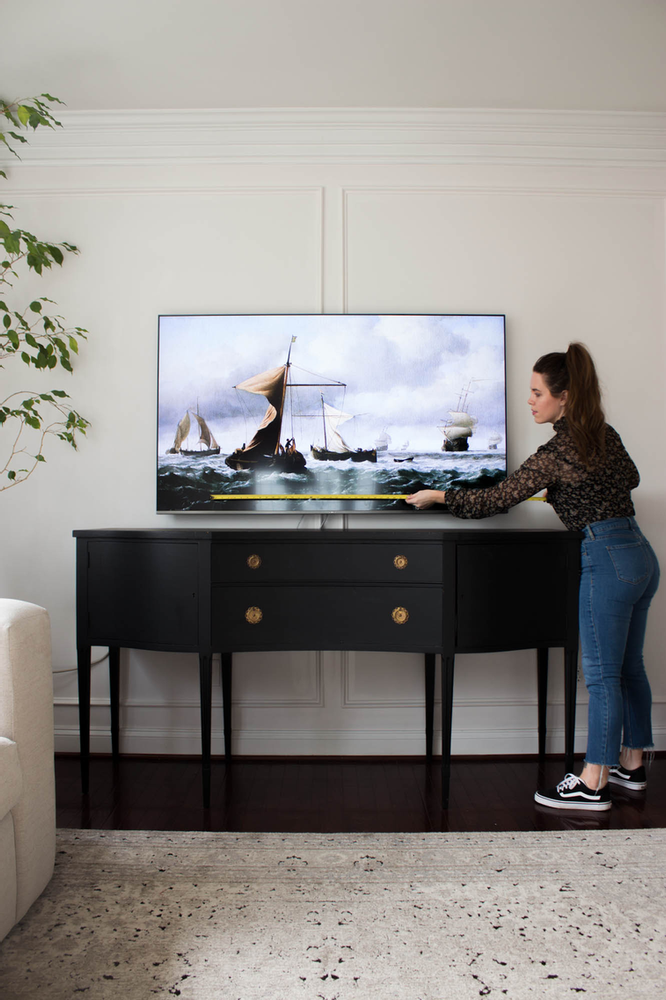
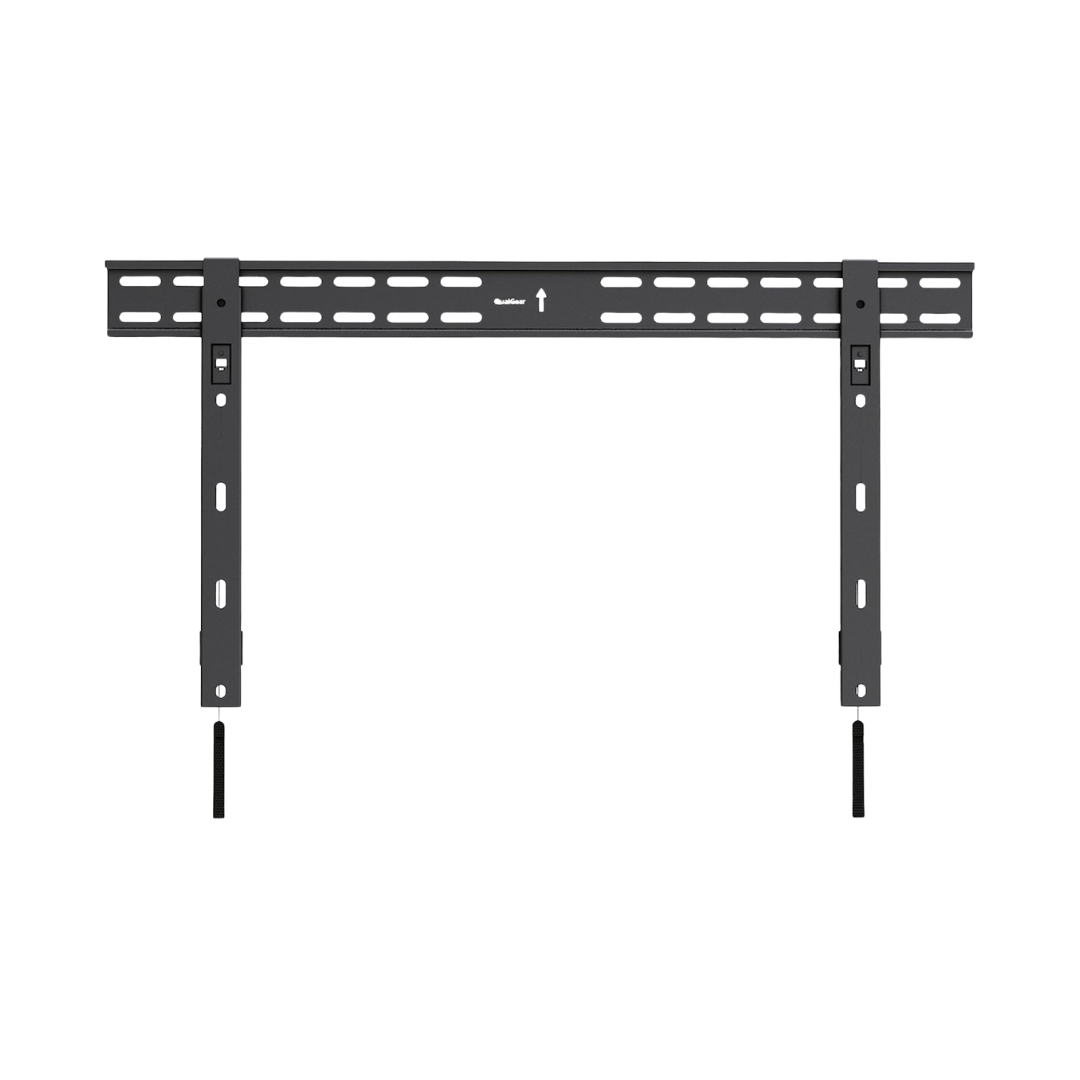
Mounting my TV with this slim mount helped me to get it close to the wall. I also found a great app on my Fire Stick called – PixArtGallery (available for Fire TV, Apple TV, and Android TV). This gave me so many options for displaying artwork on my TV! Another app called Artcast is also a great option.
Here is how I’ll make my DIY Frame for my TV:
Supplies
1×2 pine (Two 3 inch pieces)
Brad nailer (for attaching the hanger)
MEASUREMENTS
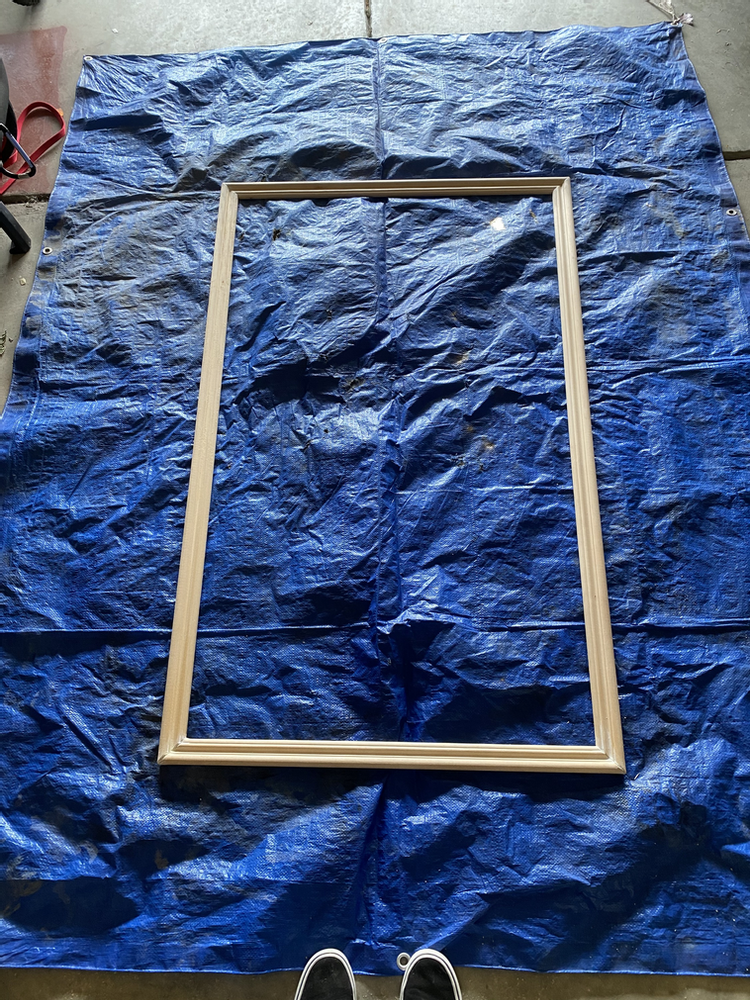
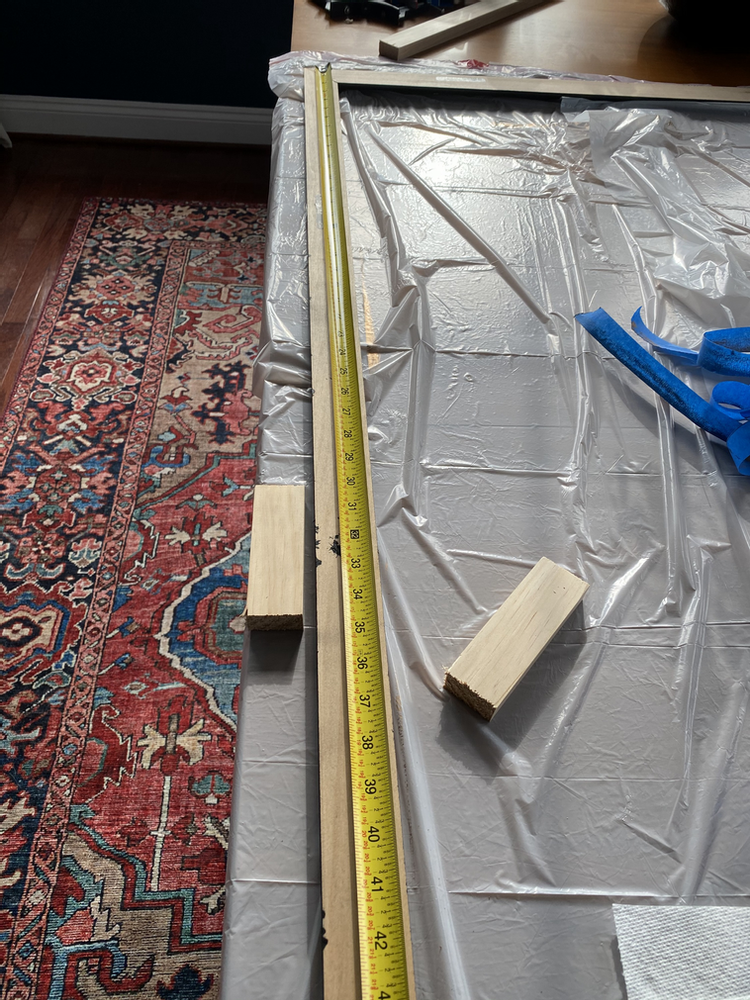
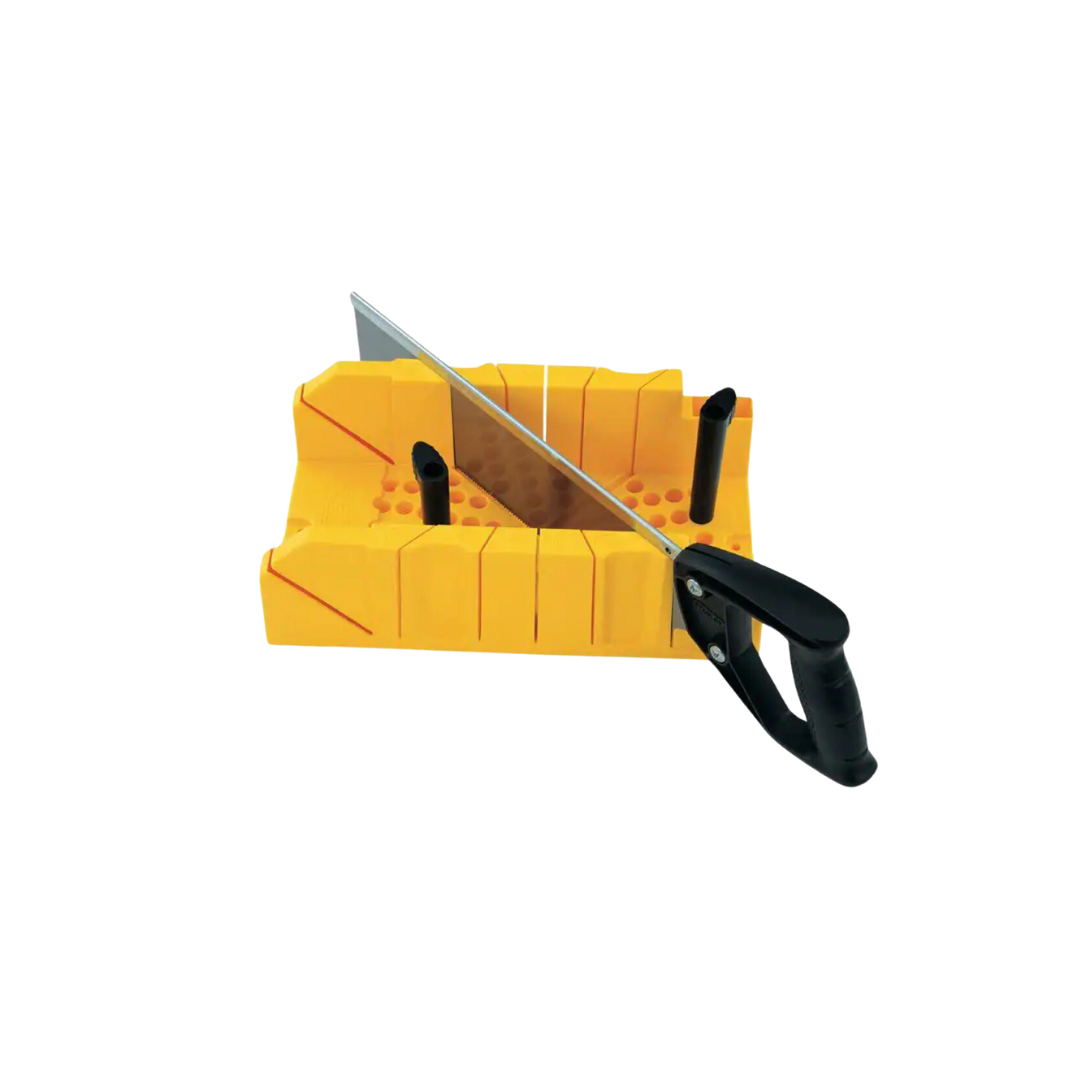
First, I’ll measure the inside frame of my TV. This ended up being the exact size of the inside of my frame! Next, off to home Home Depot to find the perfect molding, and settled on this. I wanted one that mimicked the shape of an antique frame. I’ll add four inches to the end of each measurement to allow for my angled cuts and had my four pieces cut at Home Depot for me!

Next, I’ll lay out my four pieces and measure. The four pieces need to be cut the EXACT same way with the outside of the molding being the longest. Each piece will have 45 degree angled cuts. Then, measure the inside of the molding pieces to mark the measurements from my TV (allowing at least 1.5 inches on each end). I’ll my measurement on the inside of the molding ONLY. I’ll then used my miter saw (you can use a miter box if you do not have one) to make my angled cuts. Remember, angled outward on each end and longest side is the outside! This can get confusing, especially if you are nervous around a saw. If you commit to keeping each piece of molding placed the same way, and bringing the blade down to your mark, then you should be golden!
ASSEMBLY

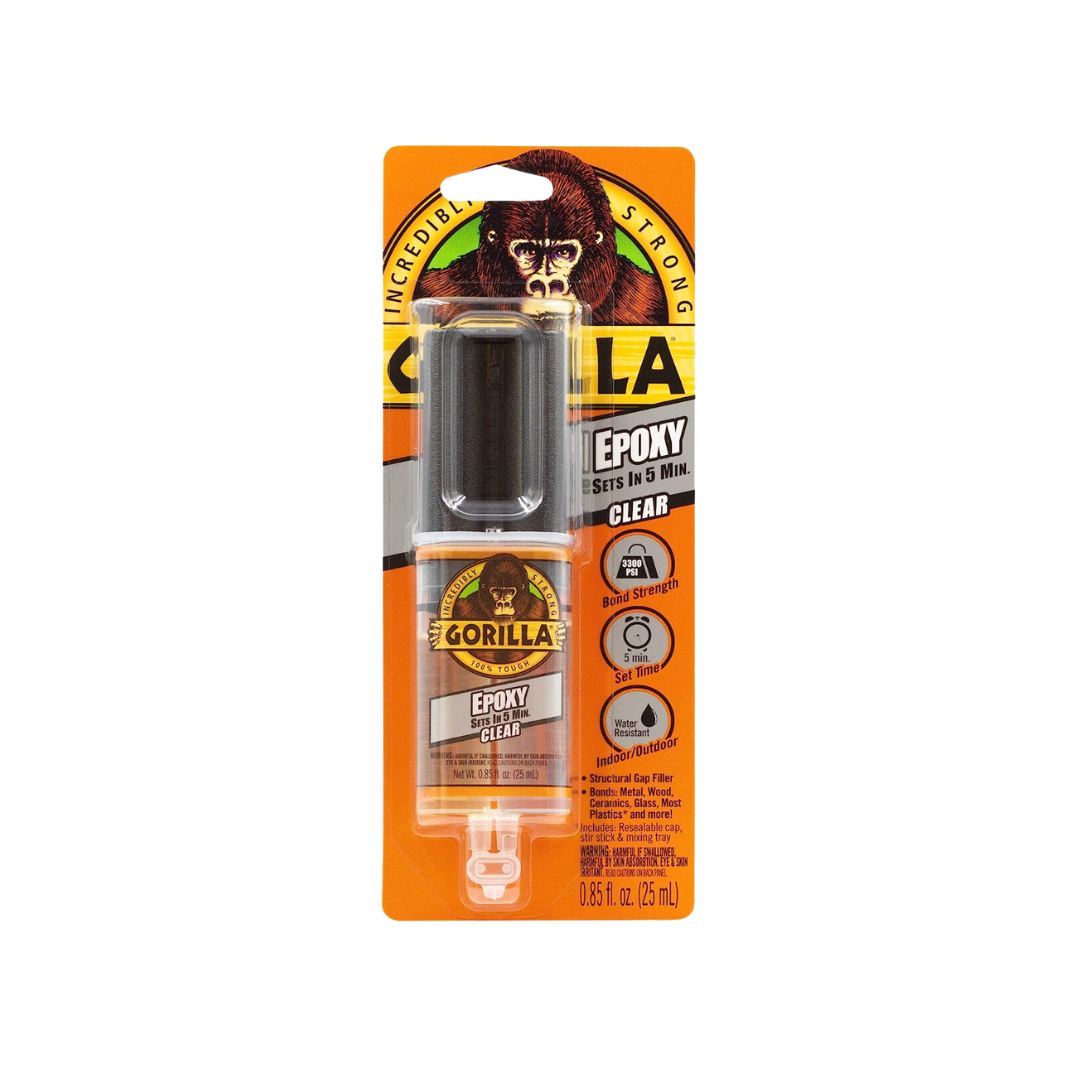
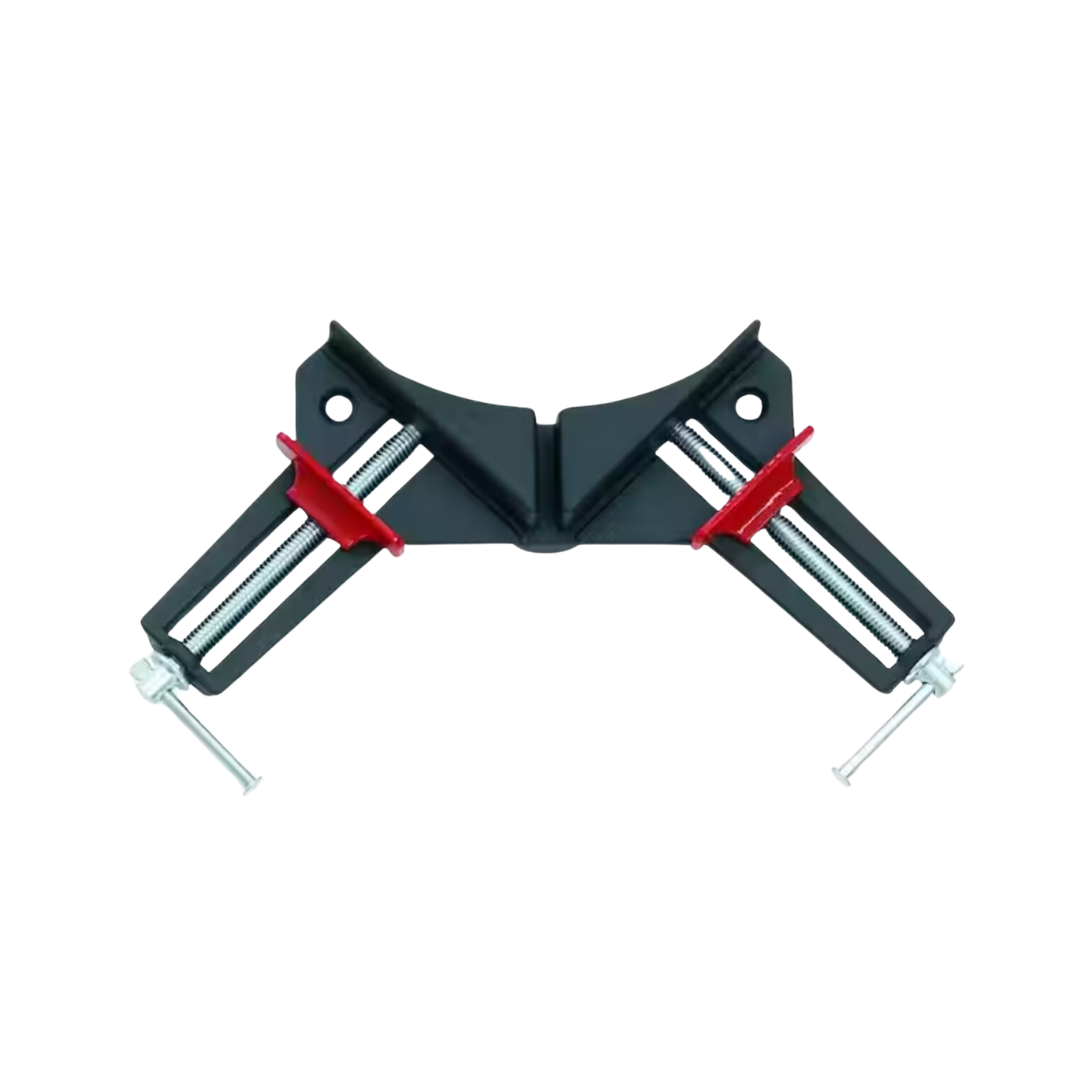
I bought this 90 degree angle clamp from Home Depot and it is so necessary for this project! Each corner needs to be clamped for at least one hour. I’ll place my pieces together on my dining room table and get ready for the epoxy (make sure to place something under your frame to protect your surface from the epoxy)! After positioning my pieces, place the corner clamp on the first corner. Bring the two angled edges to meet, and then tighten the clamp. Once the fit is perfect, I’ll loosen one side so that I can apply the epoxy. This makes sure that you can quickly tighten the clamp without having to adjust once the glue is on. I’ll follow the instruction for mixing a small amount of poly, applied it to one piece, and then clamp my corner. Allow this to sit for 1 hour to fully cure, and repeat on all corners of the frame.
PAINT
My frame is now ready for paint!
Side note: If you followed along in my stories when I did this, you’ll know that I experimented with different techniques for clamping and constructing this frame. This tutorial is my favorite technique (and most simple) that I tried.
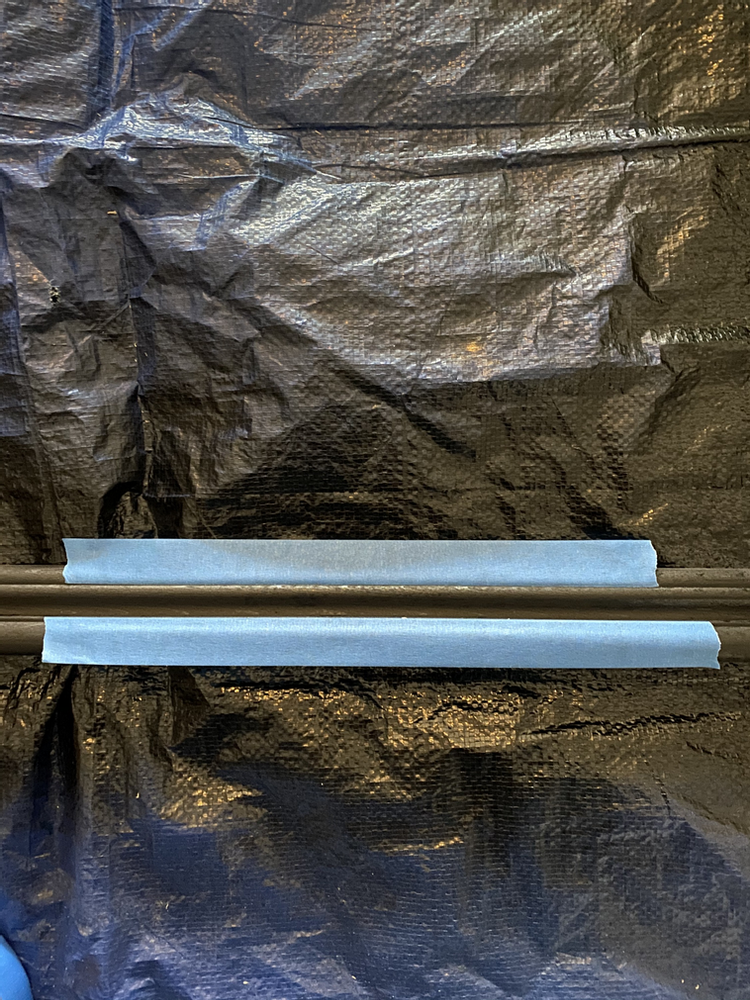
After spray painting my frame with my favorite spray paint, I’ll begin to tape of the section that I wabt to be gold. I really love the look of a black and gold vintage frame. I am so glad that the molding that I chose allowed me to do this part!
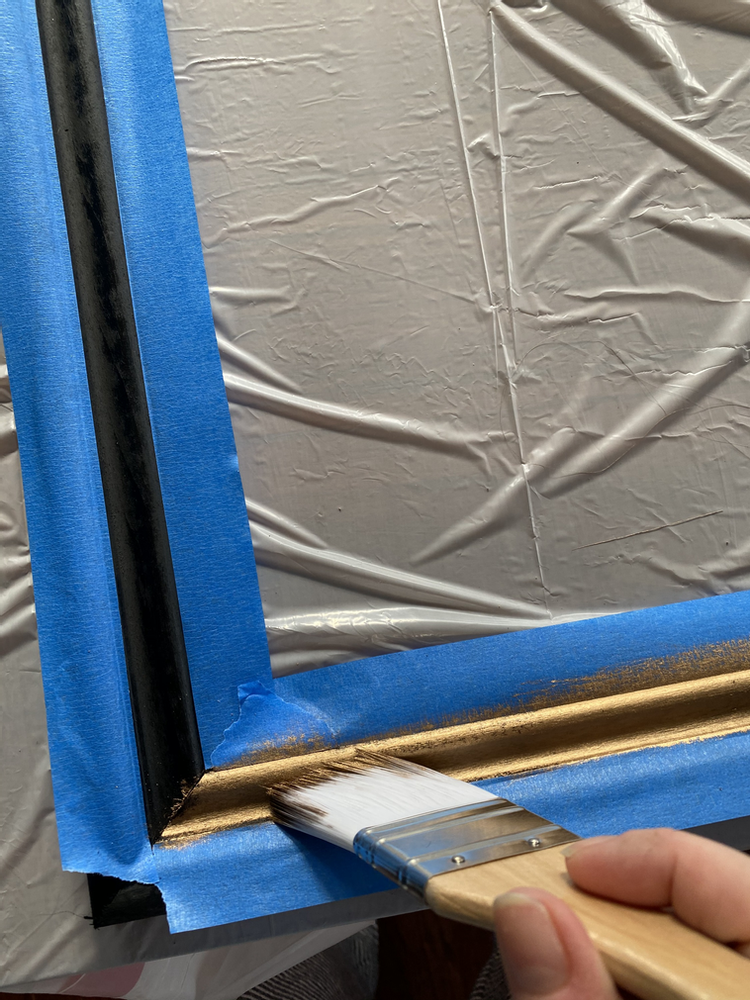
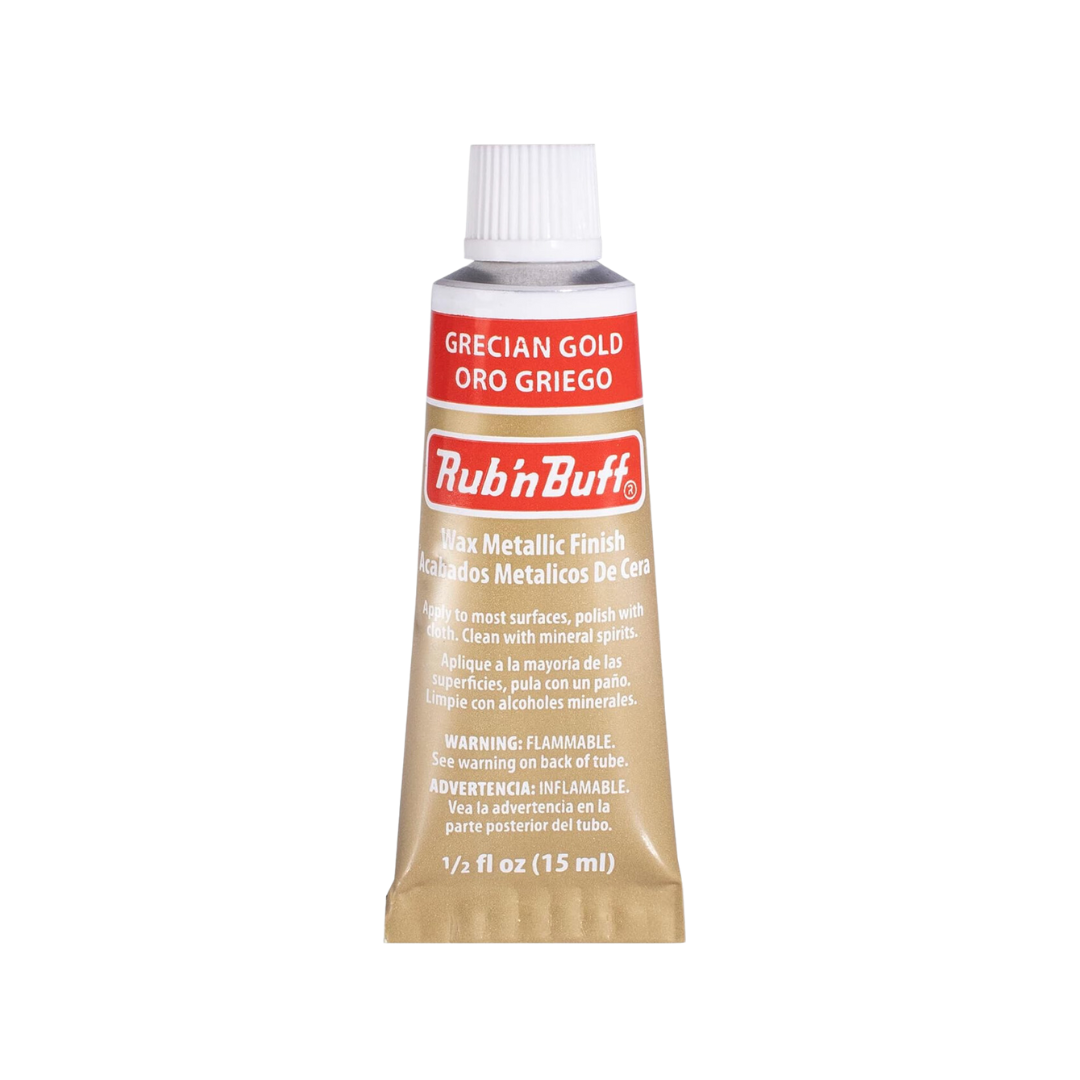
Using gold/brass spray paint is also an option for this. But I love the vintage look that Rub n’ Buff gives, so I decided to apply that to the middle of my frame! I’ll use the Antique Gold finish. Typically, it is applied with your finger tip. I’m using a craft brush and it works great. After applying this and letting it dry, my frame is ready to hang!
HANGING
I’ll get my two small pieces of 1×2 ready and measure the top of my frame to find the center, and then mark it. I’ll also mark the center of one of my wood pieces. Then I’ll position my two wood pieces together to make a L shaped hanger after making sure that it will fit over the edge of my TV. I’m using two brad nails to attach them to each other.
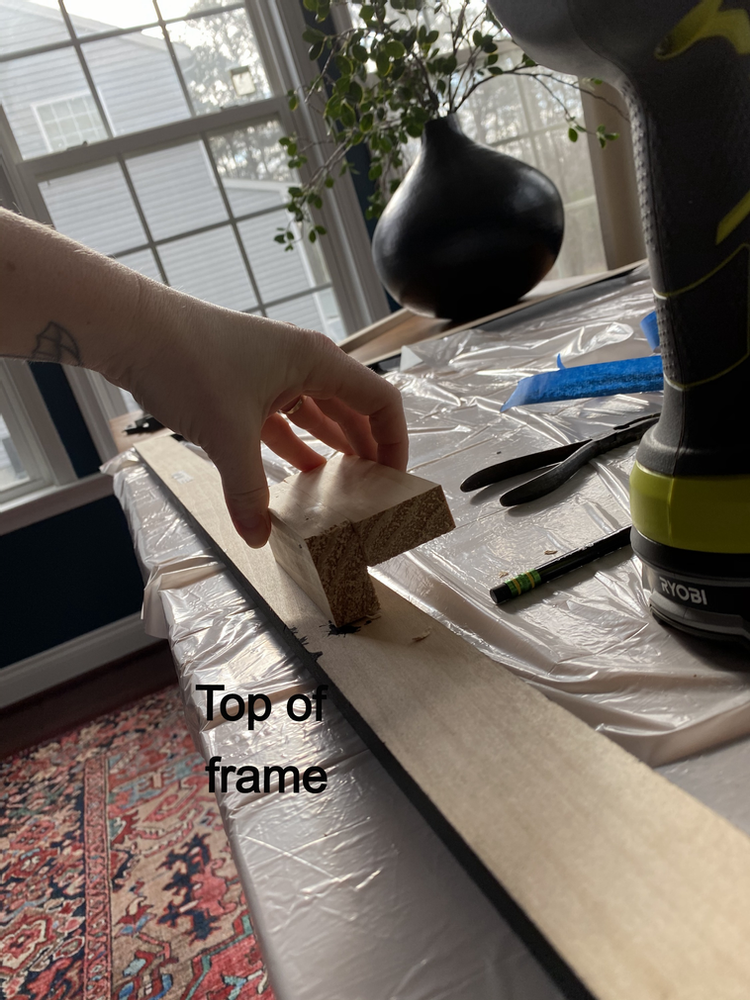
My next step is to attach my L shaped hanger to the frame. I’ll make sure to measure the top edge of my TV first. This is how far away from the inside edge of my frame that I will my hanger so that the frame covers the edges of my screen. I’ll it here with three brad nails. Make sure that you nails are long enough to go through your wood and into your frame, but no too long so that they don’t go through your frame!
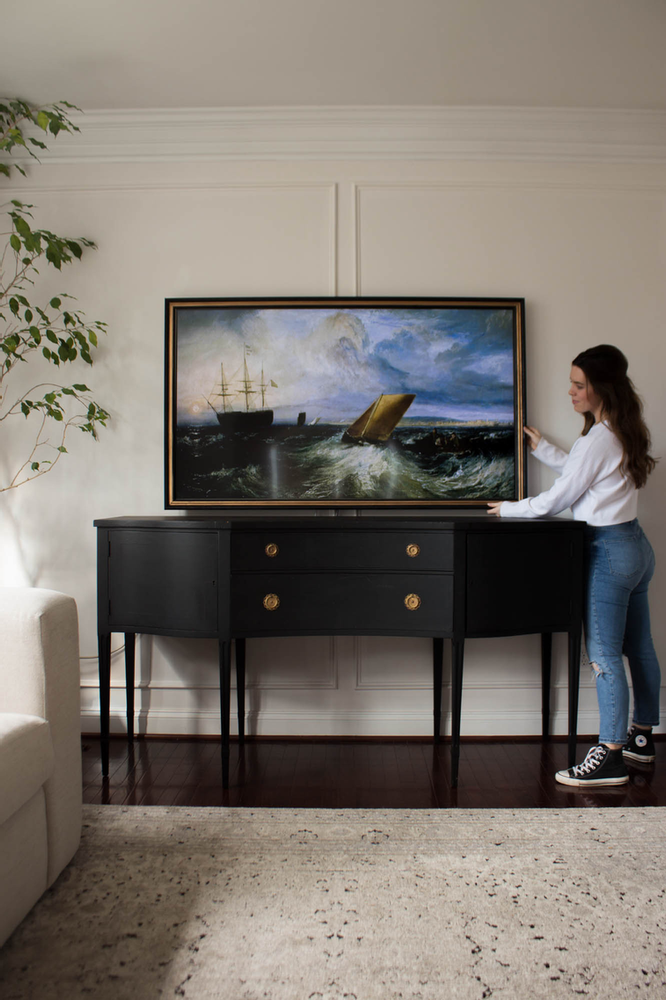
And that’s it! My TV now looked like a Frame TV for under $50! WOO HOO!!
***If your TV has a sensor that is blocked by your frame, you may consider marking your frame and using a drill bit to drill a hole straight through your frame so that the sensor can be functional. The inside of your hole can be painted to match your frame.

Here are all the products I used for my DIY Frame TV.


This is genius! Thank you for sharing!!
Of course!! And thank you!
Bravo to you! 👏👏👏👏 Thank you so much for sharing this amazing diy.
Thank YOU!
I love this so much I have been looking into frames and this is my favorite, what I’m trying to figure out is it looks like the frame needs to just be gold and the black accents come from the TV itself? Is that the case or do I have to paint black and gold to get this look, by the way if anybody asks about hiding the course I have a great solution for that I could share with you just let me know
I would love your tip on hiding cords!
Wow. I am really impressed!!!
[…] are several other DIY tutorials I’ve seen that are much more simple (and still look amazing). This very simple one from Cass Makes Home is one of the first ones I saw and definitely sparked a lot of the inspiration […]
Thank you SO MUCH for this tutorial! I’ve been pining for a Frame TV but couldn’t justify that price tag. This is perfect! Thank you!!!
I love this!!! Gonna try it this weekend!!
Beautiful! I have no experience in wood work. I want to try it but feel intimidated.
So beautiful! Can I ask what the sides look like?
I’d like to see this from the side also!! It looks great from the front but my TVs can be seen from the side as well!!
[…] spending $1,500+ on a TV is cost prohibitive for most of us, which is why I turned to creators like Cass Makes Home, From Grit to Pearl and Jennifer Laura Living for inspiration on how to DIY a Frame TV – […]
[…] also seen some great hacks out there for creating your own DIY frame to go around your TV. -I love this one from Cass Makes Home! She also shares some other sources for art that I’m going to have to check […]
[…] also seen some great hacks out there for creating your own DIY frame to go around your TV. -I love this one from Cass Makes Home! She also shares some other sources for art that I’m going to have to check […]
[…] also seen some great hacks out there for creating your own DIY frame to go around your TV. -I love this one from Cass Makes Home! She also shares some other sources for art that I’m going to have to check […]
Thank you for sharing this! The cost of the frame TV is absurd especially considering how s#%+! Samsung products usually are (documented reviews and personal experience.) I’m thrilled to have the option to make something aesthetically pleasing, workable, and for like $400. Just wish the cords could be hidden like The Frame when things are wall mounted.
Is there anyway you can link the tv you used?
Hello, I love this idea. Does this mean you have to leave your TV on all day to show the art? I too would love to get a frame TV but do not want to spend that kind of money! Thank you!
Hi!
What kind of tree is in the background, and where did you buy it? It looks really nice!
Hi-
I need to try this! Thank you. Also where did you get your console table from I’ve been searching for a similar one.
Where do you hide satelitte dish receiver ,dvd player…
[…] After some brainstorming, I figured out a plan. I went to Home Depot and gathered some wood trim that I thought would make a great frame. By a little trial and error I came up with a solution, and it worked perfectly! I made this frame for about $20. Additionally, I bought a slim TV mount for my TV to rest closer to the wall and downloaded an art viewing app onto my Fire Stick. You can read my original tutorial here. […]
So awesome. May I ask where the sideboard is from?
This is great – How do you get the “picture” on the TV?
There’s an app on the Firestick called PixArtApp!
Do you sell this please?
I absolutely love this DIY Frame TV idea! It adds such a stylish touch to the living room. Can’t wait to try this out myself. Great tips, Cass!
This DIY Frame TV project is such a clever idea! I love how it transforms the look of the TV and makes it blend seamlessly with home decor. Can’t wait to give this a try in my own living room! Thanks for sharing, Cass!
I love this DIY Frame TV idea! It really adds a stylish touch to the living room while making the TV feel less like an eyesore. The step-by-step instructions are super clear, and I can’t wait to try this project myself. Thanks for sharing such an inspiring idea, Cass!